“You’ve got to try these garlic scapes,” my neighbor blurted out last summer, thrusting a jar across the fence like some sort of culinary peace offering. I eyed the knobby green curls suspiciously. Garlic scapes? Pickled? Honestly, I was skeptical. But that first crisp, tangy bite knocked me sideways — fresh, bright, with just a little garlic punch that made me want to stash a jar in every corner of the fridge. It turned out that quick pickled garlic scapes are one of those accidental wins that happen when you’re pressed for time but still want something bursting with flavor.
I remember standing in my kitchen later that evening, jar in hand, thinking how weirdly satisfying it was to have something so simple feel so alive on the tongue. The tang, the snap, the garlicky warmth — it was a reset button after a day that felt too long and messy. Plus, they’re ridiculously easy to make, which is the kind of magic we all need on busy days. Since then, I’ve found myself grabbing garlic scapes every time they pop up at the farmer’s market and making these quick pickled versions over and over — sometimes more than once a week.
What stuck with me is how this recipe somehow hits that sweet spot between fresh and tangy, simple but special. It’s not just a condiment; it’s a little jar of summer, a bright green spark that keeps well and shows up in meals when you least expect it. So here’s the lowdown on making your own quick pickled garlic scapes — no fuss, just that fresh, tangy flavor you’ll wonder how you ever lived without.
Why You’ll Love This Quick Pickled Garlic Scapes Recipe
After quite a few rounds of experimenting with garlic scapes, I can confidently say this recipe nails what you want from a quick pickle: fresh, tangy, and crunchy with a garlicky kick. From my kitchen to yours, here’s why this one’s a keeper:
- Quick & Easy: Ready in under 30 minutes plus a short chill time, perfect for busy weeknights or last-minute flavor boosts.
- Simple Ingredients: Uses pantry staples like vinegar, salt, and sugar with fresh garlic scapes — no complicated shopping trips.
- Versatile: Fantastic on sandwiches, salads, or alongside roasted sheet pan dinners and even as a zesty snack on its own.
- Crowd-Pleaser: Even those wary of garlic usually warm up to the bright acidity and crunch.
- Unbelievably Delicious: The quick pickling process preserves the garlic scapes’ fresh snap and adds that perfect tang without overpowering the natural garlic flavor.
What sets this recipe apart is the balance — it’s not too sour or salty, and the garlic scapes keep their vibrant green color and satisfying crunch. I like to think of it as a fresh twist on a traditional pickle, kind of like the way this lamb sheet pan dinner reinvents comfort food with ease. The simplicity here means you can whip it up as soon as garlic scapes show up in markets, making it a go-to for that bright, tangy pop of flavor that feels like a small celebration every time.
What Ingredients You Will Need
This recipe uses simple, wholesome ingredients to deliver bold flavor and satisfying texture without fuss. Most of these are pantry staples, and garlic scapes are seasonal — look for fresh, crisp ones at your local market or farmers’ stand. Here’s what you’ll gather:
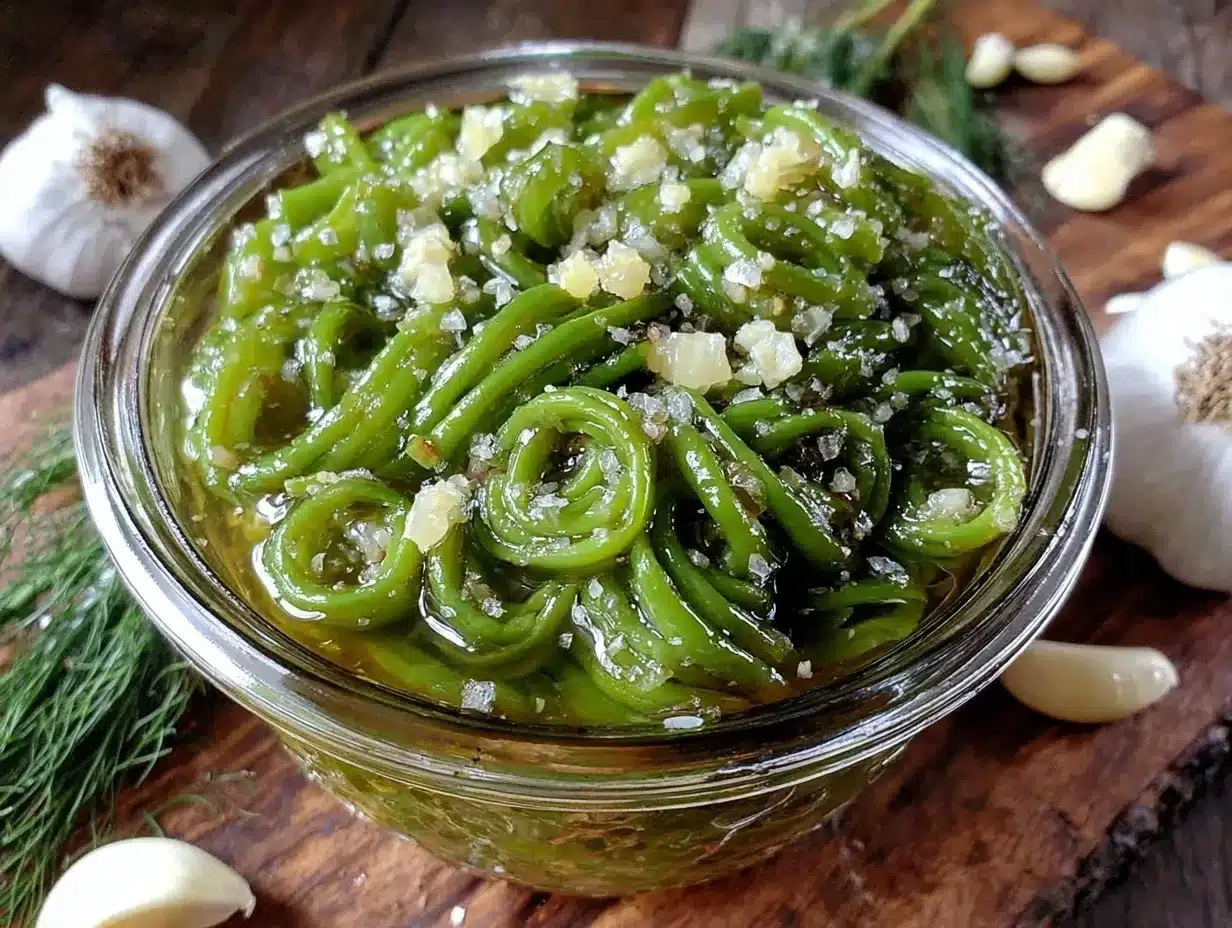
- Garlic scapes: About 1 pound (450 grams), trimmed and cut into 2-3 inch pieces. Choose firm, bright green scapes without blemishes for best texture.
- White vinegar: 1 cup (240 ml). I prefer distilled white vinegar for a clean, bright tang. You can also mix half white vinegar and half apple cider vinegar for a milder flavor.
- Water: 1 cup (240 ml), to mellow the acidity.
- Granulated sugar: 2 tablespoons (25 grams). Balances the tartness nicely without sweetness overpowering the garlic.
- Salt: 1 tablespoon (15 grams), preferably kosher salt or pickling salt for purity.
- Garlic cloves: 2-3, peeled and lightly crushed (yes, more garlic!). This adds a deeper garlicky note beyond the scapes themselves.
- Optional spices: A few peppercorns or a pinch of red pepper flakes for subtle heat and complexity.
For substitutions, if you want to avoid refined sugar, honey or maple syrup can work, but adjust to taste. If you’re after a different vinegar profile, rice vinegar or white wine vinegar can be interesting alternatives but expect a slightly different tang. For salt, do avoid table salt as it may cloud the brine. And if you can’t find fresh garlic scapes, green garlic or young garlic stalks can be a decent stand-in, though the flavor won’t be quite the same.
Equipment Needed
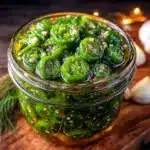
- Glass jars with lids: A couple of pint-sized (16 oz / 500 ml) jars work well for storing your pickled scapes. Mason jars are perfect and easy to find.
- Small saucepan: For heating the pickling brine. A 1 to 2 quart (1 to 2 liter) saucepan is ideal.
- Cutting board and sharp knife: For trimming and slicing garlic scapes evenly.
- Tongs or fork: Helpful for packing scapes into jars and handling hot brine safely.
If you don’t have mason jars, any clean, heat-safe glass container with a tight-fitting lid will do. I once used a repurposed jam jar and it worked just fine! Just make sure it seals well to keep the pickles fresh. For maintenance, keep your jars and lids clean and dry before use to avoid spoilage. Budget-friendly kitchen shears also work great for snipping garlic scapes if you prefer not to use a knife.
Preparation Method
- Prepare the garlic scapes: Rinse about 1 pound (450 grams) of fresh garlic scapes under cold water. Trim off any tough ends and cut the scapes into 2 to 3-inch (5 to 7.5 cm) pieces. You want pieces that are easy to handle and fit snugly into your jars.
- Pack the jars: Place the cut scapes into clean pint-sized jars, packing them fairly tightly but without crushing. Add 2-3 peeled, lightly crushed garlic cloves to each jar for extra flavor. Optionally, toss in a few peppercorns or a pinch of red pepper flakes if you like a little heat.
- Make the brine: In a small saucepan, combine 1 cup (240 ml) white vinegar, 1 cup (240 ml) water, 2 tablespoons (25 grams) granulated sugar, and 1 tablespoon (15 grams) kosher salt. Stir over medium heat until the sugar and salt fully dissolve. This usually takes 3-5 minutes. The brine should be hot but not boiling.
- Pour the brine: Carefully pour the hot brine over the garlic scapes in each jar. Fill to cover completely, leaving about 1/2 inch (1.25 cm) of headspace at the top. Use tongs or a fork to nudge scapes down if needed to prevent air pockets.
- Seal and cool: Screw the lids on tightly and let the jars cool to room temperature on the counter. You’ll notice the garlic scapes start to soften and turn a slightly brighter green as they absorb the brine.
- Refrigerate and wait: Place the jars in the fridge for at least 24 hours before tasting. The flavor deepens and the texture firms up after a day or two. For best flavor, let them pickle for 3-5 days, but honestly, I often can’t wait that long!
Pro tip: If your scapes are particularly large or tough, blanching them for 30 seconds in boiling water before packing can help soften them just a touch, but it’s not necessary for fresh, tender scapes. Also, keep an eye on your jars the first few days — if you see any cloudiness or off smells, discard, but this quick pickle usually keeps well refrigerated for up to 3 weeks.
Cooking Tips & Techniques
Making quick pickled garlic scapes is pretty straightforward, but a few things I’ve learned along the way can save you some trouble and get the best results:
- Freshness matters: The fresher your garlic scapes, the crisper and brighter your pickles will be. If they’re past their prime, the texture can get mushy fast.
- Don’t overcook the brine: You want it hot enough to dissolve sugar and salt, but boiling isn’t necessary and can dull the vinegar’s sharpness.
- Pack jars tightly but gently: You want to avoid air bubbles but don’t want to crush the scapes, which can lead to a mushy texture.
- Patience pays off: While you can eat these pickles after 24 hours, letting them hang out for several days in the fridge really brings out that complex tang.
- Watch your salt and sugar: If you prefer a less salty or less sweet pickle, feel free to adjust slightly — just keep the balance so the flavor stays lively.
I once rushed and ate my garlic scapes after just a few hours, only to find them sharp and a bit raw-tasting. Lesson learned! Also, if you’re juggling dinner while pickling (like prepping a savory turkey casserole), you can make the brine ahead and just pour over fresh scapes when ready. It’s a great way to multitask without losing flavor.
Variations & Adaptations
Quick pickled garlic scapes are pretty adaptable, so feel free to make this recipe your own:
- Spice it up: Add mustard seeds, coriander seeds, or sliced fresh chili peppers for extra heat and complexity.
- Sweet & spicy: Increase the sugar to 3 tablespoons and add a cinnamon stick or star anise for a sweet-spiced twist.
- Low-sodium version: Cut salt by half and add a splash of lemon juice post-pickling to maintain brightness.
- Fermented flavor: Skip the vinegar and ferment the scapes in a saltwater brine for a few days for a probiotic-rich, tangy treat (though this takes longer).
I tried swapping out some of the white vinegar for apple cider vinegar once, and it lent a nice mellow fruitiness to the pickles that paired beautifully with a one-pot salmon and quinoa dish I was making. It’s all about finding what flavors speak to your palate.
Serving & Storage Suggestions
These quick pickled garlic scapes shine best chilled and crunchy. Serve them straight from the jar as a tangy snack or chop them finely to toss into salads, grain bowls, or even as a punchy garnish on creamy dishes. They’re a fantastic way to brighten up rich meals — like a subtle nod of freshness alongside heavier comfort foods.
Store the pickled garlic scapes in the fridge in their sealed jars. They keep well for up to 3 weeks, though the texture may soften over time. If you want to maintain that crisp snap, try to consume within 10 days. To re-crisp slightly, drain and soak briefly in ice water before serving.
Flavors tend to meld and get more harmonious the longer they sit, so if you plan ahead, it’s worth making a batch a few days before you need it. These pickled scapes pair wonderfully with roasted meats and vegetables, or alongside hearty dishes like the creamy sausage and potato soup when you want that fresh cut through richness.
Nutritional Information & Benefits
A serving of quick pickled garlic scapes (about 1 ounce or 30 grams) has roughly:
| Nutrient | Amount |
|---|---|
| Calories | 10-15 kcal |
| Carbohydrates | 3 grams |
| Protein | 0.5 grams |
| Fat | 0 grams |
| Fiber | 1 gram |
Garlic scapes are a good source of antioxidants and have similar health benefits to garlic, including immune support and anti-inflammatory properties. The vinegar in the pickling brine can aid digestion and help balance blood sugar levels. This recipe is naturally gluten-free, low-carb, and vegan-friendly. Just watch the sodium if you’re salt-sensitive.
Conclusion
This quick pickled garlic scapes recipe has become one of those little kitchen treasures for me — fast to make, endlessly useful, and packed with fresh, tangy flavor that livens up any meal. It’s a simple way to bring a seasonal ingredient into your fridge and turn everyday dishes into something a bit more special. Whether you’re adding a zesty crunch to salads or brightening up a cozy dinner, these pickled scapes hold their own with flair.
My advice? Play around with the flavors to suit your taste, and don’t be surprised if you find yourself making this on repeat — it’s that kind of recipe. I’d love to hear how you like to use your quick pickled garlic scapes or any twists you try, so drop a comment below and share your pickling adventures. Here’s to fresh, tangy bites that make cooking feel a little more joyful!
Frequently Asked Questions about Quick Pickled Garlic Scapes
How long do quick pickled garlic scapes last in the fridge?
They typically keep well for 2 to 3 weeks when stored in a sealed jar in the refrigerator. For best crunch and flavor, try to consume within 10 days.
Can I use frozen garlic scapes for pickling?
Fresh garlic scapes work best for crispness. Frozen scapes tend to be softer and may become mushy after pickling, though the flavor will still be good.
Do I need to sterilize the jars before pickling?
For quick pickles stored in the fridge, thorough washing and drying of jars is usually sufficient. Sterilizing is more important for shelf-stable canned pickles.
What can I substitute if I don’t have white vinegar?
Apple cider vinegar or rice vinegar can be used, but expect a slightly different flavor profile. Avoid balsamic or malt vinegar as they may overpower the delicate garlic scapes.
Can I make this recipe spicy?
Absolutely! Adding red pepper flakes, sliced fresh chili, or a few mustard seeds to the jar before pouring the brine will give your pickles a nice kick.
Pin This Recipe!
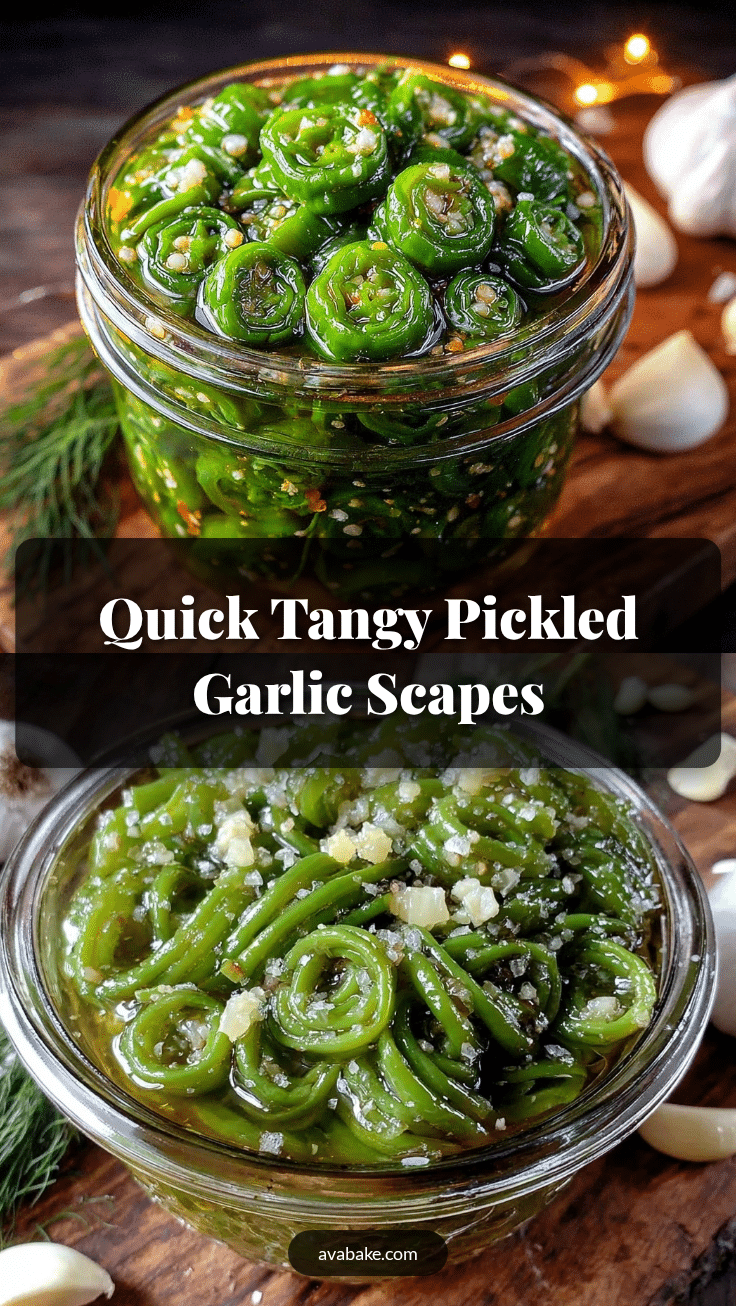
Quick Pickled Garlic Scapes
A quick and easy recipe for tangy, crunchy pickled garlic scapes that add a fresh, garlicky kick to any meal. Ready in under 30 minutes plus chilling time, perfect for busy days.
- Prep Time: 10 minutes
- Cook Time: 10 minutes
- Total Time: 30 minutes plus chilling time
- Yield: 2 pint jars (about 4-6 servings) 1x
- Category: Condiment
- Cuisine: American
Ingredients
- 1 pound (450 grams) garlic scapes, trimmed and cut into 2–3 inch pieces
- 1 cup (240 ml) white vinegar (distilled preferred, or half white vinegar and half apple cider vinegar)
- 1 cup (240 ml) water
- 2 tablespoons (25 grams) granulated sugar
- 1 tablespoon (15 grams) kosher salt or pickling salt
- 2–3 garlic cloves, peeled and lightly crushed
- Optional: a few peppercorns or a pinch of red pepper flakes
Instructions
- Rinse about 1 pound (450 grams) of fresh garlic scapes under cold water. Trim off any tough ends and cut the scapes into 2 to 3-inch pieces.
- Place the cut scapes into clean pint-sized jars, packing them fairly tightly but without crushing. Add 2-3 peeled, lightly crushed garlic cloves to each jar. Optionally, add a few peppercorns or a pinch of red pepper flakes.
- In a small saucepan, combine 1 cup (240 ml) white vinegar, 1 cup (240 ml) water, 2 tablespoons (25 grams) granulated sugar, and 1 tablespoon (15 grams) kosher salt. Stir over medium heat until sugar and salt dissolve, about 3-5 minutes. The brine should be hot but not boiling.
- Carefully pour the hot brine over the garlic scapes in each jar, filling to cover completely and leaving about 1/2 inch (1.25 cm) headspace. Use tongs or a fork to nudge scapes down to prevent air pockets.
- Screw the lids on tightly and let the jars cool to room temperature on the counter.
- Place the jars in the refrigerator for at least 24 hours before tasting. For best flavor, let them pickle for 3-5 days.
Notes
If scapes are large or tough, blanch for 30 seconds in boiling water before packing to soften slightly. Avoid boiling the brine to preserve vinegar sharpness. Store refrigerated and consume within 2-3 weeks for best quality. To re-crisp, soak briefly in ice water before serving.
Nutrition
- Serving Size: About 1 ounce (30 gr
- Calories: 1015
- Carbohydrates: 3
- Fiber: 1
- Protein: 0.5
Keywords: garlic scapes, pickled garlic scapes, quick pickles, easy pickled vegetables, tangy garlic, homemade pickles, garlic condiment


