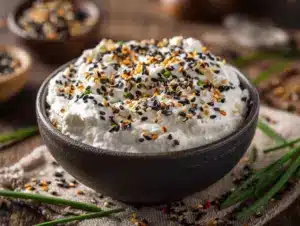
Rummaging through the pantry when the realization hit: no time, no fancy ingredients, and a porch full of impatient kids waiting for a sweet fix. The usual dessert plan had fallen apart—forgotten at the grocery store and with a busy day ahead, there was no way I could pull off anything complicated. Honestly, the last thing I wanted was to spend hours making a dessert that everyone would barely notice. That’s when this perfect red white and blue layered Jello cups recipe with cream cheese came to life—pure improvisation with a patriotic twist. The vibrant colors were a hit, brightening up the chaotic afternoon, and the creamy layer in the middle saved the whole thing from being just another jiggly treat. It’s funny how the simplest recipes, born from a pinch of panic and a dash of fridge-foraging, can become staples in your rotation.
Every spoonful brings that cool, nostalgic jello wobble combined with the smooth richness of cream cheese, making it feel a little more special—like a dessert that’s both fun and comforting at once. I keep coming back to this recipe for those moments when time is tight but you still want to impress without stress. It’s become my go-to for summer barbecues, family gatherings, and whenever I need a quick festive dessert that doesn’t scream “last-minute.” And honestly, it feels just right to serve something that looks like a celebration in a cup, even if the kitchen was a disaster ten minutes before.
What stuck with me about these layered Jello cups is how they bring a quiet kind of joy—simple ingredients, easy prep, and that little creamy surprise that makes it memorable. It’s not about fancy technique or rare ingredients; it’s about a dessert that feels like a small victory on a hectic day.
Why You’ll Love This Perfect Red White and Blue Layered Jello Cups Recipe
Having tested this recipe more times than I can count, I’ve learned what makes these layered Jello cups truly shine. Whether you’re a seasoned cook or a reluctant dessert maker like me, this recipe hits all the right notes with minimal fuss.
- Quick & Easy: Ready in under 30 minutes, plus chilling time, so perfect for busy summer afternoons or last-minute celebrations.
- Simple Ingredients: No need for specialty stores—just classic Jello flavors, cream cheese, and a few pantry staples you probably have on hand.
- Perfect for Holidays: Ideal for 4th of July, Memorial Day, or any patriotic-themed gathering that calls for festive flair.
- Crowd-Pleaser: Kids love the fun layers and adults appreciate the creamy middle that balances sweetness with a smooth texture.
- Unbelievably Delicious: The cream cheese layer isn’t just decoration—it adds a rich, slightly tangy contrast that takes these cups beyond basic Jello.
What really sets this recipe apart is the layering technique combined with that luscious cream cheese blend. Instead of the usual plain white layer, this recipe uses a cream cheese mixture that’s whipped smooth and lightly sweetened, which gives it a mousse-like feel. It’s the kind of detail that makes you close your eyes after the first bite (no joke). Plus, the recipe is forgiving—no worries if your layers aren’t perfectly even; the colors and flavors do the heavy lifting.
For me, this dessert is about capturing a moment—whether it’s a spontaneous backyard barbecue or a festive potluck where you want to bring something cheerful and fuss-free. It’s reliable, light, and just fun to serve, which explains why it’s become a staple when I want a patriotic touch without the hassle.
What Ingredients You Will Need for Perfect Red White and Blue Layered Jello Cups
This recipe uses simple, wholesome ingredients to deliver bold flavor and satisfying texture without the fuss. The ingredients are mostly pantry staples, making substitutions easy if needed.
- Red Layer: Strawberry or Cherry Jello mix (1 package, about 3 oz) – I prefer Jell-O brand for bright color and consistent flavor.
- White Layer (Cream Cheese Mixture):
- Cream cheese (8 oz), softened – use full-fat for best texture, but light cream cheese works too.
- Powdered sugar (1 cup) – for smooth sweetness that blends easily.
- Cold water (1 cup) – to thin out the mixture just right.
- Unflavored gelatin (1 tablespoon) – helps the layer set firmly but creamy.
- Blue Layer: Blueberry or Berry Blue Jello mix (1 package, about 3 oz) – Berry Blue Jello gives a vibrant color that really pops.
- Additional:
- Boiling water (6 cups total) – divided for dissolving Jello mixes and gelatin.
- Cold water (2 cups total) – to chill layers faster and set texture.
For a seasonal twist, fresh blueberries can be added atop the blue layer for extra texture and natural sweetness. If you need a dairy-free option, swapping cream cheese with a vegan cream cheese alternative works well, though the texture will be slightly different. For gluten-free needs, rest assured this recipe contains no gluten ingredients.
Equipment Needed
- Mixing bowls (at least 3) – glass or heatproof plastic work best for handling hot water.
- Whisk or electric mixer – to get that cream cheese layer smooth and fluffy.
- Measuring cups and spoons – accuracy matters for gelatin and sugar.
- Clear plastic cups or small glass jars – for serving and showing off the colorful layers.
- Small saucepan (optional) – if you prefer to bloom gelatin on the stove rather than in hot water.
- Refrigerator space – you’ll need a flat spot for chilling the cups during layer setting.
If you don’t have an electric mixer, a sturdy whisk and a bit of elbow grease will do just fine for the cream cheese layer. For budget-friendly serving, disposable clear cups work great and make cleanup a breeze. I’ve found that using clear glass jars adds a charming touch for special occasions, and they’re reusable too.
Preparation Method: Step-by-Step for Perfect Red White and Blue Layered Jello Cups
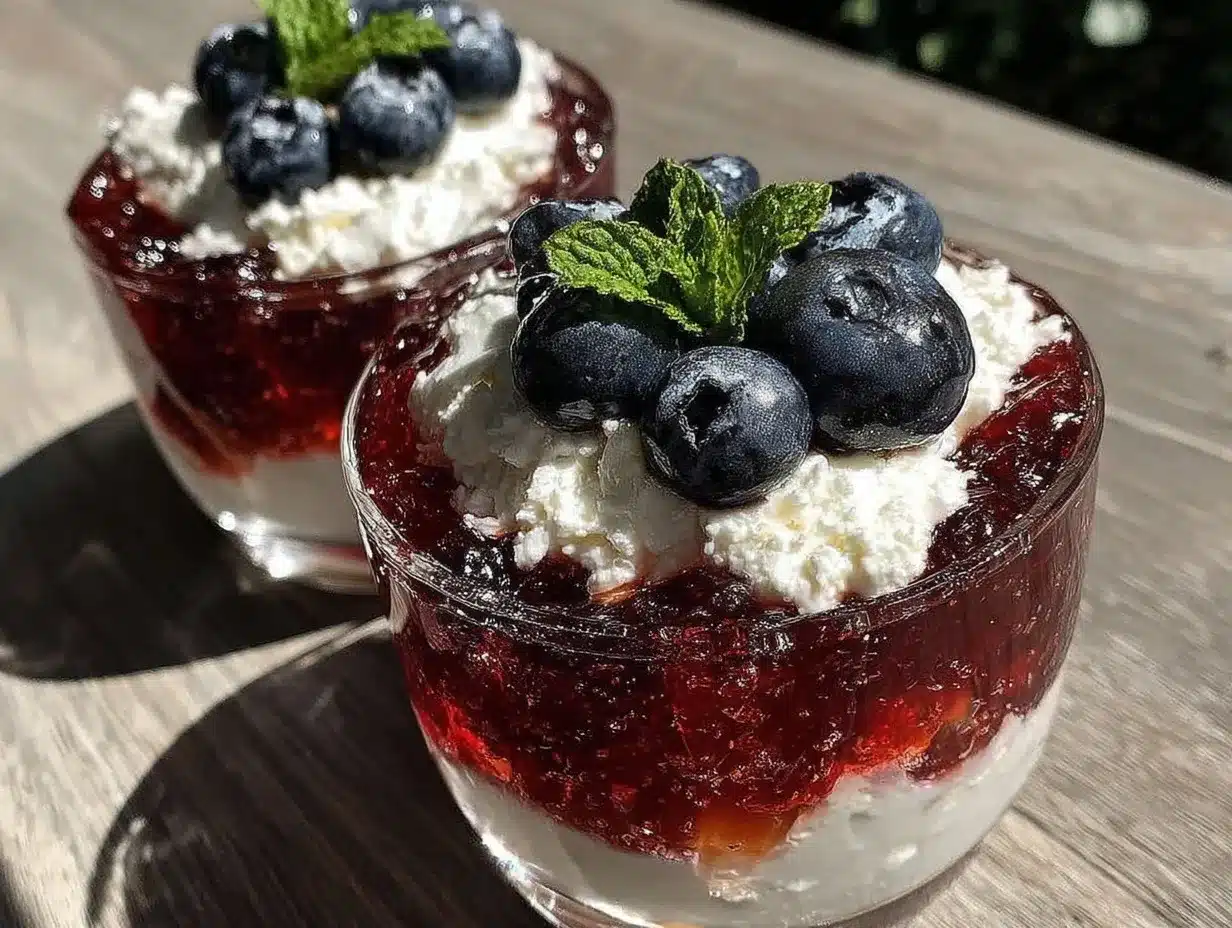
- Prepare the Red Jello Layer: Boil 2 cups (480 ml) of water. Pour over the 3 oz (85 g) strawberry or cherry Jello mix in a mixing bowl. Stir until completely dissolved (about 2 minutes). Add 1 cup (240 ml) cold water, stir again, then pour about 1/3 cup (80 ml) into each serving cup. Refrigerate for 20-25 minutes or until firm but not fully set (it should be slightly tacky to the touch). This allows layers to stick well.
- Make the Cream Cheese Layer: While the red layer chills, sprinkle 1 tablespoon (7 g) unflavored gelatin over 1/4 cup (60 ml) cold water; let it bloom for 5 minutes. In a separate bowl, beat 8 oz (225 g) softened cream cheese with 1 cup (120 g) powdered sugar until smooth and fluffy, about 3-4 minutes with an electric mixer. Warm the bloomed gelatin gently until melted (microwave in 10-second bursts), then mix into the cream cheese mixture slowly. Add 3/4 cup (180 ml) cold water and beat until combined and smooth.
- Add the White Layer: Remove the red Jello cups from fridge. Gently spoon or pipe about 1/3 cup (80 ml) of the cream cheese mixture over the red layer, smoothing the tops carefully. Return to fridge and chill for 30 minutes to let the white layer set properly.
- Prepare the Blue Jello Layer: Repeat the red layer process with the blue Jello mix—boil 2 cups (480 ml) water, stir in 3 oz (85 g) blue Jello until dissolved, add 1 cup (240 ml) cold water. Once the white layer is set, pour about 1/3 cup (80 ml) over the cream cheese layer. Refrigerate for at least 2 hours until fully firm before serving.
Pro tip: When pouring layers, use a spoon held just above the cup’s surface to avoid disturbing the layers below. If you notice any air bubbles or uneven spots, a gentle tap on the counter helps smooth things out. If your cream cheese layer feels too thick, a tiny splash more cold water can loosen it without losing firmness.
Cooking Tips & Techniques for Foolproof Layered Jello Cups
The key to perfect layered Jello cups is patience and temperature control. Honestly, rushing the chilling stages is the biggest mistake—if you pour the next layer before the previous one sets enough, colors bleed and layers mix. Waiting until the layer is slightly tacky but firm makes all the difference.
Using powdered sugar in the cream cheese layer is a trick I learned that prevents graininess and helps achieve that smooth, creamy texture. Regular granulated sugar won’t dissolve as well here. Also, blooming gelatin separately ensures it melts evenly and blends seamlessly into the cream cheese without lumps.
Another tip: use clear disposable cups for quick serving and easy cleanup, but if you want that extra wow factor, small glass mason jars showcase the layers beautifully—plus they’re reusable!
Multitasking comes in handy—start the red layer chilling, then prep the cream cheese while you wait. It’s a little dance but worth the end result. And don’t forget, the cream cheese layer adds a bit of tang and richness that balances the sweetness, so don’t skip or substitute it lightly.
Variations & Adaptations for Your Red White and Blue Layered Jello Cups
- Fruit-Infused Layers: Add fresh strawberries to the red layer or blueberries to the blue before chilling for extra texture and natural sweetness.
- Dietary Adjustments: Use sugar-free Jello mixes and low-fat cream cheese for a lighter version. Vegan cream cheese alternatives and agar powder can replace gelatin for a plant-based twist.
- Flavor Swaps: Try raspberry and blueberry Jello for a richer berry flavor or lime and coconut layers for a tropical twist while keeping the layered look.
- Presentation Styles: Instead of cups, pour layers into a clear trifle bowl for a shareable dessert or into festive silicone molds for fun shapes.
Personally, I once swapped the red layer with watermelon-flavored Jello and topped the cups with whipped cream and a cherry—it was a hit at a summer picnic. Just remember that gelatin sets differently with fruit juice, so you might need to tweak chilling time.
Serving & Storage Suggestions for Layered Jello Cups
Serve these layered Jello cups chilled, straight from the fridge, for the best texture and refreshing taste. They look fantastic when garnished with a small fresh berry or a mint leaf on top—simple touches that make a difference. Perfect alongside light summer salads or classic barbecue dishes.
Store leftovers covered tightly with plastic wrap or in an airtight container in the fridge for up to 3 days. Avoid freezing as the creamy layer loses its silky texture. When reheating is needed (rare with Jello), allow cups to sit at room temperature for about 10 minutes to soften slightly before serving.
Flavors tend to meld and mellow the next day, so these cups are often even better after resting overnight. If you’re planning ahead, make the dessert a day before your event for hassle-free serving.
Nutritional Information & Benefits
Each serving of these perfect red white and blue layered Jello cups contains approximately:
| Nutrient | Amount per Serving |
|---|---|
| Calories | 150–180 kcal |
| Protein | 3–5 g |
| Carbohydrates | 25 g |
| Fat | 4–6 g |
| Sugar | 20 g |
The cream cheese adds a dose of calcium and protein, making the dessert a bit more filling than plain Jello. Using real fruit or natural berry Jello mixes can bump up antioxidants and vitamins. This dessert is gluten-free and can be adapted for low-sugar or dairy-free diets with simple swaps.
From a wellness standpoint, it’s a treat that balances indulgence with portion control and familiar ingredients, which I appreciate when feeding a hungry crowd.
Conclusion: Why This Recipe Stays in My Dessert Lineup
This perfect red white and blue layered Jello cups recipe with cream cheese has a special place in my kitchen for its effortless charm and reliable results. It’s a dessert that feels festive but doesn’t demand hours of prep or unusual ingredients. It’s flexible, forgiving, and loved by all ages, which is a rare combo in my experience.
Feel free to tweak the flavors or swap out layers to match your preferences or occasion. I always encourage playful customization—after all, food is one of the few joys where a little improvisation can make it uniquely yours.
Give it a try next time you need a colorful, crowd-pleasing dessert without the stress. And if you happen to experiment with your own twist, I’d love to hear about it in the comments below. Remember, sometimes the best recipes come from the most unexpected kitchen moments—just like this one.
FAQs About Perfect Red White and Blue Layered Jello Cups
How long does it take to make layered Jello cups?
Active prep takes about 20-30 minutes, but chilling time for all layers to set fully is around 3 hours. Planning ahead helps!
Can I make these cups ahead of time?
Yes, they keep well refrigerated for up to 3 days. Making them the day before your event is ideal.
What if I don’t have cream cheese?
You can substitute with whipped topping or a dairy-free cream cheese alternative, but the texture and flavor will differ slightly.
Can I use fresh fruit instead of Jello?
Fresh fruit can be added for texture, but it won’t replace the gelatin’s setting properties. Consider mixing fruit into the Jello layers or as a topping.
How do I prevent the layers from mixing?
Make sure each layer is chilled until just firm (tacky but set) before adding the next. Pour gently over a spoon to avoid disturbing layers.
For more easy and festive recipes that come together quickly, you might enjoy the honey garlic butter chicken sheet pan dinner or the creamy no-bake Oreo cheesecake, both perfect for fuss-free entertaining.
Pin This Recipe!
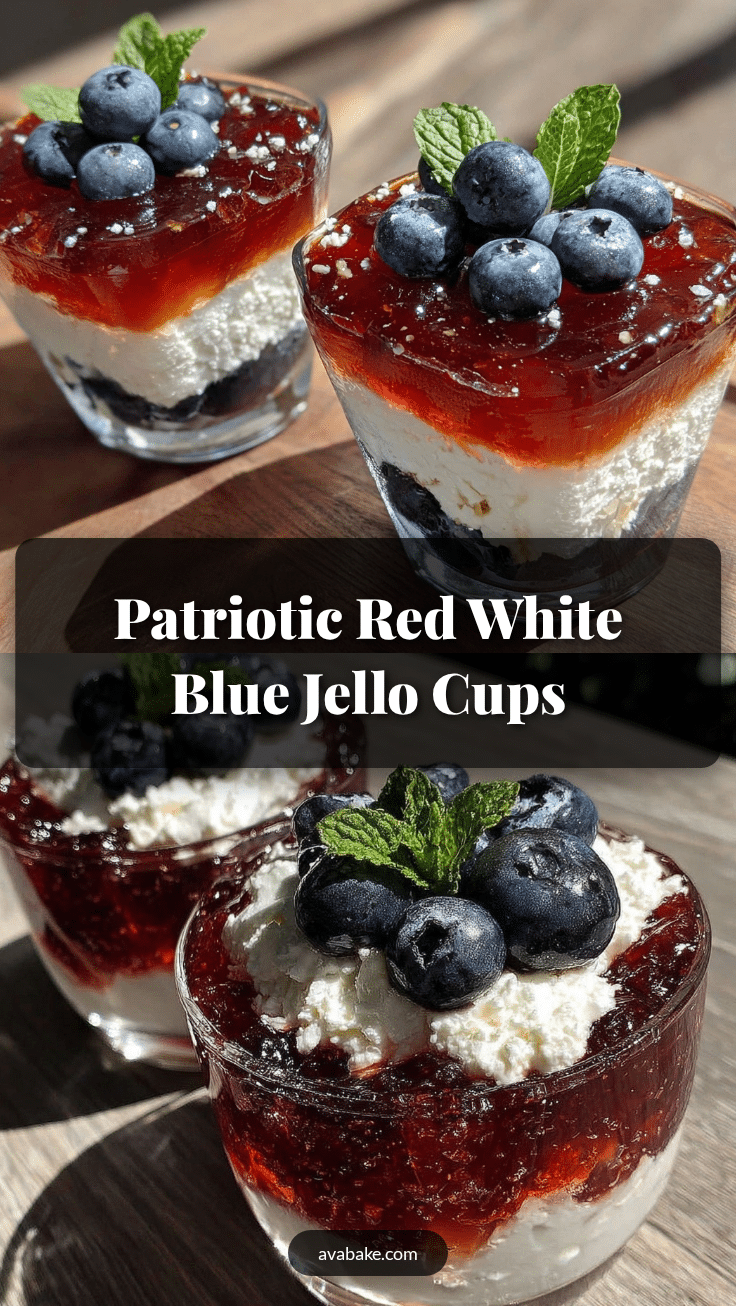
Perfect Red White and Blue Layered Jello Cups Recipe Easy 4-Step Dessert with Cream Cheese
A quick and easy patriotic dessert featuring vibrant red and blue Jello layers with a creamy, whipped cream cheese middle layer. Perfect for summer gatherings and holidays.
- Prep Time: 15 minutes
- Cook Time: 0 minutes
- Total Time: 3 hours 15 minutes
- Yield: 6 servings 1x
- Category: Dessert
- Cuisine: American
Ingredients
- 1 package (3 oz) strawberry or cherry Jello mix
- 8 oz cream cheese, softened
- 1 cup powdered sugar
- 1 cup cold water (divided)
- 1 tablespoon unflavored gelatin
- 1 package (3 oz) blueberry or berry blue Jello mix
- 6 cups boiling water (divided)
Instructions
- Boil 2 cups of water. Pour over the strawberry or cherry Jello mix in a mixing bowl. Stir until completely dissolved (about 2 minutes). Add 1 cup cold water, stir again, then pour about 1/3 cup into each serving cup. Refrigerate for 20-25 minutes or until firm but slightly tacky.
- Sprinkle unflavored gelatin over 1/4 cup cold water; let bloom for 5 minutes. Beat softened cream cheese with powdered sugar until smooth and fluffy (3-4 minutes). Warm the bloomed gelatin gently until melted, then mix into the cream cheese mixture. Add 3/4 cup cold water and beat until smooth.
- Remove the red Jello cups from fridge. Gently spoon or pipe about 1/3 cup of the cream cheese mixture over the red layer, smoothing the tops. Return to fridge and chill for 30 minutes to set.
- Boil 2 cups water. Stir in blueberry or berry blue Jello mix until dissolved. Add 1 cup cold water. Once the white layer is set, pour about 1/3 cup over the cream cheese layer. Refrigerate for at least 2 hours until fully firm before serving.
Notes
Use a spoon held just above the cup surface when pouring layers to avoid disturbing lower layers. Bloom gelatin separately for smooth texture. Use powdered sugar to prevent graininess in cream cheese layer. Chill each layer until tacky before adding the next to prevent mixing. Fresh berries can be added on top for extra texture. For dairy-free, use vegan cream cheese and agar powder instead of gelatin.
Nutrition
- Serving Size: 1 layered Jello cup
- Calories: 150180
- Sugar: 20
- Fat: 46
- Carbohydrates: 25
- Protein: 35
Keywords: Jello cups, layered dessert, patriotic dessert, cream cheese dessert, easy summer dessert, 4th of July dessert, quick dessert