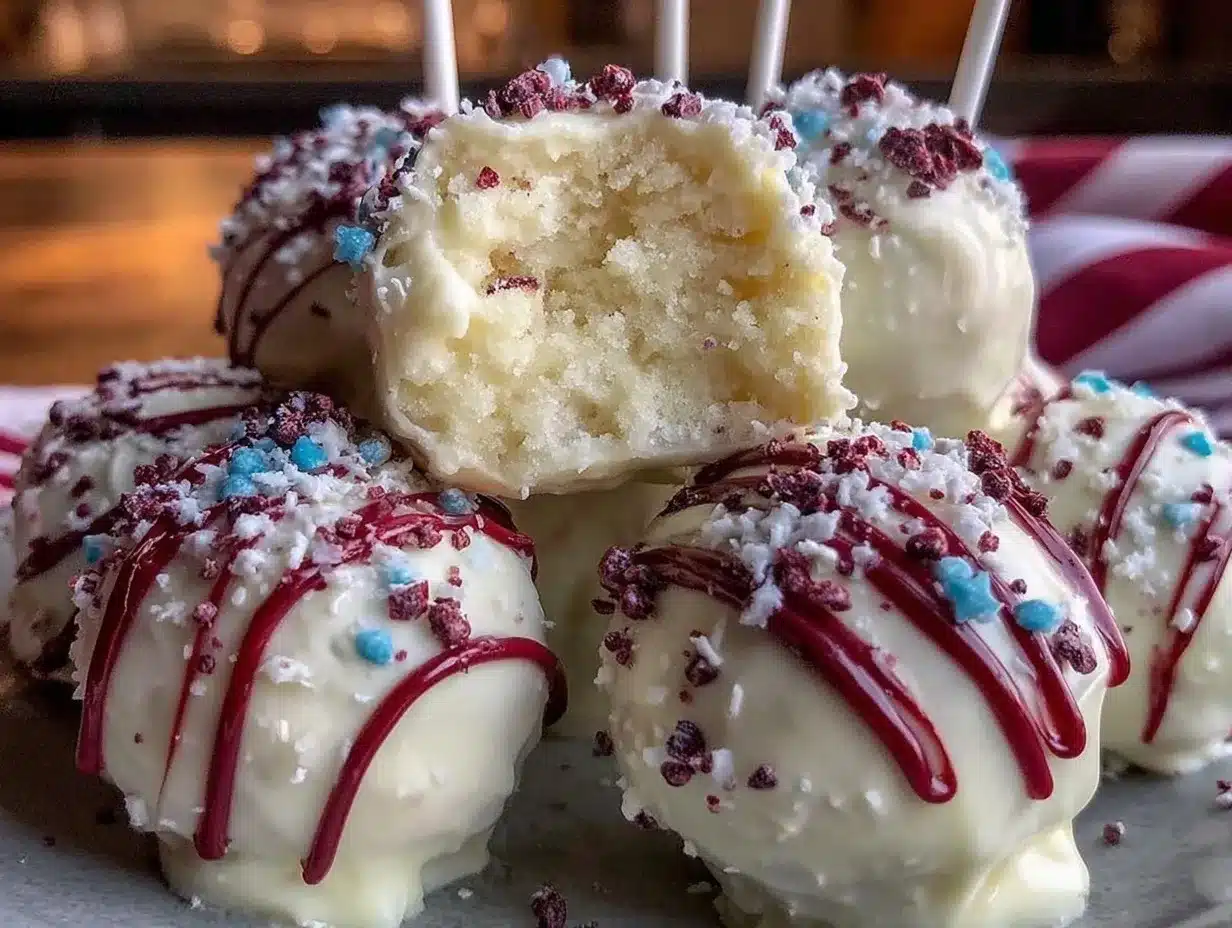
My niece took one bite of these red white and blue cake pops with white chocolate shell and immediately asked for “more, please” — three days running. Honestly, I wasn’t expecting that kind of reaction from a kid who usually snubs anything too sweet or fussy. She was sitting there, cheeks puffed with the soft, colorful cake inside and the crisp, creamy shell cracking just right under her teeth. It was one of those moments where you realize you’ve stumbled on something special without even trying too hard.
The way the white chocolate shell snaps, giving way to moist cake flecked with patriotic colors, made a little kid’s eyes light up in a way that says “this has to be good.” It wasn’t just the taste, though — it was how perfectly handheld and festive these cake pops are, turning an ordinary dessert into a fun, grab-and-go treat. I’d been toying with the idea of a red white and blue dessert for a summer cookout, but watching my niece devour these cake pops made me realize this recipe was going to be a hit with all ages.
There’s something quietly satisfying about a dessert that looks this charming and can be made ahead without losing its magic. These cake pops carry a simple joy you don’t often get from fancy cakes or complicated sweets. It’s the kind of treat you bring out on a warm afternoon, and it somehow brings everyone together, no fuss required. That’s why this recipe stuck with me — it’s easy, playful, and somehow, just right.
Why You’ll Love This Recipe
I’ve tested this red white and blue cake pops recipe more times than I can count, tweaking it until the texture and flavor hit that perfect note. It’s not just about the looks (though those colors do steal the show!). This recipe is truly a go-to for anyone who wants a homemade dessert that’s simple, fun, and reliably delicious.
- Quick & Easy: Comes together in under an hour, making it perfect for last-minute gatherings or holiday celebrations.
- Simple Ingredients: You likely have everything in your pantry — from cake mix to white chocolate — no specialty store runs needed.
- Perfect for Celebrations: Whether it’s the 4th of July, Memorial Day, or just a summer BBQ, these cake pops add that festive sparkle effortlessly.
- Crowd-Pleaser: From kids to adults, everyone loves the soft cake center combined with the crisp white chocolate shell.
- Unbelievably Delicious: The balance of sweet white chocolate and moist, colorful cake is next-level comfort food, but with a fun twist.
What sets this recipe apart? It’s the way the white chocolate shell hardens just enough to give a satisfying snap but melts smoothly on the tongue. Plus, folding in the red and blue sprinkles right into the cake mixture ensures every bite has a little pop of color and texture — no fading or dull spots here. Honestly, this isn’t just another cake pop recipe; it’s the perfect blend of festive and foolproof.
Making these cake pops feels like stealing a bit of happiness in every bite, and that’s why I keep coming back to this recipe year after year. It’s a small celebration in itself.
What Ingredients You Will Need
This recipe uses simple, wholesome ingredients to deliver bold flavor and a satisfying texture without any fuss. Most are pantry staples, with a few options for colorful, festive touches.
- For the Cake Base:
- Box of white or vanilla cake mix (about 15.25 oz / 432 g) – I prefer Betty Crocker for consistent results
- 3 large eggs, room temperature
- 1 cup water (240 ml)
- 1/3 cup vegetable oil (80 ml)
- Red and blue gel food coloring (a few drops each, to divide the batter)
- For the Cake Pop Mixture:
- 1 cup cream cheese frosting (about 240 g) – store-bought or homemade, but cream cheese adds that slight tang and moisture
- Red, white, and blue sprinkles (optional, about 1/4 cup) – to fold into the batter or sprinkle on top
- For the White Chocolate Shell:
- 12 oz (340 g) white chocolate melting wafers or good-quality white chocolate chips (Ghirardelli works well)
- 1 tsp coconut oil or vegetable shortening (optional, for a smoother dip)
- Extra sprinkles for decoration
If you want to make this gluten-free, you can swap the cake mix with a gluten-free vanilla mix of similar weight. Also, for dairy-free options, use dairy-free frosting and white chocolate alternatives. The key is keeping the balance of moist cake and a firm yet delicate shell.
Equipment Needed
- Cake pop sticks or sturdy lollipop sticks
- Mixing bowls (medium and large)
- Baking sheet lined with parchment paper or a silicone mat
- Electric mixer or stand mixer (for combining the cake and frosting mixture smoothly)
- Microwave-safe bowl or double boiler (for melting white chocolate)
- Styrofoam block or cake pop stand (to hold pops upright while drying)
- Spatula and spoon for mixing
If you don’t have a cake pop stand, sticking the pops upright in a block of floral foam or even resting them carefully on the edge of a baking sheet works just fine. I once skipped the whole stand and just laid them flat to dry — the shell cracked a bit, so I’d recommend at least propping them up to keep the shells smooth and perfect.
Preparation Method
- Bake the cake: Preheat your oven to 350°F (175°C). Prepare the cake mix according to package instructions using the eggs, water, and oil. Divide the batter evenly into three bowls. Tint one bowl red with gel food coloring, another blue, and leave the last white. Pour each colored batter into separate small cake pans or line a larger pan in sections to keep colors distinct. Bake for 25-30 minutes or until a toothpick inserted comes out clean. Let cool completely.
- Prepare the cake crumbs: Once cooled, crumble each cake color into a large bowl using your hands or a fork. Make sure there are no large chunks — you want fine crumbs for the best texture.
- Mix with frosting: Add cream cheese frosting a little at a time, gently folding it into the crumbs. You want a dough-like consistency that holds together without being too sticky (about 1 cup frosting total). Fold in a handful of red, white, and blue sprinkles here if you want an extra festive touch.
- Form the cake balls: Scoop out small portions (about 1.5 tablespoons or 20 g each) and roll into smooth balls. Place them on a parchment-lined baking sheet. Chill the balls in the fridge for at least 1 hour to firm up — this is key for easy dipping later.
- Prepare the white chocolate coating: Melt the white chocolate wafers and coconut oil in a microwave-safe bowl in 30-second bursts, stirring until smooth. Alternatively, use a double boiler. The oil helps thin the chocolate for a smoother coating.
- Insert the sticks: Dip the tip of each cake pop stick into the melted chocolate, then insert halfway into each chilled cake ball. This acts like glue to hold the pop together.
- Coat the cake pops: Holding the stick, dip each cake pop into the melted white chocolate, swirling to coat completely. Tap off excess chocolate gently. If the chocolate is too thick, warm it slightly again.
- Decorate and set: Before the coating sets, sprinkle more red, white, and blue sprinkles on top for a festive finish. Stick the pops upright into a Styrofoam block or cake pop stand to dry completely (about 30 minutes).
- Serve and enjoy: Once set, these cake pops are ready to delight! Keep them refrigerated if not serving immediately.
Pro tip: If your chocolate shell cracks or looks dull, it usually means the cake balls were too warm or the chocolate was too thick. Chilling the cake balls well and adding a bit of oil to the chocolate really helps get that perfect smooth shell.
Cooking Tips & Techniques
One trick I learned early on is to chill the cake balls thoroughly before dipping. If they’re even slightly warm, the chocolate melts unevenly and cracks. So be patient and give them at least an hour in the fridge.
When melting the white chocolate, use short bursts in the microwave and stir frequently. White chocolate burns easily and becomes grainy if overheated — you want silky smooth chocolate for a flawless coating.
For a professional-looking finish, tap off excess chocolate gently instead of shaking vigorously. Shaking sends the coating flying everywhere and can create lumps or holes in the shell.
Also, if you’re new to cake pops, don’t skip dipping the stick tip into chocolate before inserting into the cake ball. It’s the glue that keeps everything together, trust me on this.
Multitasking tip: While your cake cools in the oven, prep your frosting and gather sprinkles. This way, you can jump straight to crumb-mixing once the cake is ready, saving precious time.
One mistake I made once was rushing the white chocolate to set in the fridge. Rapid cooling sometimes causes the shell to crack. Let the pops dry at room temperature or in a cool spot for best results.
Variations & Adaptations
- Flavor swaps: Try chocolate or funfetti cake mix instead of white for a different flavor base. The white chocolate shell still complements these nicely.
- Seasonal twists: For a winter holiday, swap the red and blue for green and red sprinkles and add peppermint extract to the frosting.
- Healthier options: Use a sugar-free cake mix and light cream cheese frosting to cut down on sweetness, and use dark chocolate coating instead of white for a richer taste.
- Dairy-free: Use dairy-free frosting and white chocolate chips made with coconut milk (brands like Enjoy Life) to make these vegan-friendly.
- Texture play: Add crushed freeze-dried strawberries or blueberries into the cake crumb mix for an extra fruit burst inside the pops.
Once, I even tried dipping these cake pops in a thin layer of dark chocolate before the white chocolate shell for a two-tone look — it was a fun experiment that impressed guests at a summer party!
Serving & Storage Suggestions
Serve these cake pops chilled or at room temperature, ideally within a few hours of coating for the best white chocolate snap. They look especially festive arranged in a mason jar or a patriotic-themed holder.
Pair them with cold lemonade, iced tea, or a simple fruit salad for a light summer dessert spread. They’re also perfect alongside a classic dish like easy St. Patrick’s Day beef sheet pan dinner for a fun mix of savory and sweet.
To store, keep the cake pops in an airtight container in the refrigerator for up to 5 days. If you want to freeze them, wrap each pop individually in plastic wrap and place in a freezer-safe container for up to 2 months. Thaw in the fridge overnight before serving.
The flavor and texture hold up surprisingly well, but the white chocolate shell may soften slightly in the fridge, so letting them sit at room temp for 10 minutes before eating helps bring back that perfect snap.
Nutritional Information & Benefits
Each red white and blue cake pop contains approximately 150-180 calories, depending on the size and frosting amount. The white chocolate shell adds sweetness and that signature creamy texture but also contributes fat and sugar.
Key ingredients like cream cheese frosting add a slight tang and moisture, reducing the need for extra sugary syrups. Using high-quality white chocolate with fewer additives means a smoother taste with fewer artificial ingredients.
For dietary considerations, this recipe can be modified to gluten-free or dairy-free versions without losing its charm. Just swap the cake mix and frosting accordingly.
While these cake pops are definitely a treat, the portion-controlled size helps keep indulgence in check, making them a great dessert option for parties or celebrations where you want to enjoy a sweet bite without overdoing it.
Conclusion
If you’re looking for a fun, festive dessert that’s easy to make and always a hit, these perfect red white and blue cake pops with white chocolate shell are exactly what you need. They carry that nostalgic yet fresh feeling you want at summer barbecues or holiday parties.
Feel free to customize colors, flavors, or sprinkles to match your occasion or personal tastes. I love this recipe because it’s simple enough for busy days but special enough to impress friends and family without breaking a sweat.
Give it a try and see how quickly these pops disappear — and if you want to experiment with other handheld desserts, you might enjoy my easy creamy no-bake Oreo cheesecake for a cool, crowd-pleasing treat.
Let me know how your cake pops turn out or what fun variations you come up with — sharing kitchen wins is what makes all the extra frosting worth it!
FAQs
- Can I use homemade cake instead of box mix for these cake pops?
Absolutely! Just make sure your homemade cake is fully cooled and not too moist. You want a cake that crumbles easily but still holds together when mixed with frosting. - How do I prevent the cake pops from falling off the sticks?
Dip the tip of each stick into melted chocolate before inserting into the cake ball. This helps the stick “glue” to the cake mixture as it sets. - What’s the best way to melt white chocolate without burning it?
Use short 20-30 second bursts in the microwave, stirring well between each. Alternatively, melt it gently over a double boiler to control the temperature. - Can I make these cake pops ahead of time?
Yes! Cake balls can be made and chilled a day or two in advance. Dip and decorate just before serving for the freshest look and texture. - How do I store leftover cake pops?
Store in an airtight container in the refrigerator for up to 5 days. Bring to room temperature before serving for the best flavor and texture.
Pin This Recipe!
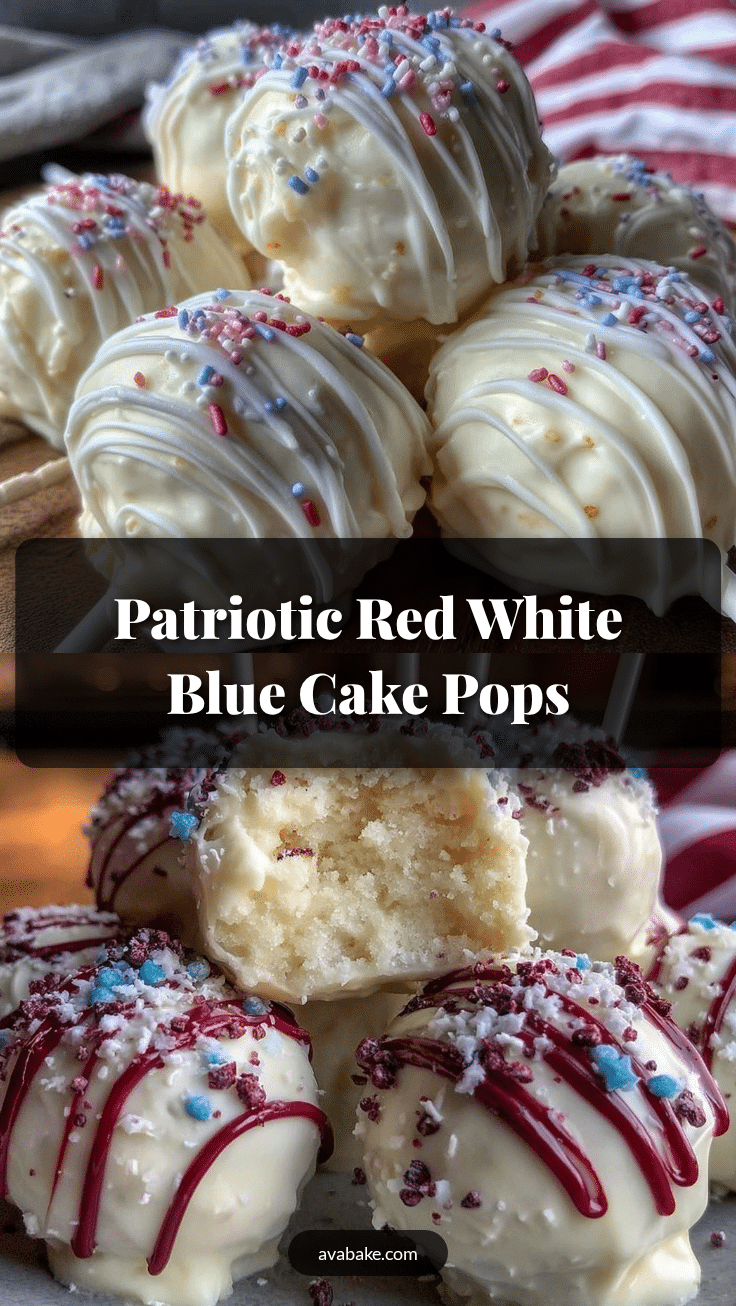
Perfect Red White and Blue Cake Pops
These festive cake pops feature a moist, colorful cake center with a crisp white chocolate shell, perfect for summer celebrations and easy to make ahead.
- Prep Time: 20 minutes
- Cook Time: 30 minutes
- Total Time: 1 hour 50 minutes
- Yield: 24 cake pops 1x
- Category: Dessert
- Cuisine: American
Ingredients
- 1 box white or vanilla cake mix (about 15.25 oz / 432 g)
- 3 large eggs, room temperature
- 1 cup water (240 ml)
- 1/3 cup vegetable oil (80 ml)
- Red and blue gel food coloring (a few drops each)
- 1 cup cream cheese frosting (about 240 g)
- Red, white, and blue sprinkles (optional, about 1/4 cup)
- 12 oz (340 g) white chocolate melting wafers or white chocolate chips
- 1 tsp coconut oil or vegetable shortening (optional)
- Extra sprinkles for decoration
Instructions
- Preheat oven to 350°F (175°C). Prepare cake mix according to package instructions using eggs, water, and oil.
- Divide batter evenly into three bowls. Tint one red, one blue, and leave one white.
- Pour each colored batter into separate small cake pans or sections of a larger pan. Bake 25-30 minutes or until a toothpick comes out clean. Cool completely.
- Crumble each cooled cake color into a large bowl, breaking into fine crumbs.
- Add cream cheese frosting gradually, folding into crumbs until dough-like consistency forms. Fold in sprinkles if desired.
- Scoop about 1.5 tablespoons (20 g) portions and roll into smooth balls. Place on parchment-lined baking sheet and chill at least 1 hour.
- Melt white chocolate and coconut oil in microwave or double boiler until smooth.
- Dip tip of each cake pop stick into melted chocolate, then insert halfway into chilled cake balls.
- Dip each cake pop into melted white chocolate, coating completely. Tap off excess chocolate gently.
- Sprinkle extra red, white, and blue sprinkles on top before coating sets.
- Place cake pops upright in Styrofoam block or cake pop stand to dry about 30 minutes.
- Serve chilled or at room temperature. Store leftovers in airtight container in refrigerator.
Notes
Chill cake balls thoroughly before dipping to prevent cracking. Use short bursts when melting white chocolate to avoid burning. Dip stick tips in chocolate before inserting to secure pops. Let cake pops dry at room temperature for best shell finish.
Nutrition
- Serving Size: 1 cake pop
- Calories: 165
- Sugar: 15
- Sodium: 120
- Fat: 9
- Saturated Fat: 5
- Carbohydrates: 20
- Fiber: 0.5
- Protein: 2
Keywords: cake pops, red white and blue, patriotic dessert, white chocolate, summer dessert, easy cake pops, party treats