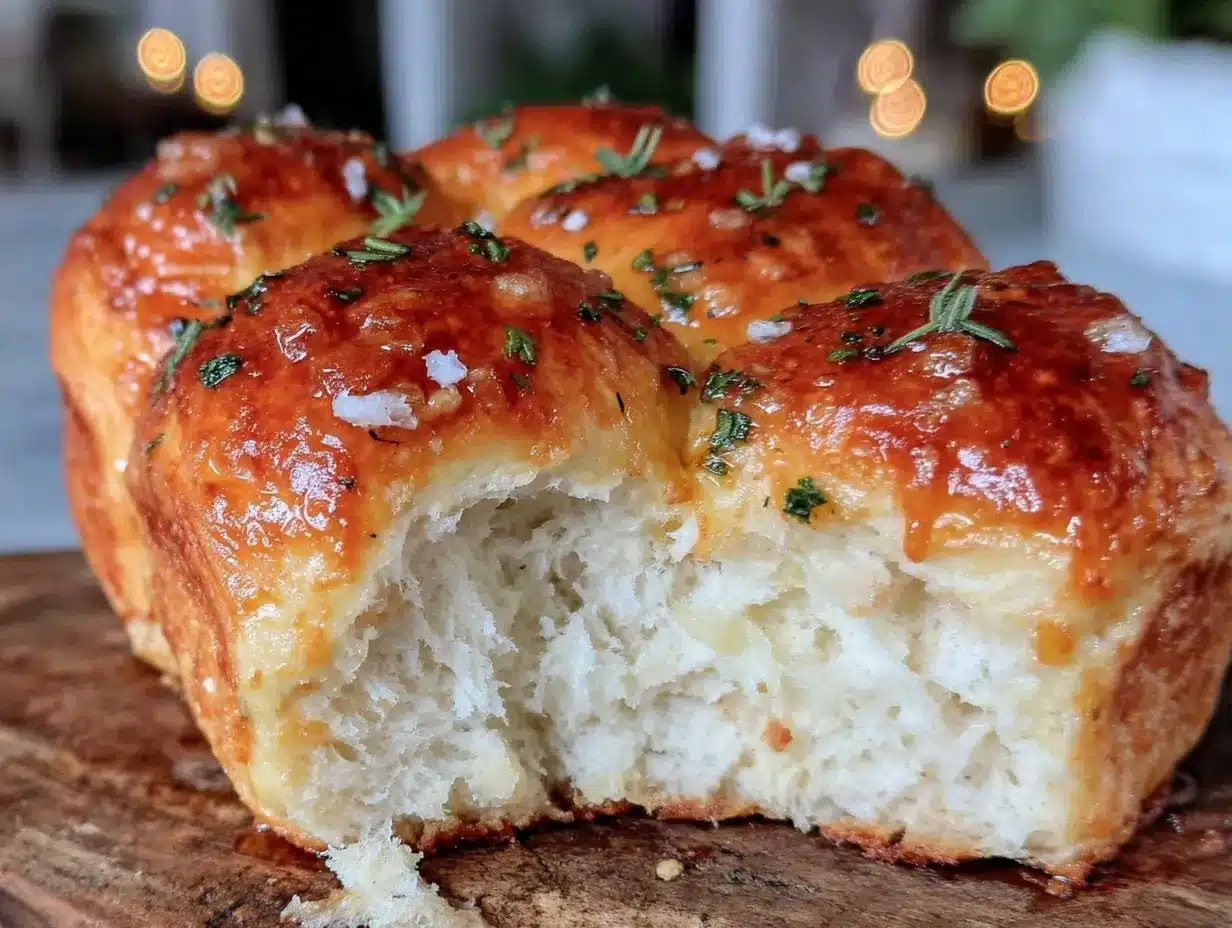
“Hey, did you bring the rolls?” That text popped up just as I was pulling a batch of these fluffy homemade dinner rolls with garlic herb butter out of the oven. Honestly, I wasn’t expecting much when I first tried this recipe — I mean, I’ve baked rolls before, but they usually end up dense or dry. This time, though, something clicked. The dough felt just right, soft and a bit sticky, and when those rolls emerged golden and pillowy, I knew I might have stumbled onto something special.
It wasn’t a planned bake, actually. I was scrambling one evening for a side to finish off a simple roast chicken dinner. No fancy ingredients, just a handful of basics and a little time. I slathered them with garlic herb butter hot from the pan, and the whole kitchen filled with that toasty, buttery aroma that just makes you want to sit down and savor every bite.
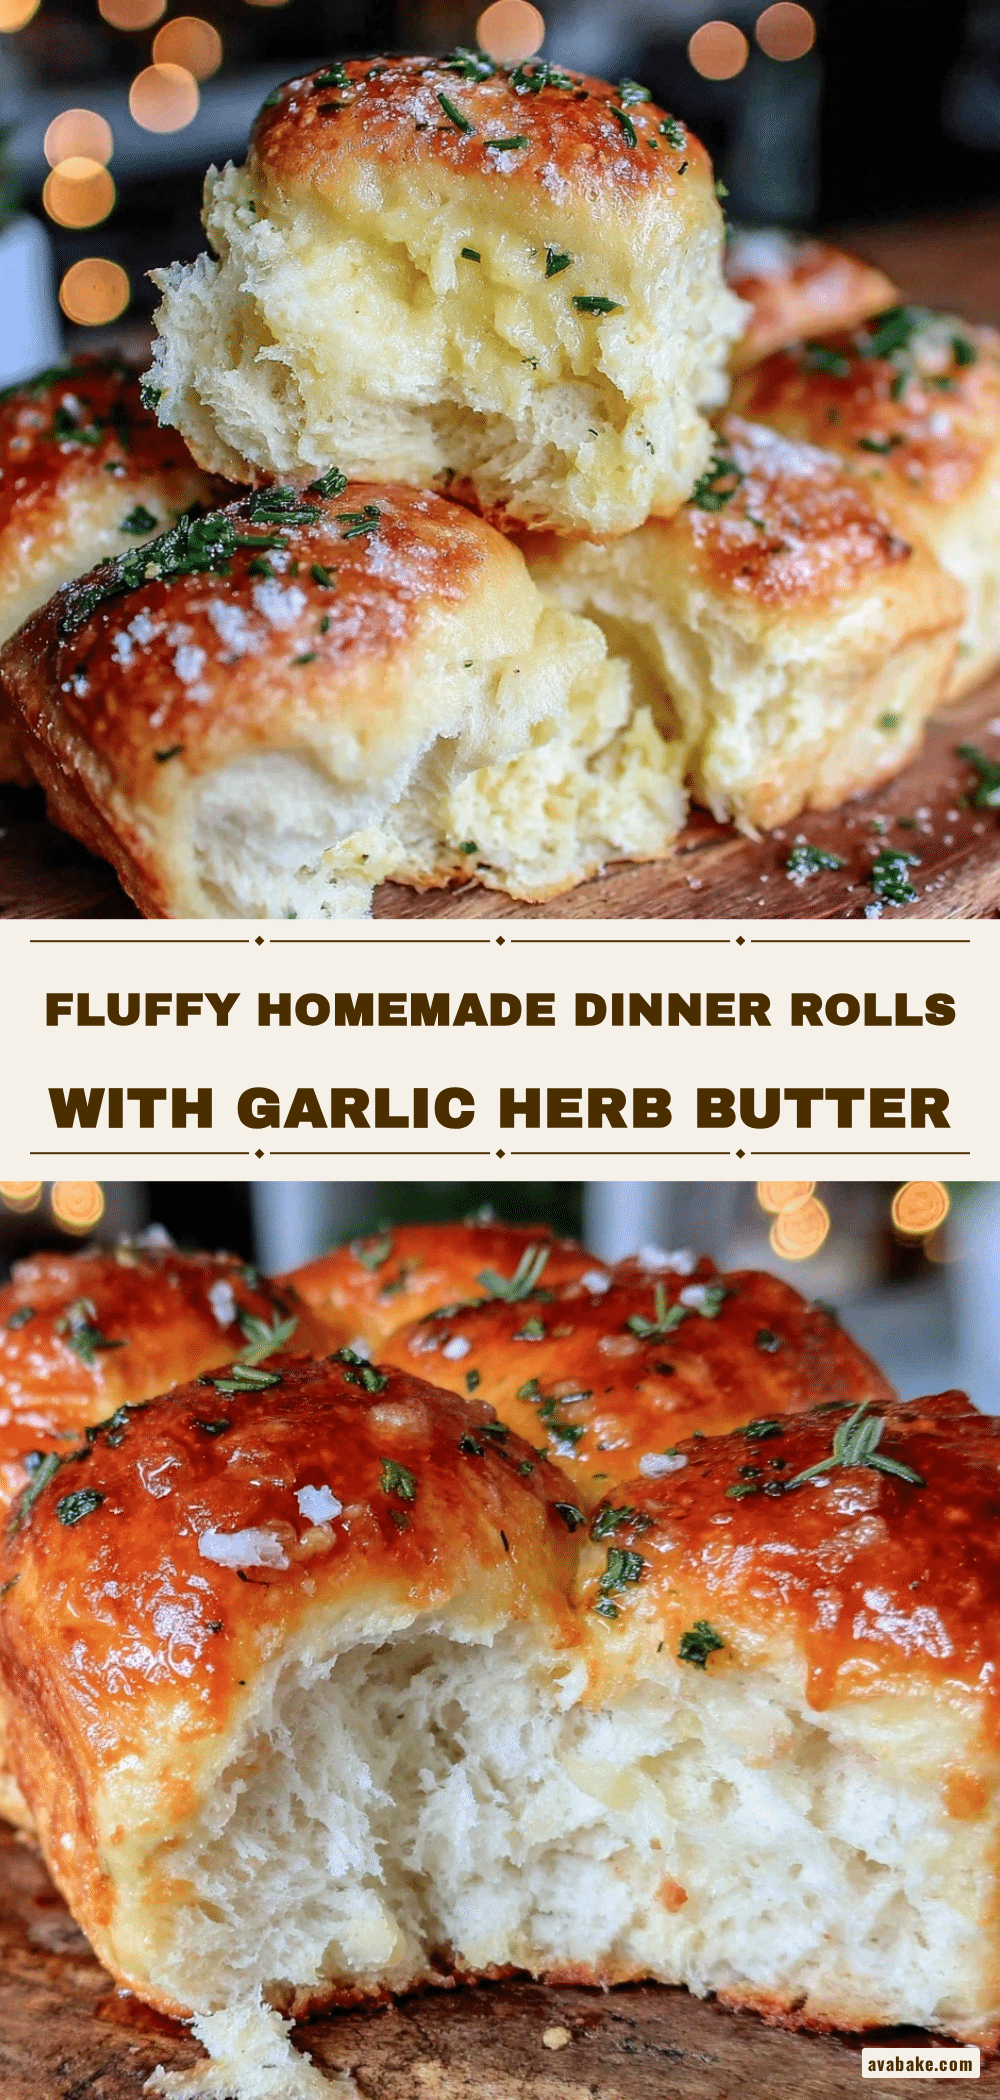
Since then, these rolls have turned into my go-to for everything from casual weeknight dinners to holiday spreads. The softness reminds me a little of that comforting pull-apart bread you find at family dinners, but with a fresh homemade twist that’s easy enough for any cook to make. What really sold me was how the garlic herb butter melts into every nook—it’s simple, but it feels like a treat. I’m pretty sure this one’s going to stick around in my recipe box for many meals to come.
There’s something quietly satisfying about pulling warm rolls from your own oven, you know? Like a little moment of calm in the middle of a hectic day. And the way that buttery, garlicky glaze soaks in… well, that’s just the kind of comfort food that makes you pause and smile without even realizing it.
Why You’ll Love This Fluffy Homemade Dinner Rolls with Garlic Herb Butter Recipe
This recipe has earned its place in my kitchen because it truly delivers on both taste and ease. After testing a bunch of roll recipes, I settled on this one for a few reasons that I think you’ll appreciate:
- Quick & Easy: From start to finish, you can have these rolls ready in about 2 hours, with most of that time spent letting the dough rest and rise. Perfect for busy nights when you want homemade without the hassle.
- Simple Ingredients: No need to hunt down anything exotic — just pantry staples like flour, yeast, butter, and a handful of herbs. I usually rely on King Arthur flour for the best texture and Fleischmann’s yeast for consistent rise.
- Perfect for Any Occasion: Whether it’s a cozy family dinner, a festive holiday meal, or a last-minute potluck, these rolls slide right into the lineup and get gobbled up fast.
- Crowd-Pleaser: Kids, adults, picky eaters — everyone loves them. The soft crumb and buttery garlic finish hit all the right notes.
- Unbelievably Delicious: The garlic herb butter glaze is where it’s at. It’s the kind of flavor combo that makes you close your eyes after the first bite and nod with approval.
What sets this recipe apart? The dough uses a touch of cream and a little sugar, which gives the rolls that tender crumb and slight sweetness without being overpowering. Plus, blending fresh herbs into the butter glaze adds a bright, savory note that feels fresh but familiar—like those rolls you remember from family dinners but better. Honestly, I’ve found it’s a small step that makes a big difference.
This recipe isn’t just about bread; it’s about creating a moment at the table, whether you’re serving up a simple roast or pairing with a hearty sheet pan beef dinner that’s packed with flavor but needs that soft, buttery partner. It’s the kind of recipe that invites you to slow down and savor, even if just for a few bites.
What Ingredients You Will Need
This recipe uses simple, wholesome ingredients to create a rich, fluffy texture with a bold garlic herb flavor that’s surprisingly easy to pull off. Most are pantry basics, but each plays an important role in making these rolls truly special.
- For the Dough:
- All-purpose flour (about 4 cups / 480 g) – look for a brand like King Arthur for consistent results
- Active dry yeast (2 1/4 teaspoons or one packet) – Fleischmann’s works great
- Granulated sugar (2 tablespoons) – adds slight sweetness and helps activate the yeast
- Salt (1 1/2 teaspoons) – balances flavor
- Whole milk (1 cup / 240 ml), warmed to about 110°F (43°C) – tenderizes the dough
- Heavy cream (1/2 cup / 120 ml), warmed – adds richness and softness
- Unsalted butter (4 tablespoons / 56 g), melted – for tenderness and flavor
- Large egg, room temperature – helps with structure and richness
- For the Garlic Herb Butter Glaze:
- Unsalted butter (6 tablespoons / 85 g), melted
- Fresh garlic (3 cloves), minced – for that punch of flavor
- Fresh parsley (2 tablespoons), finely chopped – bright herb note
- Fresh thyme leaves (1 teaspoon) – adds earthiness
- Salt (a pinch) – to taste
Feel free to swap whole milk with any dairy-free alternative if needed, just make sure it’s warm to help activate the yeast. If fresh herbs aren’t on hand, dried herbs can work, but fresh really makes the butter pop with flavor. For a twist, I sometimes add a tiny pinch of smoked paprika to the garlic butter for a subtle smoky undertone.
Equipment Needed
- Large mixing bowl – for combining and proofing dough
- Measuring cups and spoons – precise measurements help with consistent results
- Stand mixer with dough hook (optional) – makes kneading easier, but hand kneading works fine too
- Pastry brush – for applying garlic herb butter glaze evenly
- Baking sheet or round baking pan (about 9×13 inches or 23×33 cm) – to bake the rolls
- Kitchen towel or plastic wrap – to cover dough while rising
- Instant-read thermometer (optional) – useful for checking milk temperature
If you don’t have a stand mixer, no worries. Kneading by hand takes just a few extra minutes and gives you a good excuse to get hands-on. I’ve also used a cast iron skillet for baking these rolls on occasion, which gives a nice crust, but a standard baking sheet is perfect for everyday baking. For budget-friendly options, you can find decent pastry brushes and measuring sets at most grocery or kitchen stores without breaking the bank.
Preparation Method
- Activate the yeast: In a small bowl, combine the warm milk (110°F / 43°C) with sugar and yeast. Stir gently and let sit for 5-10 minutes until frothy and bubbly, indicating the yeast is active.
- Mix the dough: In a large bowl or stand mixer, whisk together the flour and salt. Add the melted butter, warm cream, egg, and the frothy yeast mixture. Using a dough hook or your hands, mix until the dough comes together.
- Knead the dough: Knead on medium speed for about 8 minutes (or 10-12 minutes by hand) until the dough is smooth, elastic, and slightly tacky but not sticky. If too sticky, add a tablespoon of flour at a time. The dough should bounce back when poked gently.
- First rise: Lightly oil a large bowl, place the dough inside, and cover with a damp kitchen towel or plastic wrap. Let it rise in a warm spot for 1 to 1.5 hours, or until doubled in size. A good test is to press your finger in gently — if the indentation stays, it’s ready.
- Shape the rolls: Punch down the dough gently to release air. Divide into 12 equal portions (about 70 g or 2.5 oz each). Shape each piece into a smooth ball by tucking edges underneath and pinching the bottom.
- Second rise: Arrange the rolls tightly in a greased 9×13-inch baking pan or on a parchment-lined baking sheet. Cover and let rise for another 30-40 minutes until puffy and nearly doubled.
- Preheat and bake: Preheat the oven to 375°F (190°C). Bake the rolls for 18-22 minutes, rotating the pan halfway through, until golden brown on top. The internal temperature should reach about 190°F (88°C) if you use a thermometer.
- Prepare garlic herb butter: While rolls bake, melt butter in a small saucepan over low heat. Stir in minced garlic, chopped parsley, thyme, and a pinch of salt. Cook gently for 1-2 minutes until fragrant, but don’t let the garlic brown.
- Glaze the rolls: As soon as the rolls come out of the oven, brush them generously with the warm garlic herb butter. Let cool slightly before serving for the best flavor.
Pro tip: If your dough feels cold or slow to rise, try placing it near a warm oven or on top of the fridge. And don’t rush the rising times — patience pays off with fluffier rolls. I often prepare the dough in the morning, let it rise slowly in a cooler spot, and bake fresh rolls for dinner, which feels like a small weekend luxury.
Cooking Tips & Techniques
Getting fluffy rolls isn’t just about following steps — it’s about some subtle tricks learned the hard way. Here’s what I’ve picked up:
- Temperature matters: Yeast is picky. Milk and cream that are too hot can kill it; too cold and it won’t activate properly. Aim for about 110°F (43°C). It’s worth using an instant-read thermometer if you have one.
- Kneading is key: Don’t skip kneading! It develops gluten, which is what gives the rolls structure and that soft chew. If you’re kneading by hand, a slightly tacky dough is better than dry.
- Don’t over-flour: Adding too much flour makes rolls dense and heavy. It’s tempting when the dough is sticky, but try oiling your hands or the work surface instead.
- Cover the dough well: During rising, keep dough covered to prevent drying out. A damp towel or plastic wrap works fine—you want a warm, humid environment.
- Brush butter hot and fresh: Applying the garlic herb butter right out of the oven lets it soak into the warm crust, creating that irresistible shine and flavor punch.
One time, I accidentally forgot the second rise and baked the rolls early. They tasted okay but were noticeably denser and less tender. Lesson learned: that second rise is non-negotiable for the fluffiest texture. Also, if you want an even softer crust, cover the rolls loosely with foil for the last 5 minutes of baking.
Variations & Adaptations
This recipe is surprisingly versatile, and I’ve enjoyed playing around with a few variations:
- Herb swaps: Use rosemary or chives in the garlic butter for a different herb profile. Dill also pairs beautifully if you want a fresher flavor.
- Cheese rolls: Add shredded cheddar or parmesan to the dough or top the rolls with cheese before baking for a savory twist.
- Whole wheat upgrade: Substitute half the all-purpose flour with whole wheat flour for a nuttier flavor and a bit more fiber. The rolls will be slightly denser but still delicious.
- Dairy-free option: Replace milk and cream with unsweetened almond or oat milk, and use vegan butter for the glaze to keep it plant-based.
- Sweet rolls: Add a tablespoon of honey to the dough and swap the herb butter for cinnamon sugar butter for a breakfast-style roll.
Personally, I tried adding a thin layer of pesto under the butter glaze once — trust me, that herbaceous punch took these rolls to another level, especially alongside a one-pot salmon casserole that I love making for busy nights.
Serving & Storage Suggestions
These rolls are best served warm, fresh from the oven, with a generous brush of garlic herb butter. They make a perfect side for hearty meals — think roast chicken, beef, or even a rich stew. For a casual gathering, they’re fantastic pulled apart and dipped in soups or smeared with additional herb butter.
To store, keep leftover rolls in an airtight container at room temperature for up to 2 days. For longer storage, wrap tightly and freeze for up to 3 months. To reheat, thaw if frozen, then warm in the oven at 350°F (175°C) for 5-7 minutes, brushing with more garlic butter to refresh the flavor and softness.
Interestingly, the flavors actually deepen a bit after a day, making these rolls even more flavorful if you prepare them a little ahead of time. Just pop them back in the oven before serving to get that fresh-baked warmth and aroma back.
Nutritional Information & Benefits
One roll (without butter) roughly contains:
| Nutrient | Amount |
|---|---|
| Calories | 150 kcal |
| Carbohydrates | 26 g |
| Protein | 4 g |
| Fat | 3.5 g |
| Fiber | 1 g |
The key ingredients like whole milk and butter add richness and essential fats, while the fresh herbs bring small amounts of antioxidants and vitamins. If you swap half the flour for whole wheat, you boost fiber and nutrients. Keep in mind these rolls contain gluten and dairy, so they aren’t suitable for those with allergies or intolerances unless adapted.
From a wellness viewpoint, enjoying bread like this in moderation, especially made at home without preservatives or additives, fits well into a balanced diet. The homemade garlic herb butter adds flavor without the excess sodium or artificial ingredients found in many store-bought spreads.
Conclusion
These fluffy homemade dinner rolls with garlic herb butter have become one of those recipes I return to when I want something comforting, simple, and a little bit special. They strike the perfect balance of soft crumb and rich flavor, thanks to that buttery garlic finish that feels like a warm hug on a plate.
Whether you’re new to bread baking or looking for a reliable roll recipe to impress at your next family dinner, this one delivers without fuss. Don’t hesitate to tweak the herbs or try a variation to make it your own — that’s part of the fun. Personally, I love how they pair with a cozy sausage and potato soup on chilly evenings.
If you try this recipe, I’d love to hear how you make it yours — drop a comment or share your adaptations. Here’s to soft rolls, buttery goodness, and many cozy meals ahead!
FAQs About Fluffy Homemade Dinner Rolls with Garlic Herb Butter
Can I make the dough ahead of time?
Absolutely! You can prepare the dough, let it rise once, then refrigerate it overnight. Before shaping the rolls, bring the dough to room temperature and let it complete the second rise. This makes for an easy morning or next-day bake.
What if I don’t have fresh herbs for the butter glaze?
You can use dried herbs at about one-third the quantity, but fresh herbs give a brighter, fresher flavor. Alternatively, finely minced garlic with a pinch of salt and butter alone still tastes fantastic.
How do I know when the rolls are fully baked?
The rolls should be golden brown on top and sound hollow when tapped. An instant-read thermometer inserted into the center should read around 190°F (88°C).
Can I freeze the rolls after baking?
Yes! Let the rolls cool completely, then wrap tightly in plastic wrap and place in a freezer-safe bag or container. They keep well for up to 3 months. Reheat in the oven before serving.
Is it possible to make these rolls gluten-free?
Gluten-free baking requires special flour blends and sometimes additional binding agents. This recipe isn’t designed for gluten-free flours, but you might try a tested gluten-free bread roll mix and add the garlic herb butter glaze for similar flavor.
Pin This Recipe!
Fluffy Homemade Dinner Rolls with Garlic Herb Butter

These fluffy homemade dinner rolls are soft, tender, and topped with a rich garlic herb butter glaze, perfect for any occasion from weeknight dinners to holiday spreads.
- Prep Time: 20 minutes
- Cook Time: 22 minutes
- Total Time: 2 hours 20 minutes
- Yield: 12 rolls 1x
- Category: Side Dish
- Cuisine: American
Ingredients
- 4 cups all-purpose flour (about 480 g)
- 2 1/4 teaspoons active dry yeast (one packet)
- 2 tablespoons granulated sugar
- 1 1/2 teaspoons salt
- 1 cup whole milk (240 ml), warmed to about 110°F (43°C)
- 1/2 cup heavy cream (120 ml), warmed
- 4 tablespoons unsalted butter (56 g), melted
- 1 large egg, room temperature
- 6 tablespoons unsalted butter (85 g), melted (for garlic herb butter glaze)
- 3 cloves fresh garlic, minced
- 2 tablespoons fresh parsley, finely chopped
- 1 teaspoon fresh thyme leaves
- Pinch of salt (for garlic herb butter glaze)
Instructions
- Activate the yeast: In a small bowl, combine the warm milk (110°F / 43°C) with sugar and yeast. Stir gently and let sit for 5-10 minutes until frothy and bubbly.
- Mix the dough: In a large bowl or stand mixer, whisk together the flour and salt. Add the melted butter, warm cream, egg, and the frothy yeast mixture. Mix until the dough comes together.
- Knead the dough: Knead on medium speed for about 8 minutes (or 10-12 minutes by hand) until smooth, elastic, and slightly tacky but not sticky. Add flour if too sticky, one tablespoon at a time.
- First rise: Lightly oil a large bowl, place the dough inside, and cover with a damp kitchen towel or plastic wrap. Let rise in a warm spot for 1 to 1.5 hours, or until doubled in size.
- Shape the rolls: Punch down the dough gently. Divide into 12 equal portions (about 2.5 oz or 70 g each). Shape each piece into a smooth ball by tucking edges underneath and pinching the bottom.
- Second rise: Arrange rolls tightly in a greased 9×13-inch baking pan or parchment-lined baking sheet. Cover and let rise for 30-40 minutes until puffy and nearly doubled.
- Preheat oven to 375°F (190°C). Bake rolls for 18-22 minutes, rotating pan halfway through, until golden brown and internal temperature reaches about 190°F (88°C).
- Prepare garlic herb butter: While rolls bake, melt butter in a small saucepan over low heat. Stir in minced garlic, parsley, thyme, and a pinch of salt. Cook gently for 1-2 minutes without browning garlic.
- Glaze the rolls: Brush rolls generously with warm garlic herb butter as soon as they come out of the oven. Let cool slightly before serving.
Notes
Use fresh herbs for best flavor in the garlic butter glaze. If dough is slow to rise, place near a warm oven or on top of the fridge. Do not skip the second rise for fluffiest texture. For softer crust, cover rolls loosely with foil for last 5 minutes of baking. Dairy-free and whole wheat substitutions are possible.
Nutrition
- Serving Size: 1 roll
- Calories: 150
- Fat: 3.5
- Carbohydrates: 26
- Fiber: 1
- Protein: 4
Keywords: dinner rolls, homemade rolls, garlic herb butter, fluffy rolls, easy bread recipe, soft rolls, yeast rolls


