“You really think this will work without baking?” my friend chuckled, eyeing the bowl of cookie dough I was nervously mixing. Honestly, I was skeptical myself. I’d been juggling a hectic week, and the idea of whipping up a dessert that didn’t need an oven sounded like a dream. Late one evening, with the kitchen lights dimmed and a quiet hum from the fridge, I decided to throw together these Easy No-Bake Cookie Dough Bites with Mini Chocolate Chips. The smell of vanilla and brown sugar filled the air, and the texture was just right—soft, a little crumbly, and dotted with those tiny chocolate gems.
What surprised me most was how these little bites became a go-to comfort snack. They weren’t just a quick fix; they were the kind of treat that made me pause, savor, and maybe even smile after a long day. No mess, no heat, just pure, nostalgic cookie dough goodness that’s safe to eat straight from the bowl. I guess you could say this recipe turned a simple craving into a reliable little joy, one I keep coming back to—especially when I’m short on time but still want something sweet and satisfying.
Even now, when I’m prepping a family meal like the easy St. Patrick’s Day beef sheet pan dinner, I think about how these bites make the perfect finish. It’s funny how the simplest ideas, like mini chocolate chips folded into no-bake cookie dough, can turn into a favorite around here. There’s something quietly reassuring about that, don’t you think?
Why You’ll Love This Recipe
Having tested various no-bake treats, this recipe stands out for plenty of reasons. It’s a snack you can whip up in under 15 minutes (yes, seriously!), making it perfect for busy days or whenever a sweet tooth hits unexpectedly. Plus, the ingredients are simple pantry staples—no hunting for exotic items or specialty flours.
- Quick & Easy: Ready in about 10-15 minutes, no oven needed—ideal for last-minute cravings or when you want a hassle-free dessert.
- Simple Ingredients: Classic staples like butter, brown sugar, vanilla, and mini chocolate chips—with nothing complicated or fancy.
- Perfect for Any Occasion: Whether it’s a cozy night in, a potluck, or even a casual snack, these bites never disappoint.
- Crowd-Pleaser: Kids love them, adults ask for seconds, and they’re great for sharing (or not!).
- Unbelievably Delicious: The texture is soft and chewy with just the right amount of sweetness, thanks to those mini chocolate chips sprinkling bursts of chocolatey goodness.
What makes this recipe different? I carefully balance the sweetness and texture by blending the butter and sugars until perfectly creamy, then folding in mini chocolate chips for that nostalgic cookie dough feel without any risk (no raw eggs here!). I also prefer using a small-curd cottage cheese in some versions for moisture and protein, but the classic butter-sugar combo is just as comforting. Honestly, it’s the kind of treat that makes you close your eyes after the first bite and think, “Yep, this is exactly what I needed.”
What Ingredients You Will Need
This recipe uses simple, wholesome ingredients to deliver bold flavor and satisfying texture without the fuss. You probably already have most of these in your pantry or fridge.
- Unsalted Butter, softened (adds richness and helps bind the bites)
- Brown Sugar, packed (for that deep caramel flavor)
- Granulated Sugar (balances sweetness and texture)
- Vanilla Extract (pure, if possible, for best aroma)
- All-Purpose Flour, heat-treated or use almond flour for gluten-free option (keeps it safe to eat raw)
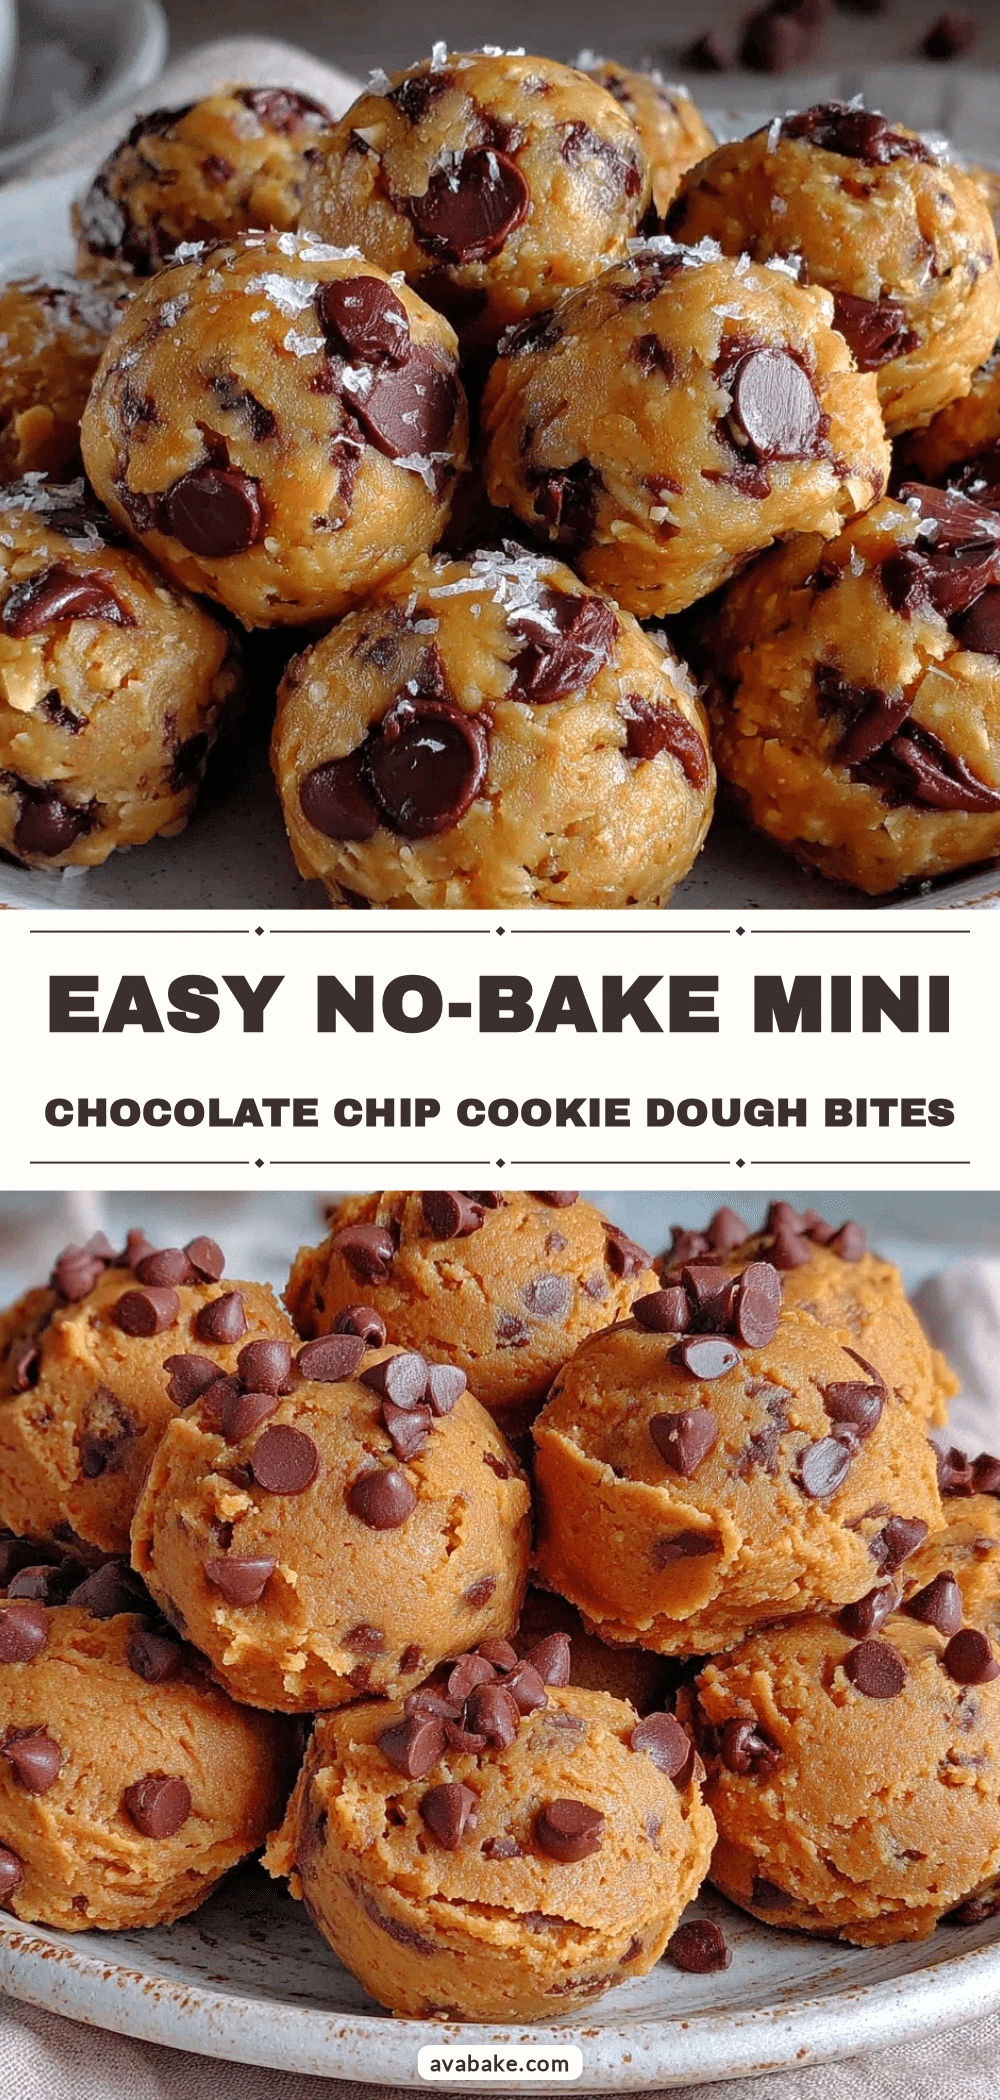
- Mini Chocolate Chips (I love Ghirardelli mini chips for their melt and flavor)
- Salt, a pinch (to balance sweetness)
If you want to add a protein boost, try folding in a few tablespoons of cottage cheese or Greek yogurt—just be mindful it changes texture slightly. For a dairy-free twist, swap butter for coconut oil and use dairy-free mini chips. In summer, folding in fresh berries or dried cranberries adds a nice tart contrast.
Equipment Needed
- Mixing Bowls: Medium and large size for combining ingredients
- Hand Mixer or Stand Mixer: Helps cream the butter and sugars smoothly; a sturdy whisk works in a pinch
- Measuring Cups and Spoons: For precise ingredient amounts
- Spatula: For folding in chocolate chips without overmixing
- Baking Sheet or Plate: To chill the cookie dough bites before serving
- Parchment Paper or Silicone Mat: Prevents sticking during chilling
If you don’t have a mixer, just take a bit more elbow grease—it’s doable! I’ve even rolled these cookie dough bites by hand, which feels oddly satisfying and helps control portion sizes. For budget-friendly options, any basic kitchen scale and manual tools will do just fine.
Preparation Method

- Cream the Butter and Sugars (5 minutes): In a medium bowl, beat 1/2 cup (115g) softened unsalted butter with 1/2 cup (100g) packed brown sugar and 1/4 cup (50g) granulated sugar until light and fluffy. This step is crucial for that creamy texture—if you skip it, the bites might be crumbly.
- Add Vanilla and Salt (1 minute): Mix in 1 teaspoon pure vanilla extract and a pinch of salt. The salt balances the sweetness, making the flavors pop just right.
- Fold in Flour (2-3 minutes): Gradually add 1 cup (120g) heat-treated all-purpose flour or almond flour, mixing until just combined. Be careful not to overmix; you want the dough to hold together but remain soft.
- Stir in Mini Chocolate Chips (1 minute): Add 1/2 cup (90g) mini chocolate chips and gently fold them in to distribute evenly.
- Shape the Bites (5 minutes): Scoop tablespoon-sized portions and roll into balls. Place them on a parchment-lined baking sheet or plate.
- Chill (at least 30 minutes): Refrigerate the bites to firm up. This step helps them hold their shape and brings out the flavors.
If the dough feels too sticky, pop it in the fridge for 10 minutes before rolling. The texture should be soft but manageable. When chilled, the bites will be pleasantly chewy but not crumbly. I usually make a batch ahead of time and keep them ready for quick snacks or dessert—makes life easier during busy evenings.
Cooking Tips & Techniques
One thing I learned the hard way is that raw flour can be risky, so heat-treating your flour or buying pasteurized flour is a must for safe no-bake cookie dough. Just pop it in a dry skillet over medium heat for a few minutes—stir constantly until it reaches 160°F (71°C)—and let cool before using.
Don’t rush the creaming step. Beating the butter and sugars well is what gives these bites their silky texture. I usually use a hand mixer, but a stand mixer works wonders too.
When adding chocolate chips, fold gently to avoid smashing them and turning the dough gray-ish. Also, if you want your bites extra bite-sized, mini chips are key. Larger chips make rolling a bit messier.
Timing is everything—those 30 minutes in the fridge help the bites firm up so they’re easy to handle and less sticky. If you’re in a hurry, a quick 15-minute chill in the freezer helps, but don’t forget to watch them so they don’t freeze solid.
Lastly, I sometimes add a sprinkle of flaky sea salt on top right before chilling. It’s a small touch that adds a fascinating contrast and depth to the sweetness.
Variations & Adaptations
This recipe is pretty flexible, which is why I keep coming back to it:
- Peanut Butter Swirl: Swap half the butter for creamy peanut butter and fold it in for a nutty twist. It pairs beautifully with mini chocolate chips.
- Gluten-Free Option: Use almond flour or oat flour instead of all-purpose flour. It changes the texture slightly but keeps it safe and delicious.
- Vegan Version: Replace butter with coconut oil and use dairy-free mini chocolate chips (brands like Enjoy Life work great).
- Seasonal Flair: Add cinnamon and nutmeg in fall, or a few drops of peppermint extract for a holiday-inspired bite.
- Protein Boost: Fold in a scoop of vanilla or chocolate protein powder for a post-workout snack.
Once, I tried a batch with crushed freeze-dried strawberries mixed in—totally changed the flavor profile but was surprisingly refreshing. Feel free to experiment and make it your own. If you want a more indulgent dessert, these cookie dough bites pair wonderfully with a dollop of whipped cream or a scoop of ice cream (think of a no-bake cookie dough sundae!).
Serving & Storage Suggestions
Serve these cookie dough bites chilled or at room temperature, depending on your preference. I like them straight from the fridge for that satisfying firmness, but they soften quickly if left out for a few minutes.
They’re perfect as a quick snack, a lunchbox treat, or a casual dessert after a meal—especially alongside something light like a fresh fruit salad or even a creamy beverage like hot chocolate or iced coffee. If you enjoy dishes with similar comfort vibes, you might appreciate the creamy simplicity of the easy creamy no-bake Oreo cheesecake on warmer days.
Store leftovers in an airtight container in the refrigerator for up to one week. For longer storage, freeze them in a single layer on a tray until solid, then transfer to a freezer-safe bag. They thaw quickly at room temperature or can be enjoyed frozen for a refreshing snack.
Flavors tend to mellow and meld a bit after chilling overnight, so sometimes I make these a day ahead when hosting casual gatherings.
Nutritional Information & Benefits
Each bite (roughly 1 tablespoon or 15 grams) contains about 80-90 calories, with a balance of fats, sugars, and a touch of protein from the butter and flour. Using almond flour or adding protein powder can increase the nutritional value.
The mini chocolate chips bring antioxidants from cocoa, while the moderate portion size helps keep snacking guilt-free. For those avoiding gluten or dairy, the substitutions make this recipe suitable for many dietary needs.
Personally, I appreciate how this snack satisfies sweet cravings without the heaviness of traditional baked cookies. It’s a quick mood booster during hectic days, without piling on extra prep time or complex ingredients.
Conclusion
These Easy No-Bake Cookie Dough Bites with Mini Chocolate Chips have found a permanent spot in my snack rotation. They’re simple, quick, and hit that sweet spot between indulgence and convenience. What I love most is how customizable they are—you can make them rich, light, nutty, or fruity depending on your mood.
If you try this recipe, feel free to tweak the mix-ins or sweetness to your liking. I’d love to hear how you make them your own, whether you add a secret ingredient or pair them with your favorite drink.
Thanks for letting me share this cozy little treat that turned a hectic week into something a bit sweeter. Now, go enjoy some bite-sized comfort!
Frequently Asked Questions
Can I use regular chocolate chips instead of mini chocolate chips?
Yes, you can! Just keep in mind that larger chips might make rolling the dough a bit trickier and the texture less uniform, but the flavor will still be delicious.
Is it safe to eat raw flour in no-bake cookie dough?
To be safe, heat-treat your flour by toasting it in a dry pan over medium heat until it reaches 160°F (71°C), or buy pasteurized flour. This kills any harmful bacteria without changing the flour’s properties.
Can I freeze these cookie dough bites?
Absolutely! Freeze them on a tray first, then transfer to a freezer-safe container. They keep well for up to 3 months and thaw quickly at room temperature.
How long will these cookie dough bites keep in the fridge?
Stored in an airtight container, they last about one week. After that, they may start to dry out or lose their fresh texture.
Can I make these bites vegan?
Yes! Substitute the butter with coconut oil and use dairy-free mini chocolate chips. The texture might vary slightly but the flavor remains enjoyable.
Pin This Recipe!
Easy No-Bake Cookie Dough Bites Recipe with Mini Chocolate Chips for Perfect Snack

A quick and easy no-bake cookie dough bites recipe featuring mini chocolate chips, perfect for a sweet, nostalgic snack without the need for an oven.
- Prep Time: 15 minutes
- Cook Time: 0 minutes
- Total Time: 45 minutes
- Yield: 24 servings 1x
- Category: Snack
- Cuisine: American
Ingredients
- 1/2 cup (115g) unsalted butter, softened
- 1/2 cup (100g) packed brown sugar
- 1/4 cup (50g) granulated sugar
- 1 teaspoon pure vanilla extract
- Pinch of salt
- 1 cup (120g) heat-treated all-purpose flour or almond flour for gluten-free option
- 1/2 cup (90g) mini chocolate chips
Instructions
- Cream the butter and sugars: In a medium bowl, beat the softened unsalted butter with packed brown sugar and granulated sugar until light and fluffy, about 5 minutes.
- Add vanilla and salt: Mix in the pure vanilla extract and a pinch of salt.
- Fold in flour: Gradually add heat-treated all-purpose flour or almond flour, mixing until just combined, about 2-3 minutes. Avoid overmixing.
- Stir in mini chocolate chips: Gently fold in the mini chocolate chips to distribute evenly.
- Shape the bites: Scoop tablespoon-sized portions and roll into balls. Place them on a parchment-lined baking sheet or plate.
- Chill: Refrigerate the bites for at least 30 minutes to firm up before serving.
Notes
Heat-treat flour by toasting in a dry skillet over medium heat until it reaches 160°F (71°C) to ensure safety. Use mini chocolate chips for easier rolling and better texture. Chill bites for at least 30 minutes to firm up. For vegan version, substitute butter with coconut oil and use dairy-free mini chocolate chips. Variations include adding peanut butter, protein powder, or seasonal spices.
Nutrition
- Serving Size: 1 tablespoon (about
- Calories: 85
- Sugar: 7
- Sodium: 40
- Fat: 5
- Saturated Fat: 3
- Carbohydrates: 10
- Fiber: 0.5
- Protein: 1
Keywords: no-bake cookie dough bites, mini chocolate chips, easy snack, no oven dessert, quick cookie dough, gluten-free option, vegan option


