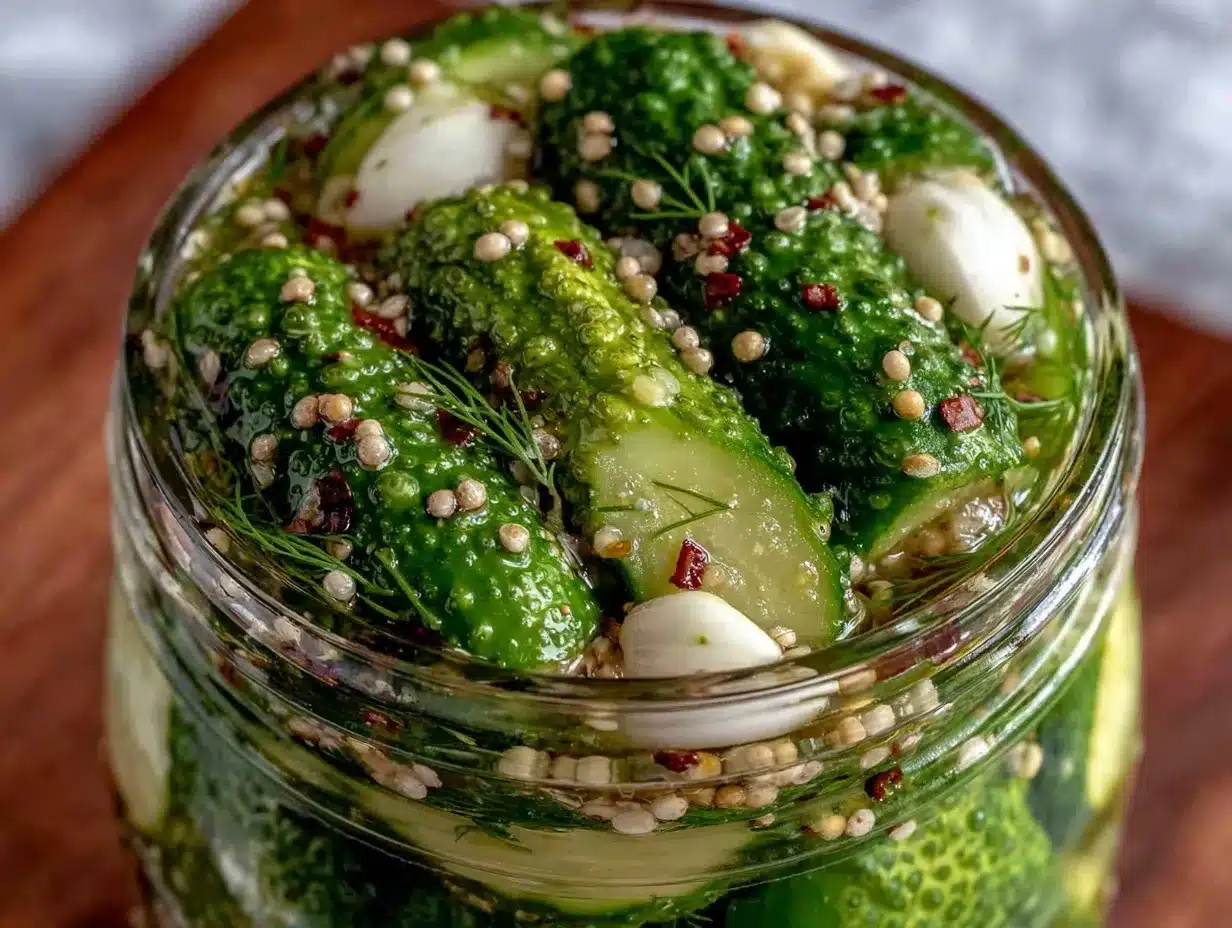
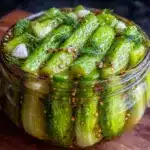
My partner took a bite of these homemade garlic dill pickles and, without missing a beat, said, “These might be the crispiest pickles I’ve ever had.” Honestly, I was just standing there watching, half-expecting the usual polite crunch but instead got that unmistakable snap that only the best pickles deliver. That moment—him savoring the perfect balance of garlic, dill, and that satisfying crisp—made all the fuss of water bath canning totally worth it. The air was thick with the tangy aroma of vinegar and fresh dill, and the kitchen felt alive with little pops and clinks as the jars sealed. I remember thinking how often store-bought pickles miss that fresh, just-pulled-from-the-garden vibe, but here it was, in a jar I made myself.
It wasn’t just about making pickles; it was about catching that exact texture and flavor that turns snacking into a small celebration. Watching the first bite happen, hearing the crunch, and then seeing the smile—well, that’s the kind of quiet victory that sticks with you. Plus, knowing these pickles will last months sealed and ready in the pantry means there’s a little jar of sunshine to brighten up any meal. It’s funny how something so simple can feel like a secret weapon for elevating even the most casual sandwiches or a great side for a feast.
That’s the real charm behind this crispy classic garlic dill pickles recipe with water bath canning—it’s a mix of patience, a bit of technique, and a whole lot of love. I kept thinking how this would be perfect alongside a hearty, comforting dish like that beef sheet pan dinner I tried recently. Honestly, the pickles add that zing that can cut through rich, savory flavors and keep things exciting on the plate. It’s the kind of homemade touch that brings a meal together without needing hours of prep or fancy ingredients.
So yeah, this recipe stuck with me because it’s more than just pickling; it’s about capturing a fresh crunch, a bright garlicky punch, and preserving summer’s best with a method that’s been trusted for generations. It’s a little kitchen magic that feels worth every minute.
Why You’ll Love This Recipe
Making crispy classic garlic dill pickles with water bath canning isn’t just a fun kitchen project—it’s a way to keep that fresh garden crunch all year long. After a few rounds in my kitchen, I can say this recipe hits all the right notes, and here’s why:
- Quick & Easy: This recipe comes together in under 2 hours, including prep and canning, which is perfect when you want homemade pickles without a weekend-long commitment.
- Simple Ingredients: You don’t need anything exotic—just fresh cucumbers, garlic, dill, vinegar, and a handful of pantry staples. I usually find everything at my local grocery store or farmer’s market.
- Perfect for Gifting or Preserving: Homemade pickles make fantastic gifts or a great way to store summer’s bounty for winter enjoyment.
- Crowd-Pleaser: Whether it’s a casual snack or a side for your favorite sandwich, these pickles always get compliments for their crispness and balanced flavor.
- Unbelievably Delicious: The garlic-dill combo is classic but this recipe nails the texture—firm, crunchy, and satisfying—thanks to the secret of proper water bath canning and fresh ingredients.
This recipe isn’t just another jar on the shelf. The water bath canning technique locks in that snap you want, plus it ensures your pickles keep safely for months without losing their bright flavor. The garlic infuses with the dill while the vinegar tang wakes up your taste buds, making each bite a refreshing punch. I’ve tried versions with different vinegars and salt levels, but this balance is my go-to because it’s reliably crisp and perfectly tangy.
Plus, there’s something oddly rewarding about hearing those lids pop as they seal shut—like a little victory you get to taste later. Honestly, it’s a pickling experience that feels both traditional and approachable, and it’s the kind of recipe I’m happy to share with friends who want to try canning without feeling overwhelmed.
What Ingredients You Will Need
This crispy classic garlic dill pickles recipe uses straightforward, wholesome ingredients to deliver that bold flavor and satisfying crunch you want with no fuss. Most of these are pantry staples or easy to find at any grocery store, and you can tweak a few based on what you have on hand.
- Fresh Pickling Cucumbers (about 4 lbs / 1.8 kg) – Choose firm, small to medium-sized cucumbers with thin skins for the best crunch. Avoid those with soft spots or yellowing.
- Fresh Dill Sprigs (6-8 sprigs) – Dill is the heart of this recipe; use fresh for the brightest flavor. If fresh isn’t available, dried dill can work but fresh is best.
- Garlic Cloves (6-8 cloves, peeled) – Adds that unmistakable garlicky punch. You can slightly crush the cloves to release more flavor.
- White Vinegar (5 cups / 1.2 liters) – Opt for distilled white vinegar at 5% acidity. It’s the gold standard for pickling and keeps that bright, clean flavor.
- Water (5 cups / 1.2 liters) – Plain tap water works fine, but filtered water is preferred if your tap water has a strong taste.
- Pickling Salt (1/4 cup / 60 g) – Use pickling or kosher salt without additives. Table salt can cloud the brine.
- Black Peppercorns (1 tbsp) – Adds subtle warmth and complexity to the brine.
- Mustard Seeds (1 tbsp) – Optional, but recommended for a lovely subtle tang and texture contrast.
- Bay Leaves (2 leaves) – For a hint of herbal depth.
- Red Pepper Flakes (1 tsp) – Optional, if you want a slight kick of heat.
If you want to swap things up, you can try swapping white vinegar for apple cider vinegar for a fruitier twist. For a low-sodium option, reduce the salt slightly, but keep in mind this may affect the crispness and preservation. I personally prefer Morton’s Pickling Salt because it dissolves quickly and keeps the brine clear.
Equipment Needed
- Large Canning Pot with Rack – Essential for the water bath canning process; the rack keeps jars off the bottom to prevent cracking. If you don’t have a dedicated canner, a large stockpot with a rack at least 6 inches deep works fine.
- Quart (or pint) Mason Jars with Lids and Bands – Use clean, undamaged jars designed for canning. I always go with Ball or Kerr brand jars for reliability.
- Jar Lifter – Makes removing hot jars from boiling water safer and easier.
- Wide-mouth Funnel – Helps fill jars neatly without spilling.
- Large Mixing Bowl – For mixing cucumbers and spices before packing.
- Sharp Knife and Cutting Board – To trim and slice cucumbers, if desired.
- Measuring Cups and Spoons – For precise brine and spice measurements.
If you’re just starting with canning, consider a magnetic lid lifter to handle hot lids safely and a bubble remover tool to release trapped air bubbles before sealing. These small tools make a big difference in the process. For budget-friendly options, using a large pot and a metal cooling rack from your kitchen works just fine as a canning setup.
Preparation Method
- Prepare your jars and lids: Wash jars, lids, and bands in hot soapy water. Rinse well. Place jars in simmering water (not boiling) to sterilize and keep warm. Heat lids in hot water separately to soften sealing compound. (About 10 minutes)
- Wash and trim cucumbers: Rinse cucumbers under cold water. Cut off the blossom ends (this helps keep pickles crisp). You can leave whole, slice into spears, or cut into chips depending on your preference.
- Make the brine: In a large pot, combine white vinegar, water, and pickling salt. Bring to a boil, stirring until salt dissolves. Keep hot but do not boil once dissolved.
- Pack jars: Remove jars from hot water using a jar lifter. Place a couple of dill sprigs, 1-2 garlic cloves, peppercorns, mustard seeds, bay leaf, and optional red pepper flakes in each jar. Pack cucumbers tightly but without crushing, leaving about 1/2 inch (1.3 cm) headspace at the top.
- Fill jars with brine: Pour the hot brine over the cucumbers, covering them completely and maintaining that 1/2 inch headspace. Use a non-metallic spatula or bubble remover tool to gently release air bubbles.
- Wipe rims and seal: Wipe jar rims with a clean, damp cloth to remove any residue. Place warmed lids on top and screw on bands fingertip-tight (don’t over-tighten).
- Process jars in water bath: Place jars on the rack inside the canning pot. The water should cover jars by at least 1 inch (2.5 cm). Bring water to a boil and process quart jars for 15 minutes (adjust for altitude as needed). Start timing when water returns to a full boil.
- Cool and store: Carefully remove jars using the jar lifter and place on a towel or cooling rack. Let sit undisturbed for 12-24 hours. You’ll hear the satisfying “pop” as lids seal. Check seals before storing in a cool, dark place.
Tip: If a jar doesn’t seal, refrigerate and consume within a few weeks. For the best crunch, avoid overprocessing and keep cucumbers fresh and firm at the start.
Cooking Tips & Techniques
Getting that perfect crunch in your garlic dill pickles is part science, part art. Here are some tips I’ve learned from a few batches (and a couple of crunchy failures) to help you nail it:
- Use fresh, firm cucumbers: Avoid those that are soft or have been sitting too long. Pickling cucumbers, like Kirby or Persian, are ideal.
- Trim blossom ends: The blossom end contains enzymes that can soften pickles, so snip it off before packing.
- Don’t skip the pickling salt: It’s free of additives that cloud brine and helps keep pickles crisp.
- Keep brine hot but don’t overboil: Dissolve salt fully but avoid boiling too vigorously after combining ingredients.
- Pack jars tightly but gently: You want lots of cucumbers in each jar, but pressing too hard can bruise and soften them.
- Process jars at a rolling boil: This ensures the safety and shelf life of your canned pickles.
- Altitude adjustments: If you live above 1,000 feet, add extra processing time as recommended by your local extension office.
One time, I forgot to remove the blossom ends and ended up with pickles that were a bit too soft for my liking—lesson learned! Also, I find it helpful to prepare all my ingredients and jars before starting the brining process; it keeps things moving smoothly and reduces stress.
Variations & Adaptations
While this garlic dill pickle recipe is a classic, sometimes I like to mix it up depending on the season or mood. Here are a few variations and adaptations I’ve tried or recommend:
- Spicy Pickles: Add more red pepper flakes or a sliced jalapeño to each jar for a fiery kick.
- Low-Sodium Version: Reduce the pickling salt by half and extend refrigeration time instead of canning. The texture will still be good, but these won’t store as long.
- Herbal Twist: Swap fresh dill for fresh tarragon or add fresh rosemary sprigs for a different herbal note.
- Quick Refrigerator Pickles: Skip the water bath canning and refrigerate for up to 2 weeks. This is great if you want pickles fast without long-term storage.
- Vinegar Swap: Use apple cider vinegar for a milder, fruitier flavor. I love this version with smoked meats like in my one-pot salmon casserole.
I once tried adding a tablespoon of sugar for a sweet-and-sour combo; while it wasn’t traditional, it brought a nice balance with the garlic and dill. Feel free to experiment a little—the canning process is forgiving as long as you keep the acidity and processing times safe.
Serving & Storage Suggestions
These crispy garlic dill pickles shine best chilled and fresh from the jar. I like to serve them cold alongside hearty meals, where their crunch and tang cut through rich or fatty dishes. They’re fantastic with sandwiches, burgers, or even as a zesty snack on their own.
For a fun twist, try serving slices with creamy dips or alongside a charcuterie board. They also pair wonderfully with cold salads or a simple potato salad to brighten up the plate.
Store your sealed jars in a cool, dark pantry or cellar. They’ll keep well for up to a year if sealed properly. Once opened, refrigerate and enjoy within a month for best flavor and texture. The flavors mellow and deepen with time, but the crunch is freshest within the first few months.
If you want to re-crisp pickles that have softened a bit, placing them in an ice water bath for 30 minutes before serving can help. Just don’t overdo it or you’ll dilute the flavor.
Nutritional Information & Benefits
Homemade garlic dill pickles are a low-calorie snack that packs a punch of flavor without added sugars or preservatives. Each serving (about 1 oz or 28 g) typically contains:
| Nutrient | Amount |
|---|---|
| Calories | 5-10 |
| Sodium | 300-400 mg |
| Carbohydrates | 1 g |
| Fiber | 0.5 g |
| Vitamin K | 5-10% DV |
Cucumbers provide hydration and some vitamins, while garlic and dill add antioxidants and anti-inflammatory compounds. Pickling preserves these benefits while offering probiotics if fermented, though this recipe is vinegar-based rather than fermented.
Just a heads up: the sodium content is moderately high due to the pickling salt, so it’s best to enjoy these pickles in moderation if you’re watching salt intake. For those following gluten-free or keto diets, this recipe fits right in, making it a versatile addition to many meal plans.
Conclusion
Making crispy classic garlic dill pickles with water bath canning is one of those kitchen projects that feels like a rewarding tradition and a tasty shortcut to flavor-packed snacks. This recipe stays true to the roots of pickling but brings a fresh, crisp bite that’s hard to find in store shelves. What I love most is how it turns simple cucumbers into something joyful and bright—perfect for sharing or enjoying quietly at home.
Feel free to adjust the garlic, dill, or spice levels to suit your taste. I hope you find the same quiet satisfaction I did in hearing that first crunch and knowing you made it yourself. And if you ever want a rich, hearty meal to pair with these pickles, my honey garlic butter chicken sheet pan dinner is a perfect match.
Give this recipe a try, and share your own pickle stories or tips—I’d love to hear how you make it your own. Happy pickling!
FAQs About Crispy Classic Garlic Dill Pickles
How long do these pickles last after canning?
Properly canned and sealed jars can last up to one year when stored in a cool, dark place. Once opened, refrigerate and consume within 3-4 weeks.
Can I use any type of cucumber for this recipe?
Pickling cucumbers like Kirby or Persian cucumbers are best for crisp pickles. Regular slicing cucumbers tend to be less firm and can result in softer pickles.
What if my jars don’t seal during water bath canning?
If a jar doesn’t seal, refrigerate it and use the pickles within a few weeks. You can also reprocess the jar with a new lid if you want to preserve it longer.
Can I make these pickles without water bath canning?
Yes! You can make quick refrigerator pickles by skipping the canning step and storing them in the fridge for up to 2 weeks. They won’t be shelf-stable but will still taste great.
How can I keep my pickles extra crispy?
Use fresh cucumbers, remove blossom ends, and avoid overprocessing during canning. Some people add grape leaves or a pinch of alum as natural crisping agents, but this recipe relies on freshness and proper technique.
PrintCrispy Classic Garlic Dill Pickles
A classic recipe for crispy garlic dill pickles using water bath canning to preserve the fresh crunch and bright flavor all year long.
- Prep Time: 30 minutes
- Cook Time: 30 minutes
- Total Time: 1 hour
- Yield: 8-10 quart jars 1x
- Category: Preserved Foods
- Cuisine: American
Ingredients
- 4 lbs fresh pickling cucumbers (small to medium-sized, firm with thin skins)
- 6–8 fresh dill sprigs
- 6–8 garlic cloves, peeled and slightly crushed
- 5 cups white vinegar (5% acidity, distilled)
- 5 cups water
- 1/4 cup pickling salt (60 g)
- 1 tbsp black peppercorns
- 1 tbsp mustard seeds (optional)
- 2 bay leaves
- 1 tsp red pepper flakes (optional)
Instructions
- Wash jars, lids, and bands in hot soapy water. Rinse well. Place jars in simmering water (not boiling) to sterilize and keep warm. Heat lids in hot water separately to soften sealing compound (about 10 minutes).
- Rinse cucumbers under cold water. Cut off the blossom ends to help keep pickles crisp. Leave whole, slice into spears, or cut into chips as desired.
- In a large pot, combine white vinegar, water, and pickling salt. Bring to a boil, stirring until salt dissolves. Keep hot but do not boil once dissolved.
- Remove jars from hot water using a jar lifter. Place a couple of dill sprigs, 1-2 garlic cloves, peppercorns, mustard seeds, bay leaf, and optional red pepper flakes in each jar. Pack cucumbers tightly but without crushing, leaving about 1/2 inch headspace at the top.
- Pour the hot brine over the cucumbers, covering them completely and maintaining 1/2 inch headspace. Use a non-metallic spatula or bubble remover tool to gently release air bubbles.
- Wipe jar rims with a clean, damp cloth to remove any residue. Place warmed lids on top and screw on bands fingertip-tight (do not over-tighten).
- Place jars on the rack inside the canning pot. The water should cover jars by at least 1 inch. Bring water to a boil and process quart jars for 15 minutes (adjust for altitude as needed). Start timing when water returns to a full boil.
- Carefully remove jars using the jar lifter and place on a towel or cooling rack. Let sit undisturbed for 12-24 hours until lids seal with a popping sound. Check seals before storing in a cool, dark place.
Notes
Use fresh, firm cucumbers and trim blossom ends to keep pickles crisp. Avoid overprocessing jars to maintain crunch. Adjust processing time for altitude if above 1,000 feet. If jars don’t seal, refrigerate and consume within weeks or reprocess with new lids. For extra crispness, place softened pickles in ice water bath for 30 minutes before serving.
Nutrition
- Serving Size: 1 oz (28 g)
- Calories: 510
- Sodium: 300400
- Carbohydrates: 1
- Fiber: 0.5
Keywords: garlic dill pickles, crispy pickles, water bath canning, homemade pickles, pickling recipe, classic pickles, dill pickles, easy pickles