“You sure you wanna smash it like that?” My buddy chuckled as I slammed the spatula down on that ball of ground beef. Honestly, I wasn’t convinced at first either. Why flatten a burger when you could just pat it into a perfect little dome? But that day, with the sizzle of the cast iron and the smell of searing beef wafting through the kitchen, something clicked. That crispy crust forming right before my eyes was pure magic. It reminded me of those casual backyard barbecues where the simplest things — a thick slice of cheddar, a soft bun, maybe a quick swipe of ketchup — mattered the most. That first bite was pure nostalgia wrapped in the crunch and juiciness you don’t get from a regular burger.
Since then, the Crispy Classic American Smash Cheeseburgers recipe has become my go-to whenever friends drop by or when I just want something straightforward but unforgettable. It’s funny how smashing a burger — literally — can change your whole perspective on what a burger should be. The caramelized edges, the melty cheese hugging every nook, and the soft yet sturdy bun all come together in a way that feels like a small victory in the kitchen.
It’s not just about the food — it’s about that familiarity, that comfort, and the simple joy of cooking something that just works every single time. This recipe stuck with me because it’s honest and real, no fancy frills, just solid technique and familiar flavors that bring people together. So if you’re up for a burger that makes you pause, close your eyes, and savor each bite — this might just become your favorite too.
Why You’ll Love This Recipe
After testing all kinds of burger recipes, I can say this Crispy Classic American Smash Cheeseburgers recipe hits a sweet spot between simplicity and flavor that just can’t be beat. It’s the kind of recipe you can rely on for a quick meal that tastes like you spent hours fussing over it.
- Quick & Easy: Ready in about 20 minutes, perfect for those busy weeknights when you want something satisfying without a ton of prep.
- Simple Ingredients: No weird additions here — just quality ground beef, American cheese, soft buns, and classic toppings you probably already have.
- Perfect for BBQs: These smash burgers bring that backyard flavor inside or out, making them a hit at cookouts and casual gatherings.
- Crowd-Pleaser: Whether you’re cooking for kids or adults, these burgers get rave reviews every time.
- Unbelievably Delicious: The crispy edges from smashing the patty create a texture and flavor combo that’s comfort food at its best.
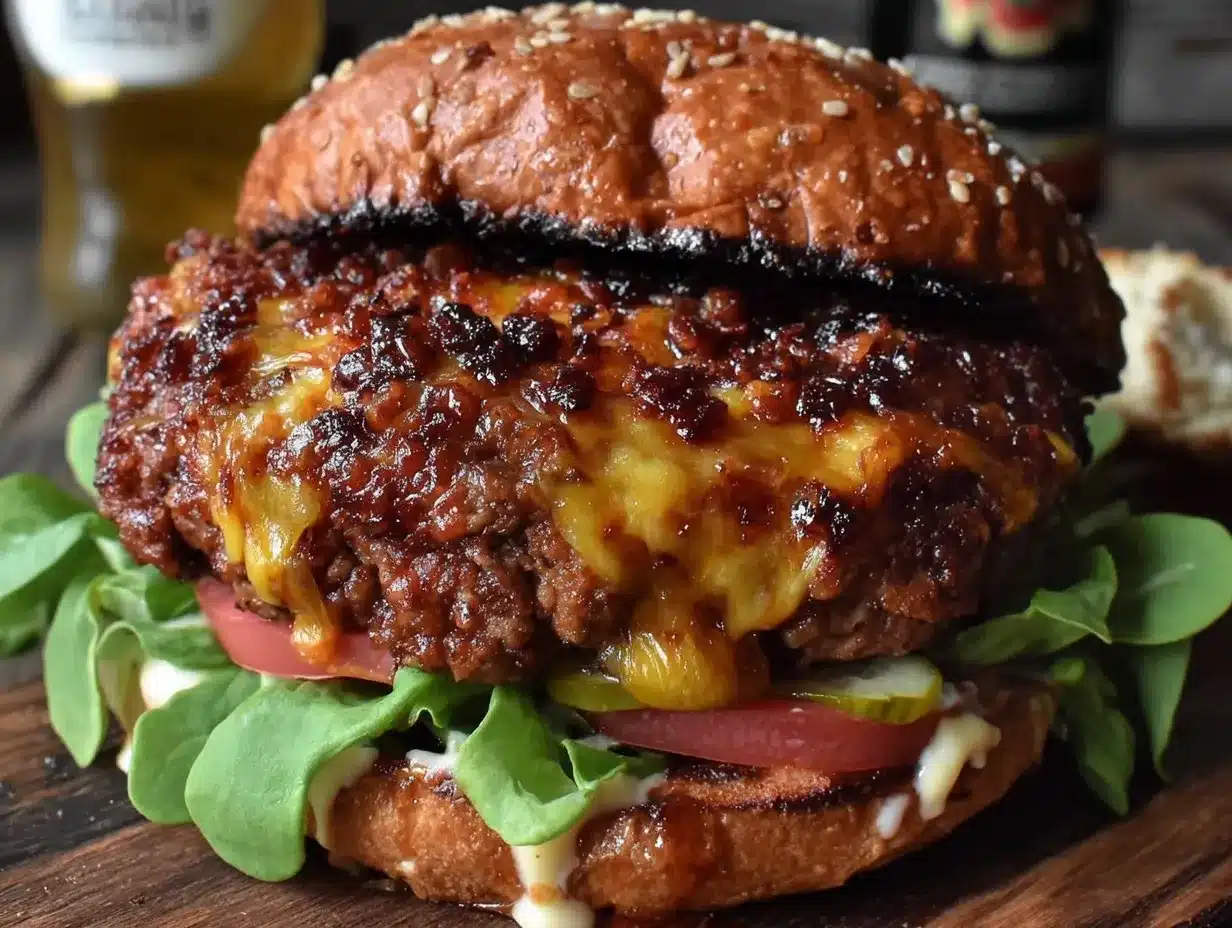
What makes this recipe unique is the smashing technique itself — pressing the beef flat on a hot skillet creates those irresistible crispy bits that you just don’t get from a thicker patty. Plus, the layering of melty American cheese and a lightly toasted bun gives it that classic diner vibe. It’s straightforward but feels totally special.
Honestly, this recipe isn’t just about making a burger; it’s about making a little moment of joy at the end of a hectic day or turning a simple meal into a casual celebration. There’s something so satisfying about that first crunch and ooey-gooey cheese pull that keeps me coming back to these smash cheeseburgers again and again.
What Ingredients You Will Need
This recipe relies on a handful of straightforward, pantry-friendly ingredients to create maximum flavor and that perfect crispy texture. Nothing fancy, just honest, quality basics that come together beautifully.
- Ground Beef (80/20 blend, 1 lb / 450 g): The fat content is key here for juicy, flavorful patties. I usually go with freshly ground chuck from my local butcher or trusted brands for the best texture.
- Salt & Pepper: Simple seasoning to bring out the beef’s natural flavor. Don’t skimp — seasoning at the right time is crucial.
- American Cheese Slices (4 slices): Classic choice for meltability and that nostalgic cheeseburger taste. Velveeta or store-brand American cheese works great.
- Burger Buns (4 soft potato or brioche buns): Potato buns add a slight sweetness and hold up nicely to the juicy patties. Lightly toasted for extra texture.
- Butter (2 tbsp, softened): For toasting buns, adds richness and helps create that golden crust.
- Classic Toppings:
- Shredded iceberg lettuce (adds crunch)
- Thinly sliced tomatoes
- Thinly sliced red onion
- Pickles (dill or bread-and-butter, your call)
- Ketchup and yellow mustard (optional, but traditional!)
Seasonal swaps work well here too — in summer, I like adding fresh garden tomatoes or swapping iceberg for crisp romaine. For a twist, try sharp cheddar or pepper jack instead of American cheese. And if you want a gluten-free option, almond flour buns or lettuce wraps hold up nicely without losing that classic vibe.
Equipment Needed
- Cast Iron Skillet or Heavy-Duty Nonstick Pan: This is essential for that sizzling, crispy crust. Cast iron holds heat evenly, which helps form the perfect sear when smashing the patties.
- Sturdy Spatula or Burger Press: You need something solid and flat to smash the beef down firmly. A metal spatula with a sharp edge works best — silicone won’t get the same crust.
- Small Bowl or Plate: For melting butter to toast the buns.
- Tongs: Handy for flipping buns and burgers without squishing them.
Honestly, I once tried making these with a flimsy spatula and ended up with unevenly smashed burgers. Lesson learned — investing in a good sturdy spatula changed the game. If you don’t have cast iron, a thick stainless-steel pan will do, but the crust might be less dramatic. And if you’re on a budget, even a well-seasoned nonstick skillet can work, just keep the heat high enough.
Preparation Method
- Preheat your skillet: Heat the cast iron pan over medium-high heat for about 5 minutes until it’s smoking hot. This step is crucial for that crispy sear.
- Divide the beef: Portion the 1 lb (450 g) ground beef into 4 equal balls, about 4 oz (113 g) each. Don’t overwork the meat — just loosely form balls for tenderness.
- Season the beef: Lightly sprinkle both sides of each ball with salt and pepper just before cooking. Seasoning too early can draw moisture out.
- Smash the burgers: Place a beef ball in the hot skillet, then immediately press down firmly with your spatula or burger press until the patty is about ¼ inch (6 mm) thick. Hold the pressure for 10-15 seconds to ensure a proper crust forms.
- Cook the first side: Let the patty cook without moving it for 2-3 minutes. You want to see a deep brown, crispy crust develop — resist the urge to flip early.
- Flip and add cheese: Carefully flip the patty and immediately place a slice of American cheese on top. Cook for another 1-2 minutes while the cheese melts and the second side cooks through.
- Toast the buns: While the burgers finish, spread softened butter on the cut sides of the buns. Toast them in a separate pan or the oven until golden and slightly crisp, about 1-2 minutes per side.
- Assemble your burger: Place the cheeseburger on the bottom bun, then add your preferred toppings — lettuce, tomato, onion, pickles, and condiments like ketchup or mustard.
- Serve immediately: Smash burgers are best enjoyed hot off the skillet to savor that crispy exterior and juicy interior.
Pro tip: If the pan starts smoking too much, reduce heat slightly. And don’t overcrowd the skillet — cook in batches if needed to keep that perfect crust. Also, pressing too hard or too long can make the burger dry, so a firm but quick smash is the sweet spot.
Cooking Tips & Techniques
One of the trickiest parts of the smash burger technique is getting the balance between crispy edges and juicy center. Here’s what I’ve learned over countless batches:
- Use cold beef: Keeping the meat cold until right before cooking helps it hold together better and prevents overcooking during smashing.
- Don’t overwork the meat: Handle the beef gently when forming balls. Overmixing can make burgers tough.
- Press down firmly but briefly: The smash creates a larger surface area for browning, but too much pressure or time can squeeze out juices.
- Preheat the pan well: The secret to that crispy crust is a screaming hot skillet before the beef hits it.
- Flip once: Resist flipping multiple times. Let the crust develop on one side before flipping for best texture.
- Cheese timing: Add cheese right after flipping to get that perfect melt without overcooking the meat.
I once tried to speed things up by smashing the patties thinner than recommended — the burgers ended up dry and crumbly. Since then, I stick to about ¼ inch thickness, which keeps them juicy but still crispy. Multitasking by toasting buns while burgers cook saves time, and I always keep a kitchen timer handy to avoid overcooking.
Variations & Adaptations
This Crispy Classic American Smash Cheeseburgers recipe is a perfect canvas for your personal taste or dietary needs:
- Flavor Boost: Mix a teaspoon of Worcestershire sauce or finely chopped caramelized onions into the beef before forming balls for extra umami depth.
- Cheese Swap: Try sharp cheddar, pepper jack, or Swiss cheese for a twist on the classic flavor profile.
- Gluten-Free: Use gluten-free buns or wrap your patty in large lettuce leaves for a low-carb option that still holds up well.
- Vegan Version: Use plant-based ground meat alternatives designed for high-heat cooking and vegan cheese slices.
- Cooking Method: While cast iron skillet is ideal, you can grill the smashed patties on a flat top grill or griddle pan for that smoky flavor.
One variation I tried recently was adding a smoky chipotle mayo and swapping iceberg lettuce for peppery arugula — it gave the classic smash burger a nice kick without losing the original charm.
Serving & Storage Suggestions
Serve your Crispy Classic American Smash Cheeseburgers hot with your favorite side dishes. They pair beautifully with crispy fries, onion rings, or even a fresh salad for a lighter option. A cold soda or a classic milkshake completes that diner-style experience perfectly.
Leftover patties can be wrapped tightly in foil and stored in the refrigerator for up to 2 days. To reheat, gently warm them in a skillet over medium-low heat to preserve that crust without drying out the meat. Avoid microwaving if you want to keep the texture intact.
The buns are best toasted fresh, but if you have extras, store them in an airtight bag and re-toast before serving. Over time, the flavors of the burger deepen, especially if you add pickles or condiments that soak in overnight — sometimes, the next-day smash burger is even better!
Nutritional Information & Benefits
This classic smash cheeseburger recipe delivers approximately 450-500 calories per serving, depending on bun and toppings. The ground beef provides a good source of protein and essential iron, while the cheese adds calcium and flavor.
Using an 80/20 beef blend balances juiciness with moderate fat content. You can lighten it up by choosing leaner beef, but keep in mind that fat plays a big role in flavor and texture here.
For those watching carbs, swapping the bun for a lettuce wrap or low-carb bread keeps it keto-friendly. Allergens include dairy (cheese, butter) and gluten (buns), so adjustments may be necessary for sensitive diets.
From a wellness perspective, this recipe is satisfying without being overcomplicated, encouraging mindful enjoyment of a classic American favorite without guilt or fuss.
Conclusion
The Crispy Classic American Smash Cheeseburgers recipe is a simple reminder that the best meals don’t have to be complicated. It’s a technique-driven recipe that brings out the best in humble ingredients — juicy beef with those crispy edges, melty cheese, and soft buns. You can tweak it to suit your preferences or dietary needs, but the core idea remains the same: a straightforward, satisfying burger that feels like home.
I love this recipe because it’s a little ritual in the kitchen — pressing the beef, hearing the sizzle, flipping at just the right moment — and it never fails to deliver that perfect bite. I hope it becomes a staple in your cooking too.
Feel free to share your own twists or questions about the recipe in the comments — I’m always excited to hear how you make these smash cheeseburgers your own!
FAQs
What’s the best beef to use for smash burgers?
Choose an 80/20 ground beef blend for the best balance of flavor and juiciness. Higher fat content helps form a crispy crust without drying out the patty.
Can I make smash burgers on a grill?
Yes! Use a flat top grill or griddle plate to get that crispy crust. Press the patties firmly and cook similarly to a skillet.
How do I prevent my burger from sticking to the pan?
Make sure the pan is preheated until very hot before adding the beef. Don’t move the patty until a crust forms, then flip carefully.
Can I prepare the patties ahead of time?
It’s best to form the beef into balls just before cooking to keep them tender. Pre-shaping and storing can cause the meat to dry and lose texture.
What’s the secret to a perfect melted cheese layer?
Add the cheese slice immediately after flipping the patty and cover the pan for 30-60 seconds to encourage even melting without overcooking the meat.
By the way, if you’re interested in other quick and flavorful dinner ideas, you might enjoy recipes like the easy St. Patrick’s Day beef sheet pan dinner or the honey garlic butter chicken sheet pan dinner. Both bring simple techniques and big flavor to your weeknight meals, just like these smash burgers.
Pin This Recipe!
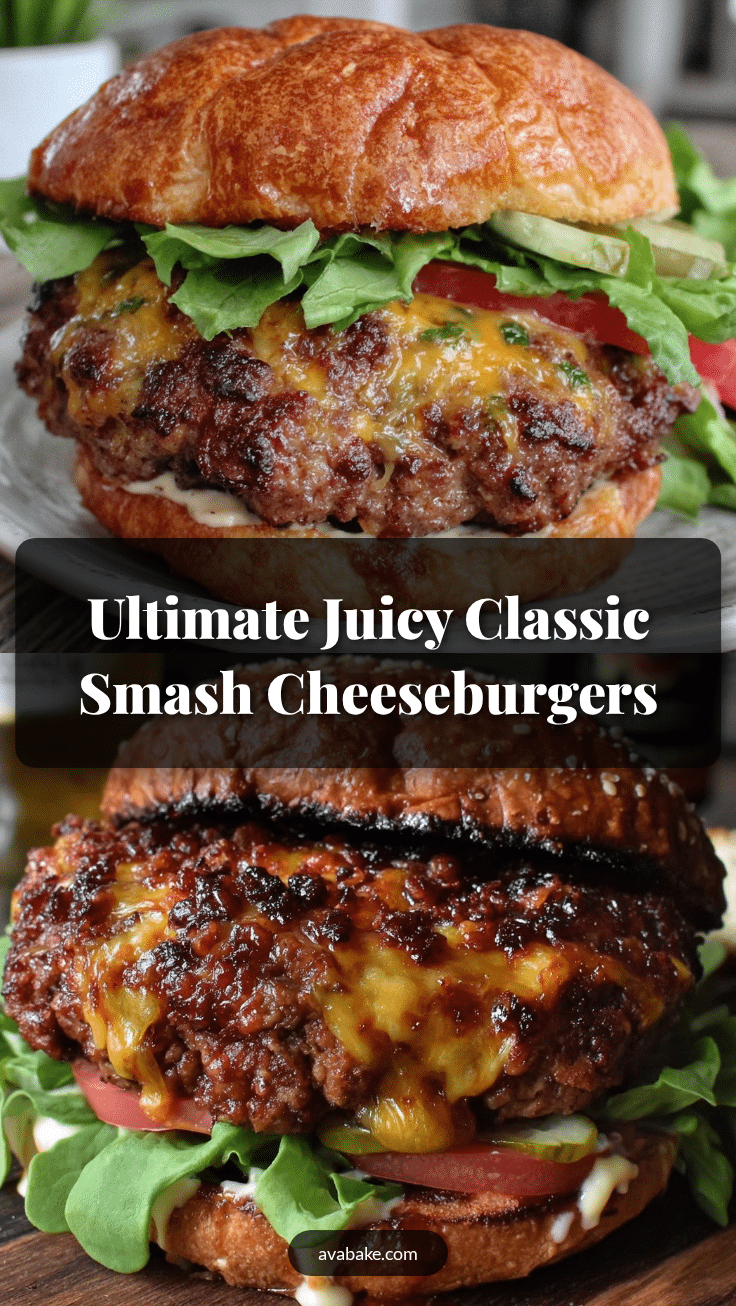
Crispy Classic American Smash Cheeseburgers

A quick and easy recipe for crispy, juicy smash cheeseburgers with melty American cheese and soft toasted buns, perfect for BBQs and casual gatherings.
- Prep Time: 5 minutes
- Cook Time: 15 minutes
- Total Time: 20 minutes
- Yield: 4 servings 1x
- Category: Main Course
- Cuisine: American
Ingredients
- 1 lb (450 g) ground beef (80/20 blend)
- Salt and pepper, to taste
- 4 slices American cheese (Velveeta or store-brand)
- 4 soft potato or brioche burger buns
- 2 tbsp butter, softened
- Shredded iceberg lettuce
- Thinly sliced tomatoes
- Thinly sliced red onion
- Pickles (dill or bread-and-butter)
- Ketchup (optional)
- Yellow mustard (optional)
Instructions
- Preheat your cast iron skillet or heavy-duty nonstick pan over medium-high heat for about 5 minutes until smoking hot.
- Divide the ground beef into 4 equal balls, about 4 oz (113 g) each, handling gently to avoid overworking.
- Lightly season both sides of each beef ball with salt and pepper just before cooking.
- Place a beef ball in the hot skillet, then immediately press down firmly with a sturdy spatula or burger press until the patty is about 1/4 inch (6 mm) thick. Hold pressure for 10-15 seconds to form a crispy crust.
- Cook the patty without moving it for 2-3 minutes until a deep brown, crispy crust forms.
- Flip the patty carefully and immediately place a slice of American cheese on top. Cook for another 1-2 minutes until cheese melts and the second side is cooked through.
- While the burgers finish cooking, spread softened butter on the cut sides of the buns and toast them in a separate pan or oven until golden and slightly crisp, about 1-2 minutes per side.
- Assemble the burger by placing the cheeseburger on the bottom bun, then add preferred toppings such as lettuce, tomato, onion, pickles, ketchup, and mustard.
- Serve immediately to enjoy the crispy exterior and juicy interior.
Notes
Use cold beef and handle gently to keep patties tender. Preheat pan well for crispy crust. Press firmly but briefly to avoid drying out the burger. Flip only once and add cheese immediately after flipping. Toast buns with butter for extra flavor. Cook in batches if needed to avoid overcrowding the pan.
Nutrition
- Serving Size: 1 burger
- Calories: 475
- Sugar: 5
- Sodium: 700
- Fat: 30
- Saturated Fat: 12
- Carbohydrates: 30
- Fiber: 1
- Protein: 28
Keywords: smash burger, cheeseburger, crispy burger, American cheese, BBQ burger, quick burger recipe, classic burger


