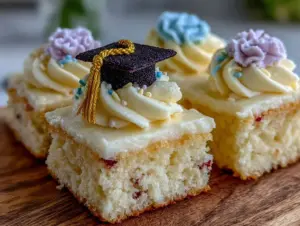
“You won’t believe how this cake came together,” my neighbor chuckled as she wiped flour off her hands. It was a hectic Saturday afternoon, and I was over for a casual visit when the smell of warm vanilla and cocoa filled the air. Honestly, I wasn’t expecting much beyond a simple dessert, but the way she crafted that perfect sheet cake with a buttercream graduation cap topper was something else. There was a moment when she almost forgot the baking powder—can you imagine?—and yet, what came out of the oven was moist, tender, and just the right size to feed a crowd. You know that feeling when a recipe surprises you so much that you want to make it over and over? That’s exactly what happened here.
Maybe you’ve been there, scrambling for a last-minute graduation treat that looks impressive but doesn’t take forever to make. This sheet cake recipe fits that bill perfectly. It’s comforting, straightforward, and the buttercream topper adds that festive touch without turning your kitchen upside down. It’s the kind of recipe that stays with you—not just because of the taste, but because it makes celebrations a little sweeter and more memorable. Let me tell you, from someone who’s had her fair share of frosting disasters, this one’s a keeper.
Why You’ll Love This Recipe
After baking this perfect sheet cake more times than I can count, I’ve learned a few things that make it stand out. It’s not just about the cake itself, but how the whole experience comes together—quick prep, foolproof steps, and that show-stopping graduation cap buttercream topper. Here’s why this recipe has become my go-to:
- Quick & Easy: Ready in under an hour, it’s ideal for busy days or when guests pop in unexpectedly.
- Simple Ingredients: You don’t need to hunt down exotic items; odds are, your pantry already has everything required.
- Perfect for Celebrations: Whether it’s a graduation party, milestone, or just a sweet gesture, this cake fits the occasion.
- Crowd-Pleaser: Kids and adults alike rave about the moist crumb and silky buttercream.
- Unbelievably Delicious: The balance between the tender chocolate cake and smooth vanilla buttercream is just right.
What really sets this recipe apart is the buttercream graduation cap topper—simple piping techniques that anyone can master, no fancy tools needed. Plus, the cake texture is surprisingly tender, thanks to a little trick with buttermilk and a touch of espresso powder to deepen the chocolate flavor without making it taste like coffee. This isn’t just another sheet cake; it’s the one that makes you pause, close your eyes, and savor every bite.
What Ingredients You Will Need
This perfect sheet cake relies on everyday ingredients that work together to create a moist, tender crumb and a luscious buttercream topping. Here’s a rundown of what you’ll need, grouped by function:
- For the Cake:
- All-purpose flour (2 ½ cups / 312 g) – for structure
- Granulated sugar (2 cups / 400 g) – sweetness and moisture retention
- Unsweetened cocoa powder (¾ cup / 75 g) – I prefer Ghirardelli for rich flavor
- Baking powder (1 ½ tsp) – leavening agent
- Baking soda (1 ½ tsp) – helps with rise and tenderness
- Salt (1 tsp) – balances sweetness
- Buttermilk (1 cup / 240 ml), room temperature – adds tang and moisture
- Vegetable oil (½ cup / 120 ml) – keeps cake moist
- Large eggs (2), room temperature – binds ingredients
- Vanilla extract (2 tsp) – flavor enhancer
- Hot water (1 cup / 240 ml) mixed with 1 tsp espresso powder (optional) – intensifies chocolate notes
- For the Buttercream Graduation Cap Topper:
- Unsalted butter (1 cup / 227 g), softened – base for smooth frosting
- Powdered sugar (4 cups / 480 g), sifted – sweetness and structure
- Heavy cream or whole milk (2-3 tbsp / 30-45 ml) – adjusts consistency
- Vanilla extract (1 tsp) – flavor
- Black gel food coloring – for the cap’s classic look
- Yellow or gold edible decoration (like sprinkles or piped frosting) – for the tassel
If you don’t have buttermilk on hand, a quick substitute is milk plus a tablespoon of white vinegar or lemon juice, left to sit for 5 minutes. For a dairy-free option, swap the butter and milk in the buttercream with plant-based alternatives, but note the texture might be slightly different. Trust me, using fresh, room-temperature eggs and sifting your powdered sugar for the buttercream really makes a difference in smoothness.
Equipment Needed
- Sheet pan (9×13 inches / 23×33 cm) – standard size for even baking; a non-stick pan works best to avoid sticking.
- Mixing bowls – at least two, for dry and wet ingredients.
- Electric mixer or stand mixer – makes creaming butter and mixing batter easier, but a sturdy whisk works if you don’t have one.
- Measuring cups and spoons – for precise ingredient amounts.
- Rubber spatula – perfect for scraping down the bowl and folding ingredients gently.
- Wire cooling rack – helps the cake cool evenly and prevents sogginess.
- Piping bags and round piping tips (optional) – for the graduation cap topper; if you don’t have these, you can use a zip-top bag with a small cut corner.
- Offset spatula or butter knife – for smooth, even frosting application.
I once tried making this cake with a glass baking dish that wasn’t quite the right size, and I ended up with uneven baking and a slightly denser texture. So, sticking to the recommended pan size really helps. If you’re on a budget, silicone spatulas and disposable piping bags are affordable and get the job done beautifully.
Preparation Method
- Preheat your oven to 350°F (175°C). Grease your 9×13-inch sheet pan with butter or non-stick spray, then line it with parchment paper, leaving an overhang for easy removal.
- Mix the dry ingredients: In a large bowl, sift together the flour, cocoa powder, baking powder, baking soda, and salt. Whisk to combine evenly (about 2 minutes). This ensures your cake will have a uniform crumb.
- Combine wet ingredients: In another bowl, whisk the buttermilk, vegetable oil, eggs, and vanilla extract until smooth and well blended (about 1-2 minutes).
- Incorporate wet into dry: Slowly pour the wet mixture into the dry ingredients. Use a mixer on low speed or a sturdy whisk to combine until just smooth and no streaks remain. Don’t overmix; this can make the cake tough. This step usually takes about 2-3 minutes.
- Add hot water with espresso powder: Carefully stir in the hot water and espresso powder mixture. The batter will be thin – that’s normal and helps keep the cake moist.
- Pour batter into the pan: Transfer the batter into your prepared sheet pan and spread it evenly with a spatula. Tap the pan gently on the counter to release any air bubbles.
- Bake: Place in the oven and bake for 30-35 minutes. Begin checking at 30 minutes by inserting a toothpick in the center; it should come out with a few moist crumbs but no raw batter.
- Cool: Remove the cake from the oven and let it cool in the pan for 15 minutes. Then, use the parchment overhang to lift it onto a wire rack to cool completely before frosting.
- Prepare the buttercream: In a mixing bowl, beat the softened butter on medium speed until creamy (about 2 minutes). Gradually add powdered sugar, 1 cup at a time, mixing well after each addition.
- Add vanilla and cream: Pour in vanilla extract and 2 tablespoons of heavy cream. Beat on high speed for 3-4 minutes until light and fluffy. Adjust consistency with more cream or powdered sugar as needed.
- Color the buttercream: Divide the buttercream into two portions. Tint the larger portion black with gel food coloring for the cap, and leave some plain or tint yellow for the tassel.
- Frost the cake: Use an offset spatula to spread a thin crumb coat of plain buttercream over the cake. Chill for 15 minutes, then apply a smooth final layer of black buttercream.
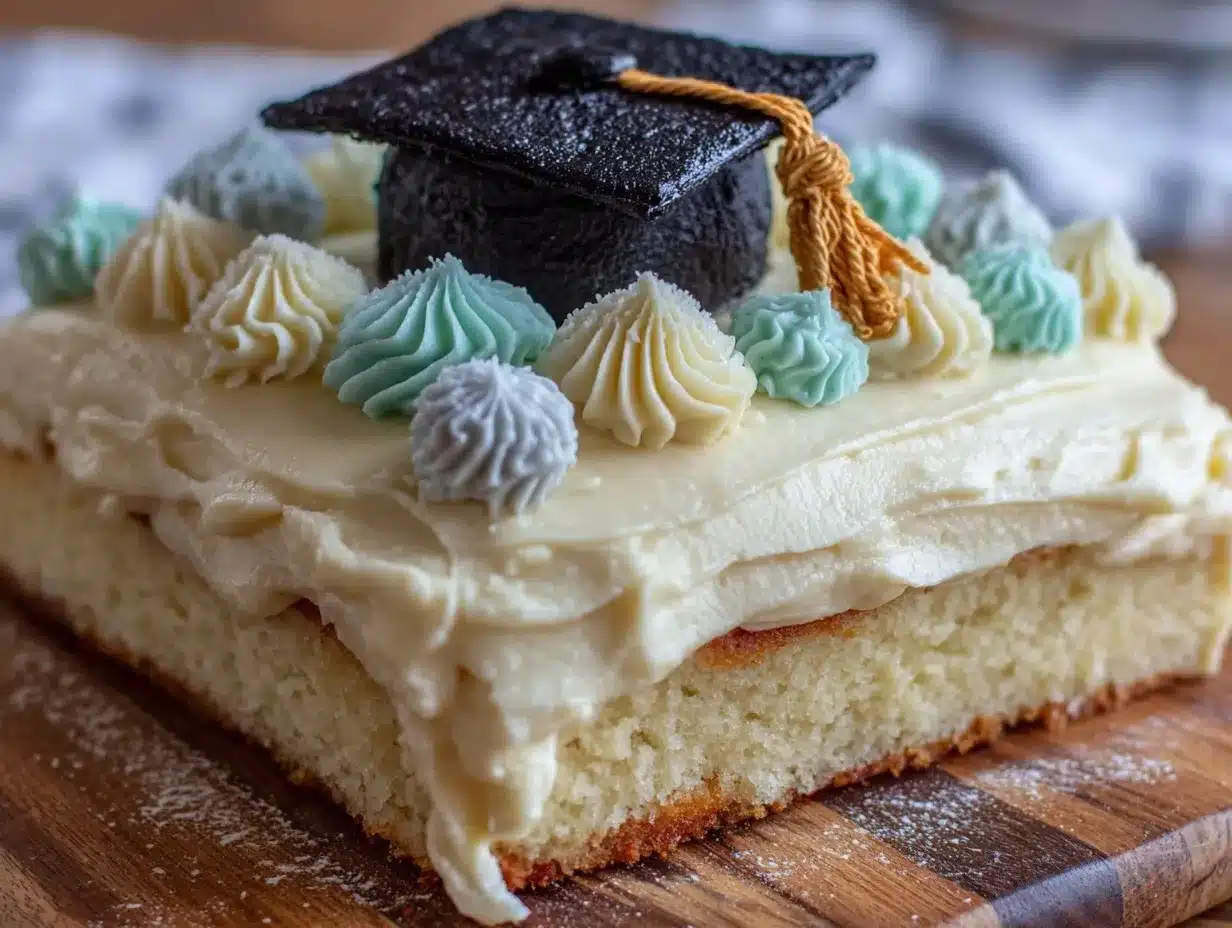
- Create the graduation cap topper: Pipe a square on the top corner of the cake using black buttercream. For the cap’s base, pipe a small black circle below the square. Use yellow buttercream to pipe a tassel hanging from the corner of the square. If piping isn’t your forte, you can make a simple square by smoothing black buttercream with a small spatula and adding the tassel freehand.
One time, I rushed the cooling step and started frosting a warm cake. The buttercream melted and got all messy—lesson learned! Patience here really pays off.
Cooking Tips & Techniques
One trick I swear by is always sifting the cocoa powder and flour. It avoids lumps and gives the cake a velvety crumb. Also, be gentle when mixing the batter; overmixing activates gluten, which isn’t what you want for a tender sheet cake.
When making the buttercream, start with softened (not melted) butter. Room temperature allows it to whip up fluffier and smoother. If your kitchen is warm, chill the buttercream briefly before piping to keep the shapes sharp and neat.
Don’t underestimate the power of the espresso powder here—it’s subtle but brings out the chocolate depth without a hint of coffee flavor. If you prefer a pure chocolate taste, you can skip it, but you might miss that rich undertone.
Multitasking tip: While the cake bakes, prep your buttercream ingredients so you can start frosting as soon as the cake cools. This keeps the process smooth and stress-free.
Common mistake? Forgetting to line the pan. I once had a cake stick so badly I had to serve it in chunks. Parchment paper is your friend.
Variations & Adaptations
- Gluten-Free Version: Use a 1-to-1 gluten-free baking flour blend instead of all-purpose flour. The cake will be just as tender and delicious.
- Vegan Adaptation: Substitute eggs with flax eggs (2 tbsp ground flaxseed + 6 tbsp water, chilled), use plant-based milk mixed with lemon juice instead of buttermilk, and swap butter for vegan margarine in the frosting.
- Flavor Twists: Add orange zest to the batter for a citrus-chocolate combo or sprinkle chopped nuts on top before frosting for texture.
- Different Toppers: Instead of the graduation cap, pipe simple flowers, stars, or write a celebratory message to suit other occasions.
- Personal Variation: I once added a layer of raspberry jam between two thin sheet cakes, then frosted as usual. It was a hit at a graduation party and added a nice fruity surprise.
Serving & Storage Suggestions
Serve this sheet cake at room temperature for the best flavor and texture. The buttercream softens slightly, making each bite melt in your mouth. It pairs beautifully with a glass of cold milk or a cup of strong coffee.
For storage, wrap the cake tightly with plastic wrap or keep it in an airtight container. It stays fresh in the refrigerator for up to 5 days. If you want to freeze it, slice into portions and freeze individually wrapped for up to 3 months. Thaw overnight in the fridge before serving.
Reheating buttercream-frosted cake isn’t recommended because heat can melt the frosting, but letting it sit at room temperature for 30 minutes before serving restores softness.
Flavors often deepen after a day, so if you can wait, the cake tastes even better the next day. Just be sure to keep it covered to prevent drying out.
Nutritional Information & Benefits
This sheet cake is a moderately indulgent treat with roughly 320 calories per serving (based on 12 servings). It provides a comforting balance of carbs, fats, and sugars.
The use of buttermilk adds a bit of protein and calcium, while cocoa powder delivers antioxidants. Using vegetable oil keeps the cake moist without the heaviness of butter, making it a bit lighter.
Gluten-free and vegan variations make this recipe accessible for many dietary needs. Be mindful that the buttercream contains dairy and sugar, so those with lactose intolerance or sugar sensitivities might want to adjust accordingly.
From a wellness standpoint, this cake is perfect for celebrating milestones without guilt—because, honestly, life’s about enjoying moments like these.
Conclusion
This perfect sheet cake with an easy buttercream graduation cap topper is more than just a dessert—it’s a sweet way to mark special moments. You can customize it, tweak the flavors, and even adapt it for different diets, but the heart of the recipe stays the same: moist, tender cake with a festive, fun finish.
I love this recipe because it’s approachable yet impressive, and it has saved me countless times from last-minute party panic. Give it a try, make it your own, and don’t be shy to share how your version turned out. I’d love to hear your stories and see your creations!
Now go ahead—grab your mixing bowls and create a celebration centerpiece that tastes as good as it looks.
Frequently Asked Questions
Can I make this cake ahead of time?
Absolutely! Bake it a day or two in advance, store it covered at room temperature or in the fridge, and frost just before serving for the freshest results.
What if I don’t have buttermilk?
No worries! Mix 1 cup of milk with 1 tablespoon of lemon juice or white vinegar. Let it sit for 5 minutes, then use as a substitute.
How do I get the buttercream really smooth?
Make sure your butter is softened but not melted, sift your powdered sugar, and beat the mixture for several minutes until fluffy. Adding a bit of cream helps too.
Can I use this buttercream for other cake designs?
Yes! This buttercream is versatile and perfect for piping, spreading, or decorating any cake.
How do I store leftover cake with buttercream?
Keep it in an airtight container in the fridge for up to 5 days. Let it come to room temperature before serving for the best taste and texture.
Pin This Recipe!
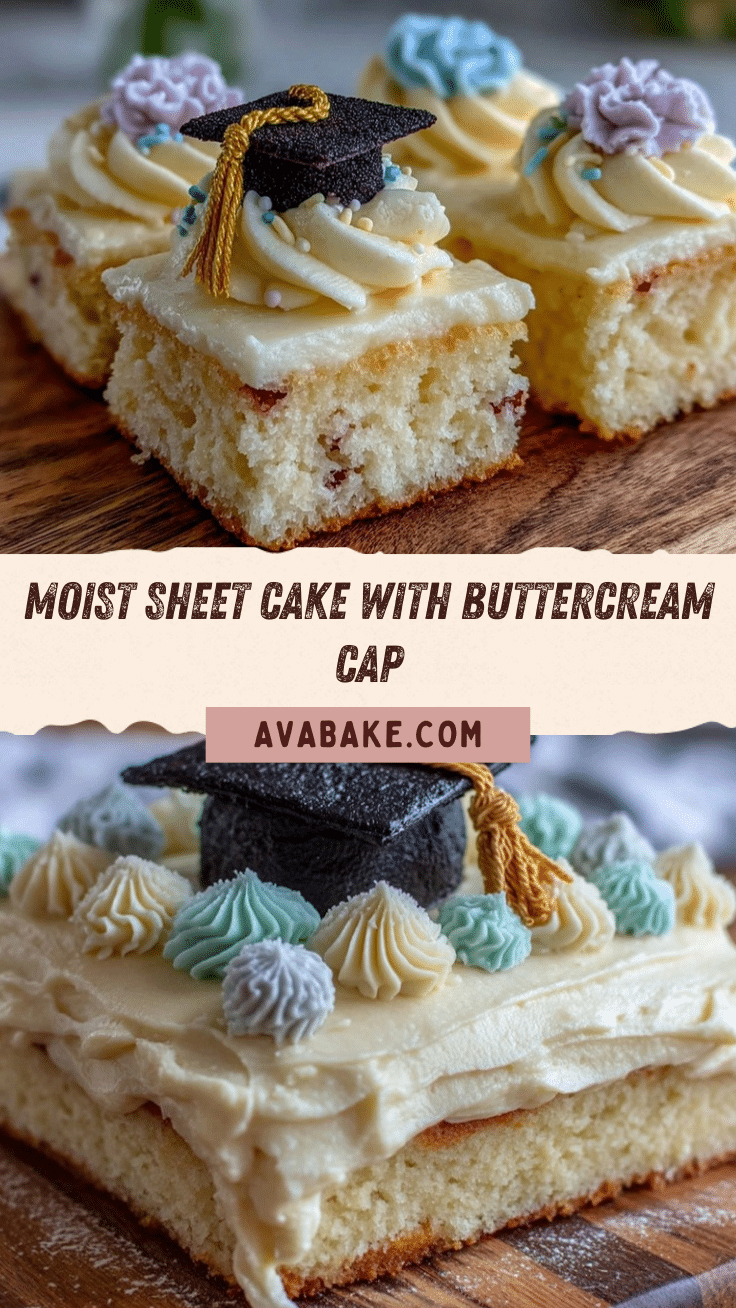
Perfect Sheet Cake Recipe with Easy Buttercream Graduation Cap Topper Tutorial
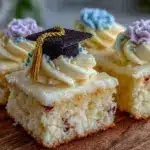
A moist and tender chocolate sheet cake topped with a smooth vanilla buttercream graduation cap, perfect for celebrations and easy to make with simple ingredients.
- Prep Time: 15 minutes
- Cook Time: 30-35 minutes
- Total Time: 50 minutes
- Yield: 12 servings
- Category: Dessert
- Cuisine: American
Ingredients
- All-purpose flour (2 ½ cups / 312 g)
- Granulated sugar (2 cups / 400 g)
- Unsweetened cocoa powder (¾ cup / 75 g)
- Baking powder (1 ½ tsp)
- Baking soda (1 ½ tsp)
- Salt (1 tsp)
- Buttermilk (1 cup / 240 ml), room temperature
- Vegetable oil (½ cup / 120 ml)
- Large eggs (2), room temperature
- Vanilla extract (2 tsp)
- Hot water (1 cup / 240 ml) mixed with 1 tsp espresso powder (optional)
- Unsalted butter (1 cup / 227 g), softened
- Powdered sugar (4 cups / 480 g), sifted
- Heavy cream or whole milk (2-3 tbsp / 30-45 ml)
- Vanilla extract (1 tsp)
- Black gel food coloring
- Yellow or gold edible decoration (like sprinkles or piped frosting)
Instructions
- Preheat your oven to 350°F (175°C). Grease your 9×13-inch sheet pan with butter or non-stick spray, then line it with parchment paper, leaving an overhang for easy removal.
- In a large bowl, sift together the flour, cocoa powder, baking powder, baking soda, and salt. Whisk to combine evenly (about 2 minutes).
- In another bowl, whisk the buttermilk, vegetable oil, eggs, and vanilla extract until smooth and well blended (about 1-2 minutes).
- Slowly pour the wet mixture into the dry ingredients. Use a mixer on low speed or a sturdy whisk to combine until just smooth and no streaks remain. Don’t overmix (about 2-3 minutes).
- Carefully stir in the hot water and espresso powder mixture. The batter will be thin.
- Transfer the batter into your prepared sheet pan and spread it evenly with a spatula. Tap the pan gently on the counter to release any air bubbles.
- Bake for 30-35 minutes. Begin checking at 30 minutes by inserting a toothpick in the center; it should come out with a few moist crumbs but no raw batter.
- Remove the cake from the oven and let it cool in the pan for 15 minutes. Then, use the parchment overhang to lift it onto a wire rack to cool completely before frosting.
- In a mixing bowl, beat the softened butter on medium speed until creamy (about 2 minutes). Gradually add powdered sugar, 1 cup at a time, mixing well after each addition.
- Pour in vanilla extract and 2 tablespoons of heavy cream. Beat on high speed for 3-4 minutes until light and fluffy. Adjust consistency with more cream or powdered sugar as needed.
- Divide the buttercream into two portions. Tint the larger portion black with gel food coloring for the cap, and leave some plain or tint yellow for the tassel.
- Use an offset spatula to spread a thin crumb coat of plain buttercream over the cake. Chill for 15 minutes, then apply a smooth final layer of black buttercream.
- Pipe a square on the top corner of the cake using black buttercream. For the cap’s base, pipe a small black circle below the square. Use yellow buttercream to pipe a tassel hanging from the corner of the square. Alternatively, smooth black buttercream with a small spatula and add the tassel freehand.
Notes
Use parchment paper to line the pan for easy removal and to prevent sticking. Do not overmix the batter to keep the cake tender. Use room temperature eggs and softened butter for best results. Chill the crumb coat before applying the final frosting layer. Espresso powder enhances chocolate flavor without tasting like coffee. Buttercream can be tinted with gel food coloring for decoration. For dairy-free or vegan options, substitute ingredients accordingly.
Nutrition
- Serving Size: 1 slice (1/12 of cak
- Calories: 320
- Sugar: 30
- Sodium: 250
- Fat: 15
- Saturated Fat: 7
- Carbohydrates: 45
- Fiber: 3
- Protein: 4
Keywords: sheet cake, chocolate cake, buttercream, graduation cake, easy cake recipe, celebration cake, moist cake, vanilla buttercream, chocolate sheet cake