“You know that feeling when you’re scrambling to find a meaningful gift, and suddenly, inspiration hits from the most unexpected place?” That was me last spring when my neighbor, Mrs. Lopez, was chatting over the fence about her granddaughter’s upcoming graduation. She casually mentioned how much she loved receiving homemade treats, and I found myself thinking, “Why not make a perfect decorated graduation sugar cookies gift set?”
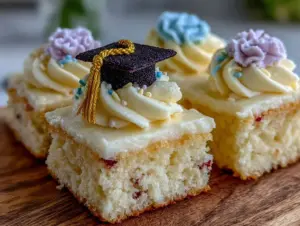
Honestly, I wasn’t sure I had the patience for the intricate icing work, but I figured, what the heck? I dug out my old cookie cutters, grabbed some royal icing ingredients, and gave it a whirl late one evening after dinner. The kitchen was a mess (flour everywhere, I admit), and I even forgot to add vanilla to the dough the first time—but somehow, those cookies turned out better than I imagined! The crisp edges, the sweet vanilla scent filling the air, and the little caps and diplomas made from icing felt like a small celebration on their own.
Maybe you’ve been there—wanting to create a gift that feels personal without spending hours in the kitchen. This decorated graduation sugar cookies gift set is that kind of recipe. It’s approachable, fun, and yes, a little addictive once you start decorating. Plus, it’s the kind of gift that makes you want to keep a batch on hand for every celebration. So, let me share how this recipe came to be my go-to for graduation gifts and why it might just become yours too.
Why You’ll Love This Recipe
After testing and tweaking this decorated graduation sugar cookies gift set multiple times, I’m confident it hits all the right notes. Here’s why you’ll want to try it:
- Quick & Easy: The dough comes together in under 20 minutes, and while the decorating takes some patience, it’s perfect for a relaxing afternoon project.
- Simple Ingredients: You probably already have everything in your pantry—no fancy shopping required.
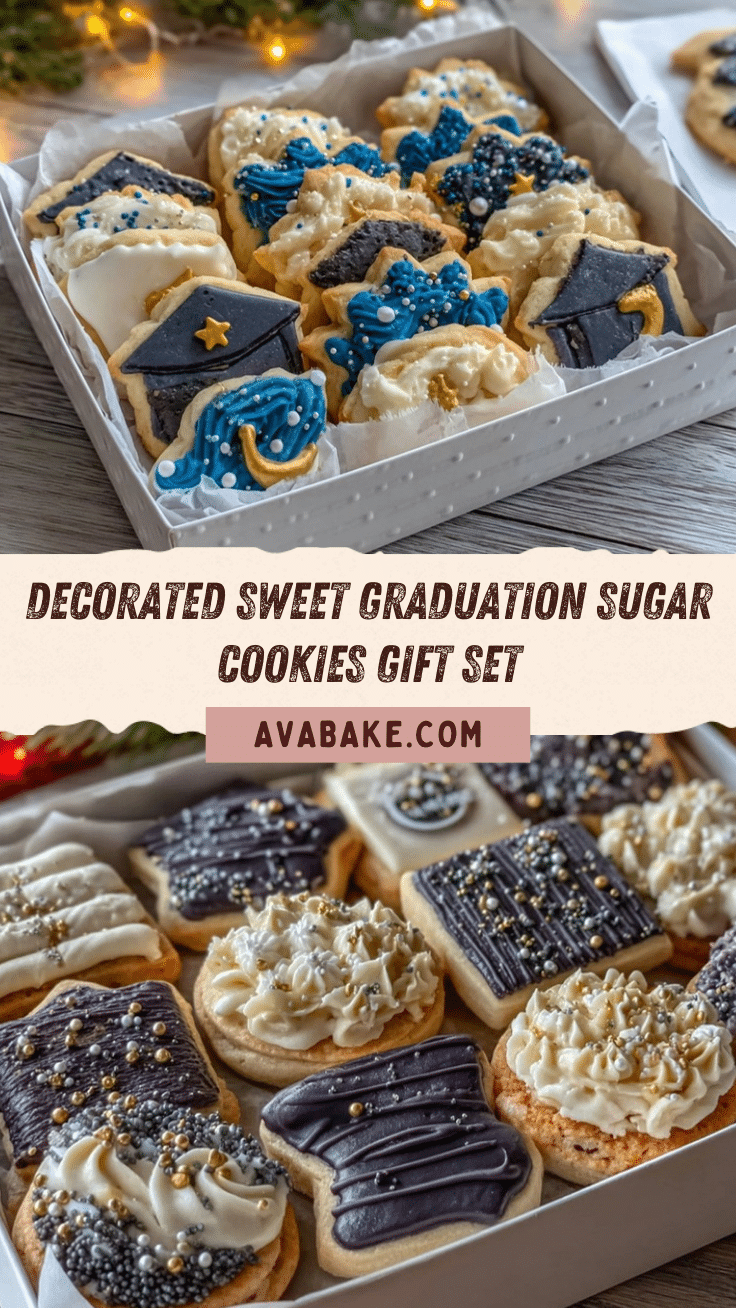
- Perfect for Graduation Gifts: Whether for your child, a friend, or a neighbor, these cookies make a thoughtful, handmade gift that stands out.
- Crowd-Pleaser: The balance of buttery sweetness and smooth royal icing wins over both kids and adults every time.
- Unbelievably Delicious: The cookies have a tender crumb with just enough crispness around the edges, and the decorated icing adds a festive touch without being overly sweet.
What sets this recipe apart? It’s the way the dough holds its shape perfectly, making your graduation-themed cutters pop with detail. Also, blending the royal icing just right (I share my secret in the steps) gives you that smooth finish that looks professionally done—even if you’re a beginner. Honestly, it’s the kind of recipe that makes you close your eyes after the first bite and think, “Yep, this is a winner.”
So if you’re after a gift that’s heartfelt, beautiful, and actually fun to make, this decorated graduation sugar cookies gift set is your answer.
What Ingredients You Will Need
This recipe uses simple, wholesome ingredients that deliver the perfect balance of flavor and texture without fuss. Most are pantry staples, and substitutions are easy if needed.
- For the Sugar Cookie Dough:
- 2 ¾ cups (345 g) all-purpose flour (I recommend King Arthur Flour for consistent texture)
- 1 teaspoon baking powder
- ½ teaspoon salt
- 1 cup (226 g) unsalted butter, softened (Room temperature butter makes all the difference!)
- 1 ½ cups (300 g) granulated sugar
- 1 large egg, room temperature
- 2 teaspoons pure vanilla extract (use Nielsen-Massey for best flavor)
- ½ teaspoon almond extract (optional, adds a subtle depth)
- For the Royal Icing:
- 4 cups (480 g) powdered sugar, sifted
- 3 tablespoons meringue powder
- 5-6 tablespoons warm water (adjust for consistency)
- Gel food coloring in black, gold, white, and your school colors
- Edible glitter or sprinkles (optional, for a festive touch)
- Optional Decorating Supplies:
- Graduation-themed cookie cutters (caps, diplomas, stars)
- Fine tip piping bags or squeeze bottles
- Toothpicks for detail work
If you need a gluten-free option, swapping the all-purpose flour with a 1:1 gluten-free baking flour blend works well, though the texture will be slightly different. For dairy-free, use a vegan butter alternative and skip the egg (or replace with a flax egg).
Equipment Needed
- Mixing bowls (preferably glass or stainless steel)
- Electric mixer or stand mixer (though you can mix by hand, a mixer saves time and effort)
- Rolling pin (a smooth, heavy one helps with even thickness)
- Baking sheets lined with parchment paper or silicone baking mats
- Cooling racks (to prevent soggy bottoms)
- Graduation-themed cookie cutters (caps and diplomas are classic; I found mine at a local craft store)
- Piping bags with fine tips or squeeze bottles for icing
- Small bowls for mixing icing colors
If you don’t have piping bags, zip-top bags with a tiny corner snipped work just fine. Personally, I love silicone mats because they’re reusable and easy to clean. Pro tip: keep your rolling pin and dough chilled to avoid sticky messes.
Preparation Method

- Mix Dry Ingredients: In a medium bowl, whisk together 2 ¾ cups (345 g) flour, 1 teaspoon baking powder, and ½ teaspoon salt. Set aside. (This keeps your dough from tasting flat.) (5 minutes)
- Cream Butter and Sugar: Using an electric mixer, beat 1 cup softened unsalted butter with 1 ½ cups granulated sugar until light and fluffy—about 3-4 minutes. This step is key for tender cookies. (5 minutes)
- Add Egg and Extracts: Beat in 1 large egg, 2 teaspoons vanilla extract, and ½ teaspoon almond extract (if using) until smooth and combined. (2 minutes)
- Combine Dry and Wet: Gradually add the flour mixture, mixing on low speed until just combined. Avoid overmixing—stop as soon as dough forms. It’ll feel soft but hold together. (3 minutes)
- Chill the Dough: Flatten dough into two disks, wrap in plastic wrap, and refrigerate for at least 1 hour. This chilling step prevents spreading and helps with clean shapes. (60 minutes)
- Preheat Oven & Prepare Baking Sheets: Set oven to 350°F (175°C) and line baking sheets with parchment. (5 minutes)
- Roll Out Dough: On a lightly floured surface, roll dough to about ¼ inch (6 mm) thickness. Keep flour light so the cookies don’t dry out. (10 minutes)
- Cut Shapes: Use graduation-themed cookie cutters to stamp shapes. Transfer carefully to baking sheets, spacing about 1 inch apart. If dough softens, pop it back in the fridge for 10 minutes before baking. (15 minutes)
- Bake Cookies: Bake for 8-10 minutes until edges are just golden. Watch closely—overbaking dries them out. (8-10 minutes)
- Cool Completely: Let cookies cool on baking sheet for 5 minutes, then transfer to cooling racks. Completely cool before decorating to avoid melting icing. (20 minutes)
- Prepare Royal Icing: In a clean bowl, combine 4 cups sifted powdered sugar and 3 tablespoons meringue powder. Add 5 tablespoons warm water and beat on medium speed until stiff peaks form—about 7-10 minutes. Adjust water or sugar for piping and flooding consistencies. (15 minutes)
- Color and Decorate: Divide icing into small bowls and tint with gel colors. Use piping bags for outlines and flooding. Let each layer dry for 15-20 minutes before adding details. Use toothpicks for fine adjustments. (1-2 hours)
- Dry and Package: Allow decorated cookies to dry thoroughly overnight before packaging in gift boxes or tins. This keeps icing from smudging. (Overnight)
Pro tip: Keep a damp cloth over unused icing to prevent drying out. If mistakes happen (and they will!), just gently scrape off icing with a toothpick and try again. Patience pays off here.
Cooking Tips & Techniques
Decorating sugar cookies can feel intimidating, but a few tricks go a long way. First, keep your dough cold—warm dough spreads too much and loses shape. Rolling between parchment paper sheets can simplify cleanup and keep dough from sticking.
When mixing royal icing, the consistency matters. For outlining, you want a thicker icing that holds its shape; for flooding (filling in areas), thin it out a bit so it spreads smoothly but not runny. Using gel colors instead of liquid food coloring keeps icing from becoming too thin.
One mistake I made early on was rushing the drying time between layers. That led to colors bleeding or icing cracking. Take it slow. A fan or cool room helps speed drying without overheating.
Also, don’t stress about perfection. Hand-decorated cookies have charm, and a little imperfection makes them feel homemade. For multitasking, bake the cookies one day, decorate the next. This break helps keep the process enjoyable.
Finally, if you’re new to piping, practice on parchment before decorating cookies. It builds confidence and helps you get the wrist action right.
Variations & Adaptations
- Dietary Adjustments: Swap all-purpose flour for gluten-free blends like Bob’s Red Mill 1-to-1. Use vegan butter and aquafaba for egg-free versions.
- Flavor Twists: Add a teaspoon of lemon zest or orange extract to the dough for a bright citrus note. Or sprinkle edible gold dust on icing for extra sparkle.
- Seasonal Themes: For spring graduations, swap black icing for pastel colors. Incorporate edible flowers or fresh lavender for a unique touch.
- Decorating Styles: Try ombré icing, marbling, or stencil designs instead of traditional piping. This is a fun way to customize for different tastes or skill levels.
- Personal Favorite Variation: Once, I added crushed peppermint candy to the edges for a winter graduate. It was unexpected and surprisingly delightful!
Serving & Storage Suggestions
Serve these decorated graduation sugar cookies at room temperature to enjoy their crisp texture and smooth icing. They look fantastic arranged on a festive platter alongside a glass of sparkling cider or your favorite coffee.
To store, place cookies in an airtight container with parchment layers between to prevent sticking. They keep well at room temperature for up to 5 days. For longer storage, freeze undecorated cookies wrapped tightly, then decorate after thawing.
Reheat is not recommended since the icing can soften and lose its shape, so best to enjoy fresh or stored cool. Interestingly, flavors meld nicely overnight, so sometimes I actually prefer them a day later.
Nutritional Information & Benefits
Each decorated sugar cookie (about 3 inches in size) contains approximately:
| Calories | 150 |
|---|---|
| Fat | 7g |
| Carbohydrates | 22g |
| Sugar | 14g |
| Protein | 1g |
While these cookies are definitely a treat, the ingredients include wholesome butter and real vanilla, which add richness without artificial flavors. Using natural gel colors helps avoid synthetic dyes common in cheaper food coloring.
For dietary concerns, this recipe can be made gluten-free or vegan with simple swaps. Just watch for potential allergens like eggs and dairy. From a personal wellness view, I see these cookies as a joyful reward—perfect for special occasions when you want to celebrate without guilt.
Conclusion
This decorated graduation sugar cookies gift set is a recipe that’s stayed with me for all the right reasons. It’s approachable enough for beginners, yet satisfying for those who love a creative challenge. Plus, the joy on a graduate’s face when receiving a handmade gift like this? Priceless.
Feel free to tweak the colors, shapes, or flavors to match your own celebration style. I promise it’s a project that brings a little sweetness and a lot of smiles. So grab your rolling pin, and let those cookies bring a touch of homemade magic to your next grad party!
If you try this recipe, please share how it went or your unique decorating ideas—I love hearing from fellow cookie bakers. Happy baking and congrats to all the grads out there!
FAQs
Can I make the cookie dough ahead of time?
Absolutely! You can prepare the dough and refrigerate it for up to 3 days or freeze it for up to a month. Just thaw in the fridge before rolling.
How do I prevent royal icing from cracking?
Make sure to mix the icing until stiff peaks form and avoid adding too much water. Also, dry cookies at room temperature rather than in a hot or humid place.
What if I don’t have graduation-themed cookie cutters?
You can use basic shapes like circles, stars, or squares and decorate them with themed colors and designs like caps and diplomas with piping.
Can I use store-bought royal icing?
While homemade royal icing gives the best results, store-bought can work in a pinch. Just thin it slightly for flooding and thicken for outlining.
How long do decorated sugar cookies keep?
Stored in an airtight container at room temperature, they last about 5 days. For longer storage, freeze undecorated cookies and decorate after thawing.
Pin This Recipe!
Perfect Decorated Graduation Sugar Cookies Gift Set

A quick and easy recipe for tender, crisp sugar cookies decorated with royal icing, perfect for graduation gifts and celebrations.
- Prep Time: 20 minutes
- Cook Time: 10 minutes
- Total Time: 3 hours 45 minutes
- Yield: 24 cookies 1x
- Category: Dessert
- Cuisine: American
Ingredients
- 2 ¾ cups (345 g) all-purpose flour
- 1 teaspoon baking powder
- ½ teaspoon salt
- 1 cup (226 g) unsalted butter, softened
- 1 ½ cups (300 g) granulated sugar
- 1 large egg, room temperature
- 2 teaspoons pure vanilla extract
- ½ teaspoon almond extract (optional)
- 4 cups (480 g) powdered sugar, sifted
- 3 tablespoons meringue powder
- 5–6 tablespoons warm water
- Gel food coloring in black, gold, white, and school colors
- Edible glitter or sprinkles (optional)
Instructions
- Mix dry ingredients: whisk together flour, baking powder, and salt in a medium bowl. (5 minutes)
- Cream butter and sugar: beat softened butter with granulated sugar until light and fluffy, about 3-4 minutes. (5 minutes)
- Add egg and extracts: beat in egg, vanilla extract, and almond extract until smooth. (2 minutes)
- Combine dry and wet ingredients: gradually add flour mixture, mixing on low speed until just combined. (3 minutes)
- Chill dough: flatten dough into two disks, wrap in plastic wrap, refrigerate for at least 1 hour. (60 minutes)
- Preheat oven to 350°F (175°C) and line baking sheets with parchment paper. (5 minutes)
- Roll out dough: roll dough on lightly floured surface to ¼ inch (6 mm) thickness. (10 minutes)
- Cut shapes: use graduation-themed cookie cutters to stamp shapes, transfer to baking sheets spaced 1 inch apart. Chill dough if soft. (15 minutes)
- Bake cookies: bake for 8-10 minutes until edges are just golden. (8-10 minutes)
- Cool cookies: cool on baking sheet for 5 minutes, then transfer to cooling racks until completely cool. (20 minutes)
- Prepare royal icing: combine powdered sugar and meringue powder, add warm water and beat until stiff peaks form, about 7-10 minutes. Adjust consistency as needed. (15 minutes)
- Color and decorate: divide icing, tint with gel colors, pipe outlines and flood cookies. Let each layer dry 15-20 minutes before adding details. Use toothpicks for fine adjustments. (1-2 hours)
- Dry and package: allow decorated cookies to dry thoroughly overnight before packaging. (Overnight)
Notes
Keep dough chilled to prevent spreading and maintain shape. Use gel food coloring to avoid thinning icing. Let each icing layer dry fully before adding details. Store cookies in airtight container with parchment layers; freeze undecorated cookies for longer storage. Practice piping on parchment before decorating cookies.
Nutrition
- Serving Size: 1 decorated sugar co
- Calories: 150
- Sugar: 14
- Fat: 7
- Carbohydrates: 22
- Protein: 1
Keywords: graduation cookies, sugar cookies, decorated cookies, royal icing, homemade gifts, easy cookie recipe