Let me tell you, the scent of rich chocolate mingling with fresh mint wafting from my kitchen is enough to make anyone’s mouth water. The first time I baked these Mint Chocolate Buttercream Bars, I was instantly hooked—the kind of moment where you pause, take a deep breath, and just smile because you know you’re onto something truly special. Years ago, when I was knee-high to a grasshopper, my grandma used to whip up minty treats around St. Patrick’s Day, but nothing quite like these bars. I stumbled upon this recipe during a rainy weekend, trying to recreate that nostalgic flavor with a creamy, buttery twist that would stand out on any dessert table.
Honestly, my family couldn’t stop sneaking them off the cooling rack (and I can’t really blame them). These bars quickly became a staple for our St. Patrick’s Day celebrations and holiday gifting. They’re dangerously easy to make, offering pure, nostalgic comfort with every bite. Whether you’re aiming to brighten up your Pinterest cookie board or searching for a sweet treat to impress your potluck crew, these Mint Chocolate Buttercream Bars fit the bill perfectly. After testing this recipe multiple times in the name of research, of course, I’m confident it’ll become a favorite in your household too.
Why You’ll Love This Recipe
Let me share why this Mint Chocolate Buttercream Bars recipe stands out from the crowd:
- Quick & Easy: Comes together in under an hour, perfect for busy weeknights or last-minute St. Patrick’s Day cravings.
- Simple Ingredients: No fancy grocery trips needed; you probably already have most of what you need in your pantry and fridge.
- Perfect for Celebrations: Ideal for St. Patrick’s Day parties, festive brunches, or just anytime you want a mint-chocolate pick-me-up.
- Crowd-Pleaser: Kids and adults alike rave about the creamy buttercream paired with that cool minty kick and rich chocolate base.
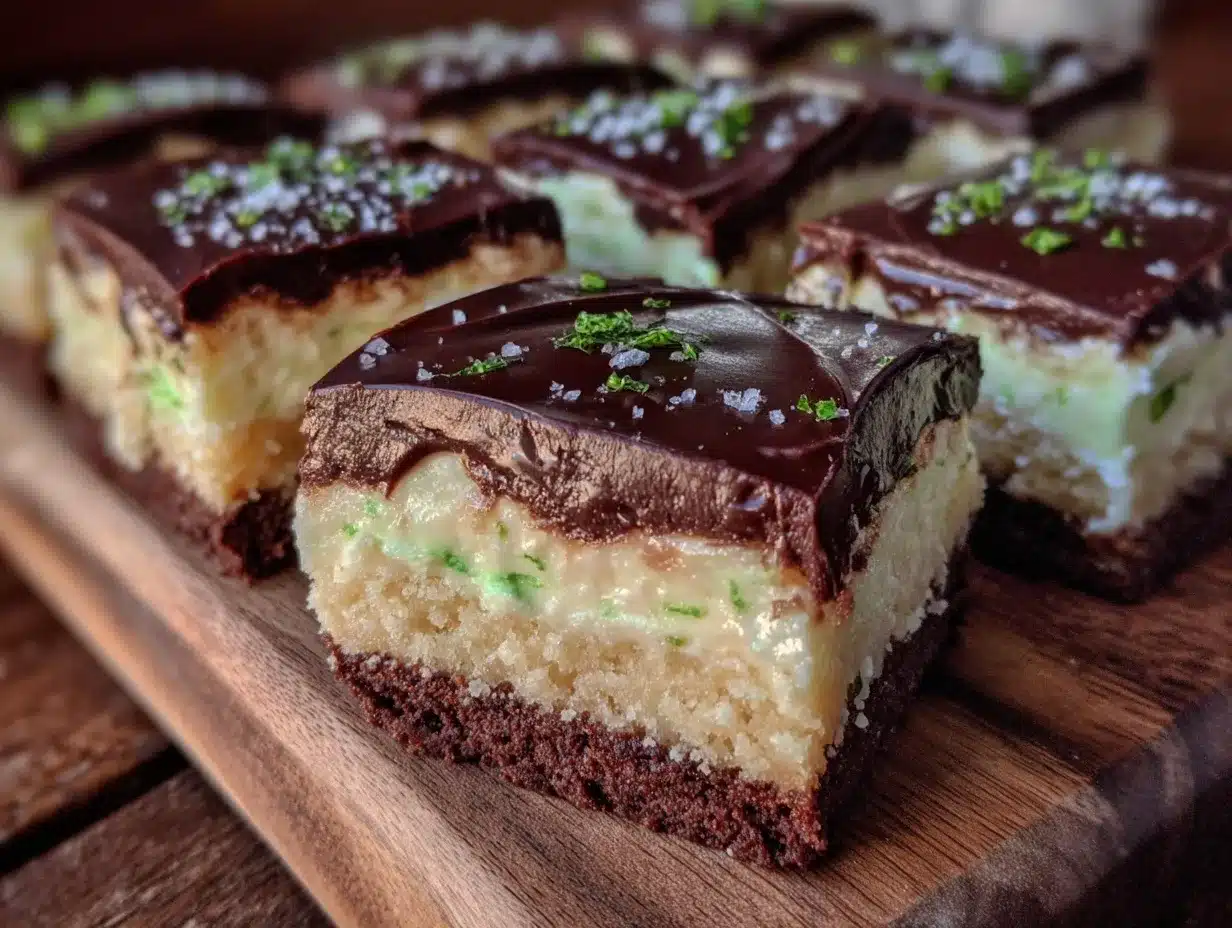
- Unbelievably Delicious: The texture combo of crumbly chocolate base with smooth, fluffy mint buttercream is next-level comfort food.
What really sets this recipe apart is the ultra-smooth mint buttercream frosting, made with just the right balance of peppermint extract—no overpowering minty burn, just refreshing sweetness. Plus, the chocolate base uses cocoa powder that I personally prefer from a trusted brand for the best texture and flavor. This isn’t your average mint chocolate dessert; it’s the best version you’ll find, promising that dreamy first-bite moment where you might just close your eyes and savor it long after the last crumb is gone. It’s comfort food with a festive twist, fuss-free but still impressive enough to wow your guests or sweeten your family’s holiday morning.
What Ingredients You Will Need
This recipe uses simple, wholesome ingredients to deliver bold flavor and satisfying texture without the fuss. Most are pantry staples, and the mint flavor comes from a good-quality peppermint extract that really makes a difference.
- For the Chocolate Base:
- 1 cup (125g) all-purpose flour
- 1/2 cup (45g) unsweetened cocoa powder (I recommend Ghirardelli for rich flavor)
- 1/4 teaspoon salt
- 1/2 cup (115g) unsalted butter, melted and slightly cooled (adds richness)
- 3/4 cup (150g) granulated sugar
- 1 large egg, room temperature
- 1 teaspoon vanilla extract
- For the Mint Chocolate Buttercream:
- 1/2 cup (115g) unsalted butter, softened
- 1 1/2 cups (180g) powdered sugar, sifted
- 1 teaspoon peppermint extract (adjust to taste)
- 2 tablespoons heavy cream or whole milk (use dairy-free milk if needed)
- 2 ounces (56g) semi-sweet chocolate, melted and cooled slightly (for swirling)
- Optional Garnishes:
- Chocolate shavings or mini chocolate chips
- Fresh mint leaves for decoration
- Green sanding sugar for a festive sparkle
If you want to keep it gluten-free, swapping the all-purpose flour for a gluten-free blend works nicely without compromising texture too much. Also, if peppermint extract isn’t your thing, you can experiment with spearmint extract or even a drop of green food coloring for that classic St. Patrick’s Day vibe. Just remember, a little peppermint extract goes a long way!
Equipment Needed
- 8×8-inch (20×20 cm) baking pan – I like to use a glass pan for even baking, but metal pans work fine too.
- Mixing bowls – at least two, one for the base and one for the buttercream.
- Electric mixer or stand mixer – while you can hand-mix, the buttercream is much smoother and fluffier with a mixer.
- Spatula – for folding ingredients and spreading the buttercream evenly.
- Whisk – handy for combining dry ingredients.
- Measuring cups and spoons – precise measurements make all the difference here.
- Cooling rack – to let your bars cool completely before frosting.
If you don’t have an electric mixer, no worries—just be prepared for a little extra elbow grease. I’ve made these bars with a hand whisk plenty of times, though the texture is definitely creamier with a mixer. Budget-friendly tip: a simple hand mixer under $30 works wonders and saves time. Also, make sure your butter is softened but not melted to get that perfect buttercream consistency.
Preparation Method
- Preheat your oven to 350°F (175°C) and line your 8×8-inch pan with parchment paper, leaving some overhang for easy removal later. This takes about 10 minutes and ensures even baking.
- Prepare the chocolate base: In a medium bowl, whisk together 1 cup all-purpose flour, 1/2 cup cocoa powder, and 1/4 teaspoon salt until fully combined.
- In a separate large bowl, mix the wet ingredients: Beat 1/2 cup melted butter with 3/4 cup granulated sugar until smooth and slightly glossy (about 2 minutes). Add 1 large egg and 1 teaspoon vanilla extract, mixing well until combined and a little fluffy.
- Slowly add the dry ingredients to the wet, stirring gently with a spatula just until no flour pockets remain. Be careful not to overmix or the bars can turn out dense.
- Pour the batter into the prepared pan and spread it evenly with a spatula. Bake for 20-22 minutes — you want the edges set but the center still slightly soft. (A toothpick inserted should come out with moist crumbs, not wet batter.)
- Remove from oven and cool completely on a wire rack—this can take about 45 minutes. Don’t rush this step; frosting warm bars will cause buttercream to melt and slide off.
- Make the mint chocolate buttercream: In a clean bowl, beat 1/2 cup softened butter until creamy (about 2 minutes). Gradually add 1 1/2 cups powdered sugar, beating on low speed to avoid a sugar cloud, then increase to medium.
- Add 1 teaspoon peppermint extract and 2 tablespoons heavy cream, beating until fluffy and smooth. If frosting seems too stiff, add a splash more cream; too soft, add a bit more powdered sugar.
- Swirl in melted chocolate: Gently fold in the cooled melted chocolate for a pretty marbled effect or spread plain if you prefer.
- Spread the buttercream evenly over the cooled bars using an offset spatula or butter knife. Finish with optional garnishes like chocolate shavings or green sanding sugar for that festive touch.
- Chill the bars in the fridge for about 30 minutes to set the buttercream before slicing into squares. Use a sharp knife warmed under hot water for clean cuts.
These steps might sound like a handful, but once you get the hang of it, this recipe feels like second nature. A friendly tip: don’t skip cooling the base fully before frosting; rushing this step is the main cause of buttercream slipping off. Also, if your kitchen is warm, popping the frosting bowl in the fridge for a few minutes before spreading can help keep things stable.
Cooking Tips & Techniques
Here’s what I’ve learned after more than a dozen batches of these bars:
- Softened Butter Is Key: For the buttercream, butter should be soft enough to press a finger in easily but not greasy or melted. Too cold and your frosting will be lumpy; too warm and it’ll be runny.
- Measure Ingredients Accurately: Use a kitchen scale or spoon and level your flour instead of scooping directly from the bag to avoid dense bars.
- Don’t Overmix the Batter: Mixing just until combined keeps the chocolate base tender and crumbly instead of tough.
- Use Quality Peppermint Extract: Cheap extracts can be harsh or artificial tasting; I prefer Nielsen-Massey or LorAnn’s for a smooth, clean mint flavor.
- Chill Your Bars Before Slicing: This prevents the buttercream from smudging and keeps bars neat — trust me, it makes a difference at parties!
- Multitasking Tip: While the bars bake and cool, prep your frosting bowl and measure ingredients to save time.
- Common Mistake: Frosting warm bars leads to a melty mess. Patience really pays off here.
Honestly, these small tips have saved me from many a kitchen disaster. The first time I rushed cooling and ended up with a frosting puddle, I learned the hard way. Now, I plan my timing so everything comes together smoothly and looks picture-perfect.
Variations & Adaptations
Want to mix things up? Here are some fun ways to customize these Mint Chocolate Buttercream Bars:
- Dairy-Free Version: Use vegan butter and coconut milk for the buttercream. The flavor is just as indulgent and perfect for dairy-sensitive friends.
- Intensify the Mint: Add crushed peppermint candies or a few drops of natural green food coloring for a festive look and extra crunch.
- Chocolate Lovers’ Dream: Fold mini chocolate chips into the base batter or sprinkle on top before baking for more texture.
- Seasonal Twist: Swap peppermint extract out for orange or almond extract to suit other holidays or personal taste.
- Lower Sugar Option: Try using powdered erythritol in place of powdered sugar for a keto-friendly treat, but note it might change texture slightly.
One of my favorite tweaks was adding a handful of chopped Andes mints into the batter for a surprise burst of chocolate-mint chunks. Totally decadent and perfect for sharing with friends who love a little extra texture.
Serving & Storage Suggestions
These Mint Chocolate Buttercream Bars are best served chilled or at room temperature. I like to slice them into neat squares and arrange on a festive green or gold platter for St. Patrick’s Day gatherings. They pair wonderfully with a cup of hot coffee or minty green tea, making for a cozy treat on a chilly March afternoon.
Store leftovers in an airtight container in the refrigerator for up to 5 days. For longer storage, you can freeze the bars (unfrosted or frosted) wrapped tightly in plastic wrap and foil for up to 2 months. Thaw overnight in the fridge before serving. When reheating (if you must), let them come to room temperature naturally—microwaving tends to melt the buttercream and makes a mess.
Fun fact: letting these bars rest a day or two in the fridge actually deepens the mint flavor and helps the chocolate base become even fudgier. So, if you can wait (and I know it’s tough), you’ll be rewarded!
Nutritional Information & Benefits
Each bar (based on 16 servings) contains approximately:
| Calories | 210 |
|---|---|
| Fat | 14g |
| Carbohydrates | 22g |
| Protein | 2g |
| Sugar | 18g |
While these bars are definitely a treat, the mint extract offers some unexpected benefits—it’s known to aid digestion and freshen breath, making this dessert a little more thoughtful than your average sweet. Using real cocoa powder adds antioxidants, too, so you’re sneaking in a tiny bit of wellness with each bite.
For those with dietary restrictions, this recipe can be easily adapted to gluten-free or dairy-free options, making it accessible to many. Just watch out for allergies to nuts or dairy when choosing your butter and milk alternatives.
Conclusion
So there you have it — a tasty, festive Mint Chocolate Buttercream Bars recipe that’s easy to make and sure to impress at any St. Patrick’s Day celebration. You can customize it to suit your preferences or dietary needs, and honestly, I love how it brings a bit of nostalgic comfort with a modern, buttery twist.
Give it a try and let me know how your family or friends respond! I’m always excited to hear about your own recipe adaptations or favorite variations. Don’t forget to bookmark this one because you’re going to want to come back to it year after year.
Happy baking, and may your St. Patrick’s Day be filled with luck, joy, and lots of mint chocolate goodness!
FAQs About Mint Chocolate Buttercream Bars
Can I make these bars ahead of time?
Absolutely! They can be made a day or two in advance and stored in the fridge. Just slice them right before serving for the freshest look.
What if I don’t have peppermint extract?
You can substitute with spearmint extract, almond extract, or even a drop of mint-flavored syrup. Just adjust the amount to taste.
How do I get smooth buttercream without lumps?
Make sure your butter is softened (not melted) and beat it well before gradually adding powdered sugar. Sifting the sugar also helps with smoothness.
Can I freeze these bars?
Yes, freeze them wrapped tightly for up to 2 months. Thaw in the fridge overnight before enjoying.
What’s the best way to cut the bars cleanly?
Use a sharp knife warmed under hot water and wiped dry between cuts to get neat slices without smudging the frosting.
Pin This Recipe!
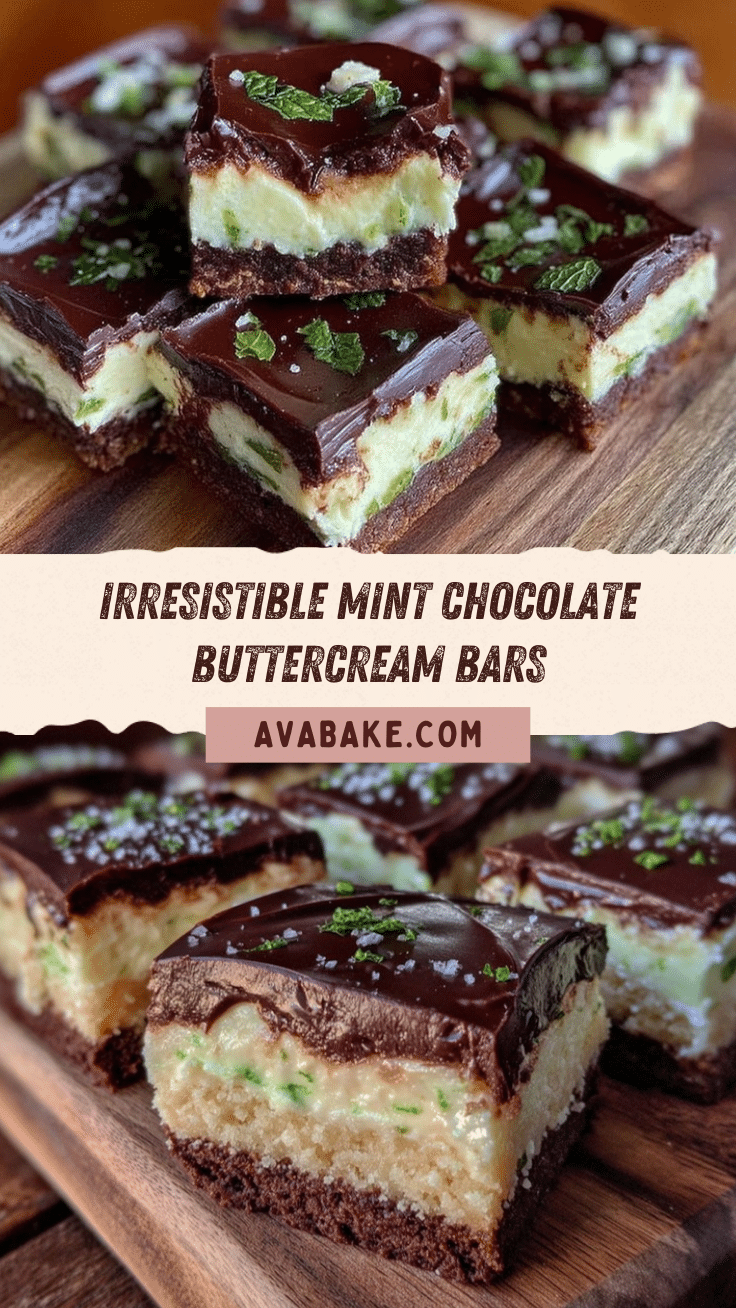
Mint Chocolate Buttercream Bars
Delicious and easy-to-make bars featuring a rich chocolate base topped with a smooth, minty buttercream frosting, perfect for St. Patrick’s Day celebrations or any festive occasion.
- Prep Time: 15 minutes
- Cook Time: 22 minutes
- Total Time: 1 hour 15 minutes
- Yield: 16 servings 1x
- Category: Dessert
- Cuisine: American
Ingredients
- 1 cup (125g) all-purpose flour
- 1/2 cup (45g) unsweetened cocoa powder
- 1/4 teaspoon salt
- 1/2 cup (115g) unsalted butter, melted and slightly cooled
- 3/4 cup (150g) granulated sugar
- 1 large egg, room temperature
- 1 teaspoon vanilla extract
- 1/2 cup (115g) unsalted butter, softened
- 1 1/2 cups (180g) powdered sugar, sifted
- 1 teaspoon peppermint extract
- 2 tablespoons heavy cream or whole milk
- 2 ounces (56g) semi-sweet chocolate, melted and cooled slightly
- Optional garnishes: chocolate shavings or mini chocolate chips, fresh mint leaves, green sanding sugar
Instructions
- Preheat oven to 350°F (175°C) and line an 8×8-inch baking pan with parchment paper, leaving overhang for easy removal.
- In a medium bowl, whisk together flour, cocoa powder, and salt until combined.
- In a separate large bowl, beat melted butter with granulated sugar until smooth and glossy (about 2 minutes).
- Add egg and vanilla extract to the wet mixture and mix until combined and slightly fluffy.
- Slowly add dry ingredients to wet ingredients, stirring gently just until no flour pockets remain; avoid overmixing.
- Pour batter into prepared pan and spread evenly. Bake for 20-22 minutes until edges are set and center is slightly soft (toothpick should come out with moist crumbs).
- Remove from oven and cool completely on a wire rack (about 45 minutes).
- To make buttercream, beat softened butter until creamy (about 2 minutes). Gradually add powdered sugar, beating on low then medium speed.
- Add peppermint extract and heavy cream, beating until fluffy and smooth. Adjust consistency with more cream or powdered sugar if needed.
- Gently fold in melted chocolate for a marbled effect or spread plain.
- Spread buttercream evenly over cooled bars. Add optional garnishes if desired.
- Chill bars in the refrigerator for about 30 minutes to set the buttercream before slicing into squares using a sharp knife warmed under hot water.
Notes
Ensure the chocolate base is completely cooled before frosting to prevent buttercream from melting and sliding off. Use softened butter (not melted) for smooth buttercream. Chill bars before slicing for clean cuts. Peppermint extract quality affects flavor; use a trusted brand. Can be adapted for gluten-free or dairy-free diets.
Nutrition
- Serving Size: 1 bar (1/16th of rec
- Calories: 210
- Sugar: 18
- Fat: 14
- Carbohydrates: 22
- Protein: 2
Keywords: mint chocolate, buttercream bars, St. Patrick's Day dessert, easy chocolate bars, homemade treats, festive desserts


