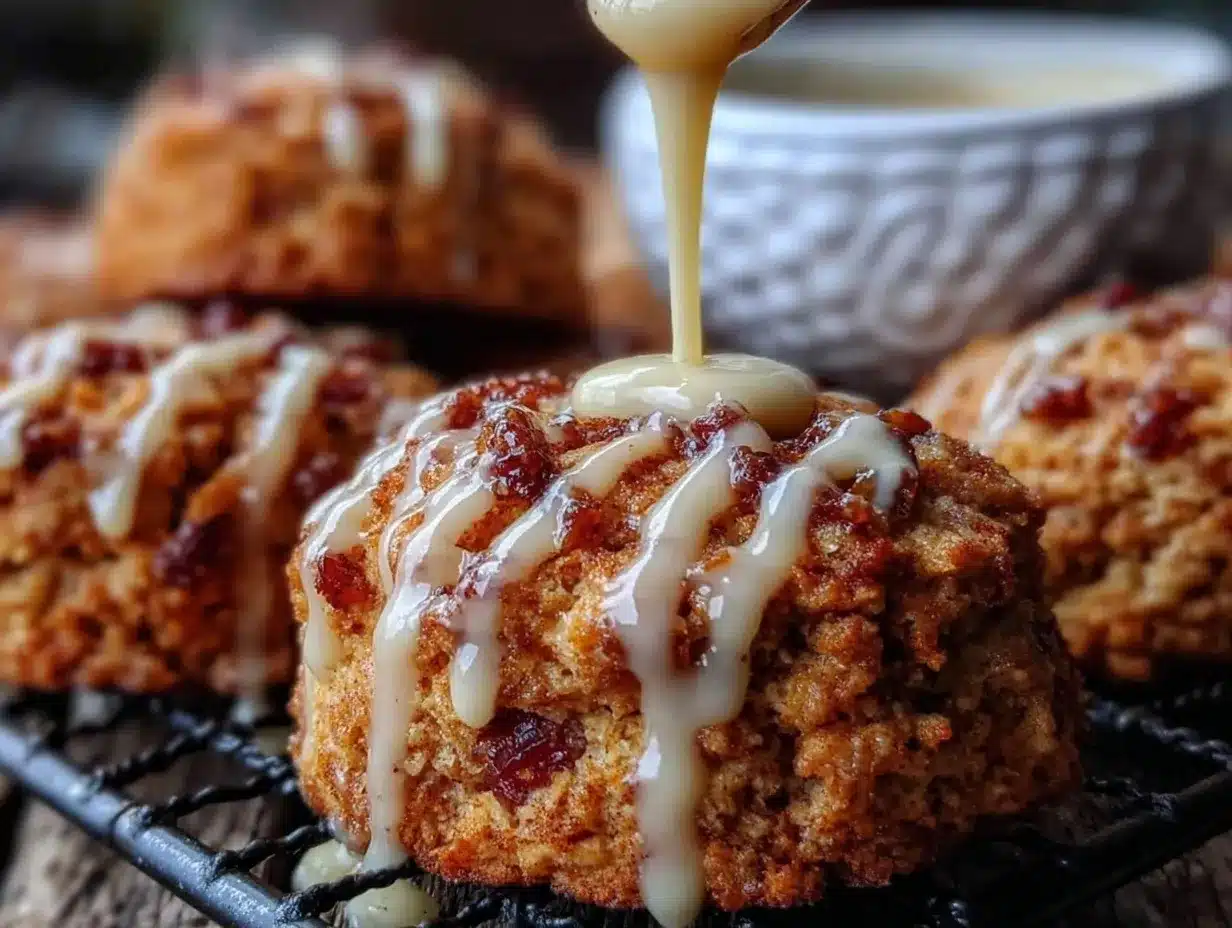
Let me just paint the scene for you—the sweet, woodsy aroma of brown sugar and cinnamon swirling through my kitchen as the oven gently warms the house. The first time I pulled a batch of these maple glazed brown sugar cinnamon scones out of the oven, I had to pause (you know, that kind of pause where you just stand there, inhaling, and maybe even close your eyes for a second). It was a chilly Saturday morning, and I wanted something more than just toast to go with my coffee—something that felt like a treat, but wasn’t fussy or over-the-top. That’s when I stumbled onto the idea of scones with a twist.
Years ago, when I was knee-high to a grasshopper, my grandma would make big trays of cinnamon rolls for family brunches. She always used maple syrup in her glaze (and let’s be honest, she never measured—just poured). That pure, nostalgic comfort stuck with me, and I can’t help but channel her every time I whip up these scones. Honestly, I wish I’d figured out how easy it was to make scones sooner. They’re dangerously easy, and the flavor is pure, cozy comfort in every bite.
My family couldn’t keep their hands off them—even the ones who claim they’re “not a scone person” (I say, just wait until you’ve tasted these). They’re perfect for potlucks, a sweet treat for your kids after school, or to brighten up your Pinterest cookie board. I’ve made these for holiday mornings, brunch with friends, and even as a gift—always a hit. Tested and retested (all in the name of research, of course), these maple glazed brown sugar cinnamon scones are now a staple for family gatherings. Honestly, it feels like a warm hug every time. If you’re looking for an easy homemade recipe that’s all about cozy comfort, you’re going to want to bookmark this one.
Why You’ll Love This Recipe
I’ve baked a lot of scones over the years, but these maple glazed brown sugar cinnamon scones truly stand out. There’s something about the combination of brown sugar, cinnamon, and that luscious maple glaze that just works. Here’s why I think you’ll be hooked (and why my family keeps requesting them):
- Quick & Easy: Comes together in under 45 minutes—no fancy dough tricks, just simple, straightforward steps. Perfect for busy mornings or when you need a last-minute sweet treat.
- Simple Ingredients: You probably already have everything in your pantry. No need for specialty flours or odd spices. Just basic, good stuff—flour, brown sugar, cinnamon, butter, cream, and maple syrup.
- Perfect for Any Occasion: These scones fit right in at brunch, cozy dinners, holiday breakfasts, or even as an afternoon snack. I’ve brought them to book club meetings, teacher appreciation days, and they never last long.
- Crowd-Pleaser: Both kids and adults rave about them. The glaze is sweet but not too sugary, and the scone itself is tender with a little crunchy top from the glaze.
- Unbelievably Delicious: The texture is next-level—crisp edges, soft inside, and the cinnamon-brown sugar combo is pure comfort food. The maple glaze ties everything together (seriously, don’t skip it).
What sets this recipe apart? I use cold butter and heavy cream for a rich, tender crumb, and a slightly higher ratio of brown sugar for deeper flavor. The glaze isn’t just drizzled—it’s spread while warm, soaking into every nook. I’ve tried scones that taste dry or bland—these are moist, flavorful, and never cakey. It’s the kind of recipe that makes you close your eyes after the first bite. Comfort food, but with just enough of a homemade twist that you’ll want to show them off. Impress your guests, treat yourself, or make a batch for gifting—whatever you choose, these scones deliver that soul-soothing satisfaction (without any stress).
Ingredients Needed for Maple Glazed Brown Sugar Cinnamon Scones
This recipe uses simple, wholesome ingredients to deliver bold flavor and satisfyingly soft texture—no fuss, no stress. Most are pantry staples, so you can get baking without an emergency grocery run. Here’s what you’ll need:
- For the Scones:
- 2 cups (250g) all-purpose flour (I like King Arthur for consistency)
- 1/2 cup (100g) light brown sugar, packed (adds that caramel depth)
- 1 tablespoon ground cinnamon (freshly opened is best for full flavor)
- 2 teaspoons baking powder
- 1/2 teaspoon salt
- 1/2 cup (115g) unsalted butter, cold and cubed
- 2/3 cup (160ml) heavy cream (or half-and-half for a lighter option)
- 1 large egg, room temperature
- 1 teaspoon pure vanilla extract (I recommend Nielsen-Massey)
- For the Maple Glaze:
- 1 cup (120g) powdered sugar, sifted (for smoothness)
- 2 tablespoons pure maple syrup (Grade A if possible—don’t use “pancake syrup”)
- 1-2 tablespoons milk or cream (start with 1 tbsp, add more for thinner glaze)
- Pinch of salt (balances sweetness)
- Optional Add-Ins & Substitutions:
- 1/2 cup (60g) chopped pecans or walnuts (for crunch)
- Swap heavy cream for coconut cream for dairy-free
- Use gluten-free 1:1 flour blend for a GF version
- Add 1/4 cup (35g) raisins or dried cranberries for a fruity twist
- Sprinkle raw sugar on top before baking for extra crunch
For the best results, use cold butter and chill your dough before baking—this helps the scones rise and get those gorgeous, flaky layers. If you’re in a pinch, you can swap the brown sugar for coconut sugar. I’ve made these with both, and honestly, they’re delicious either way. Just don’t skip the maple syrup in the glaze—it’s what makes these scones truly shine.
Equipment Needed
Don’t worry—no fancy equipment required for these maple glazed brown sugar cinnamon scones. Here’s what I use every time:
- Mixing Bowls: At least two—one for dry ingredients, one for wet. Glass or metal is best for keeping the butter cold.
- Pastry Cutter or Box Grater: For cutting in the butter. If you don’t have one, use two knives or your fingertips (just work quickly so the butter stays cold).
- Baking Sheet: Lined with parchment paper for easy cleanup.
- Bench Scraper or Sharp Knife: For cutting the dough into wedges. (I use a bench scraper—it makes clean cuts and is handy for transferring scones.)
- Measuring Cups & Spoons: Accurate measurements matter for scones! I like stainless steel sets for durability.
- Whisk: For mixing the glaze and combining wet ingredients.
- Small Offset Spatula or Spoon: For glazing scones—offset spatulas make spreading the glaze easy.
If you’re on a budget, you can skip the pastry cutter and use your hands—just work quickly. I’ve used a pizza cutter for slicing scones before (it works!). Keep your equipment dry and clean, especially your whisk for the glaze—powdered sugar clumps if there’s any leftover moisture. And, if you bake often, investing in a good bench scraper is worth it—it lasts for ages.
Preparation Method: Step-by-Step Maple Glazed Brown Sugar Cinnamon Scones
-
Preheat the Oven & Prep:
Preheat your oven to 400°F (205°C). Line a baking sheet with parchment paper. This keeps cleanup easy and prevents sticking. -
Mix Dry Ingredients:
In a large mixing bowl, whisk together 2 cups (250g) all-purpose flour, 1/2 cup (100g) brown sugar, 1 tablespoon cinnamon, 2 teaspoons baking powder, and 1/2 teaspoon salt. Make sure there are no lumps—sometimes brown sugar clumps, so break it up with your fingers if needed. -
Cut in the Butter:
Add 1/2 cup (115g) cold, cubed unsalted butter to the dry mix. Use a pastry cutter, box grater, or your fingertips to work the butter in until the mixture looks like coarse crumbs (pea-sized bits are perfect). The colder the butter, the flakier your scones—if it starts to melt, pop the bowl in the fridge for a few minutes. -
Combine Wet Ingredients:
In a separate bowl, whisk together 2/3 cup (160ml) heavy cream, 1 large egg, and 1 teaspoon vanilla extract. Pour this into the flour mixture. -
Mix the Dough:
Gently stir until just combined—don’t overmix! The dough should be a bit shaggy and sticky. If adding nuts or dried fruit, fold them in now. -
Shape & Chill the Dough:
Turn the dough onto a lightly floured surface. Pat it into a 7-inch (18cm) circle, about 1-inch (2.5cm) thick. Cut into 8 wedges using a sharp knife or bench scraper. If you want clean edges, wipe your knife between cuts. Transfer wedges to your prepared baking sheet, spacing them a bit apart. Chill the tray in the fridge for 10 minutes—this helps the scones hold their shape and gives you taller, flakier layers. -
Bake:
Bake for 18-22 minutes, until golden brown and firm to the touch. The tops should smell like brown sugar toast, and you’ll see a little bubbling at the edges. If your scones are browning too quickly, tent loosely with foil for the last few minutes. -
Prepare the Maple Glaze:
While the scones bake, whisk together 1 cup (120g) powdered sugar, 2 tablespoons pure maple syrup, 1-2 tablespoons milk or cream, and a pinch of salt in a small bowl. The glaze should be thick but pourable—add more milk a teaspoon at a time if needed. Taste and adjust maple syrup for sweetness. -
Glaze the Scones:
Let scones cool on the baking sheet for 10 minutes, then spread the glaze over each one while still slightly warm. The glaze will melt into the cracks and set with a glossy finish. -
Cool & Serve:
Transfer glazed scones to a wire rack to cool completely (if you can wait!). Enjoy warm or at room temp. If you’re batch baking, store cooled scones unglazed and add the maple glaze just before serving for best texture.
Pro tip: If your dough feels too dry, add a splash more cream. Too sticky? Dust with a bit of flour. Scones love you best when you handle them gently—rough mixing leads to tough scones, and nobody wants that. And trust me, the chill before baking really does make a difference (I learned that the hard way after a few flat, sad scones). Keep an eye on color and smell—those are your best guides.
Cooking Tips & Techniques for Perfect Scones
Let’s face it—scones can be a little tricky if you rush, but these maple glazed brown sugar cinnamon scones are forgiving if you follow a few tried-and-true tips.
- Cold Ingredients Are Key: Always start with cold butter and cream. If it’s a hot day, chill your mixing bowl and even your flour for a few minutes.
- Don’t Overmix: Mix just until the dough comes together. Overworking makes scones tough, not tender. Shaggy is good!
- Use the “Touch Test”: When shaping, the dough should feel soft but not sticky. If it sticks to your hands, add a light sprinkle of flour.
- Chill Before Baking: This prevents the scones from spreading and helps create those lofty, bakery-style layers. Just 10 minutes in the fridge works wonders.
- Glazing While Warm: Spread the maple glaze when the scones are warm—not hot. This lets the glaze soak in a bit but still set up nicely.
I’ll admit, my first few scones were more like pancakes (I forgot to chill the dough—lesson learned!). Timing is everything: bake just until golden, then pull them out. Multitasking is easier than you think—while the scones chill, prep your glaze and clean up. Consistency is all about gentle handling and trusting your senses (if they smell amazing and look golden, they’re probably ready). If you’re making a big batch, bake in the center of the oven for even heat—rotate the tray halfway if your oven runs hot. Honestly, once you nail these techniques, every batch comes out with that perfect crumb and irresistible glaze.
Variations & Adaptations
One of the best things about maple glazed brown sugar cinnamon scones? You can easily adapt them for different tastes and dietary needs. Here are a few tried-and-true tweaks:
- Gluten-Free Version: Swap the all-purpose flour for a 1:1 gluten-free baking blend. I’ve had great results with Bob’s Red Mill—just check that your baking powder is gluten-free too.
- Dairy-Free Adaptation: Use coconut cream in place of heavy cream and vegan butter instead of regular. The texture stays soft, and the flavor is surprisingly rich.
- Seasonal Twist: In fall, add 1/2 cup (60g) diced apple or pear, or toss in dried cranberries for a festive touch. Springtime? Try a handful of fresh blueberries.
- Nutty Scones: Stir in chopped walnuts or pecans for crunch. Toast the nuts first for deeper flavor.
- Spice It Up: Add a pinch of cardamom or nutmeg to the dough for extra warmth, or swap cinnamon for pumpkin spice blend.
- Vegan Option: Use flaxseed “egg” (1 tbsp ground flax + 2.5 tbsp water) and plant-based cream. The scones stay tender and flavorful.
I’ve played around with adding orange zest to the glaze for a fresh zing—highly recommend if you love citrus. For a chocolatey twist, sprinkle mini chocolate chips into the dough (my kids’ favorite). Allergies? Skip the nuts, use dairy-free substitutes, and check all ingredients for hidden allergens. The best part is, you can customize these scones for any occasion—for family brunches or gift baskets, I always offer a couple versions.
Serving & Storage Suggestions
These maple glazed brown sugar cinnamon scones are honestly best enjoyed fresh and slightly warm, but they keep well for a few days, too. Here’s how I like to serve and store them:
- Serving Temperature: Warm from the oven is pure bliss, but room temperature works just as well. If they’ve cooled, pop them in a 300°F (150°C) oven for 5 minutes to reheat (microwave in 10-second bursts if you’re in a rush).
- Presentation: Serve on a pretty plate with extra glaze drizzled on top. Add a sprinkle of cinnamon or chopped nuts for a Pinterest-worthy look.
- Pairings: These scones shine with a mug of coffee, chai tea, or hot cocoa. For brunch, pair with scrambled eggs or fresh fruit.
- Storage: Store glazed scones in an airtight container at room temperature for up to 2 days. For longer storage, keep unglazed scones in the fridge (up to 5 days) and glaze just before serving.
- Freezing: Freeze unglazed scones in a zip-top bag for up to 2 months. Thaw overnight and warm before glazing.
- Flavor Development: The cinnamon and brown sugar flavors mellow and deepen after a day. If you can wait, leftover scones are even better the next morning!
Pro tip: If you’re gifting scones, wrap them in parchment and tie with twine—cute and practical. For big gatherings, make a double batch and keep extras warm in a low oven. The maple glaze keeps its shine for hours, so your scones look (and taste) bakery-fresh.
Nutritional Information & Benefits
Here’s a quick look at what you’re getting with these maple glazed brown sugar cinnamon scones (per scone, based on 8 servings):
- Calories: About 320
- Fat: 15g
- Carbs: 40g
- Protein: 5g
- Sugar: 18g
The key ingredients bring their own benefits: brown sugar adds depth and moisture; cinnamon has antioxidant properties and may support blood sugar balance; maple syrup offers trace minerals and a lower glycemic index than regular sugar. If you use whole wheat flour or gluten-free blends, you can boost fiber. These scones are vegetarian, and can be made dairy-free or gluten-free with simple swaps. Nut allergies? Skip the nuts and check your baking powder. My personal take: these aren’t “health food,” but they’re wholesome, satisfying, and way better than store-bought treats.
Conclusion
Maple glazed brown sugar cinnamon scones are honestly the kind of recipe I wish I’d had years ago. They’re easy, comforting, and every bite feels like a little celebration. Whether you’re baking for family, gifting, or just treating yourself, you’ll love how quickly these come together and how much cozy comfort they deliver. Customize with your favorite add-ins, swap ingredients for dietary needs, and make them your own.
I keep coming back to this recipe because it’s reliable and always gets rave reviews. So, if you try these scones, let me know in the comments—share your twists, your baking stories, or even your kitchen fails! Pin it, bookmark it, and come back often. Here’s to homemade comfort, one scone at a time.
Happy baking—you’ve got this!
Frequently Asked Questions
Can I make these maple glazed brown sugar cinnamon scones ahead of time?
Absolutely! You can mix and shape the dough, then refrigerate it (covered) overnight. Just bake and glaze when you’re ready—fresh scones in the morning with no extra fuss.
Can I freeze the scones?
Yes, freeze unglazed scones in a zip-top bag for up to 2 months. Thaw overnight at room temp, then reheat and glaze before serving.
What if I don’t have heavy cream?
You can use half-and-half, whole milk, or even coconut cream for dairy-free. The texture will be a bit lighter, but still delicious.
How do I get my scones extra flaky?
Make sure your butter is very cold and don’t overwork the dough. Chilling the shaped wedges before baking makes a big difference in flakiness.
Can I use another glaze or skip it?
Sure! The maple glaze is classic, but you can use vanilla glaze, lemon icing, or even dust with powdered sugar. They’re tasty unglazed, but the glaze really adds that wow factor.
Pin This Recipe!
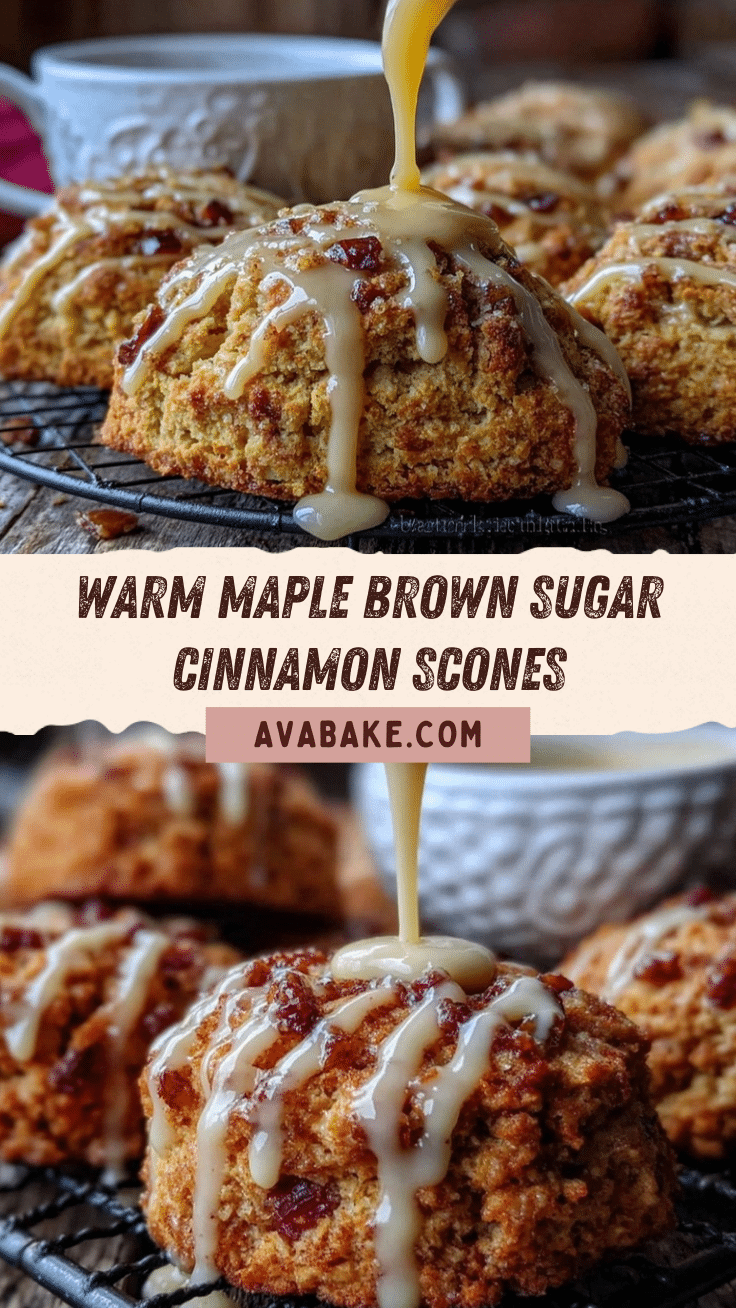
Maple Glazed Brown Sugar Cinnamon Scones
These easy homemade scones feature a cozy blend of brown sugar and cinnamon, finished with a luscious maple glaze. Perfect for chilly mornings, brunch, or gifting, they deliver bakery-style comfort in under 45 minutes.
- Prep Time: 15 minutes
- Cook Time: 20 minutes
- Total Time: 35 minutes
- Yield: 8 scones 1x
- Category: Breakfast
- Cuisine: American
Ingredients
- 2 cups (250g) all-purpose flour
- 1/2 cup (100g) light brown sugar, packed
- 1 tablespoon ground cinnamon
- 2 teaspoons baking powder
- 1/2 teaspoon salt
- 1/2 cup (115g) unsalted butter, cold and cubed
- 2/3 cup (160ml) heavy cream (or half-and-half)
- 1 large egg, room temperature
- 1 teaspoon pure vanilla extract
- 1 cup (120g) powdered sugar, sifted
- 2 tablespoons pure maple syrup
- 1–2 tablespoons milk or cream
- Pinch of salt
- Optional: 1/2 cup (60g) chopped pecans or walnuts
- Optional: 1/4 cup (35g) raisins or dried cranberries
- Optional: raw sugar for sprinkling on top
Instructions
- Preheat oven to 400°F (205°C). Line a baking sheet with parchment paper.
- In a large mixing bowl, whisk together flour, brown sugar, cinnamon, baking powder, and salt. Break up any brown sugar clumps.
- Add cold, cubed butter to the dry mix. Cut in using a pastry cutter, box grater, or fingertips until mixture resembles coarse crumbs.
- In a separate bowl, whisk together heavy cream, egg, and vanilla extract. Pour into the flour mixture.
- Gently stir until just combined. Fold in nuts or dried fruit if using.
- Turn dough onto a lightly floured surface. Pat into a 7-inch circle, about 1-inch thick. Cut into 8 wedges. Transfer to baking sheet and chill for 10 minutes.
- Bake for 18-22 minutes, until golden brown and firm to the touch. Tent with foil if browning too quickly.
- While scones bake, whisk together powdered sugar, maple syrup, milk or cream, and a pinch of salt for the glaze. Adjust consistency as needed.
- Let scones cool on the baking sheet for 10 minutes, then spread glaze over each while still slightly warm.
- Transfer glazed scones to a wire rack to cool completely. Enjoy warm or at room temperature.
Notes
For extra flakiness, keep butter and cream cold and chill dough before baking. Don’t overmix—shaggy dough yields tender scones. Glaze while warm for best absorption. Customize with nuts, dried fruit, or gluten-free/dairy-free swaps. Scones are best fresh but keep well for 2 days; freeze unglazed for longer storage.
Nutrition
- Serving Size: 1 scone
- Calories: 320
- Sugar: 18
- Sodium: 220
- Fat: 15
- Saturated Fat: 9
- Carbohydrates: 40
- Fiber: 1
- Protein: 5
Keywords: scones, maple glaze, brown sugar, cinnamon, breakfast, brunch, easy, homemade, comfort food, baked goods


