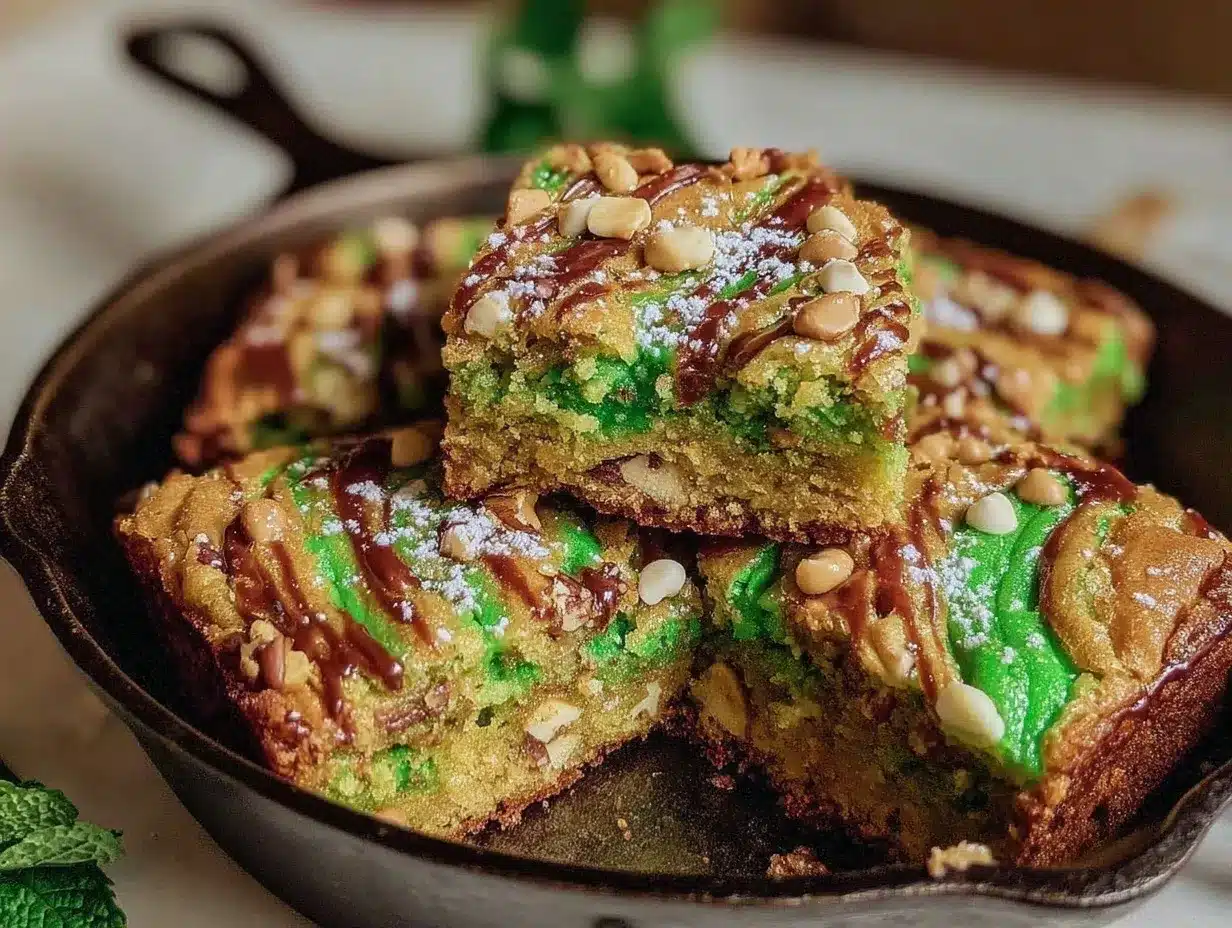
“I never thought a simple skillet could become the centerpiece of my St Patrick’s Day celebration,” my friend Maggie confessed last March, as she handed me a warm, gooey square of what she called her “secret weapon” dessert. It was a chilly Thursday afternoon, and honestly, I was just popping in for a quick cup of tea. But the moment I bit into those skillet bars, with their rich chocolate swirls melting on my tongue, I was hooked. Maybe you’ve been there—expecting something ordinary and ending up with a taste that stops you in your tracks. The bars had this perfect balance of chewy, soft, and just a hint of minty sweetness, which was totally unexpected but so welcomed.
The story behind these irresistible St Patrick’s Day skillet bars with gooey chocolate swirls is as casual as it gets. Maggie whipped them up while distracted—she’d accidentally grabbed the wrong chocolate (thank goodness!)—and instead of a mess, she got magic. That cracked bowl on the counter, the half-melted chocolate chips spilled on the floor, and the timer that rang late because she was caught up catching up with me, all add to the charm of this recipe. It’s the kind of dessert that makes you want to gather around the stove with friends or family, sharing stories and sneaking bites between laughs.
These bars aren’t just about luck or tradition; they’re about the simple joy of baking something that feels festive yet effortless. Whether you’re a seasoned baker or a kitchen newbie, this recipe will bring a touch of cozy comfort and a splash of green to your St Patrick’s Day table. So let me tell you why this skillet treat stayed with me—and why you might just find yourself baking it again and again.
Why You’ll Love This Recipe
- Quick & Easy: Comes together in under 30 minutes, perfect for last-minute St Patrick’s Day celebrations or unexpected guests.
- Simple Ingredients: Uses pantry staples plus a few festive touches like mint extract and green sprinkles—no fancy shopping required.
- Perfect for Festive Occasions: Brings a cheerful St Patrick’s vibe to brunches, potlucks, or cozy family dinners without any fuss.
- Crowd-Pleaser: Kids, adults, and even picky eaters have given this recipe rave reviews. The gooey chocolate swirls are a universal hit!
- Unbelievably Delicious: The chewy texture paired with melty chocolate and subtle mint notes hits that comfort-food sweet spot.
This isn’t just another chocolate bar recipe—it’s the one that combines the cozy, rustic feel of skillet baking with the indulgence of chocolate swirls that stay gooey long after baking. The trick lies in the way the chocolate is folded in, creating pockets of melted delight with every bite. And the mint? It’s just enough to remind you of the holiday without overpowering the chocolate’s richness.
Honestly, every time I make these bars, I catch myself closing my eyes after the first bite, savoring the nostalgic yet fresh flavor combo. Whether you’re looking to impress guests or treat yourself, this recipe hits the sweet spot with minimal effort and maximum smiles.
What Ingredients You Will Need
This recipe uses simple, wholesome ingredients to deliver bold flavor and satisfying texture without the fuss. Most of these you’ll probably already have in your pantry or fridge, and the few festive additions bring a perfect St Patrick’s Day touch.
- For the Base:
- 1 cup (225g) unsalted butter, softened (adds richness and moisture)
- 1 cup (200g) granulated sugar
- 1 cup (220g) packed light brown sugar (for extra chewiness)
- 2 large eggs, room temperature
- 1 teaspoon pure vanilla extract (I prefer Nielsen-Massey for its natural aroma)
- 2 ½ cups (315g) all-purpose flour (King Arthur’s works great for consistent results)
- 1 teaspoon baking soda
- ½ teaspoon salt
- ½ teaspoon peppermint extract (optional, but highly recommended for that minty St Patrick’s twist)
- Chocolate Swirls:
- 1 cup (175g) semi-sweet chocolate chips (Ghirardelli if you want that smooth melt)
- ½ cup (90g) milk chocolate chips (adds creaminess)
- Festive Toppings:
- Green sanding sugar or sprinkles for garnish (optional, but fun!)
Substitution tips: If you’re gluten-free, almond flour is a decent alternative though the texture will differ slightly. For dairy-free baking, swap butter with your favorite plant-based spread and use dairy-free chocolate chips. And if peppermint extract isn’t your thing, try orange zest for a citrusy twist!
Equipment Needed
- 10-12 inch cast iron or oven-safe skillet – the star of the show for even baking and rustic presentation.
- Mixing bowls – a medium and a large one work well.
- Electric mixer or sturdy whisk – to cream the butter and sugars properly.
- Rubber spatula – for folding in the flour and chocolate chips gently.
- Measuring cups and spoons – accuracy matters, especially for baking soda and salt.
- Oven mitts – because that skillet gets seriously hot!
If you don’t have a cast iron skillet, a heavy oven-safe baking dish (like a ceramic or glass pie plate) will do, but keep an eye on baking times as they can vary. I sometimes use a non-stick skillet when I’m in a rush, though the texture isn’t quite the same. A good tip: seasoning your cast iron regularly keeps your bars from sticking and makes cleanup easier.
Preparation Method
- Preheat your oven to 350°F (175°C). Grease your 10-12 inch cast iron skillet with butter or non-stick spray. This usually takes about 5 minutes including prepping your ingredients.
- Cream the butter and sugars. In a large bowl, beat 1 cup softened unsalted butter with 1 cup granulated sugar and 1 cup light brown sugar until fluffy and pale, about 3-4 minutes using an electric mixer or vigorous whisking. This step is key for that chewy texture.
- Add eggs and extracts. Beat in 2 large eggs, one at a time, then stir in 1 teaspoon vanilla extract and ½ teaspoon peppermint extract. The batter will smell heavenly at this point.
- Mix dry ingredients separately. In a medium bowl, whisk together 2 ½ cups all-purpose flour, 1 teaspoon baking soda, and ½ teaspoon salt. This helps distribute the leavening evenly.
- Combine wet and dry. Gradually fold the dry ingredients into the wet mixture using a rubber spatula until just combined. Don’t overmix or you risk tough bars.
- Add chocolate chips. Fold in 1 cup semi-sweet and ½ cup milk chocolate chips, saving a handful to sprinkle on top for extra gooey spots.
- Transfer batter to skillet. Spread evenly with the spatula. Then, sprinkle the reserved chocolate chips on top and lightly press them into the batter.
- Swirl the chocolate. Use a butter knife or skewer to gently swirl the chocolate chips on top, creating those beautiful gooey pockets when baked.
- Bake for 25-30 minutes. Keep a close eye starting at 22 minutes. Bars should be golden around edges but still slightly soft in the center. A toothpick inserted in the middle may come out with a few moist crumbs—that’s perfect!
- Cool slightly. Let the skillet bars cool in the pan for 15 minutes before slicing. This helps them set up but keeps the chocolate delightfully gooey.
- Garnish and serve. Sprinkle with festive green sanding sugar or sprinkles if you like, then cut into squares right in the skillet for that rustic charm.
Pro tip: If you find the bars baking unevenly, rotate the skillet halfway through baking. And don’t skip the peppermint extract—it’s subtle but makes the bars uniquely festive.
Cooking Tips & Techniques
When making these skillet bars, timing is everything. Overbaking is a common pitfall; it dries out the bars and kills that gooey chocolate magic. Set a timer and start checking at 22 minutes. The center should be soft but not raw—think fudgy brownie, not cake.
Always use room temperature eggs and softened butter for the best creaming action. Cold ingredients can make mixing difficult and produce dense bars. I once tried with cold eggs, and my bars were disappointingly flat and crumbly—lesson learned!
Swirling the chocolate chips on top before baking creates those pockets of molten chocolate that are the signature feature here. Don’t skip this step or gently folding all chips into the batter; it won’t have the same gooey texture.
Another tip: if you want to multitask, prepare the batter ahead and refrigerate it for up to 24 hours. Bring it to room temperature before baking for best results. This can help with busy schedules during festive prep.
Finally, let the bars cool a bit before slicing. Slicing while too hot risks messy squares, but waiting too long can firm them up too much. Fifteen minutes is usually the sweet spot.
Variations & Adaptations
- Gluten-Free Version: Swap all-purpose flour with a 1:1 gluten-free baking flour blend. Expect a slightly softer texture but equally delicious.
- White Chocolate and Matcha Twist: Replace the chocolate chips with white chocolate chunks and add 1 tablespoon of matcha powder to the dry ingredients for a green tea flair that’s subtle and sophisticated.
- Nutty Upgrade: Fold in ½ cup chopped toasted pecans or walnuts for crunch. Toasting nuts beforehand enhances their flavor and keeps them from going soggy.
- Vegan Adaptation: Use flax eggs (2 tablespoons ground flaxseed + 6 tablespoons water) instead of eggs, vegan butter, and dairy-free chocolate chips. Baking time may increase slightly.
I tried the nutty version last year when I had extra pecans from a holiday gift basket. It added a lovely texture contrast and made the bars feel even more indulgent—still the same quick, easy prep but with a delightful twist.
Serving & Storage Suggestions
These skillet bars are best served warm or at room temperature. The chocolate is at its gooey peak shortly after baking but they also hold up well if left out on the counter for a few hours during a party. For a festive touch, serve with a scoop of vanilla ice cream or a dollop of whipped cream— the mint and chocolate combo pairs beautifully with creamy cold toppings.
To store, cover the skillet tightly with plastic wrap or transfer bars to an airtight container. They keep well at room temperature for up to 3 days. For longer storage, refrigerate up to 5 days or freeze for up to 3 months. When reheating, pop individual bars in the microwave for 15-20 seconds to revive that melty chocolate goodness.
Flavors do develop over time; chilling the bars overnight often intensifies the mint and chocolate notes, making leftovers just as tempting as fresh ones.
Nutritional Information & Benefits
Each skillet bar (assuming 12 servings) contains approximately:
| Calories | 280 |
|---|---|
| Fat | 15g |
| Carbohydrates | 35g |
| Protein | 3g |
| Sugar | 22g |
While these bars are a treat, they do offer some benefits from key ingredients. Butter provides fat-soluble vitamins like A and E, and chocolate chips contain antioxidants from cocoa. The peppermint extract can aid digestion and freshen breath, which is a tiny bonus after a rich dessert.
This recipe is naturally gluten-containing unless modified, and includes dairy and eggs. For those with allergies, the substitutions mentioned earlier keep it inclusive without sacrificing flavor.
From a wellness perspective, I appreciate that this recipe balances indulgence with portion control—baking in a skillet means you can easily slice into smaller pieces if you want just a taste of that St Patrick’s Day spirit.
Conclusion
If you’re searching for a dessert that’s both festive and fuss-free, these irresistible St Patrick’s Day skillet bars with gooey chocolate swirls fit the bill perfectly. They bring together familiar flavors with a special twist that makes every bite feel a little celebration.
Feel free to customize the mint intensity, chocolate types, or add your favorite mix-ins. I love this recipe because it’s flexible, approachable, and always a crowd-pleaser—whether for a casual family night or a lively holiday gathering.
Give it a try, and I’d love to hear how you make it your own! Leave a comment below sharing your favorite variation or that moment when you realized these bars were a keeper. Happy baking and may your St Patrick’s Day be as sweet as these skillet delights!
FAQs
Can I make these skillet bars ahead of time?
Yes! You can prepare the batter a day in advance and refrigerate it. Just bring it to room temperature before baking. The baked bars also keep well for several days when stored properly.
What if I don’t have peppermint extract?
No worries! You can omit it or substitute with vanilla extract or a small amount of orange zest for a different but lovely flavor profile.
Can I use a regular baking pan instead of a skillet?
Absolutely. Use a 9×13 inch baking dish or similar oven-safe pan. Just keep an eye on baking time as it might vary slightly.
How do I keep the chocolate swirls gooey and not melted completely?
Swirling the chocolate chips on top rather than mixing all of them in the batter helps maintain gooey pockets. Also, avoid overbaking to keep the texture soft and melty.
Are these bars suitable for kids?
Definitely! They’re a hit with kids and adults alike. Just adjust the peppermint extract amount if you want a milder mint flavor for little ones.
Pin This Recipe!
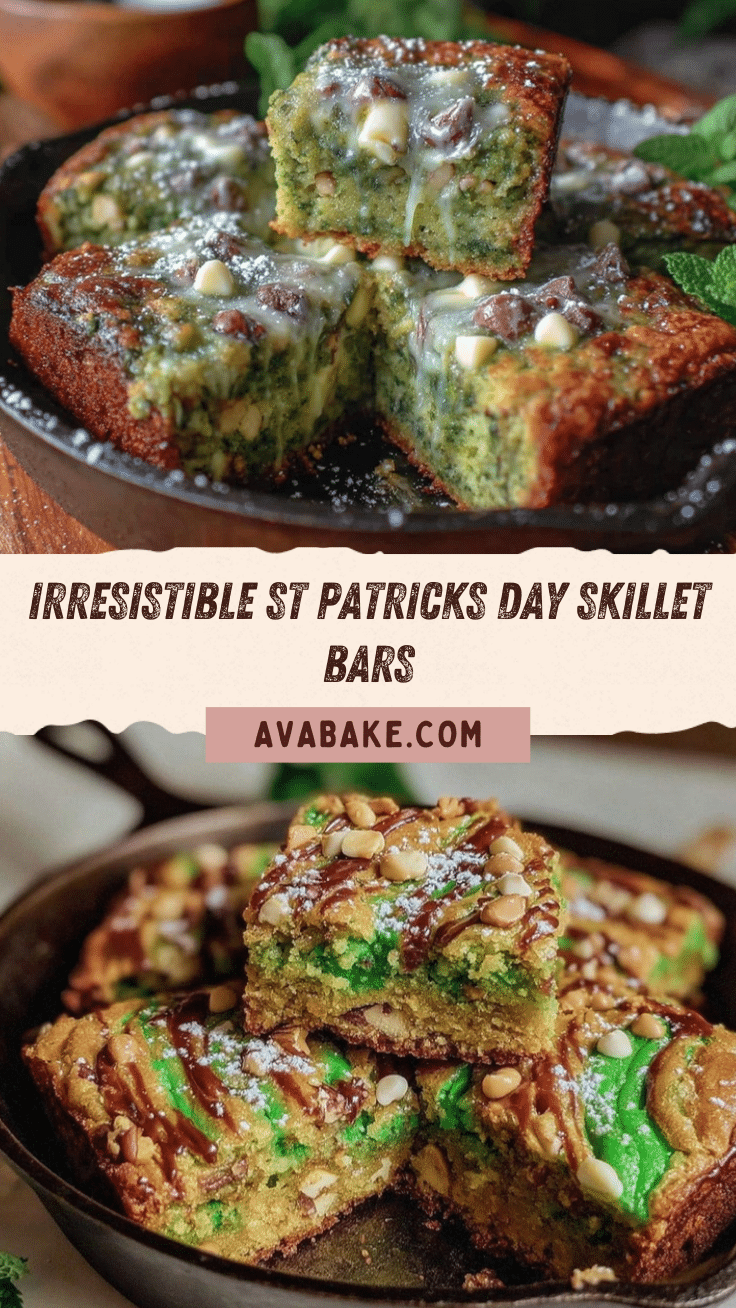
Irresistible St Patrick’s Day Skillet Bars Recipe with Gooey Chocolate Swirls

These skillet bars combine chewy texture with gooey chocolate swirls and a subtle minty sweetness, perfect for festive St Patrick’s Day celebrations. Easy to make and crowd-pleasing, they bring cozy comfort and a splash of green to your table.
- Prep Time: 10 minutes
- Cook Time: 25-30 minutes
- Total Time: 35-40 minutes
- Yield: 12 servings 1x
- Category: Dessert
- Cuisine: American
Ingredients
- 1 cup (225g) unsalted butter, softened
- 1 cup (200g) granulated sugar
- 1 cup (220g) packed light brown sugar
- 2 large eggs, room temperature
- 1 teaspoon pure vanilla extract
- 2 ½ cups (315g) all-purpose flour
- 1 teaspoon baking soda
- ½ teaspoon salt
- ½ teaspoon peppermint extract (optional)
- 1 cup (175g) semi-sweet chocolate chips
- ½ cup (90g) milk chocolate chips
- Green sanding sugar or sprinkles for garnish (optional)
Instructions
- Preheat your oven to 350°F (175°C). Grease your 10-12 inch cast iron skillet with butter or non-stick spray.
- In a large bowl, beat 1 cup softened unsalted butter with 1 cup granulated sugar and 1 cup light brown sugar until fluffy and pale, about 3-4 minutes using an electric mixer or vigorous whisking.
- Beat in 2 large eggs, one at a time, then stir in 1 teaspoon vanilla extract and ½ teaspoon peppermint extract.
- In a medium bowl, whisk together 2 ½ cups all-purpose flour, 1 teaspoon baking soda, and ½ teaspoon salt.
- Gradually fold the dry ingredients into the wet mixture using a rubber spatula until just combined.
- Fold in 1 cup semi-sweet and ½ cup milk chocolate chips, saving a handful to sprinkle on top.
- Spread batter evenly in the skillet. Sprinkle reserved chocolate chips on top and lightly press them into the batter.
- Use a butter knife or skewer to gently swirl the chocolate chips on top.
- Bake for 25-30 minutes, starting to check at 22 minutes. Bars should be golden around edges but still slightly soft in the center.
- Let the skillet bars cool in the pan for 15 minutes before slicing.
- Sprinkle with green sanding sugar or sprinkles if desired, then cut into squares and serve.
Notes
Rotate the skillet halfway through baking if bars bake unevenly. Use room temperature eggs and softened butter for best texture. Swirl chocolate chips on top to maintain gooey pockets. Prepare batter ahead and refrigerate up to 24 hours, bring to room temperature before baking. Let bars cool 15 minutes before slicing to keep chocolate gooey.
Nutrition
- Serving Size: 1 bar (assuming 12 b
- Calories: 280
- Sugar: 22
- Fat: 15
- Carbohydrates: 35
- Protein: 3
Keywords: St Patrick’s Day, skillet bars, chocolate swirls, mint, easy dessert, festive, quick baking, crowd-pleaser