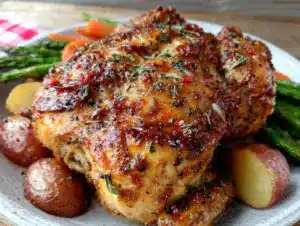
“Can you believe I ended up making Easter dinner with my Instant Pot for the first time last spring?” I asked my friend as we scrambled around my tiny kitchen. Honestly, I wasn’t expecting much from that clunky gadget that had been gathering dust on the counter. But let me tell you, the way that chicken came out with those fresh spring vegetables—wow. The aroma alone pulled me out of my usual rushed routine. I remember dropping the green beans right on the floor mid-prep (classic me), but somehow, the whole meal came together in under an hour, warm and inviting like a cozy hug. Maybe you’ve been there, staring at a fridge full of ingredients and wondering how to make something special without the fuss. This Instant Pot Easter chicken with spring vegetables recipe became my secret weapon for a comforting yet effortless dinner that felt like a celebration at home.
What made it stick with me wasn’t just the convenience—it was the way the chicken stayed juicy, and those crisp-tender veggies brought that perfect pop of spring freshness. I was skeptical at first, you know? Cooking chicken in a pressure cooker always sounded tricky. But this recipe nailed the balance between simple, wholesome ingredients and flavor that hits all the right notes. Plus, it’s the kind of dish you can tweak depending on what’s fresh at the market or what you have on hand. Honestly, every time I make it, I find myself smiling at how something so simple can feel so cozy and festive. So, if you’re curious about making a no-fuss, heartwarming Easter dinner (or just craving some springtime comfort food), this might be just what you need.
Why You’ll Love This Recipe
This Instant Pot Easter chicken recipe has earned a permanent spot in my kitchen lineup, and here’s why you might find yourself reaching for it again and again:
- Quick & Easy: Ready in about 45 minutes, it’s perfect for busy spring days when you want a meal that’s both satisfying and swift.
- Simple Ingredients: You don’t need a fancy shopping list—just fresh chicken, vibrant spring veggies, and a handful of pantry staples.
- Perfect for Spring Gatherings: Whether it’s a casual family dinner or an Easter potluck, this dish brings a cozy, seasonal vibe to the table.
- Crowd-Pleaser: I’ve tested this recipe with kids and adults alike, and it never fails to get compliments (even from picky eaters).
- Unbelievably Delicious: Thanks to the Instant Pot’s magic, the chicken stays juicy, and the vegetables keep a lovely crunch and vibrant color.
What really sets this recipe apart is the gentle layering of flavors—think garlic, fresh herbs, and a splash of lemon juice mingling with the natural sweetness of spring vegetables. I like to add a little twist sometimes, like swapping in asparagus for green beans or tossing in baby potatoes for extra heartiness. The technique is straightforward but thoughtful, so it’s more than just tossing everything in the pot. This recipe has a rhythm that makes cooking feel less like a chore and more like a small celebration. I mean, you might even find yourself looking forward to making it again (and again!).
What Ingredients You Will Need
This recipe uses simple, wholesome ingredients to deliver bold flavor and satisfying texture without the fuss. Most of these are pantry staples or fresh finds from your local market, and they come together to create a meal that’s both comforting and bright.
- Chicken: 1 whole chicken (about 3-4 pounds/1.4-1.8 kg), patted dry
- Salt and Pepper: For seasoning the chicken generously
- Olive Oil: 2 tablespoons, for browning
- Garlic: 4 cloves, minced (adds depth and warmth)
- Fresh Herbs: 2 teaspoons fresh thyme leaves and 2 teaspoons fresh rosemary, chopped (fresh is best for bright flavor)
- Chicken Broth: 1 cup (240 ml), homemade or low-sodium store-bought recommended
- Lemon: 1 medium, zested and juiced for that fresh, tangy lift
- Spring Vegetables:
- 1 cup green beans, trimmed (or asparagus spears, trimmed)
- 1 cup baby carrots, peeled
- 1 cup baby potatoes, halved (optional, for more heartiness)
- 1/2 cup frozen peas (adds a pop of sweetness, added at the end)
- Butter: 2 tablespoons, unsalted, for finishing (optional but recommended for richness)
Ingredient tips: I usually pick up organic chicken when I can, and for broth, I swear by Pacific Foods brand—rich and clean-tasting. If you want a dairy-free version, just skip the butter or use a plant-based alternative. You can swap potatoes with parsnips or celeriac for a seasonal twist, too.
Equipment Needed
- Instant Pot or Electric Pressure Cooker: This recipe is designed specifically for the Instant Pot, but any similar pressure cooker will do.
- Tongs: Helpful for handling the hot chicken safely when browning and moving it around.
- Wooden Spoon or Silicone Spatula: For stirring garlic and deglazing the pot.
- Measuring Cups and Spoons: For accurate broth and seasoning measurements.
- Cutting Board and Chef’s Knife: For prepping vegetables and herbs.
If you don’t have an Instant Pot, a heavy-bottomed Dutch oven with a lid can work for a stovetop adaptation (though cook times will change). For budget-friendly options, the Instant Pot Duo 6-quart model is a reliable classic. Pro tip: Keep your Instant Pot clean and ready by wiping the sealing ring and inner pot after each use to avoid lingering flavors.
Preparation Method
- Prep the Chicken: Pat the whole chicken dry with paper towels to help the skin crisp better. Season generously all over with salt and pepper, including inside the cavity. This step took me a while to get used to—don’t skip the inside seasoning; it makes a difference! (About 5 minutes)
- Sauté Aromatics: Set your Instant Pot to “Sauté” mode and heat the olive oil. Once hot, add the minced garlic and fresh herbs. Stir for about 30 seconds until fragrant but not browned. Watch closely here so the garlic doesn’t burn—it can turn bitter fast. (2 minutes)
- Braise the Chicken: Place the whole chicken breast-side down in the pot. Let it brown without moving it for 4-5 minutes until golden. Carefully flip and brown the other side for another 4 minutes. This step locks in flavor and texture. Use tongs and be cautious of hot oil splatters! (10 minutes total)
- Add Liquids and Veggies: Pour in the chicken broth, lemon juice, and lemon zest. Use a wooden spoon to scrape any browned bits off the bottom—this prevents the dreaded “burn” warning on the Instant Pot. Nestle the baby carrots, green beans, and baby potatoes around the chicken. (5 minutes)
- Pressure Cook: Lock the lid and set the vent to sealing. Select “Manual” or “Pressure Cook” on high for 25 minutes. The Instant Pot will take about 10 minutes to come to pressure before the timer starts. (Total 35 minutes including pressure build)
- Natural Release: When cooking finishes, let the pressure release naturally for 10 minutes, then carefully quick-release any remaining pressure. Open the lid away from your face to avoid steam burns. (10-15 minutes)
- Add Peas and Finish: Stir in the frozen peas and butter. Close the lid and let sit on “Keep Warm” for 5 minutes to warm the peas and melt the butter into a silky sauce. (5 minutes)
- Rest and Serve: Carefully remove the chicken to a serving platter. Let it rest for 5 minutes before carving to keep juices locked in. Arrange the vegetables alongside the chicken and spoon some of the cooking liquid over the top. (5 minutes)
Pro tip: If your Instant Pot gives a burn message, it usually means the bottom wasn’t deglazed well. Just add a little more broth and scrape again before pressure cooking. Also, don’t rush the natural pressure release—it helps keep the chicken tender.
Cooking Tips & Techniques
Cooking chicken in the Instant Pot can be intimidating at first, but a few tips can make it foolproof:
- Dry the Chicken Well: Patting the chicken completely dry before searing helps achieve that golden skin rather than a soggy one. I learned this the hard way after a few pale chickens!
- Don’t Skip Browning: Searing locks in flavor and improves texture. It takes a little extra time but is totally worth it.
- Layer Vegetables Smartly: Place firmer veggies like carrots and potatoes at the bottom where heat is direct, and more delicate ones like green beans on top. This keeps everything perfectly cooked.
- Use Fresh Herbs: Fresh thyme and rosemary add a bright, aromatic note that dried herbs just can’t match here.
- Timing Is Key: Pressure cooking times vary by size. For a 3-4 pound chicken, 25 minutes works well. Larger birds might need a few extra minutes, but be cautious not to overcook.
- Natural Pressure Release: This step helps the meat fibers relax, keeping the chicken juicy and tender.
Once, I rushed the release and ended up with slightly dry chicken—lesson learned! Also, when stirring in frozen peas at the end, don’t worry about overcooking; a few minutes on keep warm is just enough.
Variations & Adaptations
This cozy Instant Pot Easter chicken recipe is pretty flexible, so you can adjust it to your taste or dietary needs:
- Low-Carb Version: Skip the baby potatoes and add more green beans or zucchini for a lighter meal.
- Herb Variations: Swap thyme and rosemary for tarragon or sage for a different flavor profile that still screams spring.
- Spicy Twist: Add a pinch of red pepper flakes to the garlic and herb sauté for a gentle kick.
- Allergen-Friendly: Use coconut oil instead of butter for a dairy-free finish, and ensure broth is gluten-free if needed.
- Vegetarian Adaptation: Replace chicken with firm tofu or seitan and cook the vegetables with vegetable broth for a spring vegetable stew feel.
Personally, I tried adding lemon zest right into the broth and also squeezed some fresh lemon juice over the plated dish for a bright finish. Both ways were delicious but in different ways—one deeper and infused, the other fresh and zesty. Feel free to experiment until you find your favorite!
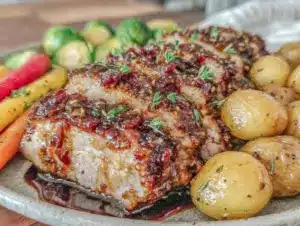
Serving & Storage Suggestions
This Instant Pot Easter chicken shines best served warm, straight from the pot, with a little of the cooking liquid drizzled over the top. The veggies retain their color and snap, making for a beautiful presentation that’s as inviting as it is tasty. I like to pair it with a fresh spring salad or crusty bread to soak up the juices.
Leftovers? No worries! Store cooled chicken and vegetables in airtight containers in the refrigerator for up to 3 days. To reheat, gently warm in the microwave or a low oven (about 300°F/150°C) covered loosely with foil to keep everything moist. Flavors actually deepen after a day, so sometimes I make this ahead for an even tastier second meal.
For longer storage, freeze portions separately in freezer-safe containers for up to 3 months. Thaw overnight in the fridge before reheating. Just be mindful that potatoes might soften a bit more after freezing.
Nutritional Information & Benefits
One serving of this cozy Instant Pot Easter chicken with spring vegetables (about 1/6 of the recipe) roughly contains:
| Nutrient | Amount |
|---|---|
| Calories | 320 kcal |
| Protein | 35 g |
| Fat | 14 g |
| Carbohydrates | 12 g |
| Fiber | 3 g |
This dish is a great source of lean protein from the chicken and fiber from the fresh vegetables, which helps keep you full and satisfied. The lemon and herbs add antioxidants and vitamin C, supporting immune health—a nice bonus during springtime. If you swap potatoes for more vegetables, you can lower the carb content, making it suitable for low-carb diets. Just a heads-up: this recipe contains garlic and butter, which can be avoided or substituted if you have allergies or sensitivities.
From my wellness perspective, this meal strikes a balance between nourishing comfort food and fresh, light flavors—perfect for spring’s transition.
Conclusion
If you’re looking for a cozy, flavorful dinner that fits into a busy spring schedule, this Instant Pot Easter chicken with spring vegetables deserves a spot on your table. It’s the kind of recipe that feels thoughtful without being complicated, and the fresh, bright veggies bring a lightness that keeps it from feeling heavy. I appreciate how easy it is to customize, whether you want to swap in your favorite herbs or adjust the veggies to what’s fresh at the market.
Honestly, this recipe is a keeper for me because it hits that sweet spot of comfort and convenience—I love how it fills the kitchen with warmth and fresh aromas, making any evening feel a little more special. Give it a try, and please share your own twists or tips in the comments. I’m always excited to hear how you make it your own!
Happy cooking and cozy dining!
FAQs
Can I use chicken thighs instead of a whole chicken?
Absolutely! Bone-in, skin-on chicken thighs work well and may even cook faster. Adjust pressure cooking time to about 15-18 minutes.
What if I don’t have fresh herbs? Can I use dried?
Yes, but use about one-third the amount since dried herbs are more concentrated. Add them during the sauté step for best flavor.
Can I prepare this recipe ahead of time?
You can chop vegetables and season the chicken a day ahead, then refrigerate separately. Cook everything fresh when ready for best results.
Is it possible to make this gluten-free?
Yes, as long as you use gluten-free chicken broth and avoid any seasoning blends with gluten, this recipe is naturally gluten-free.
How do I know when the chicken is fully cooked?
The Instant Pot timing is designed for safe, fully cooked chicken, but if in doubt, use a meat thermometer—the internal temperature should reach 165°F (74°C).
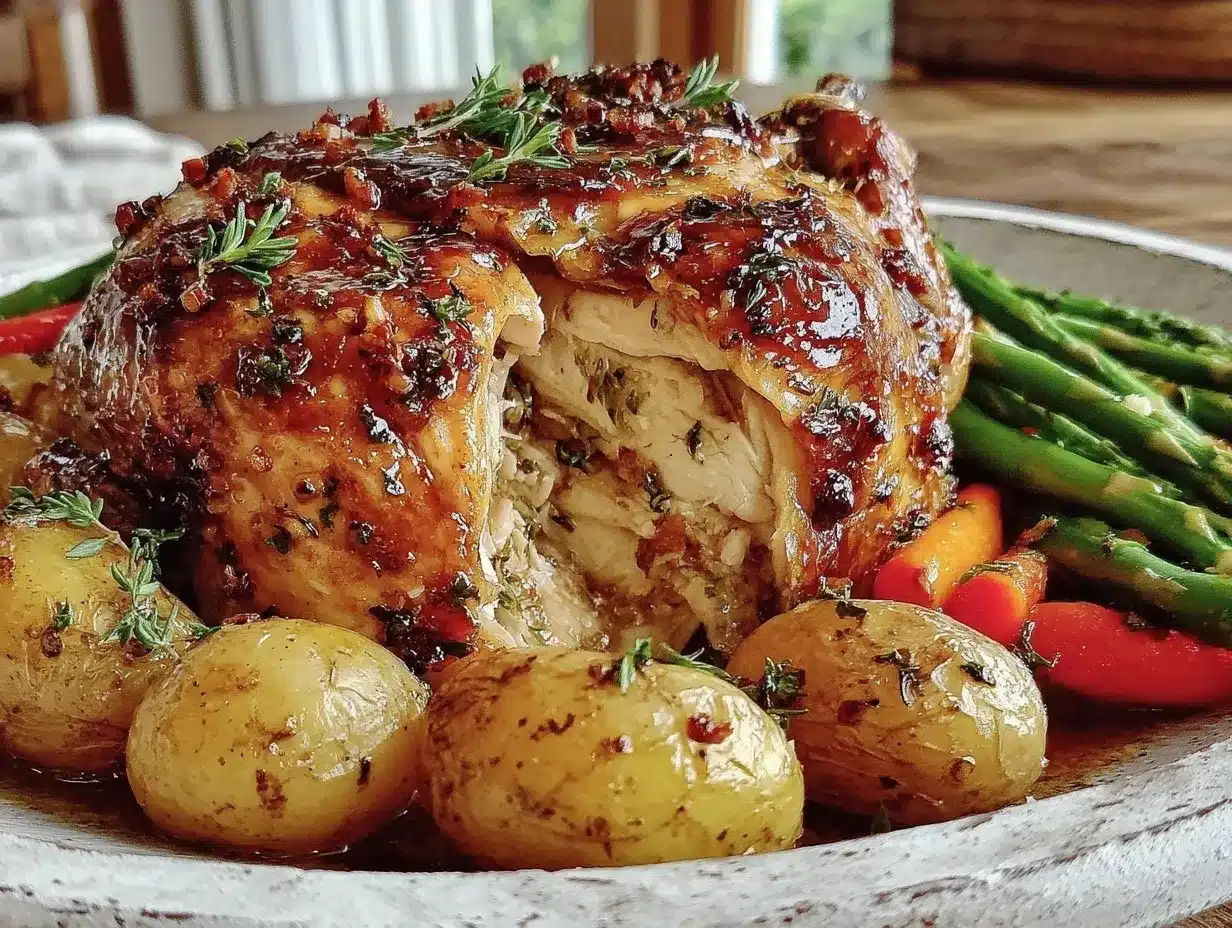
Pin This Recipe!
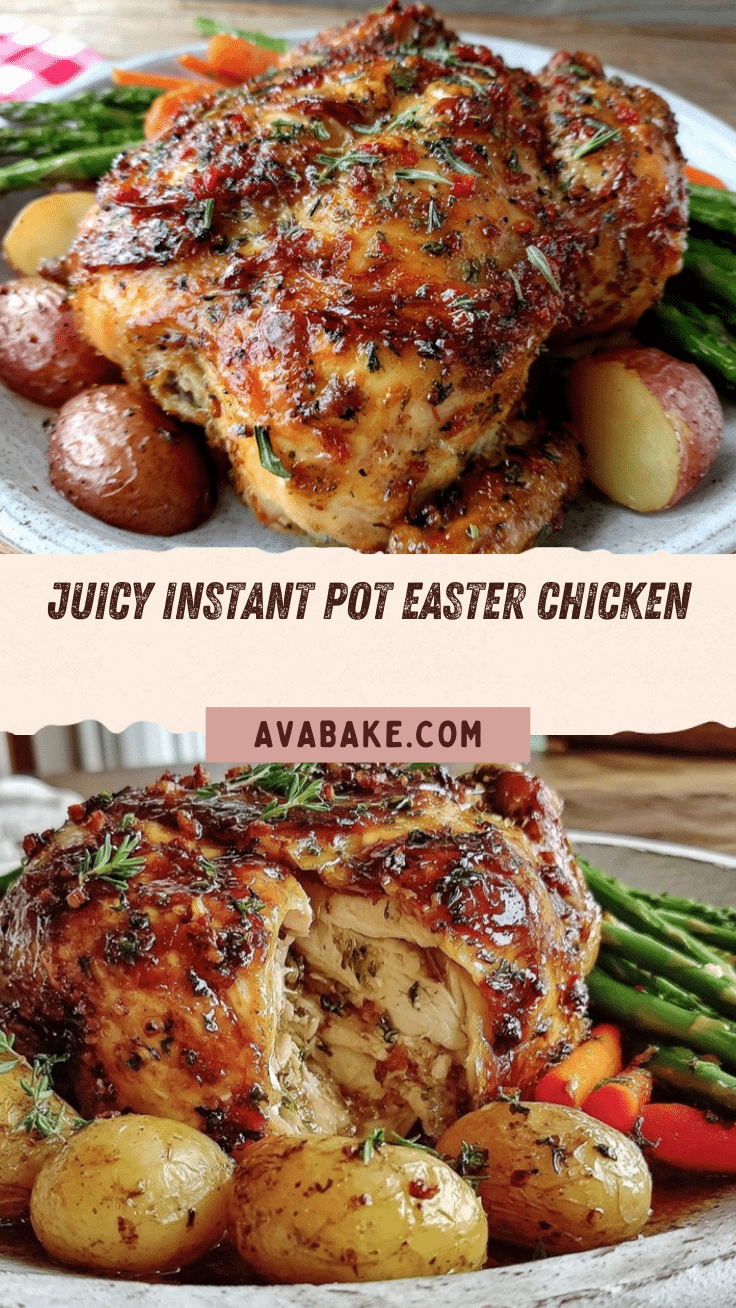
Instant Pot Easter Chicken Recipe Easy Cozy Spring Vegetables Dinner

A cozy and easy Instant Pot recipe featuring juicy whole chicken and crisp-tender spring vegetables, perfect for a quick and festive Easter dinner.
- Prep Time: 15 minutes
- Cook Time: 30 minutes
- Total Time: 45 minutes
- Yield: 6 servings 1x
- Category: Main Course
- Cuisine: American
Ingredients
- 1 whole chicken (about 3–4 pounds/1.4–1.8 kg), patted dry
- Salt and pepper, for seasoning
- 2 tablespoons olive oil
- 4 cloves garlic, minced
- 2 teaspoons fresh thyme leaves
- 2 teaspoons fresh rosemary, chopped
- 1 cup chicken broth (240 ml), homemade or low-sodium store-bought
- 1 medium lemon, zested and juiced
- 1 cup green beans, trimmed (or asparagus spears, trimmed)
- 1 cup baby carrots, peeled
- 1 cup baby potatoes, halved (optional)
- 1/2 cup frozen peas
- 2 tablespoons unsalted butter (optional)
Instructions
- Pat the whole chicken dry with paper towels and season generously all over with salt and pepper, including inside the cavity.
- Set Instant Pot to ‘Sauté’ mode and heat olive oil. Add minced garlic and fresh herbs; stir for about 30 seconds until fragrant but not browned.
- Place the whole chicken breast-side down in the pot and brown for 4-5 minutes until golden. Flip and brown the other side for another 4 minutes.
- Pour in chicken broth, lemon juice, and lemon zest. Scrape browned bits off the bottom with a wooden spoon. Nestle baby carrots, green beans, and baby potatoes around the chicken.
- Lock the lid and set vent to sealing. Select ‘Manual’ or ‘Pressure Cook’ on high for 25 minutes. Allow about 10 minutes for the pot to come to pressure.
- Let the pressure release naturally for 10 minutes, then quick-release any remaining pressure. Open lid carefully.
- Stir in frozen peas and butter. Close lid and let sit on ‘Keep Warm’ for 5 minutes to warm peas and melt butter.
- Remove chicken to a serving platter and let rest for 5 minutes before carving. Arrange vegetables alongside and spoon some cooking liquid over the top.
Notes
Pat chicken dry before searing for crispy skin. Deglaze pot well to avoid burn warnings. Use natural pressure release to keep chicken juicy. Frozen peas added at the end prevent overcooking. Butter can be substituted with plant-based alternative for dairy-free version.
Nutrition
- Serving Size: About 1/6 of the who
- Calories: 320
- Fat: 14
- Carbohydrates: 12
- Fiber: 3
- Protein: 35
Keywords: Instant Pot, Easter chicken, spring vegetables, pressure cooker, easy dinner, cozy meal, healthy chicken recipe