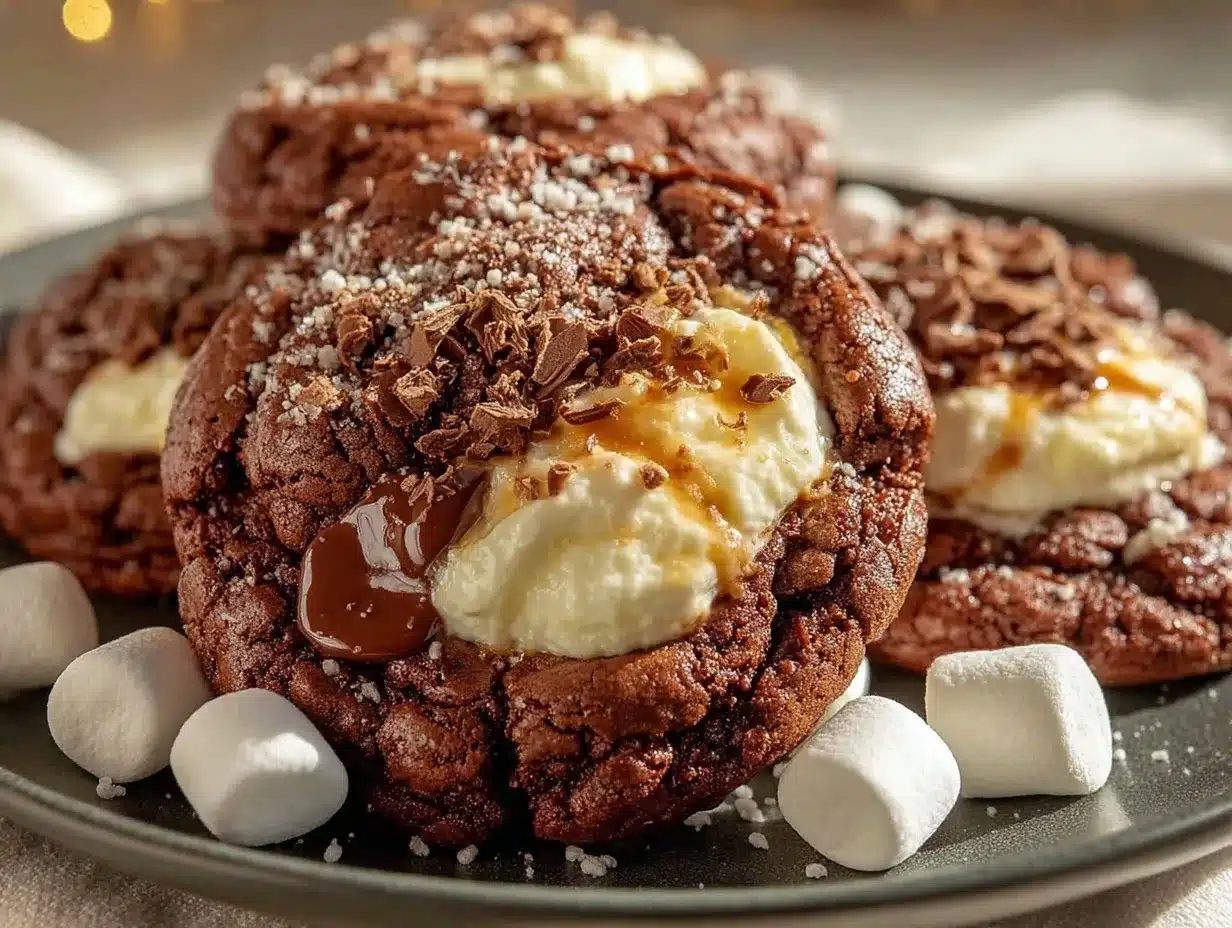
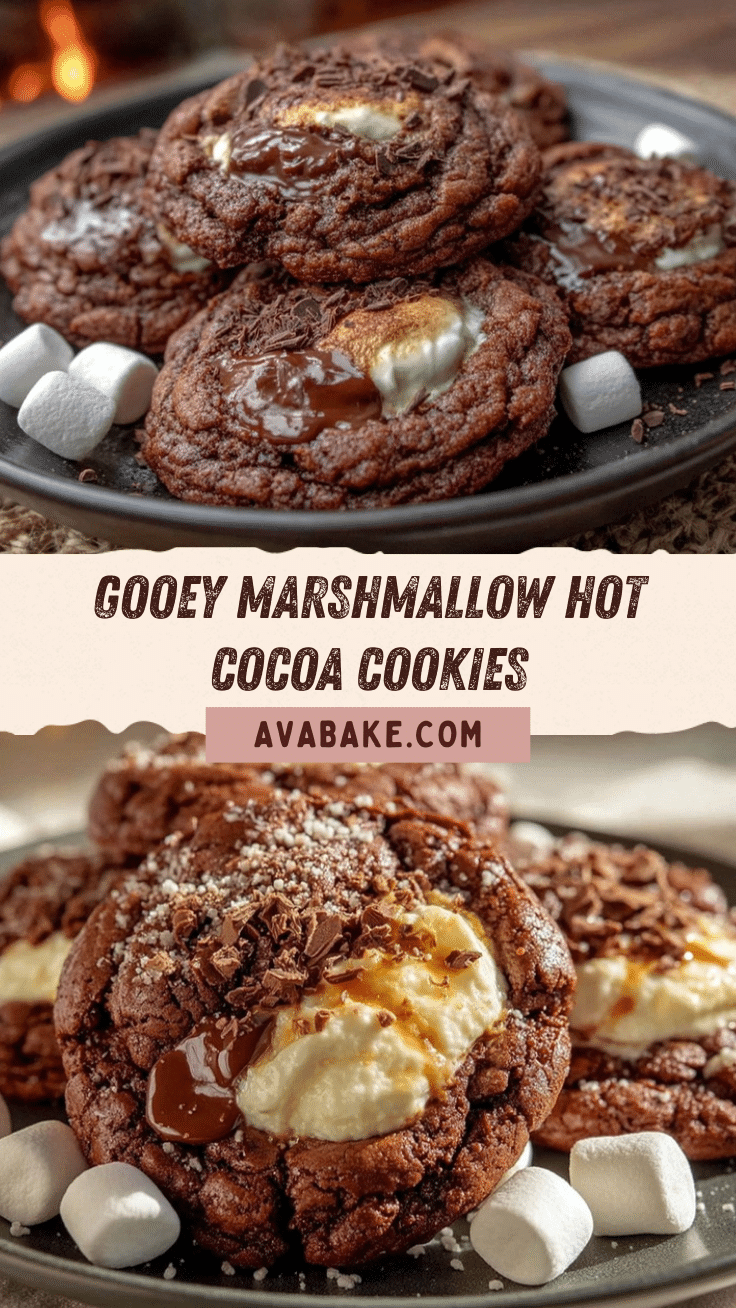
There’s nothing quite like the way rich chocolate and toasted marshmallow scents fill the kitchen when you pull a batch of these gooey hot cocoa cookies from the oven. It’s the kind of smell that stops you in your tracks—a deep, velvety chocolate aroma mixed with that unmistakable sweet marshmallow, almost like a winter campfire happening right in your house. The first time I made these cookies, it was on a blustery Saturday when the wind was rattling the windows and everyone was craving something cozy. I remember biting into that first cookie, the marshmallow soft and melty, the chocolate dough almost fudge-like. It was a moment where I just had to close my eyes and smile (honestly, I knew I’d stumbled onto something magical).
These cookies remind me of childhood snow days, when my siblings and I would come inside with flushed cheeks and icy fingers, clutching mugs of hot cocoa—with extra marshmallows, of course. My grandma used to make a version with cocoa powder and little marshmallow bits tucked inside, and those cookies never lasted long. I wish I’d figured out this gooey marshmallow center trick years ago—let’s face it, it’s dangerously easy. My family can’t stop sneaking them off the cooling rack (and I get it, I do the same). There’s something about the way the marshmallow melts and oozes that just pulls you back for another bite.
Honestly, if you’re looking for the perfect treat to brighten up your Pinterest cookie board, bring to a holiday potluck, or just spoil your kids with after school, these hot cocoa cookies are it. They’re pure, nostalgic comfort—like a warm hug in cookie form. I’ve tested them more times than I can count (in the name of research, obviously), and they’ve become a staple for family gatherings, gifting, and even cozy movie nights. Trust me, you’re going to want to bookmark this one.
Why You’ll Love This Recipe
Let me tell you—after years of cookie baking, I’ve learned that not all chocolate cookies are created equal. These gooey hot cocoa cookies with marshmallow centers are special for a lot of reasons (and not just because they disappear fast!). Here’s why you’ll fall in love with them:
- Quick & Easy: You can whip up a batch in under 45 minutes, including bake time. Perfect for when those chocolate cravings hit unexpectedly.
- Simple Ingredients: No fancy grocery runs required—you probably already have everything in your pantry. Cocoa powder, butter, eggs, and mini marshmallows are all you really need.
- Perfect for Any Occasion: These cookies are a star at holiday parties, cookie swaps, chilly weekend brunches, or just as a pick-me-up treat after a long day.
- Crowd-Pleaser: Both kids and adults can’t get enough of these—honestly, I’ve seen people sneak extras for later.
- Unbelievably Delicious: The contrast of fudgy chocolate dough and gooey marshmallow is what makes these hot cocoa cookies next-level comfort food.
What sets this recipe apart? I use a mix of high-quality Dutch-process cocoa powder and real chocolate chips for deep flavor, plus a trick for keeping the marshmallow center gooey (freeze ‘em for a bit before baking—trust me, it works!). Some recipes settle for marshmallow bits, but I wanted that classic hot cocoa experience—a true, soft center. It’s the kind of cookie that makes you close your eyes after the first bite. Comfort food, but with a twist: quicker, easier, and honestly, even more satisfying than a mug of cocoa.
If you want a treat that makes your kitchen smell amazing, impresses the pickiest eaters, and turns an ordinary day into something memorable, these hot cocoa cookies are it. You don’t need to be a pastry chef—just a little bit of curiosity, a love for chocolate, and a willingness to get your hands (and probably your face!) a little messy. That’s the secret to happiness, if you ask me.
What Ingredients You Will Need
This recipe uses simple, wholesome ingredients to deliver bold chocolate flavor and that gooey marshmallow center—no weird stuff, just classic cookie magic. I’ve grouped the ingredients to make it even easier to get everything ready. Most of these are pantry staples, and if you’re missing something, I’ve got substitution ideas too.
- For the Cookie Dough:
- 1/2 cup (113g) unsalted butter, softened (adds richness)
- 3/4 cup (150g) granulated sugar
- 1/4 cup (50g) packed light brown sugar (for chewiness)
- 1 large egg, room temperature
- 1 tsp pure vanilla extract
- 1 cup (120g) all-purpose flour (can swap in gluten-free blend if needed)
- 1/2 cup (45g) unsweetened cocoa powder (I love Valrhona or Hershey’s Special Dark for deeper flavor)
- 1/2 tsp baking soda
- 1/4 tsp salt
- 1/2 cup (90g) semi-sweet chocolate chips (Ghirardelli chips melt beautifully)
- For the Marshmallow Center:
- 18-20 mini marshmallows, or 6-8 large marshmallows cut in half (freeze for 30 minutes for best results)
- Optional Toppings:
- Extra chocolate chips or chunks, for pressing on top
- Crushed graham crackers (for a s’mores vibe)
- Pinch of flaky sea salt (brings out the chocolate flavor)
Ingredient Tips: For best texture, use room temperature butter and eggs. The cocoa powder makes a big difference—Dutch-process gives a richer, less acidic flavor. If you want to keep it dairy-free, substitute butter with vegan baking sticks and chocolate chips with a dairy-free brand like Enjoy Life. You can use marshmallow fluff in a pinch, but honestly, the classic marshmallows give you that gooey, stretchy center. If you’re baking around the holidays, toss in a dash of cinnamon or a sprinkle of peppermint chips for a festive twist.
Equipment Needed
Nothing fancy needed—these hot cocoa cookies are all about simplicity. Here’s what you’ll want to have on hand:
- Large mixing bowl (or stand mixer—makes creaming butter a breeze)
- Hand mixer or sturdy wooden spoon
- Rubber spatula (for scraping down the sides)
- Measuring cups and spoons (accuracy matters for perfect texture)
- Baking sheet (I use a heavy-duty one for even baking)
- Parchment paper or silicone baking mat (prevents sticking and makes cleanup easy)
- Small ice cream scoop or tablespoon (for portioning dough)
- Freezer-safe plate or tray (for chilling marshmallows, so they don’t melt too fast)
- Wire cooling rack
If you don’t have a stand mixer, don’t sweat it—a hand mixer or even mixing by hand works just fine. Just make sure your butter is soft enough to cream easily. I’ve tried baking these directly on greased pans, but parchment really helps prevent sticking (and trust me, marshmallow is sticky stuff!). For budget-friendly options, you can find sturdy baking sheets and silicone mats at most discount stores—they last forever if you hand-wash and dry them well.
Preparation Method
- Freeze the Marshmallows: Place your marshmallows (mini or halved large ones) on a freezer-safe plate. Freeze for at least 30 minutes. This helps keep the centers gooey without melting too fast in the oven.
- Preheat the Oven: Set your oven to 350°F (175°C). Line a baking sheet with parchment paper or a silicone baking mat.
- Cream Butter and Sugars: In a large bowl, beat together 1/2 cup (113g) softened unsalted butter, 3/4 cup (150g) granulated sugar, and 1/4 cup (50g) packed light brown sugar until pale and fluffy—about 2 minutes. If your butter isn’t soft, microwave it for a few seconds (not melted, just pliable).
- Add Egg and Vanilla: Beat in 1 large egg and 1 tsp vanilla extract until well combined. Scrape the sides of the bowl to make sure everything gets mixed in.
- Mix Dry Ingredients: In a separate bowl, whisk together 1 cup (120g) flour, 1/2 cup (45g) cocoa powder, 1/2 tsp baking soda, and 1/4 tsp salt. This step prevents clumps and distributes the cocoa evenly.
- Combine Wet and Dry: Gradually add the dry mix to the butter mixture, stirring just until combined. Don’t overmix—stop when there are no dry streaks. The dough will be thick and fudgy.
- Fold in Chocolate Chips: Stir in 1/2 cup (90g) chocolate chips. The dough should look rich and chocolate-packed. If it feels sticky, chill for 10 minutes before shaping.
- Shape Cookies: Scoop out about 2 tablespoons (or use a small ice cream scoop) of dough. Flatten each ball slightly in your hand, place a frozen marshmallow in the center, and wrap the dough around to seal. Make sure the marshmallow is completely covered (otherwise, it may ooze out too much).
- Arrange on Baking Sheet: Place cookies 2 inches apart on your prepared baking sheet. If you want a more dramatic “cracked” look, gently flatten the tops. Press a few extra chocolate chips or graham cracker crumbs on top, if you like.
- Bake: Bake for 9-11 minutes, until the cookies are set around the edges but still soft in the center. You should see a little marshmallow peeking out, and the tops should look slightly cracked.
- Cool: Let cookies cool on the baking sheet for 5 minutes (they’re fragile right out of the oven). Transfer to a wire rack to finish cooling. Warning: marshmallow centers will be hot—let them sit a bit before biting in.
- Enjoy: Serve warm for maximum gooeyness, or let cool for a chewier texture. The smell alone will bring everyone to the kitchen!
Troubleshooting: If your cookies spread too much, chill the dough for 20 minutes before shaping. If marshmallow keeps leaking, double-check you’ve sealed the dough all the way around. For evenly baked trays, rotate your pan halfway through.
Personal Tip: I always save a few cookies to reheat the next day—they taste just like fresh-baked! Sometimes, I even tuck a piece of chocolate along with the marshmallow for extra gooeyness. It’s not fancy, but it’s delicious.
Cooking Tips & Techniques
Getting that perfect gooey center and chewy texture takes a little know-how, but it’s totally doable. Here are my top tips from years of cookie baking (plus a few lessons learned the hard way):
- Freeze Marshmallows: This is the trick for gooey centers. If you skip this step, marshmallows may melt into the dough and lose their “stretch.”
- Don’t Overbake: Cookies should look slightly underdone in the middle when you pull them out—trust me, they’ll finish setting as they cool. Overbaking leads to dry, crumbly cookies (been there, not fun).
- Seal Well: Make sure each marshmallow is completely wrapped in dough. Any exposed edges will ooze and crisp up (which can be tasty, but messy).
- Room Temp Ingredients: Soft butter and eggs blend better for a smooth dough. If you forget to take them out, a quick soak of the egg in warm water works wonders.
- Batch Baking: If you double the recipe, bake in batches—crowded pans = uneven baking. Rotate trays halfway for best results.
- Chilling Dough: If your kitchen is warm, chill the dough before shaping. This helps keep cookies thick and chewy.
- Personal Flubs: I once used marshmallow fluff instead of actual marshmallows (thought I was clever)—the cookies flattened into puddles! Stick to the tried-and-true marshmallows.
- Multitasking: While marshmallows freeze, prep your ingredients and set up the baking sheet. Saves time, and you’ll be ready to go when the dough is mixed.
Consistency is all about the details—use good cocoa powder, measure flour accurately (spoon and level, don’t scoop!), and let cookies cool before moving them. You’ll get that perfect gooey bite every time.
Variations & Adaptations
These hot cocoa cookies are super flexible. Whether you want to change up the flavor, make them allergy-friendly, or just have some fun, here are a few tried-and-true ideas:
- Gluten-Free: Substitute the all-purpose flour with your favorite gluten-free blend (I like King Arthur’s). Texture stays chewy, and no one will guess they’re gluten-free.
- Peppermint Twist: Add 1/2 tsp peppermint extract to the dough, and sprinkle crushed candy canes on top before baking. It’s a holiday classic in our house!
- Peanut Butter Lovers: Fold in 1/3 cup peanut butter chips or swirl in a spoonful of creamy peanut butter with the marshmallow. The combo is out-of-this-world.
- Dairy-Free: Use vegan butter and dairy-free chocolate chips. Most marshmallows are dairy-free, but double-check if you’re serving anyone with allergies.
- Double Chocolate: Swap semi-sweet for dark chocolate chips or add a handful of white chocolate chips for contrast. My kids love the triple chocolate version!
- S’mores Style: Press a piece of graham cracker on top of each cookie before baking. It’s messy—but totally worth it.
I once tried making them with mini caramel squares instead of marshmallows—amazing! The caramel melts a bit differently, so watch for leaks. Honestly, don’t be afraid to experiment. These cookies are forgiving and fun to customize.
Serving & Storage Suggestions
Serve these gooey hot cocoa cookies warm, right out of the oven, for the ultimate melty marshmallow experience. They’re great with a cold glass of milk, a mug of coffee, or (if you really want to double down) actual hot cocoa! Arrange them on a pretty plate or stack them up for a rustic look—honestly, they’re so cute, they’ll draw a crowd.
If you’re bringing them to a party or cookie swap, pack them in cupcake liners to keep the gooey centers from sticking. For gifting, tuck them in a tin with parchment between layers. They pair well with vanilla ice cream, whipped cream, or even a drizzle of chocolate sauce.
To store, keep cookies in an airtight container at room temperature for up to 4 days. For longer storage, freeze in a single layer on a tray, then pop into a freezer bag—thaw at room temp or reheat in the microwave for 10 seconds. The marshmallow stays soft, and flavors deepen overnight (always a bonus!). If storing in the fridge, let them come to room temp before serving for best texture. The flavors mellow and merge, making the cookies even more irresistible the next day.
Nutritional Information & Benefits
Each hot cocoa cookie is about 130 calories, with 6g fat, 18g carbohydrates, and 2g protein. The cocoa powder provides antioxidants (flavonoids!), while the marshmallows add that classic sweetness. You can cut down sugar by using less chocolate chips or swapping in dark chocolate.
If you go with gluten-free flour or dairy-free butter, these cookies can suit a variety of dietary needs. Marshmallows are usually gluten-free, but always check packaging for possible allergens. For those watching sugar, try using coconut sugar or monk fruit—texture changes a bit, but they’re still delicious.
From a wellness perspective, these cookies are all about joy. They’re not health food, but sharing them brings smiles and a sense of comfort. That’s worth its weight in chocolate, if you ask me!
Conclusion
So, why should you try these gooey hot cocoa cookies with marshmallow centers? They’re the kind of treat that makes ordinary days feel special. The gooey center, the rich chocolate flavor, and the nostalgia packed into every bite are reason enough. Plus, they’re easy to customize and guaranteed to bring smiles.
I love this recipe because it’s simple, fun, and always a hit. Whether you’re baking for your family, friends, or just yourself, these cookies deliver comfort and a little bit of magic. Give them a shot, make them your own, and let me know how they turn out! Leave a comment below if you have questions or share your favorite twists—I’d love to hear about your cookie adventures.
Happy baking, and may your kitchen always smell like chocolate and warm marshmallows!
FAQs
Can I use marshmallow fluff instead of regular marshmallows?
Marshmallow fluff tends to melt and spread too much in these cookies. Stick with mini or halved large marshmallows for the best gooey center.
How do I keep the marshmallow from leaking out?
Freeze the marshmallows before using and make sure they’re fully sealed inside the dough. Chilling the shaped cookies before baking also helps!
Can I make these cookies ahead of time?
Absolutely! Bake and store in an airtight container for up to 4 days, or freeze for longer. Reheat for a few seconds in the microwave to restore gooeyness.
What’s the best cocoa powder for this recipe?
Dutch-process cocoa powder gives a deeper, richer chocolate flavor. Brands like Valrhona or Hershey’s Special Dark are favorites in my kitchen.
Are these cookies allergy-friendly?
You can make them gluten-free with a blend like King Arthur’s, and dairy-free with vegan butter and chocolate chips. Always check marshmallow packaging for hidden allergens.
Pin This Recipe!
Hot Cocoa Cookies with Gooey Marshmallow Centers

These hot cocoa cookies feature a rich, fudgy chocolate dough wrapped around a gooey marshmallow center, delivering nostalgic comfort and irresistible flavor. Perfect for cozy gatherings, holiday parties, or a sweet treat any time.
- Prep Time: 20 minutes
- Cook Time: 11 minutes
- Total Time: 45 minutes
- Yield: 12 cookies 1x
- Category: Dessert
- Cuisine: American
Ingredients
- 1/2 cup (113g) unsalted butter, softened
- 3/4 cup (150g) granulated sugar
- 1/4 cup (50g) packed light brown sugar
- 1 large egg, room temperature
- 1 tsp pure vanilla extract
- 1 cup (120g) all-purpose flour (or gluten-free blend)
- 1/2 cup (45g) unsweetened cocoa powder (Dutch-process preferred)
- 1/2 tsp baking soda
- 1/4 tsp salt
- 1/2 cup (90g) semi-sweet chocolate chips
- 18–20 mini marshmallows, or 6-8 large marshmallows cut in half (freeze for 30 minutes)
- Extra chocolate chips or chunks, for topping (optional)
- Crushed graham crackers, for topping (optional)
- Pinch of flaky sea salt, for topping (optional)
Instructions
- Place marshmallows on a freezer-safe plate and freeze for at least 30 minutes.
- Preheat oven to 350°F (175°C). Line a baking sheet with parchment paper or a silicone baking mat.
- In a large bowl, beat together softened butter, granulated sugar, and brown sugar until pale and fluffy (about 2 minutes).
- Beat in egg and vanilla extract until well combined, scraping down the sides as needed.
- In a separate bowl, whisk together flour, cocoa powder, baking soda, and salt.
- Gradually add dry ingredients to the butter mixture, stirring just until combined. Do not overmix.
- Fold in chocolate chips. If dough is sticky, chill for 10 minutes.
- Scoop about 2 tablespoons of dough, flatten slightly, place a frozen marshmallow in the center, and wrap dough around to seal completely.
- Arrange cookies 2 inches apart on prepared baking sheet. Optionally, press extra chocolate chips or graham cracker crumbs on top.
- Bake for 9-11 minutes, until edges are set but centers are soft. Tops should look slightly cracked.
- Cool cookies on baking sheet for 5 minutes, then transfer to a wire rack. Marshmallow centers will be hot.
- Serve warm for gooey centers, or let cool for a chewier texture.
Notes
Freeze marshmallows for gooey centers and seal them well in dough to prevent leaking. Use Dutch-process cocoa for richer flavor. For gluten-free or dairy-free adaptations, substitute flour and butter as needed. Cookies are best served warm but can be stored in an airtight container for up to 4 days or frozen for longer storage.
Nutrition
- Serving Size: 1 cookie
- Calories: 130
- Sugar: 12
- Sodium: 70
- Fat: 6
- Saturated Fat: 3
- Carbohydrates: 18
- Fiber: 1
- Protein: 2
Keywords: hot cocoa cookies, gooey marshmallow cookies, chocolate cookies, winter dessert, holiday cookies, easy cookie recipe, kid-friendly cookies, s'mores cookies


