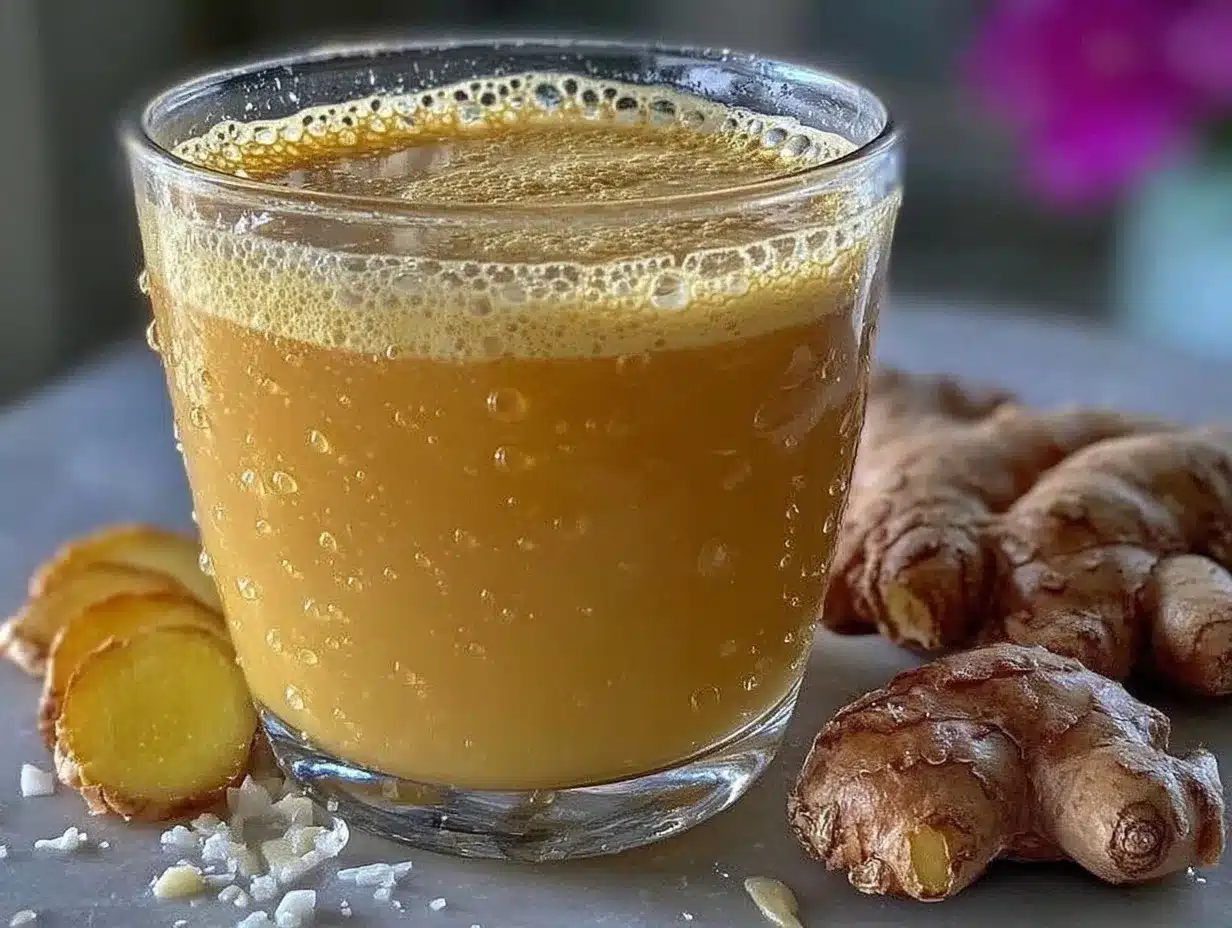
Picture this: you crack open a bottle, and the golden glow hits you before the scent does—the earthy aroma of fresh turmeric root mingling with zesty ginger and a hint of citrus that practically tingles your nose. The first time I made a fresh turmeric ginger immunity shot, my kitchen felt like a spa (seriously, the smell was that clean and uplifting). I remember standing there, watching that bright yellow pour, pausing for a second—just to marvel at the color—and taking a sip that kicked my senses awake. It’s the kind of moment where you pause, take a deep breath, and just smile because you know you’re onto something truly special.
Years ago, when I was knee-high to a grasshopper, my grandma swore by her homemade “tonics” for every ache and chill. She’d brew up ginger tea, mash turmeric with honey, and always had lemons on hand. Honestly, I wish I’d discovered this immunity shot recipe ages ago; it’s pure, nostalgic comfort with a twist. My family couldn’t stop sneaking sips off the batch cooling in the fridge (and I can’t really blame them—it’s dangerously easy to drink and makes you feel like you’re doing something good for yourself).
Let’s face it, we all need a little boost from time to time. Whether it’s cold season, a busy work week, or you just want to brighten up your Pinterest board with something that looks as vibrant as it tastes, this fresh turmeric ginger immunity shot is perfect for that. You know what? It’s become my go-to for potlucks, a sweet treat for friends who need a pick-me-up, and a staple for family gatherings and gifting. I’ve tested this recipe more times than I can count (all in the name of research, of course), and every time it feels like a warm hug from the inside out. Trust me, you’re going to want to bookmark this one.
Why You’ll Love This Fresh Turmeric Ginger Immunity Shot
Let me tell you, after years of experimenting with wellness drinks, this fresh turmeric ginger immunity shot stands out like a ray of sunshine. When you’re looking for something that’s not only healthy but also actually tastes good, this is it. Here’s why you’ll fall head over heels for it:
- Quick & Easy: Comes together in under 10 minutes—perfect for busy mornings or last-minute wellness cravings.
- Simple Ingredients: No fancy grocery trips needed (you probably already have most of these in your kitchen).
- Perfect for Every Occasion: Great for brunch, potlucks, cozy breakfasts, post-gym recovery, or as a zippy pick-me-up during cold season.
- Crowd-Pleaser: Always gets rave reviews from kids and adults alike (my toddler even calls it “sunshine juice”).
- Unbelievably Delicious: The bold flavor and zingy kick are next-level comfort in a glass—plus, the color is pure Instagram gold.
What makes this immunity shot different from the rest? For starters, it uses fresh turmeric root and ginger, not powders. That means you get the full punch of flavor and nutrition. I also add a splash of citrus (lemon or orange, depending on the season) for brightness and a pinch of black pepper—just a touch, because that’s what helps your body absorb all that good stuff from turmeric. Some folks add honey, but I keep it optional for those watching their sugar.
This isn’t just another “health shot”—it’s the best version I’ve developed after countless tries. I blend the roots instead of juicing, which keeps the fiber and amps up the creamy texture. It’s comfort food reimagined—faster, fresher, and brimming with the kind of soul-soothing satisfaction you crave. Whether you’re hoping to impress guests (without the stress) or just want a simple daily ritual that feels special, this recipe has got you covered.
Honestly, it’s the kind of shot that makes you close your eyes after the first sip and think, “Yep, this is what goodness tastes like.”
What Ingredients You Will Need
This recipe uses simple, wholesome ingredients to deliver bold flavor and satisfying texture without the fuss. Most are pantry staples or easy to find at your local grocery store, and you can swap a few things if you need to. Here’s what you’ll need:
- Fresh Turmeric Root (about 2 inches, peeled and roughly chopped; you want the real deal for best color and potency—look for firm roots at the store or farmer’s market)
- Fresh Ginger Root (about 2 inches, peeled and chopped; choose plump roots with shiny skin for maximum zing)
- Fresh Lemon Juice (from 1 large lemon, about 2 tablespoons; you can swap with orange juice for a sweeter, milder flavor)
- Black Pepper (a pinch—trust me, it matters for absorption of turmeric’s curcumin)
- Raw Honey (1 tablespoon, optional; adds a gentle sweetness and soothes the throat—use local honey if you can, or skip for vegan)
- Filtered Water (1/2 cup or 120 ml; helps everything blend smooth and lets you adjust thickness)
- Cayenne Pepper (just a tiny pinch, optional; adds a little kick and extra warming effect)
If you’re making this for a crowd or want to batch prep, you can easily double or triple the recipe. I usually stick to fresh roots, but if you’re in a pinch, you can use ground turmeric (1 teaspoon) and ground ginger (1 teaspoon)—just know the flavor won’t be as bright or intense.
For folks with dietary needs, swap honey with agave or maple syrup. If citrus isn’t your thing, try lime juice for a tangy twist. Looking for a vegan option? Omit the honey or use a vegan sweetener. If you want it even spicier, add a bit more cayenne or try a slice of fresh jalapeño (yep, I’ve tried it!).
My favorite brands for turmeric and ginger are Spice Islands and Simply Organic, but honestly, local is best for freshness. If you can get organic roots, even better! Just wash and peel (the skin can be bitter), and you’re set.
Equipment Needed
You don’t need a fancy kitchen to whip up this fresh turmeric ginger immunity shot. Here’s what I use (and a few handy alternatives):
- High-Speed Blender (like a NutriBullet or Vitamix; makes everything silky smooth)
- Fine Mesh Strainer or Cheesecloth (to strain out pulp if you prefer a clear shot)
- Peeler (for the turmeric and ginger; a spoon works in a pinch and is gentler on knuckles!)
- Sharp Knife and Cutting Board (for chopping roots and citrus)
- Glass Bottles or Jars (for storage; I reuse old juice bottles—budget-friendly and eco-conscious)
If you don’t have a blender, a small food processor works. I’ve even used a mortar and pestle for tiny batches (takes longer but gives you a rustic, earthy texture). To clean turmeric stains off your tools, soak them in lemon juice or baking soda water—it works wonders! If you’re tight on cash, any basic blender will do, just blend a little longer to get it smooth.
Preparation Method
-
Prep the Roots:
Wash the turmeric and ginger roots under cold water. Peel both using a spoon (it scrapes the skin off gently without wasting any flesh) and chop into small pieces—about 1/2 inch chunks work best. Don’t worry if your fingers turn a little yellow; it’s the sign of good turmeric!
Time: 2 minutes -
Add Everything to Blender:
Toss the chopped turmeric (about 2 inches, 20g), ginger (about 2 inches, 20g), lemon juice (2 tablespoons, 30 ml), honey (1 tablespoon, 20g, if using), black pepper (a pinch), cayenne (optional), and filtered water (1/2 cup, 120 ml) into your blender.
Time: 1 minute -
Blend Until Smooth:
Secure the lid and blend on high for 1-2 minutes. The mix should turn a vibrant yellow-orange and smell punchy—like sunshine and spice. If you see stubborn bits, scrape down the sides and blend again.
Prep note: The longer you blend, the smoother the shot.
Time: 2 minutes -
Strain (Optional):
Pour the mixture through a fine mesh strainer or cheesecloth into a bowl or large measuring cup. Use a spoon to press the pulp and extract every last drop. For a thicker, fiber-rich shot, skip straining.
Warning: Turmeric stains! Rinse your strainer right away.
Time: 2 minutes -
Bottle and Chill:
Pour the strained liquid into clean glass bottles or jars. Seal and refrigerate. I like to chill mine for at least 30 minutes—the flavors mellow and the zing softens.
Time: 1 minute (plus chilling) -
Serve:
Shake well before serving (turmeric tends to settle at the bottom). Pour 1-2 ounces (30-60 ml) per shot. Enjoy cold for the best taste!
Time: 1 minute
Troubleshooting Tips: If your shot is bitter, add a touch more honey or citrus. If it’s too strong, dilute with extra water. If you want less pulp, strain twice. Don’t skip the black pepper—it’s tiny but mighty for absorption!
Efficiency Tip: Prep multiple batches at once and store in the fridge for up to four days. I often make a double batch for the week and pour into little glass bottles so everyone in the house can grab and go.
Cooking Tips & Techniques
Here are the best tricks I’ve learned from countless test runs (and a few flops along the way):
- Use Fresh Roots: Fresh turmeric and ginger have way more flavor and nutrients than powdered—plus, the color is unbeatable. If you use powder, the taste can get muddy.
- Don’t Skip Black Pepper: Trust me, I tried without it and later learned it’s key for absorption. Just a pinch works wonders.
- Blend, Don’t Juice: Juicing removes all the fiber, which is a bummer. Blending keeps everything in and gives you a thicker, creamier shot.
- Chill Before Serving: The flavors mellow after a half hour in the fridge. I used to drink it right away—now I always wait (patience pays off!).
- Adjust Sweetness: Sometimes fresh turmeric is a little earthy. If it’s too much, add a bit more honey, maple syrup, or agave. Don’t go wild—a little goes a long way.
- Clean Up Quickly: Turmeric stains! Wash your hands, cutting board, and blender ASAP with lemon juice or baking soda.
Common mistakes? Using old, shriveled roots (the flavor is weak), skipping the pepper, or blending too short (chunks are no fun). I once forgot the lemon and it tasted flat—citrus is key. For multitasking, prep the roots in advance and freeze in small bags. That way, you can toss them straight into the blender—no peeling needed on busy mornings!
Consistency tip: Always measure your ingredients, especially the turmeric and ginger. Too much makes it spicy and overwhelming. I use a kitchen scale for the roots now—20g is my sweet spot.
Variations & Adaptations
One of the best things about this fresh turmeric ginger immunity shot is how easy it is to tweak for your mood, diet, or what’s in your fridge. Here are my favorite ways to switch it up:
- Seasonal Twist: Use orange juice instead of lemon in winter for a sweeter, kid-friendly shot. In summer, add a splash of pineapple juice for tropical vibes.
- Low-Sugar/Vegan Version: Skip the honey and use a touch of agave or maple syrup. Or just leave out sweetener entirely—ginger and citrus are punchy enough.
- Spicy Kick: Add an extra pinch of cayenne pepper or a slice of jalapeño for serious heat. I tried this last flu season and it cleared my sinuses right up!
- Allergen Substitution: If you’re allergic to citrus, use apple cider vinegar for acidity instead—it’s tangy and works surprisingly well.
- Different Prep Method: No blender? Grate the ginger and turmeric and stir everything by hand. Strain well afterwards for a smoother shot.
I’ve even added a splash of coconut water for a super-hydrating version (great after a workout). Don’t be afraid to experiment—sometimes those “happy accidents” turn into your new favorite combo.
Serving & Storage Suggestions
Serve this immunity shot chilled for the brightest flavor and the smoothest texture. I like to pour it into small glass bottles or shot glasses—it makes it feel special and lets the color pop. For parties, set out a tray with citrus wedges and a sprinkle of black pepper on top for extra flair.
Pair with a light breakfast like overnight oats, smoothie bowls, or avocado toast. For a wellness brunch, serve alongside herbal teas or sparkling water with a lemon twist. It’s surprisingly good with spicy foods—the cool zing balances the heat.
To store, keep the shot in a sealed glass bottle or jar in the refrigerator. It stays fresh for up to 4 days, though the flavor is best within the first two. Shake before pouring—turmeric settles quickly. For longer storage, freeze in ice cube trays; just thaw and shake before drinking. Reheat gently (if you must) by setting the bottle in warm water—never microwave, as it can dull the flavor.
Honestly, the taste deepens after a day—the ginger gets bolder and the citrus mellows. If you batch prep, make enough for a few days and enjoy that evolving flavor.
Nutritional Information & Benefits
Each 2-ounce (60 ml) shot packs a powerhouse of nutrition. Estimated values:
- Calories: 25-40 (depending on sweetener)
- Sugar: 3-6g (mostly from honey or citrus)
- Vitamin C: 15-20% of daily needs
- Curcumin: High (thanks to fresh turmeric and black pepper)
- Fiber: 1g (if unstrained)
Turmeric is known for its anti-inflammatory and antioxidant effects, while ginger supports digestion and immune health. Lemon juice adds vitamin C for a daily wellness boost. This recipe is naturally gluten-free, low-carb, and can be made vegan. The only potential allergen is honey—easy to swap if needed.
From a wellness perspective, I find this shot helps me start the day with clarity and comfort. It’s gentle on the stomach and makes me feel like I’m doing something good for my body (even when mornings get hectic).
Conclusion
If you’re searching for a vibrant, soul-soothing way to brighten your daily routine, this fresh turmeric ginger immunity shot recipe is worth every ounce of effort. It’s quick, easy, and feels like a little gift to yourself every time you take a sip. Whether you stick to the classic or try a zingy variation, you’ll love how simple ingredients can pack so much flavor and wellness into one tiny glass.
Customize it however you like—make it sweeter, spicier, or add your favorite citrus twist. I love this recipe because it’s become part of my family’s morning ritual, and honestly, it’s the one thing we all agree on (which is rare!).
Let me know if you try it! Drop a comment below, share your favorite adaptation, or tag me on Pinterest with your colorful shot. Here’s to more bright mornings and healthy days—cheers!
FAQs
How often can I drink the fresh turmeric ginger immunity shot?
Most people enjoy one shot per day, especially during cold and flu season. If you’re new to turmeric or ginger, start with a small amount and see how your body reacts.
Can I use powdered turmeric and ginger instead of fresh?
Yes, you can use 1 teaspoon each of powdered turmeric and ginger if fresh roots aren’t available. The flavor and nutrients will be less intense, but it still works in a pinch.
Is this recipe suitable for kids?
Absolutely! Just reduce the ginger and skip the cayenne for a milder flavor. My toddler loves the version with orange juice and a touch of honey.
Will turmeric stain my blender and hands?
Turmeric can leave yellow stains, especially on plastic. Wash everything immediately with lemon juice or baking soda water to minimize staining. It usually fades after a few washes.
Can I prepare this immunity shot in advance?
Yes! Make a batch ahead and store in the refrigerator for up to 4 days. Shake well before serving, as turmeric settles quickly.
Pin This Recipe!
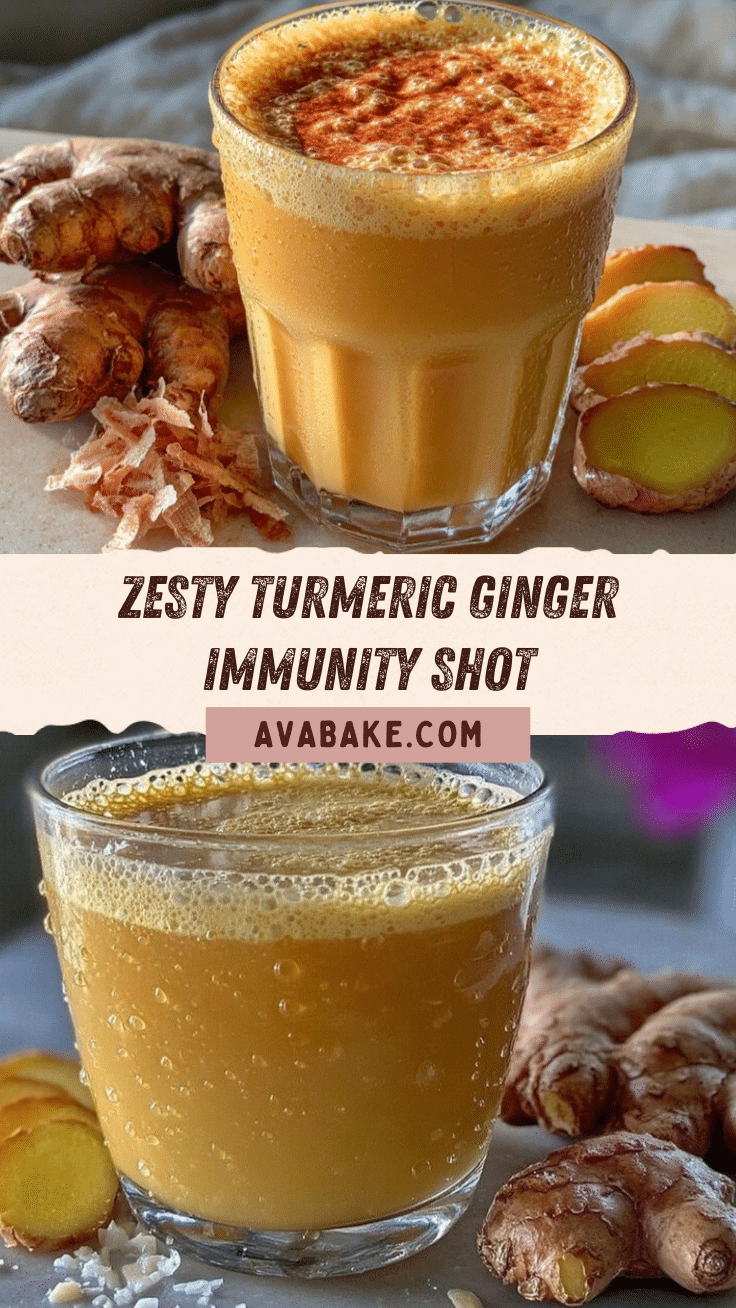
Fresh Turmeric Ginger Immunity Shot
A vibrant, wellness-boosting shot made with fresh turmeric root, ginger, citrus, and a hint of black pepper. This easy recipe is perfect for daily immune support and comes together in minutes for a refreshing, zingy start to your day.
- Prep Time: 5 minutes
- Cook Time: 2 minutes
- Total Time: 7 minutes (plus 30 minutes chilling)
- Yield: 4 shots (2 ounces each) 1x
- Category: Drink
- Cuisine: Fusion
Ingredients
- 2 inches fresh turmeric root, peeled and roughly chopped (about 20g)
- 2 inches fresh ginger root, peeled and chopped (about 20g)
- 2 tablespoons fresh lemon juice (from 1 large lemon, or substitute orange juice)
- 1 tablespoon raw honey (optional, or substitute agave/maple syrup for vegan)
- 1/2 cup filtered water (120 ml)
- Pinch of black pepper
- Pinch of cayenne pepper (optional)
Instructions
- Wash turmeric and ginger roots under cold water. Peel using a spoon and chop into 1/2-inch pieces.
- Add chopped turmeric, ginger, lemon juice, honey (if using), black pepper, cayenne (optional), and filtered water to a high-speed blender.
- Blend on high for 1-2 minutes until smooth and vibrant yellow-orange. Scrape down sides and blend again if needed.
- Strain mixture through a fine mesh strainer or cheesecloth into a bowl or measuring cup. Press pulp to extract liquid. For a thicker shot, skip straining.
- Pour strained liquid into clean glass bottles or jars. Seal and refrigerate for at least 30 minutes to mellow flavors.
- Shake well before serving. Pour 1-2 ounces (30-60 ml) per shot and enjoy cold.
Notes
Use fresh roots for best flavor and nutrition. Black pepper is essential for turmeric absorption. Adjust sweetness and spice to taste. Turmeric stains—clean tools promptly. Store in fridge up to 4 days; shake before serving.
Nutrition
- Serving Size: 2 ounces (60 ml) per
- Calories: 30
- Sugar: 4
- Sodium: 2
- Carbohydrates: 7
- Fiber: 1
Keywords: turmeric shot, ginger shot, immunity, wellness drink, anti-inflammatory, healthy, vegan, gluten-free, breakfast, cold remedy


