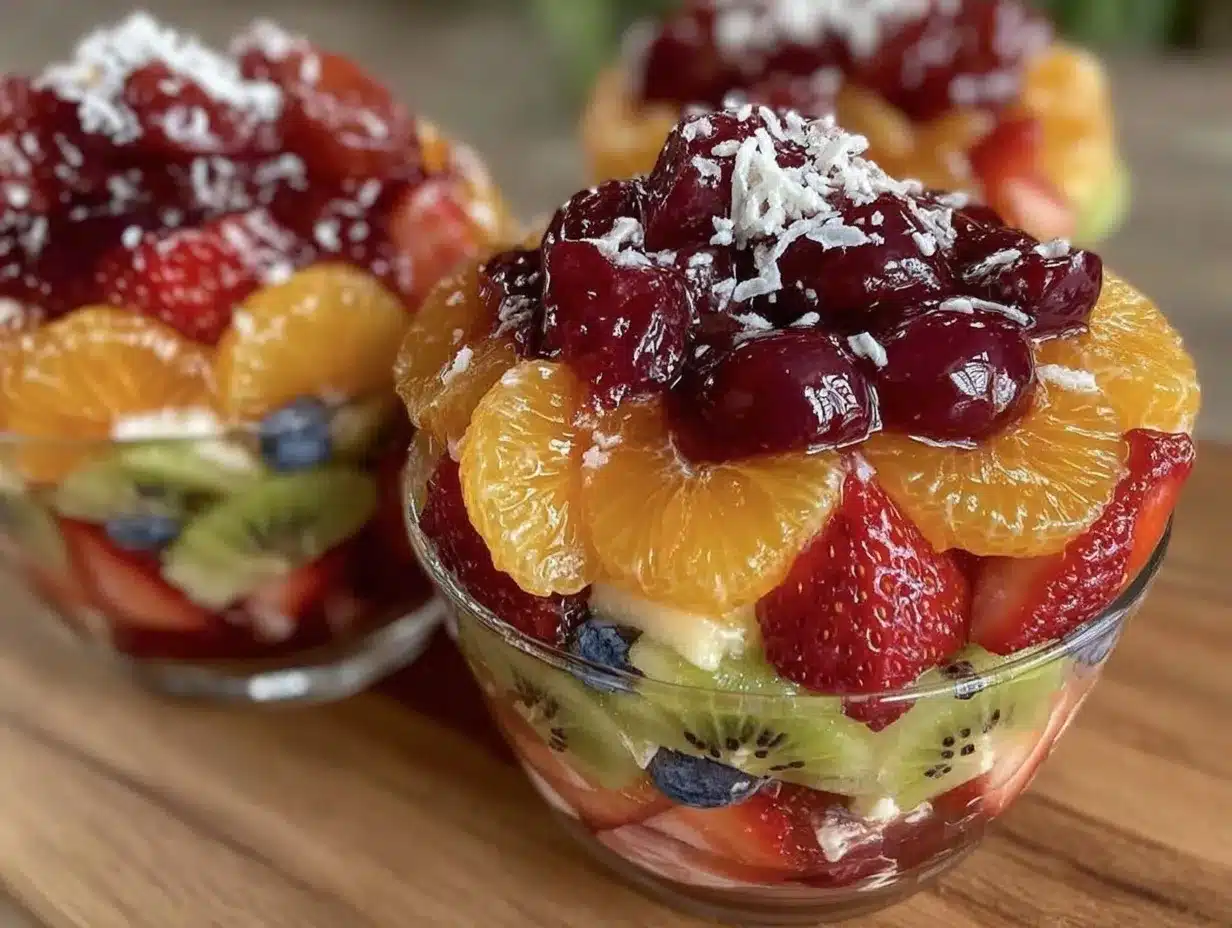
Let me tell you, the sight of those vibrant layers of fresh fruit stacked just right is enough to make anyone’s mouth water. The juicy reds, sunny yellows, and deep purples all nestled in a clear cup — it’s like holding a little edible rainbow in your hands. The first time I made these Fresh Dr. Seuss Rainbow Stack Fruit Cups, I was instantly hooked. I remember the kind of moment where you pause, take a deep breath, and just smile because you know you’re onto something truly special.
When I was knee-high to a grasshopper, fruit snacks were usually sticky and loaded with sugar, but these cups bring pure, nostalgic comfort without any of the junk. I stumbled upon this recipe on a rainy weekend while trying to make something bright and healthy for my kids. Honestly, I wish I’d discovered this way of stacking fresh fruit years ago! My family couldn’t stop sneaking the cups off the counter (and I can’t really blame them).
Let’s face it, these Fresh Dr. Seuss Rainbow Stack Fruit Cups are dangerously easy to make and perfect for potlucks, school lunches, or a sweet treat for your kids after a long day. They’re colorful, fun, and seriously refreshing. After testing this recipe multiple times in the name of research, of course, it’s become a staple for family gatherings and gifting. Trust me, this recipe feels like a warm hug in a cup — you’re going to want to bookmark this one.
Why You’ll Love This Recipe
Honestly, this Fresh Dr. Seuss Rainbow Stack Fruit Cups recipe is a winner for so many reasons. Having tested countless fruit snack options, I can say this one truly stands out:
- Quick & Easy: Comes together in under 15 minutes, perfect for busy weeknights or last-minute snack cravings.
- Simple Ingredients: No pricey or hard-to-find items here; most are pantry staples or everyday produce.
- Perfect for Any Occasion: Great for birthday parties, brunch tables, or brightening up your Pinterest snack board.
- Crowd-Pleaser: Kids and adults alike rave about the fun colors and fresh flavors.
- Unbelievably Delicious: The mix of textures and natural sweetness creates a next-level refreshing treat.
What makes this recipe different? It’s all about the layering technique — stacking fruit by color to create that iconic Dr. Seuss rainbow effect. Plus, I’ve added a little twist: a splash of fresh lime juice to keep everything bright and juicy without making it soggy. It’s not just another fruit cup; it’s a playful, fresh take that turns healthy eating into a celebration. This recipe isn’t just good — it’s the kind that makes you close your eyes after the first bite. Whether you want to impress guests without stress or sneak in some extra vitamins for your kids, these rainbow stack fruit cups have got you covered.
What Ingredients You Will Need
This recipe uses simple, wholesome ingredients to deliver bold flavor and satisfying texture without the fuss. Most of these fruits are easy to find year-round, and you can swap in seasonal favorites to keep it fresh.
- Red Layer: Strawberries, hulled and sliced (adds juicy sweetness)
- Orange Layer: Mandarin orange segments, peeled and pith removed (bright and tangy)
- Yellow Layer: Pineapple chunks, fresh or canned in juice (for tropical sweetness)
- Green Layer: Green grapes, halved (adds crisp texture)
- Blue Layer: Blueberries, fresh and firm (small but packed with flavor)
- Purple Layer: Blackberries or purple grapes, halved (deep color, rich taste)
- Lime Juice: Freshly squeezed, about 1 tablespoon (helps keep fruit fresh and vibrant)
- Fresh Mint (optional): Finely chopped for garnish (adds a refreshing aroma)
If you want to switch things up, I recommend using organic fruit when possible for the best flavor. I usually go for Driscoll’s berries because they’re consistently juicy and fresh. For a gluten-free and vegan snack, this recipe checks all the boxes without any tweaks needed. If you’re short on time, frozen fruit can work too—just thaw and drain excess moisture before stacking. For a fun seasonal twist, swap pineapple with mango in the summer or add pomegranate seeds in the fall.
Equipment Needed
- Clear Plastic or Glass Cups: To show off those gorgeous rainbow layers. I like 8-ounce size for individual servings.
- Sharp Knife: For slicing strawberries and grapes. A serrated knife works well for delicate fruit.
- Cutting Board: A sturdy, easy-to-clean board is your best friend here.
- Mixing Bowls: Several small bowls to prep each fruit layer separately.
- Citrus Juicer (optional): For squeezing fresh lime juice—hand juicers are inexpensive and do the job.
- Measuring Spoons: To measure the lime juice precisely.
If you don’t have clear cups, small mason jars or even wide-mouth glasses will do just fine. For budget-friendly options, dollar stores often carry suitable plastic cups that look great and are disposable. I’ve found that using a sharp knife makes a world of difference — chopping fruit cleanly prevents mushy edges and keeps those layers neat. Keep your cutting board wiped clean throughout prep for safety and ease.
Preparation Method
- Prepare the Fruit (10 minutes): Rinse all fruit under cold water and pat dry gently. Hull and slice strawberries into thin pieces about ¼-inch thick. Peel mandarin segments carefully, removing any white pith. Cut pineapple into bite-sized chunks. Halve grapes and blackberries if large. Place each fruit type in separate bowls.
- Add Lime Juice (2 minutes): Squeeze about 1 tablespoon of fresh lime juice over all the fruit except blueberries and blackberries. Toss gently to coat. This keeps the fruit fresh and prevents browning. Avoid soaking too long to prevent sogginess.
- Start Layering (10 minutes): Take your clear cups and add the red layer first — about 1/3 cup of sliced strawberries. Press lightly to make an even layer. Follow with the orange layer (mandarin segments), then yellow (pineapple), green (grapes), blue (blueberries), and purple (blackberries). Each layer should be about the same thickness for the best rainbow effect.
- Garnish and Chill (5 minutes): Sprinkle chopped fresh mint on top if using. Cover cups with plastic wrap or lids and chill in the fridge for at least 30 minutes before serving. This lets flavors meld and fruit chill perfectly.
- Serve and Enjoy: Serve cold as a refreshing snack or dessert. The layers should remain distinct and colorful. If you notice any excess liquid at the bottom, drain gently before serving.
Pro Tip: If stacking fruit feels tricky, use a small spoon or even a piping bag to place layers precisely. You want clean lines between colors for that iconic Dr. Seuss rainbow look. Also, don’t overcrowd the cups — a little breathing room keeps the texture just right.
Cooking Tips & Techniques
One thing I learned the hard way is that prepping fruit the day before can make the cups watery if not handled carefully. Always toss fruit gently with lime juice right before assembling to keep everything crisp. Avoid juicy fruit like watermelon here, as it releases too much liquid.
Use a sharp knife to slice fruit evenly — uneven pieces throw off the stack and can cause layers to collapse. When layering, press down lightly but don’t mash the fruit. You want those layers to look clean, but still feel light and fresh.
Timing is everything: assemble these cups close to serving time for maximum freshness. If you need to prep ahead, store fruit separately in airtight containers and layer just before guests arrive. Multitasking tip: prep all fruit at once, then assemble cups in batches.
When stacking, rotate the cup slightly after each layer to keep the fruit nestled tightly but not squished. This little trick keeps the rainbow lines crisp and the cup stable during transport or serving.
Variations & Adaptations
Want to mix things up? Here are a few ideas I’ve tried and loved:
- Seasonal Swap: In spring, use fresh cherries and kiwi instead of grapes for a brighter palette. In fall, add diced apples and pears for a cozy twist.
- Dairy Boost: Add a dollop of Greek yogurt or coconut yogurt on top for a creamy finish and extra protein.
- Allergy-Friendly: If citrus is a no-go, swap lime juice with a mild apple cider vinegar splash to keep fruit fresh.
- Savory Twist: Sprinkle a pinch of chili powder or Tajín on the layers for a little heat and tang — surprisingly addictive!
Personally, I once made a tropical version with mango, papaya, and passion fruit that was a hit at a summer picnic. The key is to keep your fruit firm and colorful so the layers pop visually. Feel free to customize based on what’s fresh and available — that’s the fun part!
Serving & Storage Suggestions
Serve these Fresh Dr. Seuss Rainbow Stack Fruit Cups chilled for the best experience. They look fantastic on a dessert table or as a healthy snack at kids’ parties. For an easy presentation, garnish with a sprig of fresh mint or a thin lime wedge on the rim of the cup.
Pair these fruit cups with light, refreshing beverages like iced herbal tea or sparkling water with lemon. They also go well alongside simple cheese plates or light sandwiches for a balanced snack spread.
Store leftovers in the refrigerator covered tightly with plastic wrap or lids. Best eaten within 24 hours as fruit releases juice over time, which can soften layers. To reheat, you really don’t want to — they’re meant to be enjoyed cold and fresh. Flavors actually get more vibrant after a short chill, so make them an hour ahead if possible.
Nutritional Information & Benefits
Each serving of these rainbow stack fruit cups is roughly 90-120 calories, packed with fiber, vitamins, and antioxidants. The fresh fruit delivers natural sugars and hydration without any added sugars or preservatives. Key benefits include vitamin C from strawberries and pineapple, potassium from grapes, and antioxidants from blueberries and blackberries.
This recipe is naturally gluten-free, dairy-free, and vegan, making it accessible for most dietary needs. Just watch for any personal citrus sensitivities due to the lime juice. From a wellness perspective, it’s a guilt-free, colorful way to boost your fruit intake and satisfy sweet cravings healthily.
Conclusion
These Fresh Dr. Seuss Rainbow Stack Fruit Cups are worth every minute of prep. They’re not just pretty — they’re a fun, fresh way to get more fruit into your day, and honestly, who can resist that rainbow charm? I love how customizable and quick they are, perfect for any season or occasion.
Give this recipe a try, and don’t be afraid to make it your own with different fruits or a splash of yogurt. I’d love to hear your favorite variations and how your family reacts — be sure to leave a comment and share your photos! Thanks for stopping by, and here’s to colorful, healthy snacking that brightens every day.
FAQs
Can I make these fruit cups ahead of time?
Yes, but I recommend prepping the fruit and adding lime juice just before assembling the cups to avoid sogginess. Assemble the cups no more than a couple of hours before serving for best results.
What can I substitute if I don’t have fresh lime juice?
You can use a mild splash of apple cider vinegar or lemon juice, but lime juice gives the best fresh flavor and helps prevent browning.
Can I use frozen fruit for this recipe?
Frozen fruit works if thawed completely and drained well to avoid excess moisture, but fresh fruit gives the best texture and appearance.
Are these fruit cups suitable for kids?
Absolutely! Kids love the bright colors and fun layers, plus it’s a healthy snack option that feels like a treat.
How long do the fruit cups keep in the fridge?
They’re best eaten within 24 hours since the fruit juices can make layers softer over time, but they’ll stay fresh and tasty for up to a day if covered properly.
Pin This Recipe!

Fresh Dr Seuss Rainbow Stack Fruit Cups Easy Healthy Snack Recipe
A colorful and refreshing layered fruit cup recipe that is quick, easy, and perfect for kids and adults alike. This healthy snack features vibrant fresh fruit stacked by color to create a playful rainbow effect.
- Prep Time: 15 minutes
- Cook Time: 0 minutes
- Total Time: 45 minutes
- Yield: 6 servings
- Category: Snack
- Cuisine: American
Ingredients
- Strawberries, hulled and sliced
- Mandarin orange segments, peeled and pith removed
- Pineapple chunks, fresh or canned in juice
- Green grapes, halved
- Blueberries, fresh and firm
- Blackberries or purple grapes, halved
- Fresh lime juice, about 1 tablespoon
- Fresh mint, finely chopped (optional)
Instructions
- Rinse all fruit under cold water and pat dry gently. Hull and slice strawberries into thin pieces about ¼-inch thick. Peel mandarin segments carefully, removing any white pith. Cut pineapple into bite-sized chunks. Halve grapes and blackberries if large. Place each fruit type in separate bowls.
- Squeeze about 1 tablespoon of fresh lime juice over all the fruit except blueberries and blackberries. Toss gently to coat, avoiding soaking too long to prevent sogginess.
- Take clear cups and add the red layer first — about 1/3 cup of sliced strawberries. Press lightly to make an even layer. Follow with the orange layer (mandarin segments), then yellow (pineapple), green (grapes), blue (blueberries), and purple (blackberries). Each layer should be about the same thickness for the best rainbow effect.
- Sprinkle chopped fresh mint on top if using. Cover cups with plastic wrap or lids and chill in the fridge for at least 30 minutes before serving to let flavors meld and fruit chill perfectly.
- Serve cold as a refreshing snack or dessert. Drain any excess liquid gently before serving if needed.
Notes
Use a sharp knife to slice fruit evenly to keep layers neat. Toss fruit gently with lime juice right before assembling to keep fruit fresh and prevent browning. Avoid juicy fruits like watermelon to prevent sogginess. Assemble cups close to serving time for best freshness. Frozen fruit can be used if thawed and drained well. Rotate the cup slightly after each layer to keep layers tight but not squished.
Nutrition
- Serving Size: One 8-ounce fruit cu
- Calories: 90120
- Sugar: 18
- Sodium: 2
- Fat: 0.3
- Carbohydrates: 23
- Fiber: 3
- Protein: 1
Keywords: fruit cups, rainbow fruit, healthy snack, kids snack, fresh fruit, layered fruit, gluten-free, vegan, easy recipe


