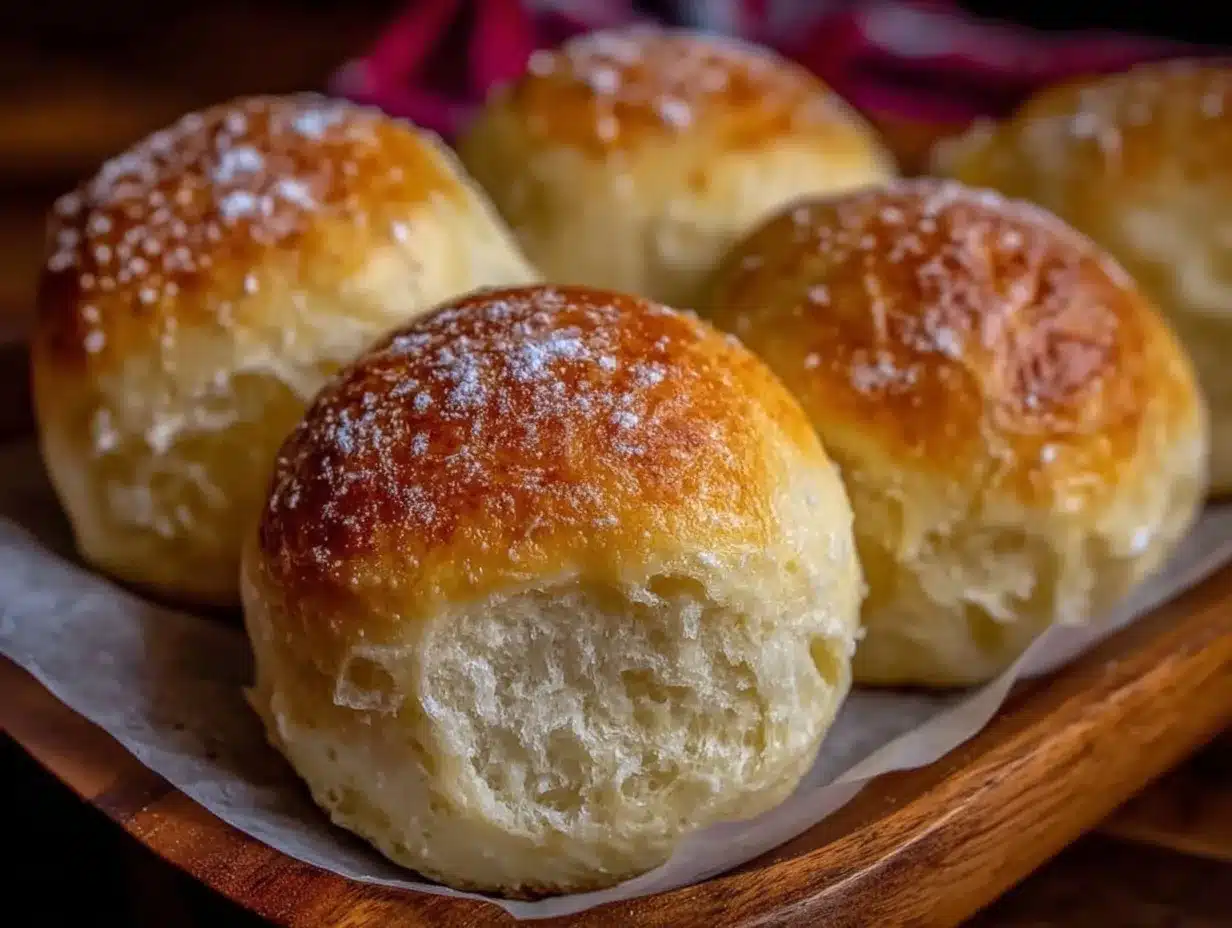
“I wasn’t expecting much when I grabbed the wrong flour bag last Saturday,” I confessed to my neighbor, Ellen, as we shared a laugh over the cracked mixing bowl still sitting on my counter. You see, I was aiming for a classic wheat roll, but somehow, my kitchen chaos led me to create what quickly became my go-to fluffy gluten-free dinner rolls. Honestly, it all started with a distracted moment—my phone rang mid-mix, and I absentmindedly grabbed rice flour instead of all-purpose. The dough seemed a little off at first, sticky and a bit reluctant, but I pushed through. The result? Soft, pillowy buns that vanished faster than I could count.
Maybe you’ve been there—trying to juggle cooking and life’s interruptions, only to end up with something surprisingly delightful. These rolls remind me of the warmth of Sunday dinners with friends, the kind of bread you tear apart with your hands, butter melting into every crevice. They’re not just gluten-free; they’re proof that mistakes in the kitchen can turn into magic. And I promise, no fancy equipment or complicated steps—just one bowl, a little patience, and a lot of yum.
What’s more, these rolls never fail to impress, even the skeptics who swear off gluten. They’ve become my little secret weapon for holidays and last-minute gatherings. I’m still amazed how a simple mix-up led to something so comforting and reliable. So, if you’ve ever felt frustrated by dry or crumbly gluten-free bread, you’re not alone—and this recipe might just change your mind.
Keep reading, because I’m sharing everything I learned (and the few times I messed up) to help you get these soft buns right the first time.
Why You’ll Love This Fluffy Gluten-Free Dinner Rolls Recipe
Having tested countless gluten-free bread recipes in my kitchen, this one stands out for its simplicity and unbeatable texture. Whether you’re new to gluten-free baking or a seasoned pro, these dinner rolls deliver softness and flavor without fuss.
- Quick & Easy: Ready in under 90 minutes from start to finish, perfect for busy weeknights or unexpected guests.
- Simple Ingredients: No need for obscure gluten-free blends; you’ll mostly use pantry staples like rice flour and tapioca starch.
- Perfect for Any Occasion: Ideal for cozy dinners, holiday feasts, or sandwich bases—these rolls fit right in.
- Crowd-Pleaser: Even my gluten-eating friends can’t tell these apart from traditional rolls.
- Unbelievably Delicious: The texture is airy but sturdy, with a slightly sweet crust that’s just begging for butter.
What sets this recipe apart? I blend the flours with a touch of xanthan gum and an extra egg for structure, creating that perfect soft crumb you’d expect from classic rolls. Plus, the one-bowl method means less cleanup and more time to enjoy the results. Honestly, after a few tries and tweaks, this became my go-to when I want soft, reliable gluten-free buns without stress.
Think of this as comfort food reimagined—whether it’s a casual dinner or a special occasion, these rolls bring that warm, homemade feeling with none of the usual gluten-free headaches.
What Ingredients You Will Need
This recipe uses straightforward, wholesome ingredients to create fluffy gluten-free dinner rolls that are soft inside with a golden crust. Most are pantry staples, but a few help with texture and rise—no need for exotic items.
- Gluten-Free Flour Blend: 2 cups (240g) rice flour (I prefer Bob’s Red Mill for consistent results)
- Tapioca Starch: ½ cup (60g) – adds chewiness and stretch
- Xanthan Gum: 1 teaspoon – essential for binding and elasticity
- Baking Powder: 1 teaspoon – gives a gentle lift
- Instant Yeast: 2 ¼ teaspoons (one packet) – for that perfect rise
- Sugar: 2 tablespoons – balances flavor and feeds the yeast
- Salt: 1 teaspoon – enhances overall taste
- Warm Milk: 1 cup (240ml), about 110°F (43°C) – use dairy-free milk like almond or oat for a vegan twist
- Large Egg: 1, room temperature – adds structure and moisture
- Unsalted Butter: 3 tablespoons, melted (or coconut oil for dairy-free) – for richness and softness
- Apple Cider Vinegar: 1 teaspoon – helps tenderize the crumb
Tip: For a slight variation, swapping part of the rice flour for sorghum flour can add a subtle nuttiness. Also, fresh yeast works if you have it but adjust quantities accordingly. I usually recommend letting the yeast bloom in warm milk with sugar for a few minutes to check it’s active, though instant yeast can be mixed straight in.
Equipment Needed
One of the best things about this recipe is how minimal the equipment needs to be. Here’s what I use and recommend:
- Large Mixing Bowl: Preferably glass or stainless steel to mix all ingredients in one spot without mess.
- Whisk or Fork: For combining dry ingredients and beating eggs.
- Rubber Spatula: Essential for folding and scraping sides of the bowl.
- Measuring Cups and Spoons: For accuracy, especially with gluten-free baking.
- Baking Sheet: Line with parchment paper or a silicone mat to prevent sticking.
- Kitchen Towel or Plastic Wrap: To cover the dough while it rises and keep moisture in.
- Oven: Obviously, for baking. A reliable oven thermometer can help ensure perfect temperature.
If you don’t have a silicone spatula, a wooden spoon works just fine. For measuring, I’m a fan of using a digital scale to get consistent results, but cups/spoons will work if you’re careful. No need for a stand mixer here—this recipe is truly one-bowl and hands-on.
Preparation Method
- Activate the Yeast: In your large mixing bowl, combine warm milk (110°F/43°C) and sugar. Stir to dissolve, then sprinkle in the instant yeast. Let it sit for about 5 to 7 minutes until frothy—if it doesn’t foam, your yeast might be inactive, so start again with fresh yeast.
- Mix Dry Ingredients: While yeast activates, whisk together rice flour, tapioca starch, xanthan gum, baking powder, and salt in a separate bowl or directly into the yeast mixture after activation.
- Add Wet Ingredients: Crack the egg into the bowl, add melted butter and apple cider vinegar. Stir everything gently with a rubber spatula until a sticky dough forms. It should be thicker than cake batter but still a bit tacky. If it feels too dry, add water a teaspoon at a time.
- First Rise: Cover the bowl with a kitchen towel or plastic wrap. Place it in a warm, draft-free spot (I usually use the oven with the light on). Let the dough rise for about 45 minutes or until it has puffed up noticeably.
- Shape the Rolls: Lightly grease your hands with oil or wet them to prevent sticking. Divide the dough into 8 equal portions (about 90g or 3 oz each). Shape each portion gently into a smooth ball by folding edges underneath and placing them on the prepared baking sheet, spaced evenly.
- Second Rise: Cover the shaped rolls with your towel or plastic wrap again. Let them rise for another 20 to 25 minutes until puffy but not doubled. Preheat your oven to 375°F (190°C) during this time.
- Bake: Place the baking sheet in the center rack of the oven. Bake for 18 to 22 minutes, or until the tops are golden brown and the rolls sound hollow when tapped.
- Cool & Serve: Remove rolls from oven and let cool on a wire rack for at least 10 minutes before slicing or serving. This resting helps set the crumb and prevents crumbling.
Note: If the tops brown too quickly, tent loosely with foil halfway through baking. Also, don’t skip the second rise—it’s key for that airy texture. I learned the hard way after rushing to bake just after shaping, ending up with dense rolls that no one wanted to eat!
Cooking Tips & Techniques
Baking gluten-free bread can be tricky, but here are some tips I picked up over time:
- Temperature Matters: Yeast loves warmth but hates heat. Keep your milk around 110°F (43°C) to wake the yeast without killing it.
- Don’t Overmix: Gluten-free dough is naturally sticky and looser than wheat dough. Stir gently and avoid overworking it to keep the texture light.
- Use Fresh Yeast: Old yeast can lead to flat rolls. Always check your yeast’s expiration and proof it if unsure.
- Patience is Key: Let the dough rise fully during both proofs. It’s tempting to rush but waiting makes a huge difference in fluffiness.
- Moisture Balance: Gluten-free flours absorb liquids differently. If your dough feels dry, don’t hesitate to add a splash of water or milk.
- Practice Makes Perfect: I once baked these at a high altitude without adjusting liquid—lesson learned. If you’re baking above sea level, adding a little extra moisture helps.
One kitchen mishap: I forgot to add the xanthan gum once and ended up with crumbly rolls that fell apart. That little ingredient really holds the magic together. Also, using a kitchen scale ensures consistency, especially with gluten-free flours that vary in density.
Variations & Adaptations
These fluffy gluten-free dinner rolls are a great base for customization:
- Dairy-Free Option: Swap butter for coconut oil or vegan margarine, and use almond or oat milk instead of cow’s milk.
- Herb-Infused Rolls: Add 1 to 2 teaspoons of dried herbs like rosemary, thyme, or oregano to the dry ingredients for savory flavor.
- Sweet Cinnamon Rolls: Mix 2 tablespoons of cinnamon and 3 tablespoons of brown sugar into the dough and brush with melted butter before baking. Top with a simple glaze for breakfast buns.
- Whole Grain Boost: Replace ½ cup of rice flour with buckwheat or sorghum flour for a nuttier profile.
- Low-Carb Version: Substitute tapioca starch with coconut flour (reduce quantity to ⅓ cup) and increase eggs to 2 for better binding.
I once tried adding a tablespoon of chia seeds to the dough for extra texture, which worked surprisingly well and added a nice crunch. Feel free to experiment with mix-ins like garlic powder, shredded cheese, or seeds on top for extra flair.
Serving & Storage Suggestions
These rolls are best enjoyed fresh and warm, straight from the oven with a pat of butter melting on top. They make a perfect side for soups, stews, roasted veggies, or to build sandwiches.
For storing, keep leftovers in an airtight container at room temperature for up to 2 days. To extend shelf life, freeze the rolls individually wrapped in plastic wrap and a freezer bag for up to 3 months.
When reheating, thaw at room temperature and warm in a 350°F (175°C) oven for 5 to 7 minutes or in a microwave for about 15 seconds. Avoid overheating to prevent drying out.
Interestingly, these rolls tend to develop even better flavor after resting overnight wrapped in foil—makes for a great make-ahead option.
Nutritional Information & Benefits
Each fluffy gluten-free dinner roll (about 90g) provides approximately:
| Calories | 150 |
|---|---|
| Carbohydrates | 28g |
| Protein | 3g |
| Fat | 4g |
| Fiber | 1g |
The key ingredients, like rice flour and tapioca starch, provide quick energy without gluten irritation. Using apple cider vinegar helps with digestion and adds tenderness without extra fat. Plus, the moderate protein and fat from the egg and butter support satiety.
This recipe is naturally gluten-free and dairy-free adaptable, making it suitable for many dietary needs. Keep in mind, it contains eggs and dairy by default, so swap accordingly if avoiding allergens.
Conclusion
Fluffy gluten-free dinner rolls don’t have to be a complicated mystery. This easy one-bowl recipe has become my trusted favorite because it’s forgiving, quick, and reliably soft every time. Whether you’re new to gluten-free baking or looking for a simple crowd-pleaser, these rolls fit the bill with their light texture and subtle flavor.
Feel free to customize with herbs, dairy-free swaps, or even turn them into sweet treats—there’s room to make these rolls your own. I love how they bring a little warmth and comfort to the table without the stress.
Give them a try, and let me know how they turned out for you! Share your tweaks, questions, or photos—I always enjoy hearing from fellow kitchen experimenters. After all, baking is all about having fun (and sometimes making a mess) while creating something delicious.
Happy baking, friends!
FAQs
Can I make these dinner rolls vegan?
Yes! Replace the egg with a flax or chia egg (1 tablespoon ground seeds + 3 tablespoons water), and swap butter for coconut oil or vegan margarine. Use plant-based milk to keep it fully vegan.
How do I store leftover gluten-free rolls?
Keep them in an airtight container at room temperature for up to 2 days. For longer storage, freeze wrapped individually for up to 3 months.
Can I use a different gluten-free flour blend?
You can, but results may vary. I recommend using a mix with rice flour and tapioca starch to maintain the soft texture. Avoid blends with heavy nut flours unless adjusting liquid amounts.
Why are my rolls dense or crumbly?
This usually means the dough was too dry, or the yeast didn’t rise properly. Make sure to proof your yeast and allow enough rising time. Also, don’t skip the xanthan gum—it’s key for binding.
Can I make these rolls ahead of time?
Absolutely! Prepare the dough and let it rise, then shape and refrigerate overnight. Bake fresh the next day for best texture, adding a few extra minutes to baking time if cold from fridge.
Pin This Recipe!

Fluffy Gluten-Free Dinner Rolls Easy One-Bowl Recipe for Perfect Soft Buns

These fluffy gluten-free dinner rolls are soft, pillowy, and perfect for any occasion. Made with simple pantry staples and a one-bowl method, they deliver a light texture and subtle flavor without gluten.
- Prep Time: 15 minutes
- Cook Time: 22 minutes
- Total Time: 82 minutes
- Yield: 8 rolls 1x
- Category: Bread
- Cuisine: American
Ingredients
- 2 cups (240g) rice flour
- ½ cup (60g) tapioca starch
- 1 teaspoon xanthan gum
- 1 teaspoon baking powder
- 2 ¼ teaspoons (one packet) instant yeast
- 2 tablespoons sugar
- 1 teaspoon salt
- 1 cup (240ml) warm milk (about 110°F/43°C), dairy-free milk like almond or oat for vegan option
- 1 large egg, room temperature
- 3 tablespoons unsalted butter, melted (or coconut oil for dairy-free)
- 1 teaspoon apple cider vinegar
Instructions
- Activate the yeast: In a large mixing bowl, combine warm milk (110°F/43°C) and sugar. Stir to dissolve, then sprinkle in the instant yeast. Let it sit for about 5 to 7 minutes until frothy.
- Mix dry ingredients: Whisk together rice flour, tapioca starch, xanthan gum, baking powder, and salt either in a separate bowl or directly into the yeast mixture after activation.
- Add wet ingredients: Crack the egg into the bowl, add melted butter and apple cider vinegar. Stir gently with a rubber spatula until a sticky dough forms. If too dry, add water a teaspoon at a time.
- First rise: Cover the bowl with a kitchen towel or plastic wrap. Place in a warm, draft-free spot and let the dough rise for about 45 minutes until puffed up noticeably.
- Shape the rolls: Lightly grease or wet your hands to prevent sticking. Divide dough into 8 equal portions (~90g or 3 oz each). Shape each into a smooth ball and place on a prepared baking sheet spaced evenly.
- Second rise: Cover shaped rolls with towel or plastic wrap. Let rise for another 20 to 25 minutes until puffy but not doubled. Preheat oven to 375°F (190°C) during this time.
- Bake: Place baking sheet on center rack and bake for 18 to 22 minutes until tops are golden brown and rolls sound hollow when tapped.
- Cool & serve: Remove rolls from oven and cool on a wire rack for at least 10 minutes before slicing or serving.
Notes
If tops brown too quickly, tent loosely with foil halfway through baking. Do not skip the second rise for airy texture. Use fresh yeast and proof it if unsure. For dairy-free, substitute butter with coconut oil and milk with plant-based milk. Use a kitchen scale for best consistency. Add water if dough feels too dry. Let rolls cool before slicing to prevent crumbling.
Nutrition
- Serving Size: 1 roll (about 90g)
- Calories: 150
- Fat: 4
- Carbohydrates: 28
- Fiber: 1
- Protein: 3
Keywords: gluten-free dinner rolls, gluten-free bread, soft buns, easy gluten-free recipe, one-bowl bread, dairy-free option, yeast rolls