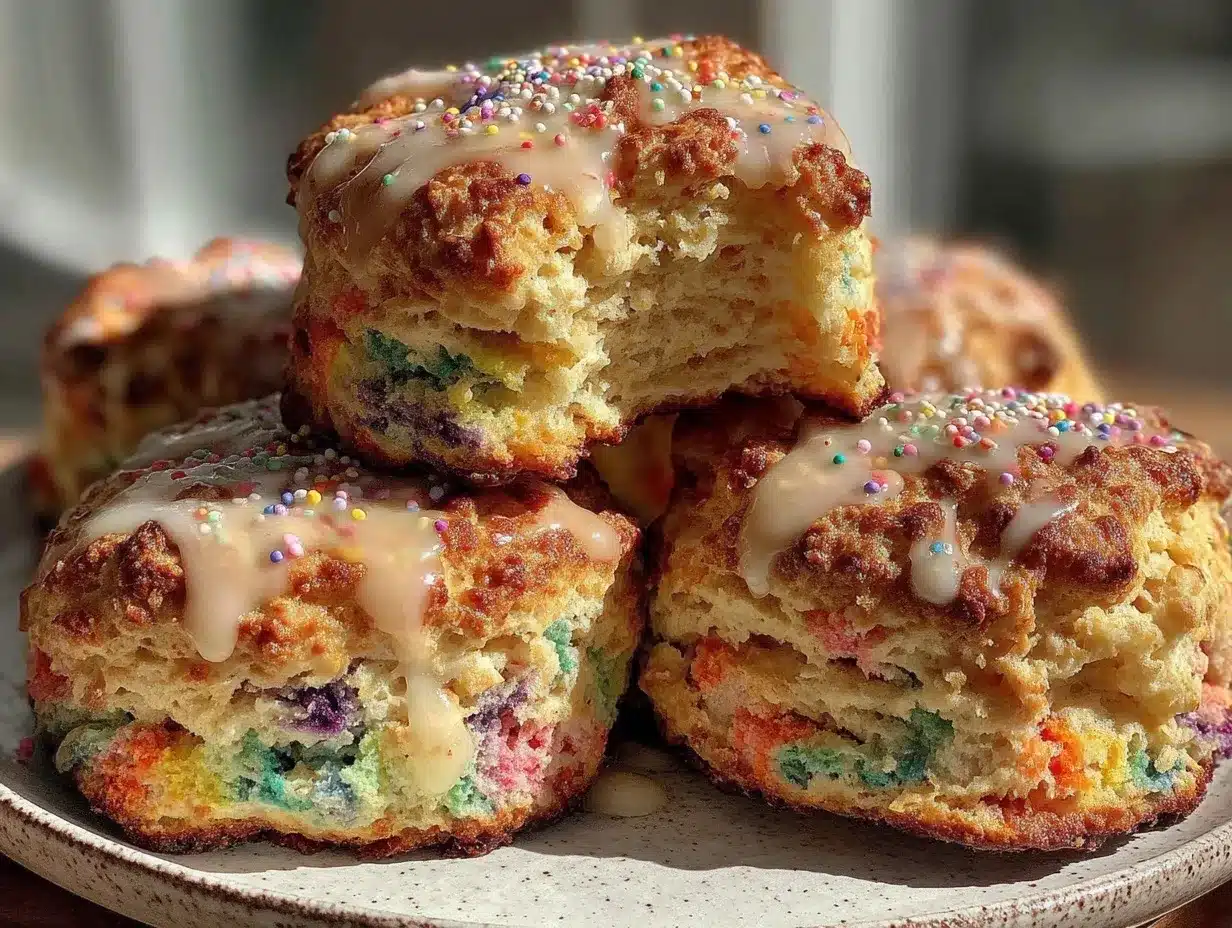
Let me tell you, the moment these Fluffy Dr. Seuss Rainbow Scone Cloud Towers came out of the oven, the air was thick with the sweet scent of vanilla and buttery dough, mingling with a playful burst of fruity colors that almost seemed too good to eat. The first time I baked these whimsical treats, I was instantly hooked—the kind of moment where you pause, take a deep breath, and just smile because you know you’re onto something truly special. Honestly, they feel like a warm hug wrapped in a rainbow, and I wish I’d stumbled upon this recipe years ago when I was knee-high to a grasshopper and spent rainy weekends dreaming up colorful desserts in my grandma’s kitchen.
This recipe first came to me on a lazy Sunday afternoon, fiddling with colors and flavors just for fun, and before I knew it, my family couldn’t stop sneaking these scone cloud towers off the cooling rack (and I can’t really blame them). Let’s face it, who doesn’t want a scone that’s fluffy, sweet, and bursting with that playful Dr. Seuss charm? Perfect for potlucks, birthday brunches, or just brightening up your Pinterest cookie board, these scones have become a staple at my family gatherings and gifting occasions. I’ve tested this recipe multiple times, in the name of research, of course, and each batch feels like a little celebration you’re going to want to bookmark forever.
Why You’ll Love This Recipe
From my kitchen to yours, this Fluffy Dr. Seuss Rainbow Scone Cloud Towers recipe brings together the best of both worlds—fun and flavor—with a few tricks learned over numerous trials to make it shine every time.
- Quick & Easy: Comes together in under 30 minutes, perfect for busy mornings or last-minute guests.
- Simple Ingredients: No need for fancy or hard-to-find items; you probably have everything on hand.
- Perfect for Celebrations: Ideal for birthdays, themed parties, or anytime you want to add a splash of color to your table.
- Crowd-Pleaser: Kids and adults alike rave about the soft texture and vibrant layers.
- Unbelievably Delicious: The scones are tender and fluffy, with just enough sweetness to keep you coming back for more.
What really sets this recipe apart is the delicate fluffiness achieved by a special folding technique paired with the perfect balance of vanilla and citrus zest—trust me, this isn’t your average scone. The rainbow layers are gently blended, so each bite is a little surprise of color and flavor. This recipe isn’t just good—it’s the kind that makes you close your eyes after the first bite and say, “Yep, this is the one.” It’s comfort food reimagined—fun, fast, and full of soul-soothing satisfaction. Whether you want to impress guests without breaking a sweat or brighten your breakfast routine, these scone cloud towers have you covered.
What Ingredients You Will Need
This recipe uses simple, wholesome ingredients to deliver bold flavor and a satisfying fluffy texture without the fuss. Most are pantry staples, with a few colorful surprises.
- For the Scone Batter:
- 2 ½ cups (320g) all-purpose flour, sifted (I recommend King Arthur for best texture)
- ¼ cup (50g) granulated sugar
- 1 tablespoon baking powder
- ½ teaspoon salt
- 1 teaspoon vanilla extract (pure, not imitation)
- Zest of 1 lemon (adds a bright, fresh note)
- ¾ cup (170g) cold unsalted butter, cut into cubes (keep it chilled!)
- 1 cup (240ml) heavy cream, plus extra for brushing
- 1 large egg, room temperature
- For the Rainbow Layers:
- Gel food coloring in red, orange, yellow, green, blue, and purple (use gel for vibrant color without sogginess)
- Optional Glaze:
- 1 cup (120g) powdered sugar
- 2 tablespoons (30ml) milk or cream
- ½ teaspoon vanilla extract
If you want to make these gluten-free, almond flour is a decent substitute but expect a denser texture. For dairy-free options, swap the heavy cream for coconut cream and butter for a plant-based alternative—just keep everything cold! When picking your butter, the colder and unsalted kind really helps with that flaky, fluffy cloud effect. And if you’re using seasonal fruit or want to switch things up, a handful of fresh blueberries or diced strawberries tucked between layers is a lovely surprise.
Equipment Needed
- Mixing bowls (medium and large)
- Pastry cutter or two forks (for cutting in butter; a food processor works but be gentle!)
- Measuring cups and spoons (accuracy counts here)
- Rolling pin (a lightweight, smooth one is best for gentle rolling)
- Baking sheet lined with parchment paper or silicone mat
- Cooling rack for finishing
- Small bowls or ramekins for gel colors
- Pastry brush (for cream and optional glaze)
If you don’t have a pastry cutter, you can use your fingers, but try to work quickly to keep the butter cold. A bench scraper can also help in folding and layering the dough. For budget-friendly options, consider silicone baking mats instead of parchment to reduce waste and improve even baking. Keep your rolling pin chilled in the fridge for a bit before you start—it helps the dough stay cool and fluffy.
Preparation Method
- Mix Dry Ingredients: In a large bowl, whisk together the sifted flour, sugar, baking powder, salt, and lemon zest. This takes about 2 minutes. The zest will infuse subtle brightness, so don’t skip it.
- Cut in Butter: Add the cold, cubed butter to the dry mixture. Using a pastry cutter or two forks, cut the butter into the flour until the mixture looks like coarse crumbs with pea-sized bits of butter remaining. This step should be quick, around 3-4 minutes, to avoid warming the butter.
- Whisk Wet Ingredients: In a separate bowl, combine the heavy cream, egg, and vanilla extract. Whisk until smooth and slightly frothy. This should only take a minute or two.
- Combine Wet & Dry: Pour the wet ingredients into the flour and butter mixture. Use a wooden spoon or spatula to gently stir until just combined. The dough will be shaggy, and that’s okay. Avoid overmixing—it can make the scones tough.
- Divide Dough for Coloring: Turn the dough onto a lightly floured surface and split it into six equal portions (about 8 oz or 225g each). Place each portion into a separate small bowl.
- Add Colors: Add a small dollop of gel food coloring to each bowl (red, orange, yellow, green, blue, purple). Gently knead each portion just enough to incorporate the color evenly—don’t overwork it or you’ll lose the fluffiness. This should take about 2 minutes per color.
- Roll & Layer: Roll each colored dough portion into a roughly 8-inch (20 cm) circle about ½ inch (1.3 cm) thick. Starting with one color, place the next circle on top, stacking all six layers to form a rainbow tower. Gently press the layers together without squishing the dough.
- Cut the Scone Cloud Towers: Using a sharp knife or bench scraper, cut the stacked dough into 8 equal triangles, just like a pizza. This should take 5 minutes. Arrange the scones on your lined baking sheet, spacing about 2 inches (5 cm) apart.
- Brush and Chill: Brush the tops of the scones with a bit of heavy cream for a golden finish. Chill the baking sheet in the fridge for 15 minutes—this helps maintain their shape and fluffiness during baking.
- Bake: Preheat your oven to 400°F (200°C). Bake the scones for 18-22 minutes, until puffed and golden on top. Keep an eye on them around the 15-minute mark to avoid over-browning.
- Optional Glaze: While the scones cool on a rack, whisk together powdered sugar, milk, and vanilla to make a simple glaze. Drizzle over the scones once slightly cooled for a shiny, sweet finish.
Pro tip: If your kitchen is warm, pop the dough layers back in the fridge between rolling and stacking to keep everything cool. When done baking, the scones should feel light and springy to the touch—if they’re dense, you might have overmixed the dough a bit.
Cooking Tips & Techniques
Fluffy scones can be tricky, but a few tricks make all the difference. First, keep your butter and cream cold—that’s the secret to those cloud-like layers. I learned the hard way that warm butter leads to heavy, dense scones, and honestly, nobody wants that. When mixing, less is more; overworking the dough develops gluten and ruins the tender crumb.
Folding the dough gently when mixing in colors preserves fluffiness and prevents the layers from bleeding into a muddy mess. Don’t rush the chilling steps: letting the dough rest in the fridge before baking helps the scones hold their shape and rise beautifully.
Common mistakes include skipping the lemon zest or vanilla—those little flavor punches really lift the whole scone. If you find your scones are too crumbly, a splash more cream usually fixes it. Also, don’t crowd the baking tray; give them room to puff up.
Multitasking tip: While the scones chill, prep your glaze or clean up—makes the process smoother and less stressful. Finally, always use a sharp knife to cut the scones to avoid squishing those lovely layers.
Variations & Adaptations
Feeling adventurous? Here are some fun twists to make these rainbow cloud towers your own:
- Gluten-Free Version: Swap all-purpose flour for a gluten-free blend like Bob’s Red Mill 1-to-1. The texture will be slightly denser but still delicious.
- Vegan Adaptation: Use coconut cream instead of heavy cream, vegan butter, and a flax egg (1 tablespoon ground flaxseed + 3 tablespoons water) in place of the egg. Add a touch more lemon zest for brightness.
- Fruit Infused: Fold in small fresh berries or diced dried fruit between the layers before stacking for a juicy surprise.
- Chocolate Drizzle: After glazing, drizzle melted dark or white chocolate for an extra indulgent treat.
One of my favorite personal adaptations was adding a pinch of cardamom to the batter for a subtle spicy warmth that made these scones feel perfect for chilly mornings. Feel free to experiment with your favorite extracts or spices to match your mood or season.
Serving & Storage Suggestions
Serve these Fluffy Dr. Seuss Rainbow Scone Cloud Towers warm or at room temperature to fully enjoy their soft texture and vibrant colors. They pair beautifully with a cup of tea, coffee, or a bright glass of fresh-squeezed orange juice. For brunch, consider serving alongside fresh fruit salad or scrambled eggs for a balanced spread.
Store scones in an airtight container at room temperature for up to 2 days. If you want to keep them longer, freeze the baked scones individually wrapped in plastic wrap and placed in a freezer bag for up to 3 months. To reheat, pop them in a 350°F (175°C) oven for 8-10 minutes until warmed through—this helps revive that just-baked fluffiness.
Over time, the flavors meld and the lemon zest shines even brighter, making leftovers surprisingly delightful. If glazing, add it fresh after reheating to keep that lovely shine and sweetness intact.
Nutritional Information & Benefits
Each scone contains approximately 250-280 calories, with around 12 grams of fat, 30 grams of carbohydrates, and 4 grams of protein. The lemon zest adds a touch of vitamin C, while the heavy cream contributes calcium and richness. This recipe is vegetarian-friendly and can be adapted for gluten-free or vegan diets as noted.
While these scones lean more toward a treat category, the use of fresh lemon zest and real vanilla extract offers a natural flavor boost without artificial additives. Making these at home means you can control sugar levels and avoid preservatives common in store-bought scones. From a wellness perspective, enjoying a homemade, thoughtfully prepared scone feels like a little self-care moment—pure, nostalgic comfort with a colorful twist.
Conclusion
If you’re looking for a fun, fluffy treat that brings a pop of color and a big smile to any table, these Fluffy Dr. Seuss Rainbow Scone Cloud Towers are absolutely worth trying. They’re easy to make, customizable, and the perfect way to add a little whimsy to your baking routine. Personally, I love how they turn a simple scone into a celebration—each bite feels like a tiny party in your mouth!
Don’t be shy to play with the colors or flavors to make this recipe your own. And hey, if you try it out, I’d love to hear how your rainbow towers turned out—drop a comment or share your tweaks! Remember, baking is all about joy and experimentation, and these scones are here to bring some bright, fluffy happiness to your day.
Happy baking, and may your kitchen always smell like vanilla and rainbows!
Frequently Asked Questions
Can I use regular food coloring instead of gel?
You can, but gel food coloring is best because it provides vibrant color without adding extra liquid, which can affect dough consistency.
How do I keep the scones fluffy and not dense?
Keep your butter and cream cold, mix lightly, and avoid overworking the dough. Also, chilling the dough before baking helps maintain fluffiness.
Can I make these ahead of time?
Absolutely! You can prepare and cut the scones, freeze them unbaked, then bake fresh when ready. Just add a couple of extra minutes to the baking time.
What’s the best way to store leftover scones?
Store leftovers in an airtight container at room temperature for up to 2 days or freeze for longer storage. Reheat in the oven to refresh texture.
Are these scones suitable for kids?
Yes! Kids love the bright colors and soft texture. Just be mindful of any food coloring sensitivities and consider natural coloring alternatives if needed.
Pin This Recipe!
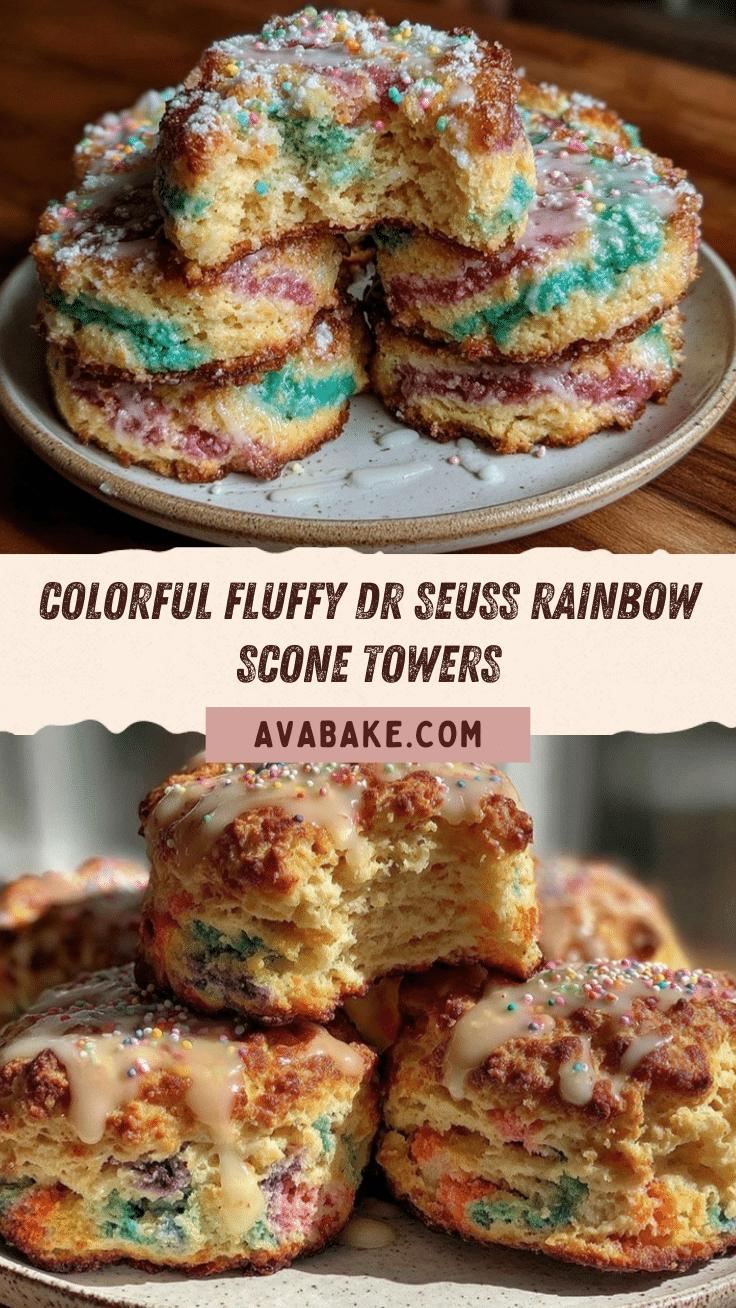
Fluffy Dr. Seuss Rainbow Scone Cloud Towers
These fluffy, colorful scones are a fun and easy homemade treat bursting with vanilla, citrus zest, and vibrant rainbow layers. Perfect for celebrations, brunches, or brightening up any table with a playful twist.
- Prep Time: 20 minutes
- Cook Time: 20 minutes
- Total Time: 40 minutes
- Yield: 8 scones 1x
- Category: Breakfast, Brunch, Dessert
- Cuisine: American
Ingredients
- 2 ½ cups (320g) all-purpose flour, sifted
- ¼ cup (50g) granulated sugar
- 1 tablespoon baking powder
- ½ teaspoon salt
- 1 teaspoon vanilla extract (pure)
- Zest of 1 lemon
- ¾ cup (170g) cold unsalted butter, cut into cubes
- 1 cup (240ml) heavy cream, plus extra for brushing
- 1 large egg, room temperature
- Gel food coloring in red, orange, yellow, green, blue, and purple
- Optional Glaze:
- 1 cup (120g) powdered sugar
- 2 tablespoons (30ml) milk or cream
- ½ teaspoon vanilla extract
Instructions
- Mix dry ingredients: In a large bowl, whisk together sifted flour, sugar, baking powder, salt, and lemon zest (about 2 minutes).
- Cut in butter: Add cold cubed butter to dry mixture and cut in using a pastry cutter or forks until mixture resembles coarse crumbs with pea-sized butter bits (3-4 minutes).
- Whisk wet ingredients: In a separate bowl, combine heavy cream, egg, and vanilla extract; whisk until smooth and frothy.
- Combine wet and dry: Pour wet ingredients into dry mixture and gently stir until just combined; dough will be shaggy.
- Divide dough: Turn dough onto floured surface and split into six equal portions (~8 oz or 225g each). Place each in separate small bowls.
- Add colors: Add gel food coloring to each portion (red, orange, yellow, green, blue, purple) and gently knead to incorporate color evenly (about 2 minutes per color).
- Roll and layer: Roll each colored dough into an 8-inch circle about ½ inch thick. Stack all six layers gently to form a rainbow tower.
- Cut scones: Using a sharp knife or bench scraper, cut stacked dough into 8 equal triangles. Arrange on lined baking sheet spaced 2 inches apart.
- Brush and chill: Brush tops with heavy cream and chill baking sheet in fridge for 15 minutes.
- Bake: Preheat oven to 400°F (200°C). Bake scones for 18-22 minutes until puffed and golden, watching closely after 15 minutes.
- Optional glaze: Whisk powdered sugar, milk or cream, and vanilla extract. Drizzle over cooled scones.
Notes
Keep butter and cream cold to ensure fluffy, flaky layers. Avoid overmixing dough to prevent toughness. Chill dough before baking to maintain shape and fluffiness. Use gel food coloring for vibrant colors without sogginess. For gluten-free, use a 1-to-1 gluten-free flour blend; for vegan, substitute coconut cream, vegan butter, and flax egg. Fresh berries can be added between layers for a fruity surprise. Store scones in airtight container up to 2 days or freeze up to 3 months. Reheat in oven at 350°F for 8-10 minutes.
Nutrition
- Serving Size: 1 scone
- Calories: 265
- Sugar: 8
- Sodium: 250
- Fat: 12
- Saturated Fat: 7
- Carbohydrates: 30
- Fiber: 1
- Protein: 4
Keywords: rainbow scones, fluffy scones, colorful scones, Dr. Seuss scones, easy scone recipe, homemade scones, breakfast treats, brunch recipes


