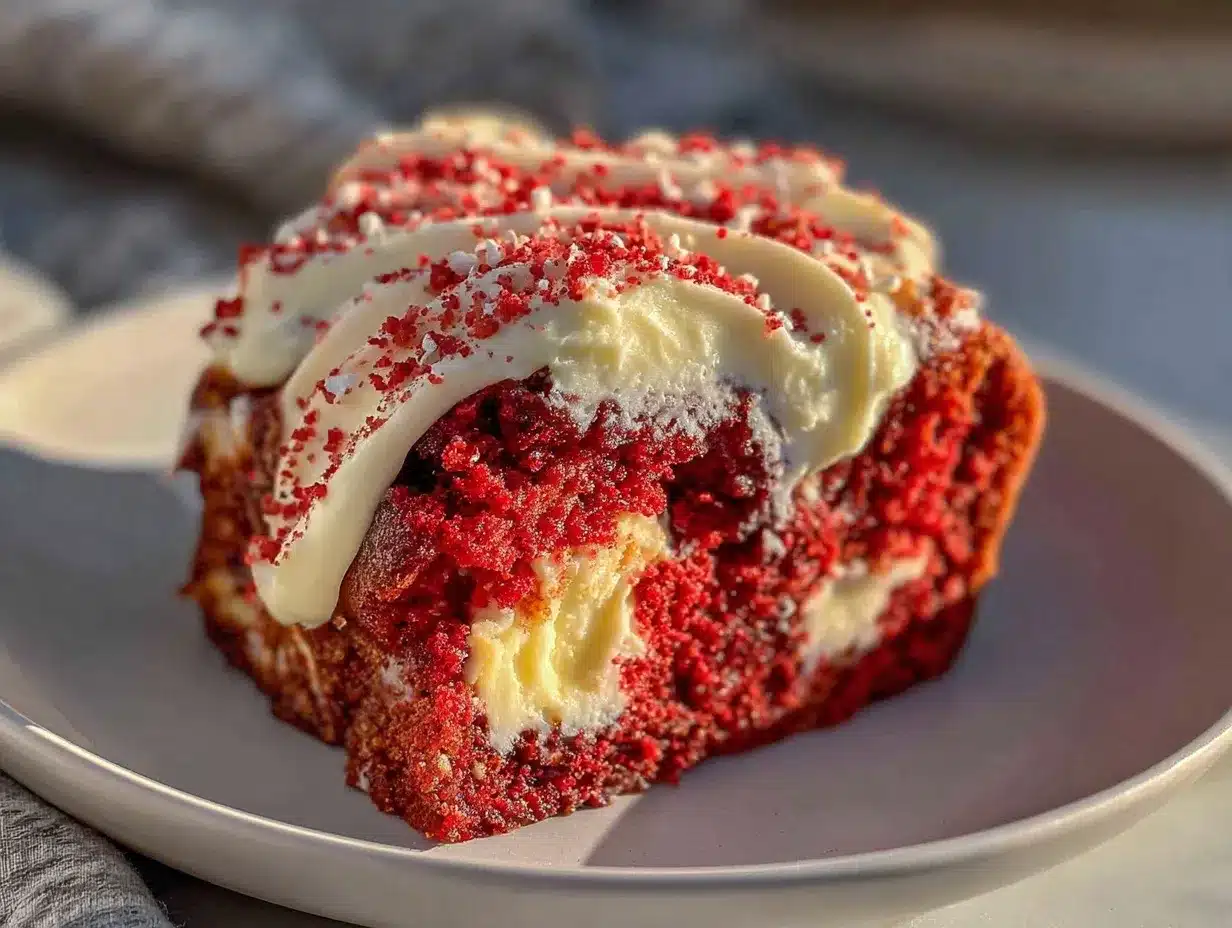
“I wasn’t expecting my Tuesday night baking spree to turn into a full-on kitchen adventure, but there I was, juggling a cracked mixing bowl and a half-melted stick of butter, creating what would become my go-to dessert: the firecracker red velvet poke cake with cream cheese filling. You know that feeling when you’re halfway through a recipe, and suddenly the power goes out? Yep, that happened. The oven light flickered off just as I was about to slide the cake in, leaving me staring at a pan full of batter and a slightly frazzled spirit. But let me tell you, this recipe stuck with me—not just because of that chaotic night, but because the flavors and textures blend into something honestly unforgettable.
I first tasted a version of this cake at a friend’s Fourth of July barbecue, where it was served as a “no big deal” dessert that stole the show. The bright red cake with pockets of sweet cream cheese and a playful pop of sprinkles made it feel like a celebration in every bite. Since then, I’ve tweaked and tested this firecracker red velvet poke cake recipe in my own kitchen, learning what works, what doesn’t, and how to get that perfect balance of rich velvet flavor and creamy filling. If you’ve ever been curious about poke cakes or just want to try something that’s a little extra with a whole lot of fun, this one’s for you.
Maybe you’ve been there—wanting a dessert that’s easy but impressive, colorful but not fussy, with a bit of nostalgia and a splash of surprise. That’s exactly why this recipe keeps popping up in my rotation. It’s kind of like a friendly kitchen rebel: simple on the surface but packing a punch with every forkful.
Why You’ll Love This Recipe
- Quick & Easy: Ready in under an hour, perfect for last-minute celebrations or those spontaneous dessert cravings.
- Simple Ingredients: Uses pantry staples and common baking items you likely already have on hand.
- Perfect for Gatherings: Great for holiday parties, potlucks, or casual get-togethers with friends and family.
- Crowd-Pleaser: Kids and adults alike can’t get enough of that creamy cream cheese filling combined with luscious red velvet.
- Unbelievably Delicious: The poke cake method lets the cream cheese filling soak into the moist cake, creating pockets of luscious texture and flavor.
What sets this firecracker red velvet poke cake apart is the creamy, dreamy homemade cream cheese filling that isn’t just dolloped on top but cleverly soaked right into the cake. I’ve tried boxed pudding and instant mixes before, but honestly, nothing beats the richness and smoothness of this fresh filling. Plus, the sprinkle “firecracker” effect on top adds a joyful pop of color and texture that makes the cake feel festive without extra fuss.
This recipe isn’t just about sweetness—it’s about that warm, comforting feeling you get from an old-fashioned cake, with a playful twist that keeps it lively. Whether you’re making it for a holiday, a birthday, or just because you want to impress your coworkers without breaking a sweat, this cake hits the spot every time.
What Ingredients You Will Need
This recipe uses simple, wholesome ingredients to deliver bold red velvet flavor and a satisfyingly creamy texture without too much fuss. Most of these are pantry staples, and substitutions are easy if needed.
- For the Cake:
- 1 box red velvet cake mix (I recommend Betty Crocker for consistent results)
- 1 cup water (240 ml)
- 1/3 cup vegetable oil (80 ml) (adds moistness without heavy flavor)
- 3 large eggs (room temperature)
- 1 teaspoon vanilla extract (adds depth to the red velvet flavor)
- For the Cream Cheese Filling:
- 8 oz cream cheese, softened (226 g) (use full-fat for best creaminess)
- 1 cup powdered sugar (120 g), sifted (for smooth sweetness)
- 1/2 cup unsalted butter, softened (113 g) (adds richness and silky texture)
- 1 teaspoon vanilla extract
- 1/4 cup milk (60 ml) (adjust to get perfect spreading consistency)
- For Decoration:
- Red, white, and blue sprinkles (for that firecracker pop!)
- Optional: whipped cream for topping
Substitution tips: For a dairy-free version, swap cream cheese and butter with plant-based alternatives like vegan cream cheese and margarine. Use almond or oat milk instead of dairy milk. Gluten-free cake mix works well if you need a gluten-free dessert.
Equipment Needed
- 9×13 inch (23×33 cm) baking pan – standard size, but you can use glass or metal depending on what you have.
- Electric mixer or stand mixer – helpful for whipping the cream cheese filling smooth, but a sturdy whisk works if you’re patient.
- Mixing bowls – at least two, one for cake batter and one for cream cheese filling.
- Rubber spatula – for scraping down the sides and folding ingredients.
- Toothpick or skewer – essential for poking holes in the cake to soak in the filling.
- Measuring cups and spoons – accurate measurements matter, especially for baking!
If you don’t have a stand mixer, I’ve made this with a hand mixer many times. Just soften your cream cheese and butter well, or you’ll end up with lumps (trust me, learned that the hard way). Also, a glass pan heats more evenly, but metal works fine if you adjust baking time slightly.
Preparation Method
- Preheat your oven to 350°F (175°C). Grease your 9×13 inch baking pan lightly with butter or non-stick spray. This prevents the cake from sticking and helps with even browning. (Time: 10 minutes)
- Prepare the red velvet cake batter: In a large bowl, combine the cake mix, water (1 cup/240 ml), vegetable oil (1/3 cup/80 ml), eggs (3 large), and vanilla extract (1 tsp). Beat on medium speed for about 2 minutes until smooth and velvety. Don’t overmix; just get rid of lumps. (Time: 5 minutes)
- Pour the batter evenly into your prepared pan. Use a spatula to smooth the top gently. (Time: 2 minutes)
- Bake the cake for 30-35 minutes. Insert a toothpick into the center to check doneness; it should come out with a few moist crumbs but no wet batter. (Time: 30-35 minutes) Tip: If the edges bake faster than the center, cover loosely with foil halfway through.
- Remove the cake from the oven and let it cool for 10 minutes in the pan. Then, use a toothpick or skewer to poke holes all over the surface—about 1-inch apart. This is the “poke” that lets the cream cheese filling seep in, making it so moist and delicious. (Time: 5 minutes)
- Make the cream cheese filling: While the cake cools, beat the softened cream cheese (8 oz/226 g) and butter (1/2 cup/113 g) together until smooth and creamy. Gradually add powdered sugar (1 cup/120 g), then vanilla extract (1 tsp). Add milk (1/4 cup/60 ml) little by little until the filling spreads easily but isn’t runny. (Time: 10 minutes)
- Pour the cream cheese filling evenly over the warm cake, using a spatula to spread it gently into the holes. The filling will sink into the cake’s pockets, creating those magical creamy bursts. (Time: 5 minutes)
- Chill the cake: Cover loosely with plastic wrap and refrigerate for at least 2 hours, preferably overnight. This helps the filling set and flavors meld perfectly. (Time: 2+ hours)
- Before serving, sprinkle red, white, and blue sprinkles over the top to create that festive firecracker look. Optionally, add a dollop of whipped cream on each slice. (Time: 5 minutes)
Common pitfalls: Don’t poke too large holes or the filling will pool too much and make the cake soggy. Make sure the cake is warm but not hot when adding the filling, or it won’t soak in properly. And patience with chilling is key—rushing this step results in a runnier texture.
Cooking Tips & Techniques
Making a poke cake sounds simple, but there are a few tricks that make a big difference. Honestly, the trickiest part is getting the filling texture just right so it soaks into the cake without sliding off.
- Soften your cream cheese and butter well. Cold chunks will ruin the smoothness. I usually take them out 2 hours before starting.
- Avoid overmixing the cake batter. Overworked batter can get dense and heavy, and you want that light, tender crumb typical of red velvet.
- Use room temperature eggs. Helps the batter combine better and rise evenly.
- Don’t skip the poking step. Those holes are the secret sauce that transforms this cake from ordinary to extraordinary.
- Chill the cake long enough. I’ve tried serving it right away, and it’s a mess! The flavors and cream cheese filling get way better after resting.
- Multitask while the cake bakes. I usually prepare the filling during baking to save time. Just remember to soften ingredients ahead.
One time I rushed and added the filling when the cake was still too hot—the cream cheese melted and spread too thin, losing that creamy goodness. Lesson learned!
Variations & Adaptations
This firecracker red velvet poke cake is surprisingly versatile. Here are some ways I’ve experimented:
- Berry Firecracker: Swap the classic sprinkles for fresh strawberries and blueberries on top for a natural, juicy twist.
- Chocolate Lover’s Edition: Add 1/2 cup cocoa powder to the cake mix and sprinkle mini chocolate chips into the cream cheese filling.
- Dairy-Free Option: Use vegan cream cheese and butter substitutes, plus almond or oat milk in the filling. The texture changes slightly but still delicious.
- Gluten-Free: Choose a gluten-free red velvet cake mix. I’ve found that brands like King Arthur’s work well here.
- Spiced Variation: Add a pinch of cinnamon and nutmeg to the batter for a cozy, autumnal vibe.
One of my personal favorites is using a mix of homemade cream cheese filling with a swirl of raspberry jam, adding a sweet tartness. It surprised my family, and honestly, it was gone in a flash.
Serving & Storage Suggestions
This cake is best served chilled or at cool room temperature. I like slicing it into generous squares and plating with a small scoop of vanilla ice cream or a dollop of lightly whipped cream.
Pairing it with a hot cup of coffee or a cold glass of milk balances the richness beautifully. For a party, set out an array of toppings like extra sprinkles, fresh berries, or even mini marshmallows for guests to customize their slices.
Store leftovers tightly covered in the fridge for up to 4 days. The flavors actually deepen overnight, making it even better the next day. You can freeze the cake (wrapped well in plastic wrap and foil) for up to 2 months—just thaw in the fridge before serving.
When reheating, avoid microwaving as it can make the filling separate. Instead, bring slices to room temperature or warm gently in a low oven (about 300°F/150°C) for 10 minutes.
Nutritional Information & Benefits
Per serving (based on 12 slices): approximately 350 calories, 18g fat, 42g carbohydrates, 3g protein.
The cream cheese filling adds some calcium and protein, while the cake provides quick energy. Using vegetable oil instead of butter in the batter keeps it lighter, though it’s still a treat that’s best enjoyed in moderation.
If you need to watch allergens, this recipe contains dairy, eggs, and gluten (unless you use substitutions). The homemade filling is free from artificial preservatives and colors, which I always appreciate.
From a wellness perspective, this cake is a nostalgic indulgence that can fit into a balanced diet when paired with mindful portions and active days. Plus, baking something from scratch can be a great stress-relief activity (trust me, I’ve been there!).
Conclusion
This firecracker red velvet poke cake with cream cheese filling is proof that simple ingredients and a little patience can create a dessert that’s both fun and unforgettable. It’s the kind of recipe you can customize, bring to any party, or just make on a quiet night to treat yourself. I love it because it’s festive without being complicated, creamy without being heavy, and colorful without being over the top.
Give it a try, tweak it as you like, and let me know how your version turns out! Share your tips or photos—I’m always excited to see different takes on this classic poke cake. Remember, baking is as much about joy as it is about the final product, so have fun with it and enjoy every bite.
Frequently Asked Questions (FAQs)
Can I make this cake ahead of time?
Yes! It actually tastes better after chilling overnight, which lets the cream cheese filling set and flavors meld.
What if I don’t have a cake mix? Can I make it from scratch?
Absolutely! Use your favorite red velvet cake recipe, but be sure to keep the batter moist enough to soak in the filling.
How do I soften cream cheese quickly?
Cut it into small cubes and let it sit at room temperature for about 30 minutes, or microwave in short 10-second bursts, stirring in between.
Can I use a different filling instead of cream cheese?
Sure! Vanilla pudding, chocolate ganache, or even whipped cream mixed with mascarpone can work, but the cream cheese filling gives the best balance of tangy and sweet.
What’s the best way to poke holes in the cake?
A wooden skewer or a thick toothpick works well. Make holes about 1 inch apart to allow the filling to seep evenly without creating big gaps.
Pin This Recipe!

Firecracker Red Velvet Poke Cake with Homemade Cream Cheese Filling
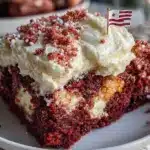
A festive and easy-to-make red velvet poke cake filled with a creamy homemade cream cheese filling and topped with colorful sprinkles. Perfect for celebrations and gatherings.
- Prep Time: 20 minutes
- Cook Time: 30-35 minutes
- Total Time: 2 hours 55 minutes
- Yield: 12 servings 1x
- Category: Dessert
- Cuisine: American
Ingredients
- 1 box red velvet cake mix (Betty Crocker recommended)
- 1 cup water (240 ml)
- 1/3 cup vegetable oil (80 ml)
- 3 large eggs (room temperature)
- 1 teaspoon vanilla extract
- 8 oz cream cheese, softened (226 g)
- 1 cup powdered sugar (120 g), sifted
- 1/2 cup unsalted butter, softened (113 g)
- 1 teaspoon vanilla extract
- 1/4 cup milk (60 ml)
- Red, white, and blue sprinkles
- Optional: whipped cream for topping
Instructions
- Preheat your oven to 350°F (175°C). Grease a 9×13 inch baking pan lightly with butter or non-stick spray.
- In a large bowl, combine the cake mix, water, vegetable oil, eggs, and vanilla extract. Beat on medium speed for about 2 minutes until smooth and velvety.
- Pour the batter evenly into the prepared pan and smooth the top gently with a spatula.
- Bake the cake for 30-35 minutes. Check doneness by inserting a toothpick into the center; it should come out with a few moist crumbs but no wet batter.
- Remove the cake from the oven and let it cool for 10 minutes in the pan. Use a toothpick or skewer to poke holes about 1 inch apart all over the surface.
- While the cake cools, beat the softened cream cheese and butter together until smooth and creamy. Gradually add powdered sugar, then vanilla extract. Add milk little by little until the filling spreads easily but isn’t runny.
- Pour the cream cheese filling evenly over the warm cake, spreading it gently into the holes so it soaks in.
- Cover loosely with plastic wrap and refrigerate for at least 2 hours, preferably overnight, to let the filling set and flavors meld.
- Before serving, sprinkle red, white, and blue sprinkles over the top. Optionally, add a dollop of whipped cream on each slice.
Notes
Soften cream cheese and butter well before mixing to avoid lumps. Do not poke holes too large to prevent sogginess. Add filling when cake is warm but not hot for best absorption. Chill cake for at least 2 hours or overnight for best flavor and texture. Use room temperature eggs for better batter consistency.
Nutrition
- Serving Size: 1 slice (1/12th of c
- Calories: 350
- Sugar: 30
- Sodium: 300
- Fat: 18
- Saturated Fat: 10
- Carbohydrates: 42
- Fiber: 1
- Protein: 3
Keywords: red velvet poke cake, cream cheese filling, easy dessert, festive cake, poke cake recipe, homemade cream cheese filling, holiday dessert