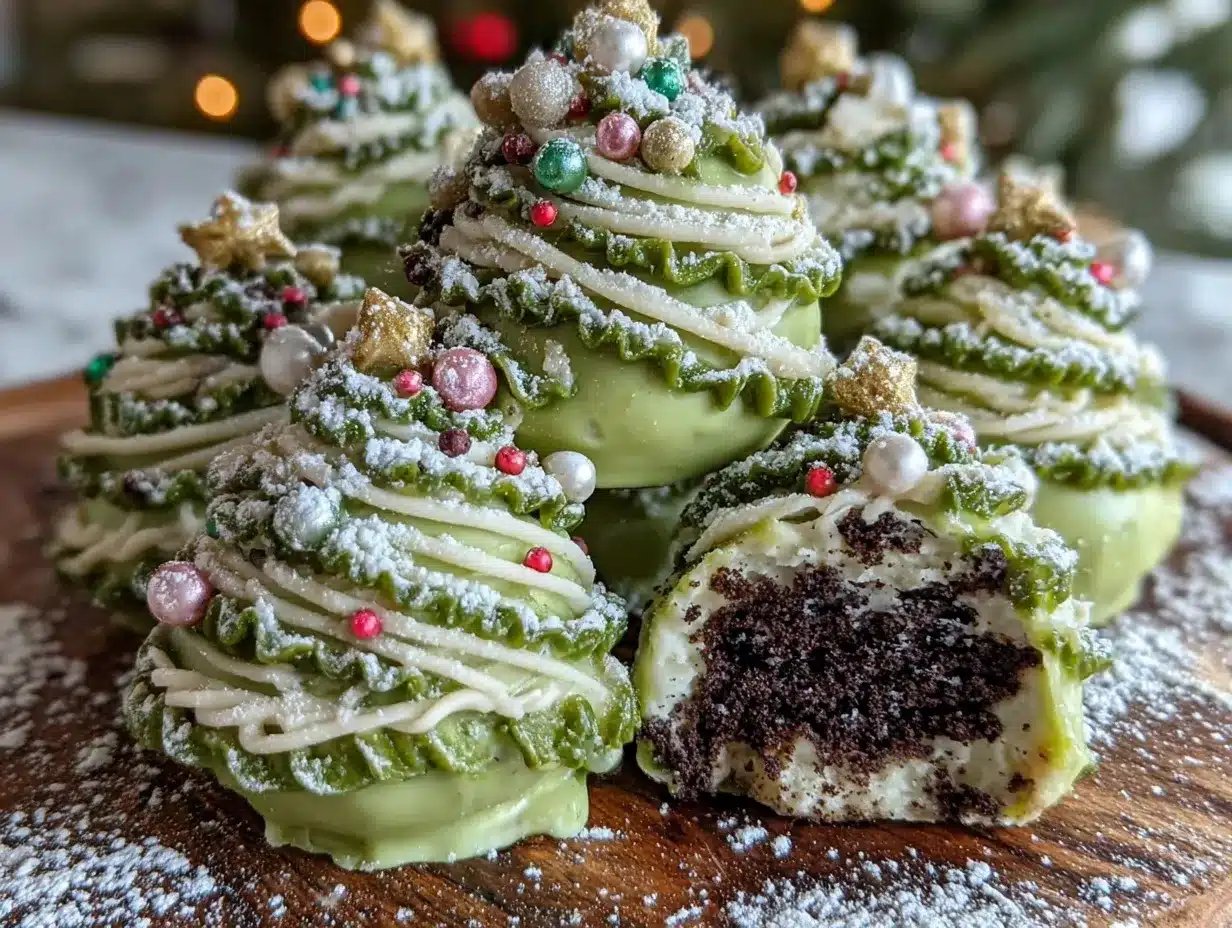
Picture this: the rich aroma of crushed Oreos mingling with cream cheese, followed by the unmistakable sweetness of melting chocolate. These Festive No-Bake Christmas Tree Oreo Truffles will transform your holiday dessert table into a whimsical winter wonderland. The first time I made these, they were an instant hit—my kids couldn’t stop gushing over how cute they looked, and my husband kept sneaking more when he thought I wasn’t looking. Honestly, they’re one of those recipes where you just know you’ve struck gold.
It all started years ago when I was brainstorming party treats for a Christmas get-together. I wanted something magical that didn’t require hours in the kitchen. That’s when the idea of turning Oreo truffles into adorable Christmas trees popped into my head. Let me tell you—there’s nothing quite like seeing your kids’ faces light up when they spot these tiny, edible masterpieces on the table. And the best part? No oven necessary!
This recipe is dangerously easy, looks like something straight off Pinterest, and tastes like pure holiday joy. Whether you’re making these for a festive potluck, gifting them to friends, or adding them to your holiday cookie tray, you’re going to want to bookmark this one. Trust me when I say these Oreo truffles will become a family tradition faster than you can say “Merry Christmas!”
Why You’ll Love This Recipe
- No Baking Required: Say goodbye to the stress of preheating ovens and monitoring timers. These truffles come together without a single degree of heat.
- The Christmas tree design is a showstopper that appeals to kids and adults alike.
- Quick and Easy: Perfect for last-minute holiday plans or impromptu gatherings.
- Simple Ingredients: Everything you need can be found at your local grocery store or already in your pantry.
- Customizable: Add sprinkles, edible glitter, or different colors of chocolate to make these truly your own.
- Kid-Friendly: A fantastic recipe to make with your little ones—they’ll love decorating their edible trees!
These truffles aren’t just another holiday treat; they’re a conversation starter, a memory-maker, and a bite of holiday magic all rolled into one. With their creamy Oreo filling and decorative chocolate shell, they’re the kind of dessert that makes you smile with every bite. Plus, they’re perfect for impressing guests without a lot of effort!
What Ingredients You Will Need
This recipe uses simple, accessible ingredients to create an eye-catching and delicious holiday treat.
- Oreos: One standard pack of Oreos (about 36 cookies), crushed into fine crumbs.
- Cream Cheese: 8 ounces of softened cream cheese for a creamy, dreamy filling.
- White Chocolate Chips: Melted for the outer coating (use candy melts for vibrant colors!).
- Green Food Coloring: To transform the white chocolate into festive green for your trees.
- Sprinkles: Red, gold, and silver sprinkles for decorating your trees like ornaments.
- Mini Star Sprinkles: For topping each tree—because every Christmas tree needs a star on top!
- Mini Pretzel Sticks: These make perfect tree trunks.
If you prefer dairy-free, you can swap the cream cheese for a plant-based alternative. Want to cut back on sugar? Use low-sugar Oreos or dark chocolate instead of white chocolate. The beauty of this recipe is how easily it adapts to what you have on hand.
Equipment Needed
- Food Processor: For crushing the Oreos into a fine crumb (a zip-top bag and rolling pin will work too).
- Mixing Bowl: Essential for combining the Oreo crumbs with cream cheese.
- Microwave-Safe Bowl: Perfect for melting the chocolate quickly.
- Baking Sheet: Line it with parchment paper for easy cleanup.
- Decorating Tools: Toothpicks or piping bags to help with detail work.
If you don’t have a food processor, no worries! Place the Oreos in a zip-top bag and crush them with a rolling pin until they’re crumbly. And if you don’t have a piping bag for decorating, just use a plastic sandwich bag with the tip snipped off.
Preparation Method
- Crush the Oreos: Use a food processor to pulse the Oreos into fine crumbs. Alternatively, place them in a zip-top bag and crush with a rolling pin until you have crumb-sized pieces.
- Combine with Cream Cheese: In a mixing bowl, combine the Oreo crumbs and softened cream cheese. Mix until fully combined and the mixture forms a dough-like consistency.
- Shape the Truffles: Roll the mixture into small balls (about 1 inch in diameter). Then shape each ball into a cone to resemble a Christmas tree. Place them on a parchment-lined baking sheet.
- Chill the Truffles: Refrigerate the truffles for at least 30 minutes to firm up.
- Melt the Chocolate: Melt the white chocolate chips in a microwave-safe bowl in 30-second intervals, stirring until smooth. Add the green food coloring and mix well.
- Coat the Truffles: Dip each cone-shaped truffle into the melted chocolate, ensuring full coverage. Let excess chocolate drip off before placing it back on the parchment paper.
- Decorate: Before the chocolate sets, add sprinkles to mimic Christmas tree ornaments and place a mini star on top of each tree.
- Add Tree Trunks: Insert a mini pretzel stick into the bottom of each truffle to create the tree trunk.
- Set and Serve: Chill the decorated truffles for at least 15 minutes or until the chocolate hardens completely. Serve and enjoy!
Cooking Tips & Techniques
Here are some helpful tips to make your Oreo truffles turn out beautifully:
- Make sure the cream cheese is fully softened before mixing—it helps the texture stay smooth.
- For extra stability, freeze the shaped truffles for 10 minutes before dipping them in chocolate.
- If the melted chocolate is too thick, add a teaspoon of vegetable oil to thin it out.
- Use a fork or toothpick to help coat the truffles evenly in chocolate.
- Decorate quickly after dipping—once the chocolate hardens, sprinkles won’t stick.
And don’t sweat it if your trees aren’t perfectly shaped. The charm of homemade desserts is in those little quirks that make them unique and special!
Variations & Adaptations
One of the best parts about these Oreo truffles is how easy they are to customize. Here are some fun ideas:
- Flavor Twist: Try flavored Oreos like mint or birthday cake for a unique taste.
- Color Variety: Experiment with different food coloring shades to create a forest of colorful trees.
- Dietary Adaptations: Use gluten-free Oreos or vegan cream cheese to make them suitable for dietary restrictions.
When I made these for a summer party (yes, Christmas trees in July!), I swapped the green chocolate for pastel shades and turned them into “fairy trees.” They were just as magical!
Serving & Storage Suggestions
These truffles are best served chilled to keep their shape, but they’ll soften slightly at room temperature—perfect for that melt-in-your-mouth experience.
- Serving Ideas: Arrange the truffles on a festive platter and pair them with a mug of hot cocoa or eggnog.
- Storage Instructions: Keep the truffles in an airtight container in the refrigerator for up to one week.
- Freezing Tips: You can freeze the undipped truffles for up to a month. Defrost them in the fridge overnight and dip them in chocolate before serving.
- Reheating: While not necessary, if you want to soften the chocolate slightly, leave the truffles at room temperature for 10 minutes before serving.
Pro tip: The flavors deepen over time, making them even better the next day!
Nutritional Information & Benefits
Here’s a snapshot of the nutritional profile for these delightful Oreo truffles:
- Calories: Approximately 150-180 per truffle.
- Carbs: Mostly from the Oreos and chocolate coating.
- Fats: Cream cheese and chocolate provide richness.
- Protein: Minimal, but present in the cream cheese.
While these aren’t a “light” treat, they’re perfect for enjoying in moderation. Plus, the portion sizes make it easy to indulge without overdoing it. Want a healthier twist? Use reduced-fat cream cheese and dark chocolate for added antioxidants!
Conclusion
If you’re looking for a holiday treat that’s equal parts adorable and delicious, these Festive No-Bake Christmas Tree Oreo Truffles are the answer. They’re easy to make, endlessly customizable, and guaranteed to bring smiles to everyone’s faces. Honestly, this recipe is one of my favorite ways to bring a little extra holiday magic into our home.
Why not give them a try this season? I’d love to hear how you make them your own—whether it’s swapping out decorations or trying new flavors. Drop me a comment below and let me know how your truffles turned out!
Here’s to sweet holiday memories and festive desserts that bring everyone together. Happy holidays!
FAQs
Can I use a different type of cookie instead of Oreos?
Absolutely! Try graham crackers, vanilla wafers, or chocolate chip cookies for a fun twist.
What if I don’t have green food coloring?
No problem! You can use any color or skip it altogether for a white chocolate look. Add sprinkles for festive flair.
How do I store these truffles?
Keep them in an airtight container in the fridge for up to one week, or freeze the undipped truffles for a month.
Can I make these ahead of time?
Yes! Prepare the truffles up to 3 days in advance and decorate closer to serving time for the freshest look.
What’s the best way to melt chocolate for dipping?
The microwave works wonders! Heat in 30-second intervals, stirring in between until smooth. Alternatively, use a double boiler for even melting.
Pin This Recipe!
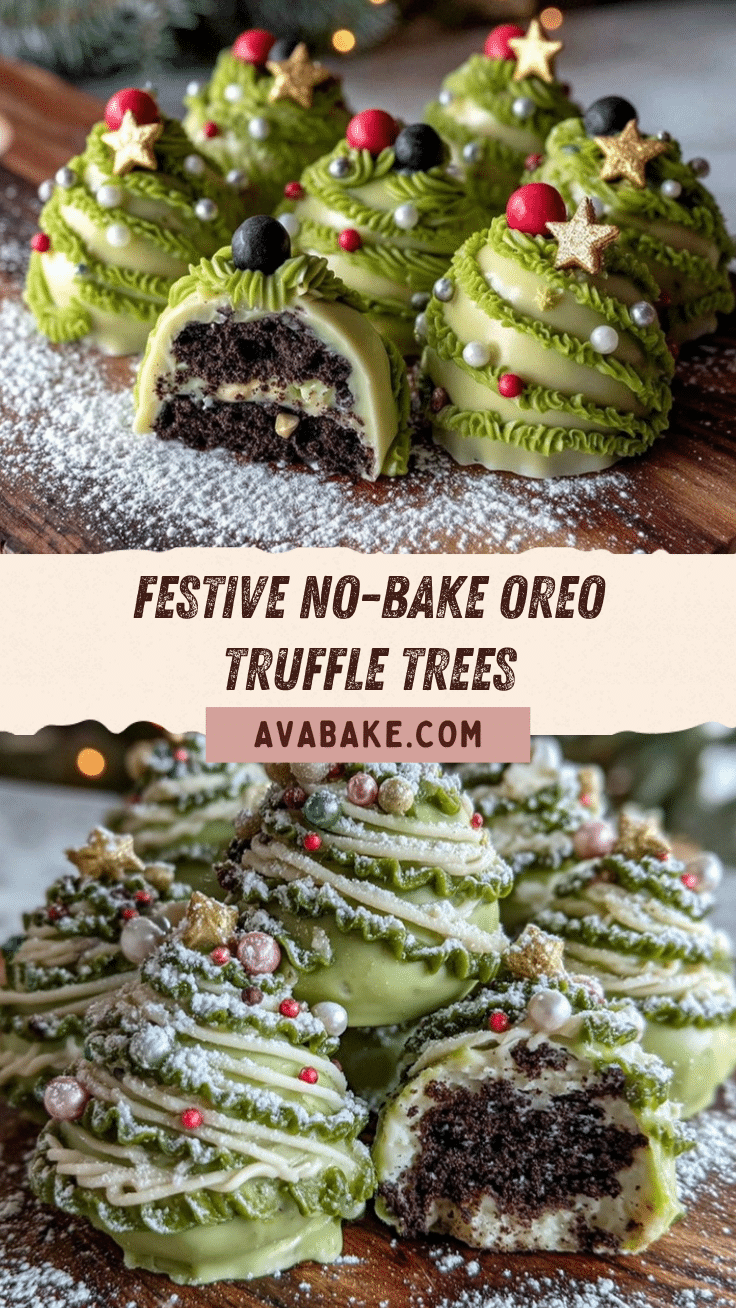
Festive No-Bake Christmas Tree Oreo Truffles

These adorable no-bake Oreo truffles shaped like Christmas trees are a festive and easy holiday treat that will delight kids and adults alike.
- Prep Time: 20 minutes
- Cook Time: 15 minutes
- Total Time: 35 minutes
- Yield: 24 truffles 1x
- Category: Dessert
- Cuisine: American
Ingredients
- 1 standard pack of Oreos (about 36 cookies), crushed into fine crumbs
- 8 ounces of softened cream cheese
- 1 cup white chocolate chips, melted
- Green food coloring
- Red, gold, and silver sprinkles
- Mini star sprinkles
- Mini pretzel sticks
Instructions
- Crush the Oreos into fine crumbs using a food processor or by placing them in a zip-top bag and crushing with a rolling pin.
- In a mixing bowl, combine the Oreo crumbs and softened cream cheese. Mix until fully combined and the mixture forms a dough-like consistency.
- Roll the mixture into small balls (about 1 inch in diameter) and shape each ball into a cone to resemble a Christmas tree. Place them on a parchment-lined baking sheet.
- Refrigerate the truffles for at least 30 minutes to firm up.
- Melt the white chocolate chips in a microwave-safe bowl in 30-second intervals, stirring until smooth. Add the green food coloring and mix well.
- Dip each cone-shaped truffle into the melted chocolate, ensuring full coverage. Let excess chocolate drip off before placing it back on the parchment paper.
- Before the chocolate sets, add sprinkles to mimic Christmas tree ornaments and place a mini star on top of each tree.
- Insert a mini pretzel stick into the bottom of each truffle to create the tree trunk.
- Chill the decorated truffles for at least 15 minutes or until the chocolate hardens completely. Serve and enjoy!
Notes
[‘Make sure the cream cheese is fully softened before mixing for a smoother texture.’, ‘Freeze the shaped truffles for 10 minutes before dipping them in chocolate for extra stability.’, ‘Thin out thick melted chocolate with a teaspoon of vegetable oil.’, “Decorate quickly after dipping, as sprinkles won’t stick once the chocolate hardens.”]
Nutrition
- Serving Size: 1 truffle
- Calories: 150180
- Sugar: 14
- Sodium: 75
- Fat: 8
- Saturated Fat: 5
- Carbohydrates: 18
- Fiber: 1
- Protein: 2
Keywords: Christmas, holiday dessert, no-bake, Oreo truffles, festive treats


