Introduction
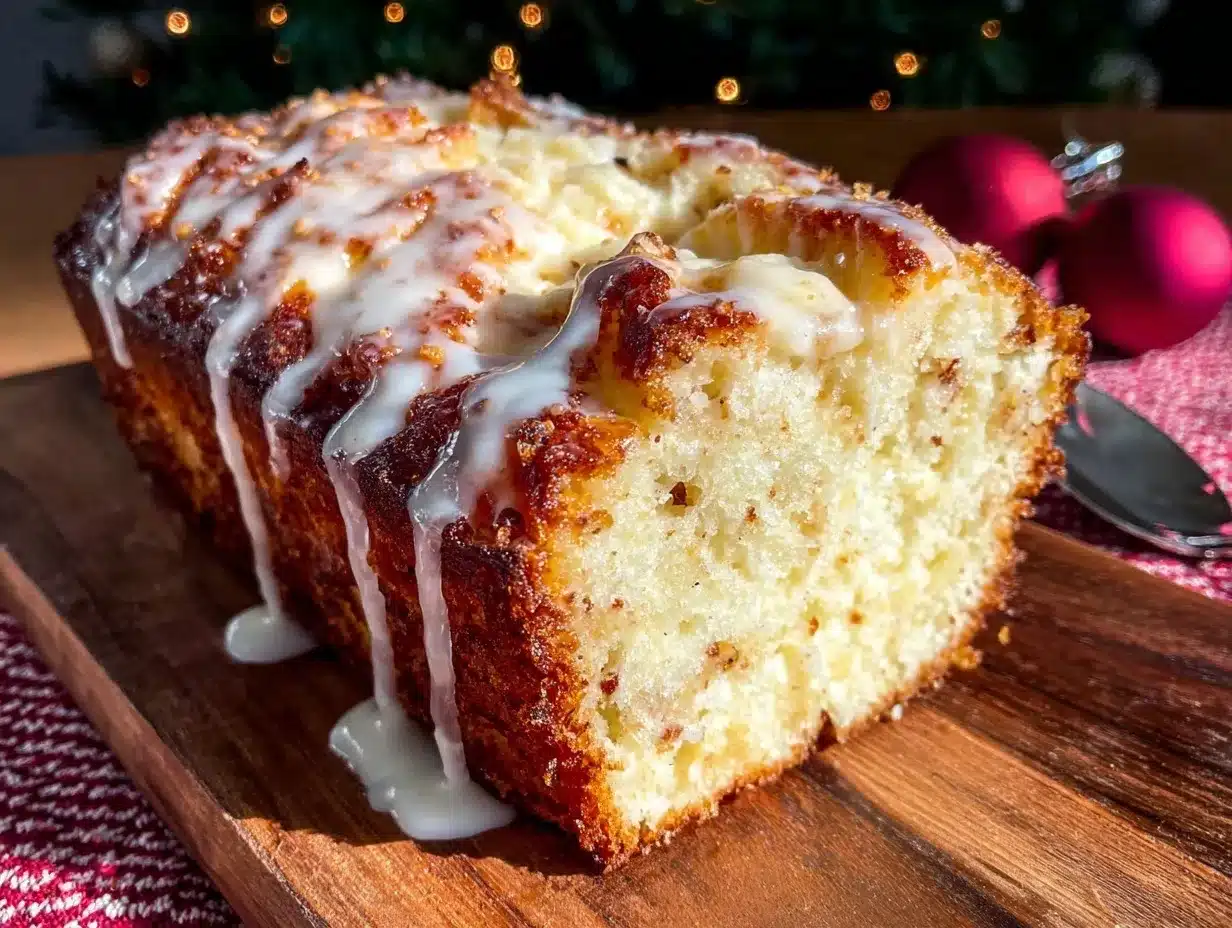
Let me tell you, the scent of fresh eggnog bread with glaze drifting through my kitchen on a chilly December morning is downright magical. It’s the kind of aroma that wraps around you like a cozy blanket, with sweet, spicy notes of nutmeg and vanilla mingling in the air. The golden loaf peeking out from the oven, the gentle crackle as you pour that silky eggnog glaze over the top—honestly, it’s pure holiday bliss.
The first time I baked this eggnog bread, it was on a whim during a snowy weekend, when I was knee-high to a grasshopper and convinced there was nothing better than licking the spoon after mixing a batter with eggnog. I was instantly hooked. There’s just something about that creamy richness and the gentle warmth of spices that makes you pause, take a deep breath, and just smile because you know you’re onto something truly special.
This recipe reminds me of family gatherings at my grandma’s house, where eggnog was always poured generously and sweet treats were passed around like treasured gifts. I stumbled upon the idea while hunting for a way to use up leftover holiday eggnog—wishing, honestly, that I’d found this recipe years ago. My family couldn’t stop sneaking slices off the cooling rack (and I can’t really blame them). Even my picky uncle, who usually skips anything not chocolate, came back for seconds.
Honestly, this eggnog bread is dangerously easy to make and provides pure, nostalgic comfort. It’s perfect for potlucks, a sweet treat for your kids, or to brighten up your Pinterest cookie board. Plus, it’s tested—multiple times, in the name of research, of course—and has become a staple for family gatherings and gifting. If you’re after a recipe that feels like a warm hug, you’re going to want to bookmark this one. Eggnog bread with glaze is here to make your holidays a whole lot sweeter!
Why You’ll Love This Recipe
I’ve baked a lot of holiday breads over the years, and this eggnog bread recipe is truly a standout. Trust me, after testing it in my home kitchen (and with the help of a few enthusiastic taste-testers), I can say this sweet bread brings festive cheer to any table. Here’s why this is my absolute go-to for holiday mornings:
- Quick & Easy: Comes together in under 15 minutes of prep—perfect for busy weeknights or last-minute holiday cravings.
- Simple Ingredients: No fancy grocery trips needed; you likely already have everything in your kitchen or pantry.
- Perfect for Any Occasion: Great for brunch, potlucks, cozy dinners, or gifting to neighbors during the festive season.
- Crowd-Pleaser: Always gets rave reviews from both kids and adults (my own family can vouch for that—there’s never any leftovers!).
- Unbelievably Delicious: The soft, tender crumb and creamy eggnog glaze make it next-level comfort food (seriously, it’s hard not to sneak a second slice).
What sets this eggnog bread apart from the rest? For starters, I blend real eggnog into the batter for maximum flavor and a moist texture that never turns out dry or crumbly. The secret is a touch of nutmeg and a splash of vanilla that echoes what’s in the classic holiday drink. I also tested a few different glazes before settling on one that’s smooth, sweet, and not too heavy—just enough to set off the flavors underneath without overpowering them.
This isn’t just another loaf on your holiday table. It’s the kind that makes you close your eyes after the first bite, savoring the warmth and the soft crumb. If you want a recipe that’s both comforting and festive, healthier than a boxed mix, and so easy you’ll wonder why you ever settled for store-bought, this is it. Eggnog bread turns any simple breakfast into a memorable moment—and honestly, it’s perfect for impressing guests without stress!
What Ingredients You Will Need
This eggnog bread recipe uses simple, wholesome ingredients to deliver bold flavor and a satisfying texture, all without the fuss. Most of these are pantry staples, and you can tweak a few for dietary needs or personal taste. Here’s what you’ll need:
- For the bread:
- 2 cups (250 g) all-purpose flour (or use a 1:1 gluten-free blend for GF option)
- 1 1/2 teaspoons baking powder
- 1/2 teaspoon baking soda
- 1/2 teaspoon salt
- 1/2 teaspoon ground nutmeg (freshly grated if possible—adds classic eggnog flavor)
- 1/4 teaspoon ground cinnamon
- 1/2 cup (115 g) unsalted butter, softened (or use margarine for dairy-free)
- 1 cup (200 g) granulated sugar
- 2 large eggs, room temperature
- 1 teaspoon vanilla extract (I love Nielsen-Massey for the best depth)
- 1 cup (240 ml) eggnog (store-bought or homemade—full-fat is best for richness)
- Optional: 1/2 cup (60 g) chopped pecans or walnuts (for nuttiness and crunch)
- For the glaze:
- 1 cup (120 g) powdered sugar
- 2-3 tablespoons eggnog (adjust for desired consistency)
- 1/4 teaspoon ground nutmeg (for extra festive flavor)
- Optional: pinch of salt (balances the sweetness)
If you want to make this bread even more special, swap the nuts for dried cranberries or add a handful of mini white chocolate chips—my kids love that twist. For a lighter version, substitute half the butter with unsweetened applesauce; for dairy-free, use almond milk nog and vegan butter. In summer, you can skip the spices and add lemon zest for a fresh take (but let’s face it, nothing beats the classic eggnog flavor during the holidays!).
When it comes to eggnog, I prefer a thick, creamy brand like Southern Comfort or a local dairy farm’s batch. If you’re making your own, even better! Just make sure the eggnog is chilled and well-shaken before adding. For flour, King Arthur’s all-purpose never lets me down for tender bakes. The key is to measure everything properly—especially the flour—so the bread stays soft and moist.
Equipment Needed
You don’t need anything fancy to whip up this festive eggnog bread! Here’s what you’ll want on hand:
- 9×5-inch (23×13 cm) loaf pan (metal or glass both work)
- Mixing bowls—one large, one medium
- Whisk and rubber spatula (for folding in dry ingredients)
- Hand mixer or stand mixer (makes creaming butter a breeze, but you can use a sturdy whisk too)
- Measuring cups and spoons (for accuracy—trust me, it matters!)
- Cooling rack (lets the bread set without getting soggy)
- Small bowl for glaze
If your loaf pan isn’t nonstick, line it with parchment paper for easy release. I’ve used both metal and glass pans; metal browns the edges a bit faster, so watch your bake time. If you don’t have a stand mixer, a hand mixer is perfectly fine—just cream the butter and sugar well, so the bread gets that irresistible tender crumb.
Quick note: wash your rubber spatula right after glazing to avoid sticky mess! If you’re on a budget, most of these tools are easy to find at any supermarket—no need for gourmet gadgets here. I’ve baked this bread with thrifted pans and dollar-store bowls, and it always turns out great.
Preparation Method
- Prep your pan and oven: Preheat your oven to 350°F (175°C). Grease a 9×5-inch loaf pan or line with parchment paper for easy removal.
- Mix dry ingredients: In a medium bowl, whisk together 2 cups (250 g) all-purpose flour, 1 1/2 teaspoons baking powder, 1/2 teaspoon baking soda, 1/2 teaspoon salt, 1/2 teaspoon ground nutmeg, and 1/4 teaspoon cinnamon. Set aside.
- Cream butter and sugar: In a large bowl, beat 1/2 cup (115 g) softened unsalted butter and 1 cup (200 g) sugar on medium speed until light and fluffy, about 2-3 minutes. If your butter isn’t soft, microwave for 10 seconds—just don’t melt it completely.
- Add eggs and vanilla: Beat in 2 large eggs, one at a time, then add 1 teaspoon vanilla extract. Scrape down the bowl between additions for a smooth mixture.
- Incorporate eggnog: Mix in 1 cup (240 ml) eggnog on low speed until fully combined. The mixture may look a little curdled (don’t worry, it comes together with the flour).
- Combine wet and dry: Add the flour mixture to the eggnog mixture in two batches, folding gently with a spatula. Stop mixing as soon as no dry streaks remain—overmixing can make the bread tough.
- Add-ins: If using, fold in 1/2 cup (60 g) chopped nuts or other mix-ins. Again, keep it gentle so the bread stays tender.
- Transfer and bake: Pour the batter into your prepared pan and smooth the top. Bake for 50-60 minutes, or until a toothpick inserted into the center comes out clean (a few moist crumbs are fine). If the top browns too quickly, tent with foil after 40 minutes.
- Cool: Let the bread cool in the pan for 10 minutes, then transfer to a wire rack to cool completely. This helps avoid soggy bottoms and makes glazing easier.
- Prepare the glaze: In a small bowl, whisk together 1 cup (120 g) powdered sugar, 2-3 tablespoons eggnog, and 1/4 teaspoon nutmeg until smooth. Add a pinch of salt if desired. The glaze should be thick but pourable.
- Glaze and finish: Drizzle or pour the glaze over the cooled bread, letting it drip down the sides. Let set 15-20 minutes before slicing. (Pro tip: place a sheet of parchment under the cooling rack for easy cleanup!)
For troubleshooting: If your bread sinks in the middle, it’s likely underbaked—check with a toothpick at 50 minutes and add more time if needed. If the glaze is too runny, add more powdered sugar; too thick, a splash more eggnog fixes it. The bread should feel springy to the touch and smell sweetly spiced when ready.
I always clean as I go—makes everything less chaotic. And taste-test the glaze before pouring; you can adjust spices to suit your preference!
Cooking Tips & Techniques
Over the years, I’ve picked up a few tricks to guarantee perfect eggnog bread every time. Here’s what I’ve learned (sometimes the hard way):
- Room temperature ingredients: Make sure your eggs and butter are soft and at room temp—this helps them blend smoothly and prevents clumps.
- Don’t overmix: Fold the flour mixture into the wet ingredients gently. Overmixing creates a dense loaf (trust me, I ruined a batch once by getting overzealous!).
- Check your oven temp: Ovens can run hot or cold. If your loaf browns too quickly on the edges, tent with foil and lower the temp by 10°F (5°C).
- Use fresh spices: Freshly grated nutmeg makes a world of difference—try it if you haven’t!
- Glaze when cool: Pouring glaze over warm bread can make it melt and run off. Wait until the loaf is cool for a pretty drizzle.
- Test doneness: Insert a toothpick in the thickest part of the loaf. If it comes out clean or with a few moist crumbs, you’re golden.
- Multitask: While the bread bakes, clean up and prep your glaze—saves time and keeps things organized.
Personal fail: I once forgot to cream the butter and sugar properly, and the bread turned out oddly dense. Lesson learned! Take your time with that first step—it sets the stage for everything else. If you’re baking more than one loaf, rotate pans halfway through for even color.
Consistency is key! Use accurate measuring tools and check your ingredients for freshness. With these tips, your eggnog bread will turn out tender, flavorful, and ready to steal the show.
Variations & Adaptations
One of the best things about eggnog bread is how easy it is to tweak for different tastes, diets, and occasions. Here are some of my favorite twists:
- Gluten-Free: Use a 1:1 gluten-free flour blend—Bob’s Red Mill is my go-to. The loaf stays just as moist.
- Dairy-Free: Substitute almond milk nog and vegan butter. Silk’s dairy-free nog is a solid choice (I’ve made this version for my lactose-intolerant cousin, and it was a hit!).
- Flavor Boost: Fold in 1/2 cup (90 g) dried cranberries or 1/2 cup (85 g) mini white chocolate chips for extra sweetness and holiday color.
- Spiced Variation: Add a pinch of cloves and ginger to the batter for a gingerbread vibe.
- Mini Loaves or Muffins: Bake batter in mini loaf pans or muffin tins—reduce bake time to about 20-25 minutes.
For allergies, skip the nuts or use sunflower seeds. If you’re not a fan of nutmeg, swap it for all cinnamon. My personal favorite? Adding a swirl of raspberry jam before baking—sounds odd, but it’s like an eggnog Danish!
Cooking method notes: If you want a crustier edge, bake in a metal pan. For softer sides, glass pans work best. There’s plenty of room to play with flavors and textures, so don’t be afraid to make this eggnog bread recipe your own!
Serving & Storage Suggestions
This eggnog bread tastes best served slightly warm, with the glaze just set and a sprinkle of extra nutmeg on top. Slice thick for breakfast, brunch, or dessert—trust me, it pairs perfectly with coffee or hot cocoa.
For a festive touch, arrange slices on a holiday platter and garnish with fresh cranberries or orange zest. If you’re serving at a party, cut into mini cubes and stick in toothpicks for easy snacking. It’s also a lovely addition to a holiday bread basket alongside biscotti or cinnamon rolls.
To store: Wrap cooled bread tightly in plastic wrap or foil and refrigerate for up to 5 days. For longer storage, freeze slices in a zip-top bag for up to 2 months—just thaw overnight and reheat in the microwave for 15-20 seconds. If the glaze gets sticky, a quick toast in the oven crisps it up again.
Pro tip: The flavors deepen overnight, so this bread is even better the next day. Just don’t leave it uncovered—the glaze can attract moisture and get a bit runny. Enjoy every last crumb!
Nutritional Information & Benefits
Each slice of eggnog bread (about 1/10th of the loaf) has roughly:
- Calories: 220
- Fat: 8g
- Carbohydrates: 34g
- Protein: 3g
- Sugar: 19g
Eggnog provides a dose of calcium and protein, and the spices (nutmeg, cinnamon) offer antioxidants and anti-inflammatory benefits. If you use nuts, you’ll get healthy fats and extra crunch. For gluten-free or dairy-free adaptations, the nutrition profile is similar—just watch for added sugars in some alternative nogs.
Allergen note: Contains dairy, eggs, wheat, and optional nuts. Always check labels if you’re baking for someone with allergies. From a wellness perspective, I love that this bread feels indulgent but isn’t overloaded with processed ingredients. Moderation is key, and honestly, sharing a loaf with family is good for the soul!
Conclusion
Eggnog bread with glaze is the kind of recipe you’ll come back to year after year. It’s festive, easy, and delivers that unmistakable holiday comfort—plus it’s a breeze to customize. Whether you’re gifting, hosting, or just looking for a sweet breakfast treat, this bread never disappoints.
I love making this for my family because it feels like a tradition in the making. The simple prep, rich flavor, and tender crumb mean you can focus on what matters: enjoying the season and spending time together. If you’ve never baked with eggnog before, you’re in for a treat—bookmark this recipe, share it with friends, and let me know how you make it your own!
Don’t forget to leave a comment or share your favorite variation below. I can’t wait to see how you make this eggnog bread part of your holiday celebrations. Happy baking, and may your kitchen always smell like the holidays!
FAQs
Can I use homemade eggnog for this bread recipe?
Absolutely! Homemade eggnog works great—just make sure it’s well-chilled and similar in thickness to store-bought varieties. Thinner nog may need a bit less than 1 cup to avoid a runny batter.
How do I know when my eggnog bread is done baking?
Check with a toothpick after 50 minutes. If it comes out clean or with a few moist crumbs, your bread is ready. The top should be golden and springy to the touch.
Can I make eggnog bread ahead of time?
Yes! This bread actually tastes better the next day as the flavors deepen. Just store tightly wrapped at room temperature for up to 2 days, or refrigerate for longer shelf life.
What should I do if my glaze is too runny or thick?
If it’s too runny, add a little more powdered sugar. If it’s too thick, stir in a splash more eggnog. You want it thick enough to drizzle but not too stiff.
Can I freeze eggnog bread?
Definitely! Slice cooled bread, wrap tightly, and freeze for up to 2 months. Thaw overnight and reheat in the microwave or toaster oven for fresh-baked taste.
Pin This Recipe!
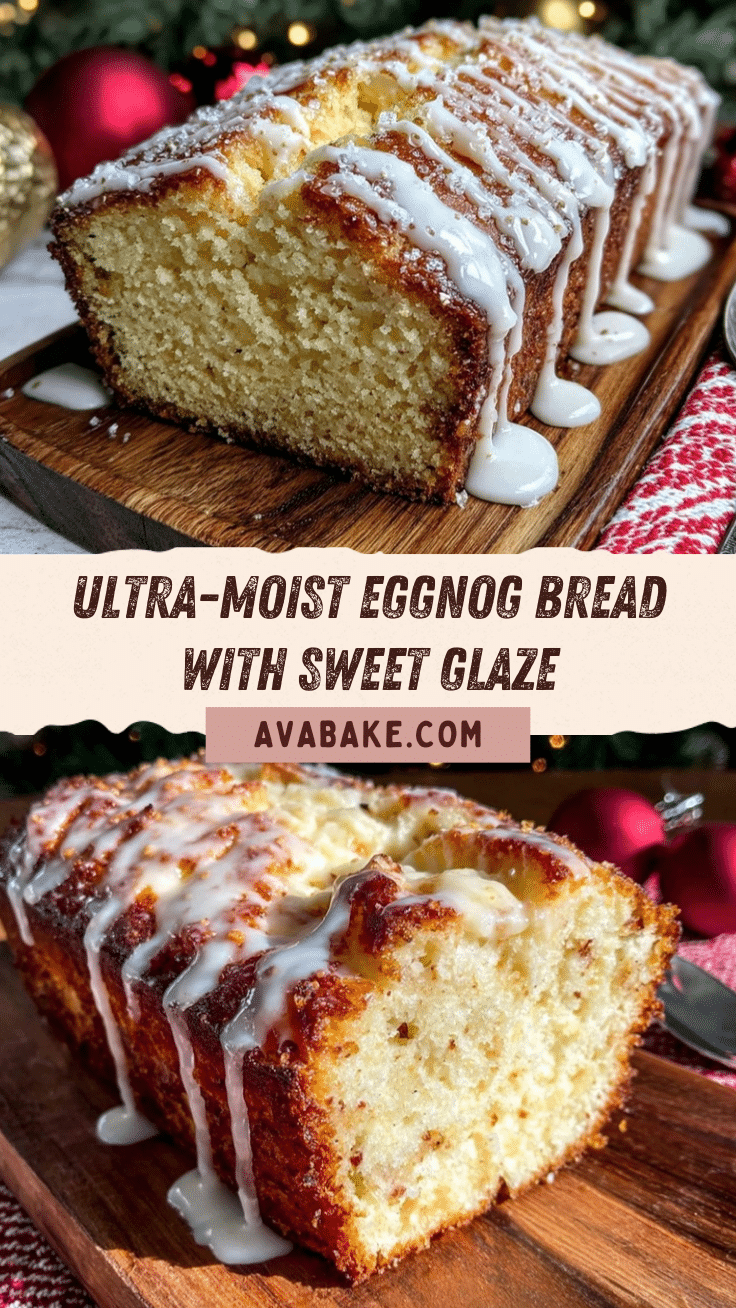
Eggnog Bread Recipe – Easy Homemade Holiday Sweet Bread with Glaze

This festive eggnog bread is soft, tender, and infused with classic holiday flavors of nutmeg and vanilla, then finished with a creamy eggnog glaze. It’s quick to make, perfect for gatherings, and guaranteed to bring cozy comfort to your holiday table.
- Prep Time: 15 minutes
- Cook Time: 50-60 minutes
- Total Time: 1 hour 15 minutes
- Yield: 10 servings 1x
- Category: Dessert
- Cuisine: American
Ingredients
- 2 cups (250 g) all-purpose flour (or use a 1:1 gluten-free blend for GF option)
- 1 1/2 teaspoons baking powder
- 1/2 teaspoon baking soda
- 1/2 teaspoon salt
- 1/2 teaspoon ground nutmeg
- 1/4 teaspoon ground cinnamon
- 1/2 cup (115 g) unsalted butter, softened (or margarine for dairy-free)
- 1 cup (200 g) granulated sugar
- 2 large eggs, room temperature
- 1 teaspoon vanilla extract
- 1 cup (240 ml) eggnog (store-bought or homemade)
- Optional: 1/2 cup (60 g) chopped pecans or walnuts
- For the glaze:
- 1 cup (120 g) powdered sugar
- 2–3 tablespoons eggnog
- 1/4 teaspoon ground nutmeg
- Optional: pinch of salt
Instructions
- Preheat your oven to 350°F (175°C). Grease a 9×5-inch loaf pan or line with parchment paper.
- In a medium bowl, whisk together flour, baking powder, baking soda, salt, nutmeg, and cinnamon. Set aside.
- In a large bowl, beat softened butter and sugar on medium speed until light and fluffy, about 2-3 minutes.
- Beat in eggs, one at a time, then add vanilla extract. Scrape down the bowl between additions.
- Mix in eggnog on low speed until fully combined (mixture may look curdled).
- Add the flour mixture to the wet ingredients in two batches, folding gently with a spatula until just combined.
- Fold in nuts or other mix-ins if using.
- Pour batter into prepared pan and smooth the top.
- Bake for 50-60 minutes, or until a toothpick inserted into the center comes out clean. Tent with foil after 40 minutes if top browns too quickly.
- Let bread cool in pan for 10 minutes, then transfer to a wire rack to cool completely.
- For the glaze: In a small bowl, whisk together powdered sugar, eggnog, nutmeg, and a pinch of salt until smooth and pourable.
- Drizzle or pour glaze over cooled bread. Let set 15-20 minutes before slicing.
Notes
Use room temperature eggs and butter for best texture. Don’t overmix the batter to keep the loaf tender. Freshly grated nutmeg adds extra flavor. Glaze only when bread is fully cooled. For gluten-free or dairy-free, substitute flour and nog as needed. Bread tastes even better the next day as flavors deepen.
Nutrition
- Serving Size: 1 slice (1/10th of l
- Calories: 220
- Sugar: 19
- Sodium: 220
- Fat: 8
- Saturated Fat: 5
- Carbohydrates: 34
- Fiber: 1
- Protein: 3
Keywords: eggnog bread, holiday bread, sweet bread, Christmas baking, eggnog glaze, festive dessert, easy loaf, nutmeg, vanilla, brunch


