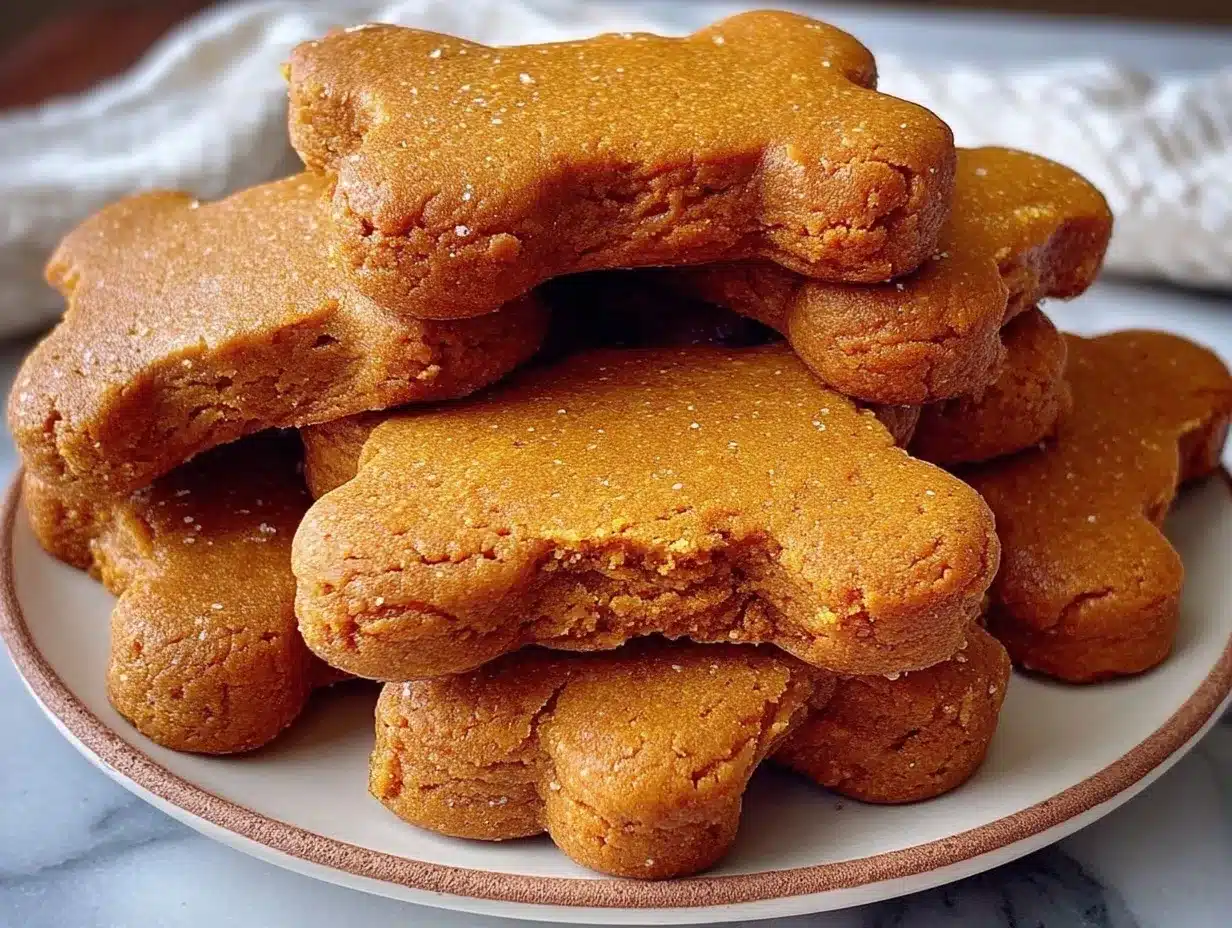
Let me just say, the aroma of pumpkin and peanut butter drifting through my kitchen is enough to send my dog into a tail-wagging frenzy. You know that warm, sweet smell that instantly feels like autumn? That’s exactly what fills the air when you bake these easy pumpkin dog biscuits. The first time I made them, my pup practically camped out by the oven, nose twitching and eyes wide with anticipation. I remember pausing for a moment, just soaking in the pure excitement—honestly, it was the kind of moment where you pause, take a deep breath, and just smile because you know you’re onto something truly special.
Years ago, when I was knee-high to a grasshopper, my grandma always had homemade treats for our dogs. She believed in simple ingredients and big flavors, and that’s the spirit behind these pumpkin dog biscuits. I stumbled across this recipe on a rainy weekend, desperate to whip up something wholesome and safe for my pup. I wish I’d discovered it sooner, because it’s become a staple in our house for birthday parties, training rewards, and even holiday gifting. My family couldn’t stop sneaking them off the cooling rack (and I can’t really blame them—they smell almost good enough for human snacking!).
Honestly, these easy pumpkin dog biscuits are dangerously easy to make—just five ingredients you probably already have. They give pure, nostalgic comfort and are perfect for potlucks at the dog park, sweet surprises for your fur baby, or to brighten up your Pinterest board with the cutest homemade treats. I’ve tested this recipe more times than I can count (in the name of research, of course), and each batch feels like a warm hug for my dog. Trust me, you’re going to want to bookmark this one for every special occasion and everyday treat!
Why You’ll Love This Recipe
If you’re like me, you want the best for your pup—no mystery ingredients, no sketchy additives, just wholesome goodness in every bite. This easy pumpkin dog biscuits recipe has become my go-to for homemade treats, and here’s why I think you’ll love it just as much:
- Quick & Easy: These biscuits come together in under 30 minutes, making them perfect for busy pet parents or last-minute treat emergencies.
- Simple Ingredients: No need for a special trip to the pet store. If you’ve got pumpkin puree, oats, peanut butter, eggs, and whole wheat flour, you’re halfway there.
- Perfect for All Occasions: Whether you’re celebrating your pup’s birthday, training, or just want to spoil your dog “just because,” these treats fit the bill.
- Crowd-Pleaser: I’ve handed these out at puppy playdates and the rave reviews aren’t just from the dogs—pet parents love knowing exactly what’s in each bite.
- Unbelievably Delicious: The combo of pumpkin and peanut butter is a surefire winner. The texture is soft enough for older dogs but sturdy enough for crunch-loving pups.
What sets this recipe apart? Well, blending the oats into a fine flour makes the biscuits extra smooth and easy on sensitive tummies. Using unsweetened pumpkin puree (not pumpkin pie filling!) means you get that signature flavor without the sugar overload. I’ve tried plenty of dog treat recipes, but this one nails the perfect balance of taste and nutrition. It’s comfort food for your dog—healthier, faster, but with the same soul-soothing satisfaction.
Let’s face it, nothing beats the joy of watching your dog do a happy dance for a homemade treat. This recipe isn’t just about making food—it’s about making memories. Whether you’re impressing guests at a dog-friendly party or turning a simple walk into something special, these pumpkin dog biscuits are always a hit. I’ve been making these for years, and they never fail to deliver the kind of joy that makes you close your eyes after the first bite (or bark).
What Ingredients You Will Need
This recipe uses simple, wholesome ingredients to deliver bold flavor and satisfying texture without any fuss. Most of these are pantry staples, and they’re easy to swap if you need to adjust for dietary needs. Here’s what you’ll need for these easy pumpkin dog biscuits:
- Pumpkin Puree (unsweetened, not pumpkin pie filling) – Adds moisture and subtle sweetness. I like Libby’s for consistent texture.
- Whole Wheat Flour – Gives structure and a nutty flavor. You can swap for oat flour or a gluten-free blend if your pup is sensitive.
- Oats (old-fashioned or quick, ground into flour) – They boost fiber and make the biscuits more digestible. I blend my oats in a food processor for a finer texture.
- Egg (large, room temperature) – Acts as a binder and adds protein. If you need a vegan alternative, use a flax egg (1 tbsp ground flax + 3 tbsp water).
- Peanut Butter (unsweetened, xylitol-free) – For irresistible flavor and healthy fats. I always double-check the label for dog safety. Creamy works best for mixing.
Optional add-ins (for extra flavor or texture):
- Cinnamon (just a pinch) – For a cozy aroma (skip if your dog is sensitive).
- Chia Seeds – Adds crunch and a little omega boost.
- Carrot (finely grated) – For extra nutrition and color.
Ingredient tips:
- For gluten-free biscuits, swap whole wheat flour for oat flour or a certified GF blend.
- If your pup can’t have eggs, the flax egg swap works perfectly—my neighbor’s dog loves it this way!
- Not a fan of peanut butter? You can use unsweetened sunflower seed butter or almond butter (just double-check for dog safety).
- Looking to sneak in some veggies? Finely grated zucchini or apple (peeled and cored) blends right in for extra moisture and vitamins.
Honestly, these ingredients are so easy to mix and match based on what you have—no fancy shopping required! Just be sure to use dog-safe, unsweetened nut butters and plain pumpkin for the healthiest results.
Equipment Needed
You don’t need much to whip up these easy pumpkin dog biscuits, which is part of their charm. Here’s what I use every time:
- Mixing Bowl – Any large bowl works. Stainless steel is easy to clean and lasts forever.
- Measuring Cups and Spoons – Accurate measurements make for consistent treats. My old Pyrex set is still going strong.
- Rolling Pin – For even thickness. If you don’t have one, a clean glass bottle or sturdy water bottle does the trick (been there, done that!).
- Cookie Cutters – Classic bone shapes look cute, but any shape works. You can even use a pizza cutter for quick squares.
- Baking Sheet – Nonstick or lined with parchment paper. If you’ve got silicone baking mats, they make cleanup a breeze.
- Food Processor or Blender (optional) – For grinding oats into flour. If you use store-bought oat flour, you can skip this step.
- Wire Rack – For cooling the biscuits quickly. If you don’t have one, just let them cool on the baking sheet.
Maintenance tip: If you use cookie cutters, wash them by hand and dry thoroughly to keep them rust-free. For budget-friendly baking, thrift stores are gold mines for basic kitchen tools—my favorite rolling pin cost just a dollar and still works like a charm.
Preparation Method
-
Prep the Oats: Measure 1 cup (90g) oats. Pulse in a food processor or blender until you have a fine flour. This usually takes about 30 seconds. If using oat flour, skip this step.
Tip: The oat flour should feel soft and powdery, almost like whole wheat flour. -
Mix the Dry Ingredients: In a large mixing bowl, combine 1 cup (120g) whole wheat flour, the oat flour, and a pinch of cinnamon (if using). Stir well to distribute everything.
Warning: Don’t use self-rising flour—it can affect the texture. -
Combine Wet Ingredients: In a separate bowl, whisk together 1/2 cup (120g) pumpkin puree, 1/4 cup (60g) peanut butter, and 1 large egg (or flax egg). Mix until smooth and creamy.
Tip: If the peanut butter is super thick, microwave it for 10 seconds to soften. -
Make the Dough: Add the wet ingredients to the dry ingredients. Stir with a sturdy spoon or your hands until a dough forms. It should feel soft but not sticky.
If it’s too dry, add a teaspoon of water. If too wet, sprinkle in a bit more flour. -
Roll and Cut: Lightly flour your work surface and rolling pin. Roll out the dough to about 1/4-inch (6mm) thickness. Cut out shapes with your favorite cookie cutters.
Efficiency tip: Roll the dough between two sheets of parchment for less mess. -
Arrange on Baking Sheet: Place the cut biscuits on a parchment-lined baking sheet, leaving a little space between each. They won’t spread much, so you can fit quite a few.
Personal note: I always sneak a few “mini” treats for training rewards. -
Bake: Bake at 350°F (175°C) for 15–20 minutes, until the biscuits are firm and dry to the touch.
Sensory cue: The biscuits should smell nutty and pumpkin-y, with a golden edge. -
Cool: Transfer biscuits to a wire rack and let cool completely before serving. They crisp up more as they cool.
Warning: Hot treats can upset tummies—always check before sharing.
Troubleshooting:
- If the dough cracks, add a touch more pumpkin or water.
- For softer biscuits, bake for less time and let them cool on the sheet.
- If your dog likes crunchy treats, leave them in the oven (turned off) with the door slightly open for 1 hour.
Honestly, the hardest part is waiting for them to cool—my dog usually camps out by the oven, just in case!
Cooking Tips & Techniques
Years of baking dog treats have taught me a thing or two about getting these easy pumpkin dog biscuits just right. Here’s what I’ve learned along the way:
- Don’t Overmix: Stir just until the dough comes together. Overmixing can make the biscuits tough.
- Watch the Thickness: Rolling the dough too thin makes brittle biscuits; too thick and they won’t bake evenly. Aim for 1/4 inch (6mm)—it’s the sweet spot for texture.
- Peanut Butter Caution: Only use unsweetened peanut butter without xylitol (it’s toxic to dogs). I once grabbed the wrong jar and had to toss the whole batch—lesson learned!
- Time Management: While the biscuits bake, clean up and prep storage containers. Multitasking saves time, especially when you’ve got a hungry pup waiting.
- Consistency Matters: Use the same brand of pumpkin puree each time for reliable results. I once switched brands and the texture changed—always check for water content.
- Let Them Cool: The biscuits firm up as they cool, so don’t rush this step. Patience pays off (even if your dog disagrees).
Common mistakes? Using pumpkin pie filling instead of puree (it’s packed with sugar and spices), forgetting to check the peanut butter label, or skipping the cooling phase. I’ve made all these errors over the years, and trust me, your dog will thank you for getting it just right. A little attention to detail makes these treats consistently perfect every time.
Variations & Adaptations
One of my favorite things about these easy pumpkin dog biscuits is how flexible they are. Here are a few tried-and-true variations you can use to keep things interesting (and safe!):
- Gluten-Free Variation: Swap whole wheat flour for oat flour or a certified gluten-free blend. My neighbor’s pup with allergies loves this version!
- Seasonal Add-Ins: Stir in 1/4 cup (30g) finely grated apple or carrot for extra nutrients and a splash of color. In summer, fresh blueberries work too.
- Protein Boost: Add 1 tablespoon (10g) chia seeds or ground flaxseed for extra fiber and omega-3s. This is especially good for active dogs.
Adjustments for different cooking methods:
- If you want dehydrated treats, bake the biscuits at 200°F (93°C) for 2–3 hours until completely dry—great for long-term storage.
- For softer, chewy treats (good for older dogs), bake for 10–12 minutes and let cool on the sheet.
Customization tips:
- Go nut-free by using sunflower seed butter instead of peanut butter.
- If your dog is sensitive to eggs, the flax egg substitute works perfectly.
- Try different shapes—my personal favorite is using heart-shaped cutters for Valentine’s Day biscuits.
Honestly, my dog’s favorite variation is the apple-carrot combo—he’ll do anything for those! Play around with ingredients based on what your dog loves (and what’s safe), and you’ll never run out of treat ideas.
Serving & Storage Suggestions
These easy pumpkin dog biscuits are best served at room temperature, right after that final cool-down. If you’re feeling fancy, arrange them on a cute dog-themed platter or tuck a couple into a treat jar for daily rewards. They pair well with a bowl of fresh water or a splash of goat’s milk for an extra treat.
For storage, keep the biscuits in an airtight container at room temperature for up to 5 days. If you want them to last longer, stash them in the fridge for up to 2 weeks—they’ll stay firm and fresh. Freezing is easy too: just pop the biscuits into a freezer-safe bag and store for up to 3 months. Thaw a few at a time or microwave for a few seconds for a quick snack.
Reheating is simple—just let the biscuits come to room temp or zap them in the microwave for 10 seconds (not too hot!). Honestly, the flavors seem to deepen after a day or two, so I always save a few for “later.” If you have a multi-dog household, double the batch and freeze half—you’ll thank yourself next week!
Nutritional Information & Benefits
Each easy pumpkin dog biscuit is packed with wholesome goodness and free from artificial ingredients. Here’s the lowdown:
- Calories: About 30–35 per biscuit (depending on size)
- Protein: Around 1g per treat
- Fat: Healthy fats from peanut butter (no trans fats)
- Fiber: Thanks to oats and pumpkin, great for digestion
Health benefits:
- Pumpkin is rich in beta-carotene and helps support your dog’s digestion.
- Oats are gentle on sensitive stomachs and add extra fiber.
- Peanut butter (xylitol-free!) provides healthy fats and protein.
Dietary notes: These biscuits can easily be made gluten-free, nut-free, or egg-free. They’re naturally low in sugar and contain no preservatives. Always check for allergens if your dog has sensitivities—my wellness goal is simple treats for happy, healthy pups!
Conclusion
So there you have it—easy pumpkin dog biscuits that are as delicious as they are wholesome. Whether you’re a first-time treat maker or an old pro, these homemade healthy treats will make your pup’s tail wag with joy. Don’t be afraid to tweak the ingredients or shapes to suit your dog’s tastes—personalization is part of the fun!
I keep coming back to this recipe because it’s simple, safe, and always a hit. Honestly, nothing beats the feeling of handing your dog a treat you made with love and knowing exactly what’s inside. Give these a try, and let me know how your furry friend likes them!
If you whip up a batch, drop a comment below, share your best photo, or tell me about your creative variations. Your dog deserves the best, and you deserve an easy, reliable recipe that always brings a smile. Happy baking and extra belly rubs to all the pups out there!
Frequently Asked Questions
Can I use canned pumpkin pie filling instead of pumpkin puree?
Nope! Pumpkin pie filling contains sugar and spices that aren’t safe for dogs. Always stick to plain, unsweetened pumpkin puree.
What if my dog has a peanut allergy?
You can swap the peanut butter for sunflower seed butter or unsweetened almond butter—just make sure it’s safe for dogs and xylitol-free.
How do I make these biscuits gluten-free?
Simply use oat flour or a certified gluten-free flour blend instead of whole wheat flour. It works great and tastes just as good!
How long do these treats last?
At room temperature, about 5 days. In the fridge, up to 2 weeks. For longer storage, freeze them for up to 3 months.
Can I make these biscuits without eggs?
Yes! Use a flax egg (1 tbsp ground flaxseed + 3 tbsp water) as a substitute. Works perfectly and keeps the biscuits together.
Pin This Recipe!
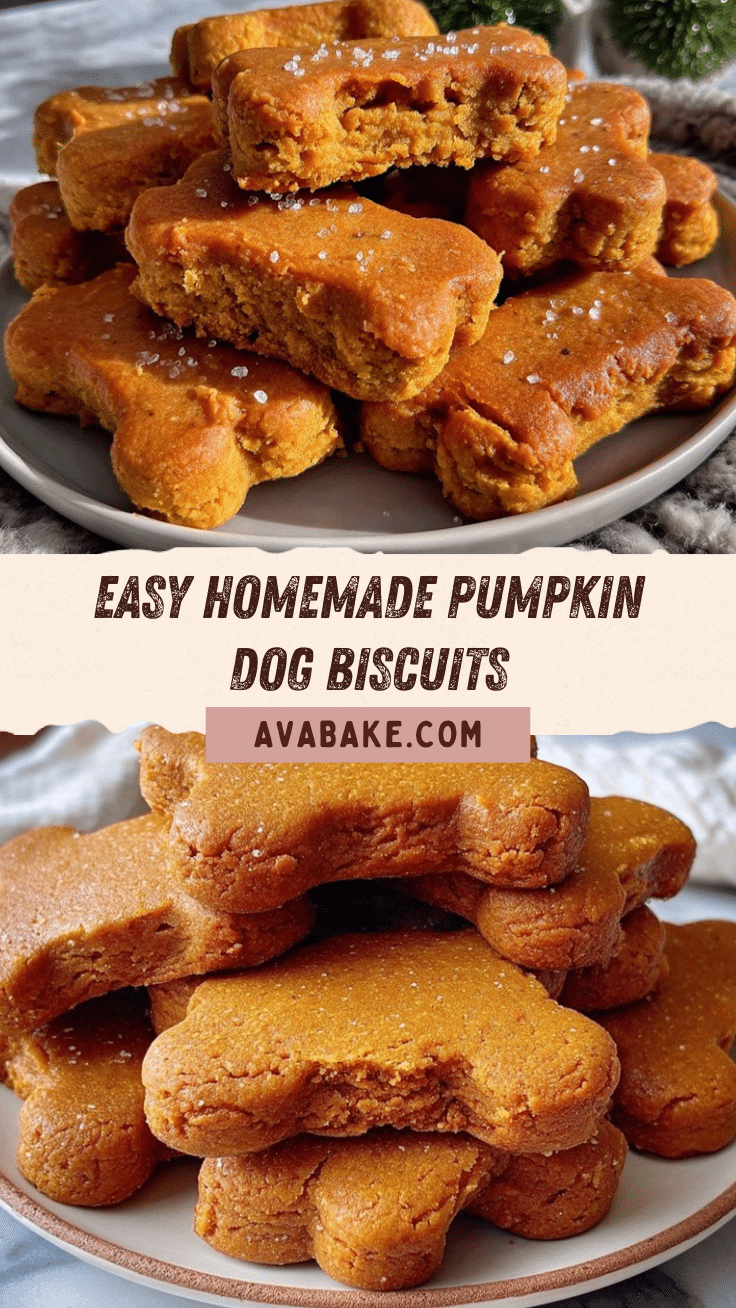
Easy Pumpkin Dog Biscuits Recipe – 5-Ingredient Healthy Homemade Treats
These easy pumpkin dog biscuits are made with just five wholesome ingredients and come together in under 30 minutes. They’re soft, nutritious, and perfect for pups of all ages—ideal for birthdays, training rewards, or everyday treats.
- Prep Time: 10 minutes
- Cook Time: 15–20 minutes
- Total Time: 30 minutes
- Yield: 24–30 biscuits (depending on cutter size) 1x
- Category: Dog Treats
- Cuisine: American
Ingredients
- 1 cup old-fashioned or quick oats (ground into flour)
- 1 cup whole wheat flour (or oat flour for gluten-free)
- 1/2 cup unsweetened pumpkin puree
- 1/4 cup unsweetened, xylitol-free peanut butter (creamy preferred)
- 1 large egg (or flax egg: 1 tbsp ground flaxseed + 3 tbsp water)
- Pinch cinnamon (optional)
- 1 tbsp chia seeds (optional)
- 1/4 cup finely grated carrot or apple (optional)
Instructions
- Preheat oven to 350°F (175°C). Line a baking sheet with parchment paper or a silicone baking mat.
- Pulse oats in a food processor or blender until finely ground into flour. If using oat flour, skip this step.
- In a large mixing bowl, combine whole wheat flour, oat flour, and a pinch of cinnamon (if using). Stir to mix.
- In a separate bowl, whisk together pumpkin puree, peanut butter, and egg (or flax egg) until smooth.
- Add wet ingredients to dry ingredients. Stir until a soft dough forms. If too dry, add a teaspoon of water; if too wet, sprinkle in more flour.
- Lightly flour your work surface and rolling pin. Roll out dough to 1/4-inch thickness.
- Cut out shapes using cookie cutters or slice into squares.
- Arrange biscuits on prepared baking sheet, leaving a little space between each.
- Bake for 15–20 minutes, until firm and dry to the touch.
- Transfer biscuits to a wire rack and let cool completely before serving.
Notes
Use only unsweetened, xylitol-free peanut butter. For gluten-free treats, substitute oat flour for whole wheat flour. For egg-free, use a flax egg. For crunchier biscuits, leave in the oven (turned off) with the door slightly open for 1 hour. Store in an airtight container at room temperature for 5 days, in the fridge for 2 weeks, or freeze for up to 3 months.
Nutrition
- Serving Size: 1 biscuit (about 1.5
- Calories: 3035
- Sugar: 0.3
- Sodium: 10
- Fat: 1.5
- Saturated Fat: 0.3
- Carbohydrates: 5
- Fiber: 0.7
- Protein: 1
Keywords: pumpkin dog biscuits, homemade dog treats, healthy dog snacks, easy dog biscuits, peanut butter dog treats, gluten-free dog treats, egg-free dog treats


