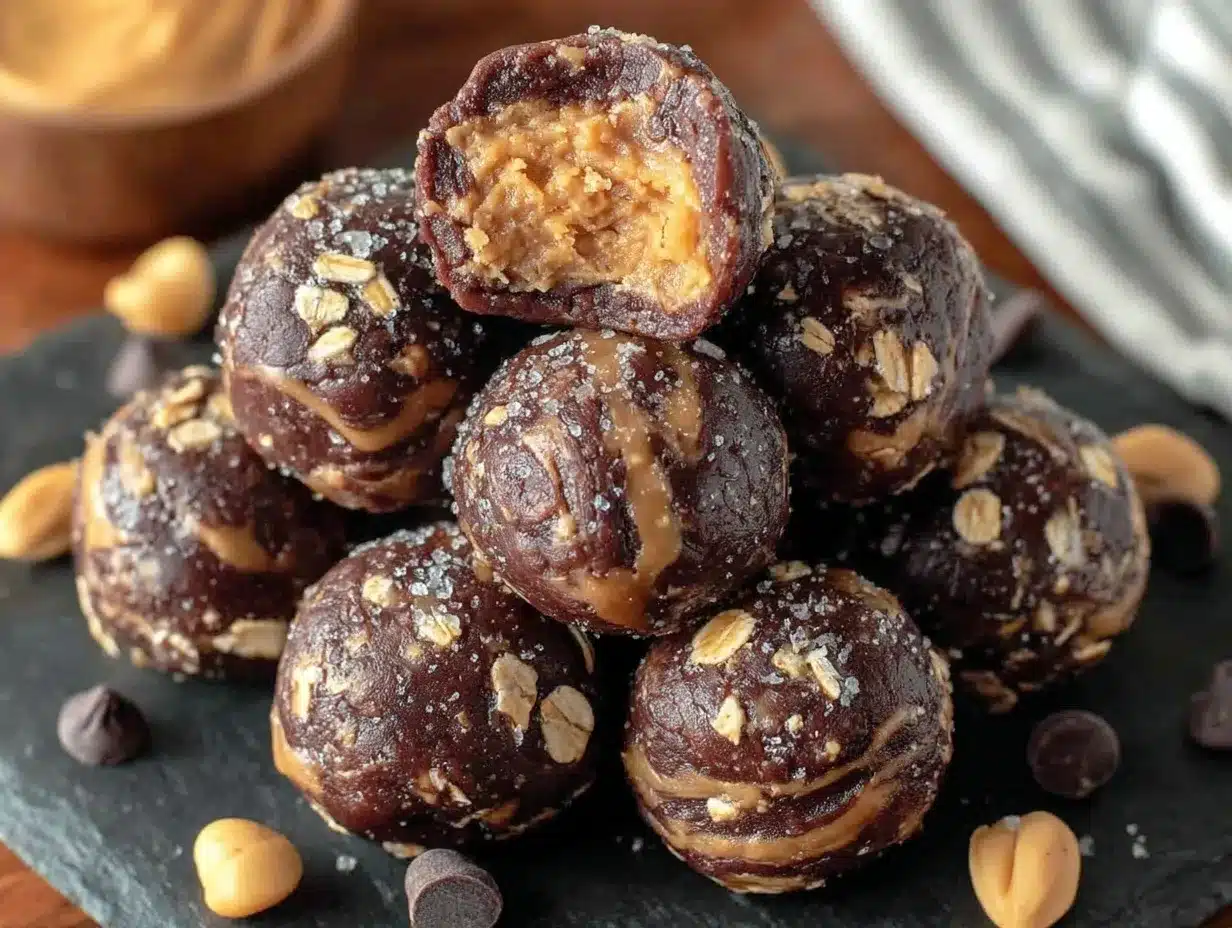
Picture this: the moment you open your kitchen cabinet, the rich, nutty aroma of peanut butter and the deep, velvety scent of chocolate hit you like a wave. There’s a certain magic in the way these two come together—think smooth, creamy peanut butter mingling with dark cocoa powder, all rolled up into bite-sized treats that practically beg you to sneak one before they’re chilled. The first time I whipped up these Easy No-Bake Chocolate Peanut Butter Protein Balls, I was knee-high to a grasshopper, watching my grandma stir up a batch for her bridge club. She’d always say, “Good snacks don’t need fancy gadgets or hot ovens—just a little elbow grease and a lot of love.”
Honestly, I stumbled onto this recipe again during a rainy weekend when the oven was on the fritz (talk about perfect timing). Desperate for something sweet but feeling a little too lazy for full-on baking, I remembered these nostalgic little bites from my childhood. The kind of moment where you pause, take a deep breath, and just smile because you know you’re onto something truly special. My family couldn’t stop sneaking them off the tray (“Just one more!” became the unofficial motto). Let’s face it, when you need a healthy snack that brings pure, nostalgic comfort and a hit of protein, these chocolate peanut butter protein balls are a real winner.
Whether you’re looking to brighten up your Pinterest snack board, pack a sweet treat for your kids’ lunchboxes, or fuel your post-workout cravings, this recipe is dangerously easy. I’ve tested it more times than I care to admit (in the name of research, of course). It’s now a staple for family gatherings, gifting, or just when I need something that feels like a warm hug. Trust me, you’re going to want to bookmark this one.
Why You’ll Love This Easy No-Bake Chocolate Peanut Butter Protein Balls Recipe
You know what? I’ve made more “healthy” snacks than I can count, and these chocolate peanut butter protein balls always steal the show. After countless taste tests and tweaks, here’s why you’ll love them as much as I do:
- Quick & Easy: No oven, no fuss—done in under 15 minutes! Perfect for busy weeknights, last-minute cravings, or when you realize you need a snack, pronto.
- Simple Ingredients: Nothing fancy here. If you’ve got peanut butter, oats, cocoa powder, and a scoop of protein powder, you’re halfway there. Most of these are pantry staples (so you’re not running to the store).
- Perfect for Any Occasion: Great for after-school snacks, post-gym fuel, potlucks, or even as a sweet bite on a holiday morning. They’re also fantastic for gifting because they look so cute piled up in a mason jar!
- Crowd-Pleaser: Kids love ‘em, adults love ‘em—my picky eater niece literally asks for these every visit. Ideal for picky eaters and chocolate lovers alike.
- Unbelievably Delicious: The chocolate-peanut butter combo is classic, but the added protein makes them extra satisfying. Soft, chewy, and just a touch of crunch from the oats. It’s comfort food with a healthy twist.
What sets these apart from other protein balls? I blend half the oats for a smoother texture, and I use a mix of chocolate protein powder and natural cocoa for a richer flavor. No weird aftertaste, no chalky texture. If you’ve tried homemade protein bites before and found them a little dry or bland, this recipe fixes all that. It’s just the right balance of sweetness, richness, and chewiness.
Honestly, these chocolate peanut butter protein balls are more than just snacks. They’re the kind you pop in your mouth and close your eyes, savoring every bite. Whether you’re trying to eat a bit healthier or just need something quick, this recipe is here to make snack time memorable—no stress, no mess, just pure, portable goodness.
What Ingredients You Will Need
This recipe uses simple, wholesome ingredients to deliver bold flavor and satisfying texture without the fuss. Most of these are pantry staples, and there’s flexibility for substitutions if you’re missing something or have dietary needs. Here’s the full rundown:
- Peanut Butter (creamy or crunchy, unsweetened works best; natural peanut butter gives a nice texture and flavor)
- Rolled Oats (old-fashioned oats preferred; quick oats work in a pinch, but the texture is a bit softer)
- Chocolate Protein Powder (whey or plant-based; I use Orgain or Vital Proteins for consistently good results)
- Cocoa Powder (unsweetened; Dutch-process for a deeper chocolate flavor, but regular works too)
- Honey or Maple Syrup (for sweetness and binding; maple syrup gives a subtle extra flavor)
- Chia Seeds (optional, for extra crunch and nutrition)
- Mini Chocolate Chips (semi-sweet or dark; optional, but honestly, they add a fun pop!)
- Vanilla Extract (just a splash—adds warmth and depth)
- Salt (a pinch; helps balance the sweetness and brings out the chocolate flavor)
If you’re looking for a gluten-free version, use certified gluten-free oats. For a vegan option, swap honey for maple syrup and choose a plant-based protein powder. Almond butter or sunflower seed butter works beautifully as a peanut-free alternative. If you don’t have chia seeds, you can leave them out or add a tablespoon of flaxseed meal for extra fiber.
I recommend using natural peanut butter—the kind with just peanuts and salt. It makes the balls softer and less sweet (if you like it sweeter, simply add more honey). For the protein powder, stick with one you actually enjoy drinking; some can be gritty or chalky. Oats are the backbone here—if you want a smoother texture, pulse half of them in a food processor first.
In summer, swap mini chocolate chips for dried cherries or cranberries for a fruity twist. If you’re feeling fancy, roll finished balls in shredded coconut or extra cocoa powder. And don’t worry about exact measurements—this recipe is forgiving and lets you adjust to your taste!
Equipment Needed
You don’t need much to make these Easy No-Bake Chocolate Peanut Butter Protein Balls, which is part of their charm. Here’s what I use:
- Large Mixing Bowl (sturdy glass or ceramic is best; easy to scrape down the sides)
- Wooden Spoon or Silicone Spatula (for mixing; a stand mixer works if you’re doubling the batch)
- Measuring Cups and Spoons (accurate measurements help with texture; digital scale if you prefer weighing)
- Food Processor (optional; for pulsing oats or achieving a smoother blend)
- Baking Sheet or Plate (for chilling the balls; line with parchment paper for easy cleanup)
- Small Cookie Scoop or Tablespoon (for uniform size, but you can use your hands, too)
If you don’t have a food processor, those oats can be chopped with a knife (just takes a bit longer). I’ve used plastic bowls in a pinch, but glass is easier to clean when dealing with sticky peanut butter. For maintenance, rinse spatulas and mixing bowls soon after using them—a little warm water does wonders for cleaning off nut butter residue. Honestly, even budget-friendly tools work—no need for fancy gadgets here!
Preparation Method
- Measure and Prepare Ingredients: Gather all your ingredients. Measure out 3/4 cup (180g) peanut butter, 1 cup (90g) rolled oats, 1/2 cup (60g) chocolate protein powder, 2 tablespoons (15g) unsweetened cocoa powder, 1/4 cup (80g) honey or maple syrup, 2 tablespoons (18g) chia seeds (optional), 1/4 cup (40g) mini chocolate chips, 1 teaspoon vanilla extract, and 1/4 teaspoon salt. If you want a smoother texture, pulse half the oats in a food processor for about 10 seconds.
- Mix Wet Ingredients: In a large bowl, combine peanut butter, honey (or maple syrup), and vanilla extract. Stir until smooth and well blended. The mixture should be glossy and thick.
- Add Dry Ingredients: Add oats, protein powder, cocoa powder, chia seeds, and salt to the wet mixture. Stir with a wooden spoon or spatula until everything is combined. The dough will be thick—if it feels too dry, add a splash of milk (any kind) or a bit more peanut butter. Too sticky? Add a tablespoon of oats.
- Fold in Chocolate Chips: Gently fold in the mini chocolate chips. If your mixture is still warm from the peanut butter, chill for a few minutes before adding chips to prevent melting.
- Shape the Balls: Using a small cookie scoop or tablespoon, portion out the dough and roll between your palms to form balls, about 1-inch (2.5cm) in diameter. You should get about 16-20 balls, depending on size.
- Chill: Place the balls on a parchment-lined baking sheet or plate. Refrigerate for at least 30 minutes to set. The chilling helps the flavors meld and holds the shape.
- Serve or Store: After chilling, transfer to an airtight container. Store in the fridge for up to 1 week, or freeze for longer storage.
Troubleshooting tips: If the dough is too sticky, add more oats a tablespoon at a time. If it’s crumbly, add a little more honey or peanut butter. Watch for sensory cues—the dough should feel moist but not wet, sticky but workable. If your protein powder is especially absorbent, you might need extra wet ingredients. The color should be rich and chocolaty, and the smell should make your mouth water!
I like to prep these in double batches, especially before busy weeks. Efficiency tip: measure dry ingredients into one bowl, wet into another, then mix fast. Wash hands before rolling—trust me, sticky dough is easier to shape with clean hands. And if you’re making these with kids, let them add the chocolate chips—mine always sneak a few!
Cooking Tips & Techniques
Let’s face it: Easy No-Bake Chocolate Peanut Butter Protein Balls aren’t rocket science, but a few pro tips can make a world of difference. Here’s what I’ve learned after many batches (and some hilarious fails):
- Temperature Matters: If your peanut butter is cold, it won’t mix well. Let it sit at room temperature for 15 minutes before starting.
- Protein Powder Quality: Choose a powder you actually enjoy drinking—some brands can taste chalky or artificial. I learned that the hard way and tossed a whole batch once (ouch).
- Mixing Technique: Start with wet ingredients and add dry slowly. This keeps the dough from getting too dry or crumbly.
- Chilling Time: Don’t skip the chill! It sets the shape and melds the flavors. If you’re in a rush, 15 minutes in the freezer works.
- Batch Efficiency: Double the recipe for meal prep. Portion into separate containers for grab-and-go snacks.
- Texture Adjustments: For smoother balls, pulse oats in a food processor. For chunkier bites, keep oats whole.
- Consistency Checks: Dough too dry? Add a teaspoon of milk or more honey. Too sticky? More oats. It’s forgiving, so don’t stress.
- Kid-Friendly Tip: If you make these with kids, let them roll the balls—just expect some imperfectly shaped ones (and some giggles).
Common mistakes I’ve made: skipping the salt (flavor falls flat), using old oats (balls taste stale), and not chilling long enough (balls fall apart). The biggest lesson? Taste as you go and don’t be afraid to tweak. Multitasking tip: while balls chill, clean up your workspace or prep containers for storage. Consistency is key—measure your ingredients and keep a little extra peanut butter on hand, just in case!
Variations & Adaptations
One of the best things about these chocolate peanut butter protein balls is how easy they are to customize. Here are a few tried-and-true variations you can whip up:
- Vegan Version: Swap honey for maple syrup and choose a plant-based protein powder. Use dairy-free chocolate chips if you add them.
- Gluten-Free: Use certified gluten-free oats and double-check your protein powder label for any hidden gluten.
- Nut-Free: Substitute peanut butter with sunflower seed butter or almond butter. Both are delicious and safe for nut allergies.
- Seasonal Twist: Add dried cranberries, cherries, or apricots instead of chocolate chips. In winter, try a dash of cinnamon or pumpkin spice.
- Low-Carb/Keto: Use unsweetened almond butter, sugar-free syrup, and a low-carb protein powder. Skip oats and use coconut flour or ground flaxseed instead (start with 1/3 cup and adjust).
For a personal spin, I once stirred in shredded coconut and chopped pecans—turned out amazing for a holiday batch! If you want more crunch, toss in a handful of chopped nuts or seeds. For chocolate lovers, roll finished balls in extra cocoa powder. And if you like it sweeter, add a tablespoon of mini marshmallows or a drizzle of melted dark chocolate. There’s no wrong way to enjoy these—just follow your cravings!
Serving & Storage Suggestions
These Easy No-Bake Chocolate Peanut Butter Protein Balls are best served chilled. Arrange them on a pretty plate or stack them in a mason jar—they look adorable and make for easy snacking. I like to serve them right from the fridge for maximum chewiness, but they’re fine at room temperature for a couple of hours (perfect for lunchboxes or picnics).
Pair with a glass of cold milk, almond milk, or your favorite smoothie for a balanced snack. They’re also great alongside a fruit platter or with a handful of roasted nuts for extra protein. If you’re feeling fancy, drizzle with melted chocolate or dust with cocoa powder before serving.
To store, place in an airtight container lined with parchment paper. Keep in the refrigerator for up to 1 week—the flavors actually deepen after a day or two. For longer storage, freeze them in a zip-top bag for up to 2 months. To enjoy from frozen, thaw at room temperature for 10-15 minutes. Reheating isn’t necessary, but if you want them slightly softer, let them sit out for a bit before eating. Honestly, they’re pretty irresistible any way you serve them!
Nutritional Information & Benefits
Each ball (based on a batch of 18) packs about 100-120 calories, 5g protein, 6g healthy fats, and 8g carbs. Not bad for something that tastes like a treat! The peanut butter adds heart-healthy monounsaturated fats, while oats provide fiber and slow-digesting carbs. Chocolate protein powder bumps up the protein, making these a great post-workout snack or midday pick-me-up.
Chia seeds boost omega-3s and fiber. For those watching sugar, stick to unsweetened cocoa and limit maple syrup. These balls are easily made gluten-free and vegan. Potential allergens include peanuts, oats, and dairy (if using whey protein or regular chocolate chips)—always double-check labels if serving to friends with allergies. Personally, I love how these keep me full and fueled, and the nutrients support my energy levels throughout the day.
Conclusion
If you’re searching for a healthy snack that feels like pure indulgence, these Easy No-Bake Chocolate Peanut Butter Protein Balls are worth a try. Quick, customizable, and packed with nourishing ingredients, they fit into busy lives without sacrificing flavor or fun. I love this recipe because it brings back memories, fuels my workouts, and makes snack time something to look forward to.
Don’t be afraid to experiment with your favorite add-ins or swap ingredients for your dietary needs. I’d love to hear how you make these your own—drop a comment with your adaptations or tag me if you share your creations on Pinterest! Honestly, these protein balls are like little bites of happiness, and I hope they become a staple in your home just like they are in mine.
Bookmark this recipe, share it with friends, and keep a batch in your fridge—happy snacking!
Frequently Asked Questions
How long do Easy No-Bake Chocolate Peanut Butter Protein Balls last in the fridge?
Stored in an airtight container, they keep fresh for up to 1 week in the refrigerator. You can also freeze them for up to 2 months.
Can I make these protein balls without protein powder?
Absolutely! Just substitute with extra oats or a tablespoon of almond flour. They’ll still hold together and taste delicious.
Are these protein balls gluten-free?
Yes, as long as you use certified gluten-free oats and double-check your protein powder label. Always check for cross-contamination if you have sensitivities.
Can I use almond or sunflower seed butter instead of peanut butter?
Definitely! Both work well as substitutes and are great for anyone with peanut allergies. The flavor will change slightly but stays delicious.
What’s the best way to make these vegan?
Use maple syrup instead of honey, a plant-based protein powder, and dairy-free chocolate chips. That’s it—easy peasy!
Pin This Recipe!
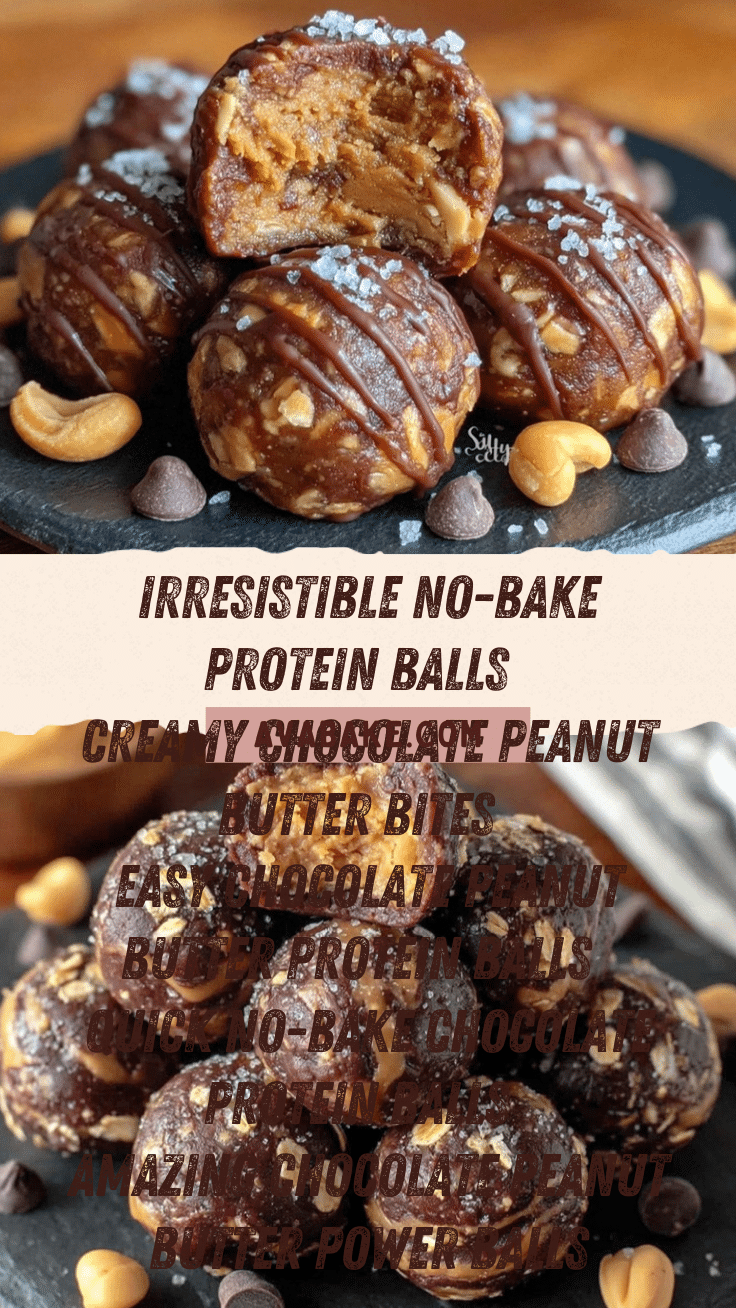
Easy No-Bake Chocolate Peanut Butter Protein Balls

These no-bake chocolate peanut butter protein balls are quick, healthy, and packed with protein. Perfect for snacks, lunchboxes, or post-workout fuel, they come together in minutes and are easily customizable for dietary needs.
- Prep Time: 10 minutes
- Cook Time: 0 minutes
- Total Time: 40 minutes
- Yield: 16-20 balls 1x
- Category: Snack
- Cuisine: American
Ingredients
- 3/4 cup (180g) peanut butter (creamy or crunchy, unsweetened preferred)
- 1 cup (90g) rolled oats (old-fashioned or quick oats)
- 1/2 cup (60g) chocolate protein powder (whey or plant-based)
- 2 tablespoons (15g) unsweetened cocoa powder
- 1/4 cup (80g) honey or maple syrup
- 2 tablespoons (18g) chia seeds (optional)
- 1/4 cup (40g) mini chocolate chips (semi-sweet or dark, optional)
- 1 teaspoon vanilla extract
- 1/4 teaspoon salt
Instructions
- Gather all ingredients. Measure out peanut butter, oats, protein powder, cocoa powder, honey or maple syrup, chia seeds, mini chocolate chips, vanilla extract, and salt. For smoother texture, pulse half the oats in a food processor for about 10 seconds.
- In a large bowl, combine peanut butter, honey (or maple syrup), and vanilla extract. Stir until smooth and well blended.
- Add oats, protein powder, cocoa powder, chia seeds, and salt to the wet mixture. Stir with a wooden spoon or spatula until combined. If too dry, add a splash of milk or more peanut butter. If too sticky, add a tablespoon of oats.
- Gently fold in mini chocolate chips. If mixture is warm, chill for a few minutes before adding chips.
- Using a small cookie scoop or tablespoon, portion out dough and roll between palms to form 1-inch balls. You should get about 16-20 balls.
- Place balls on a parchment-lined baking sheet or plate. Refrigerate for at least 30 minutes to set.
- After chilling, transfer to an airtight container. Store in the fridge for up to 1 week, or freeze for up to 2 months.
Notes
Use certified gluten-free oats for gluten-free version. For vegan, swap honey for maple syrup and use plant-based protein powder and dairy-free chocolate chips. Adjust sweetness and texture by adding more honey, peanut butter, or oats as needed. Pulse oats for smoother texture. Store in fridge for up to 1 week or freeze for up to 2 months.
Nutrition
- Serving Size: 1 ball
- Calories: 110
- Sugar: 4
- Sodium: 60
- Fat: 6
- Saturated Fat: 1.5
- Carbohydrates: 8
- Fiber: 2
- Protein: 5
Keywords: protein balls, no-bake, chocolate peanut butter, healthy snack, gluten-free, vegan, easy recipe, post-workout, kid-friendly, meal prep


