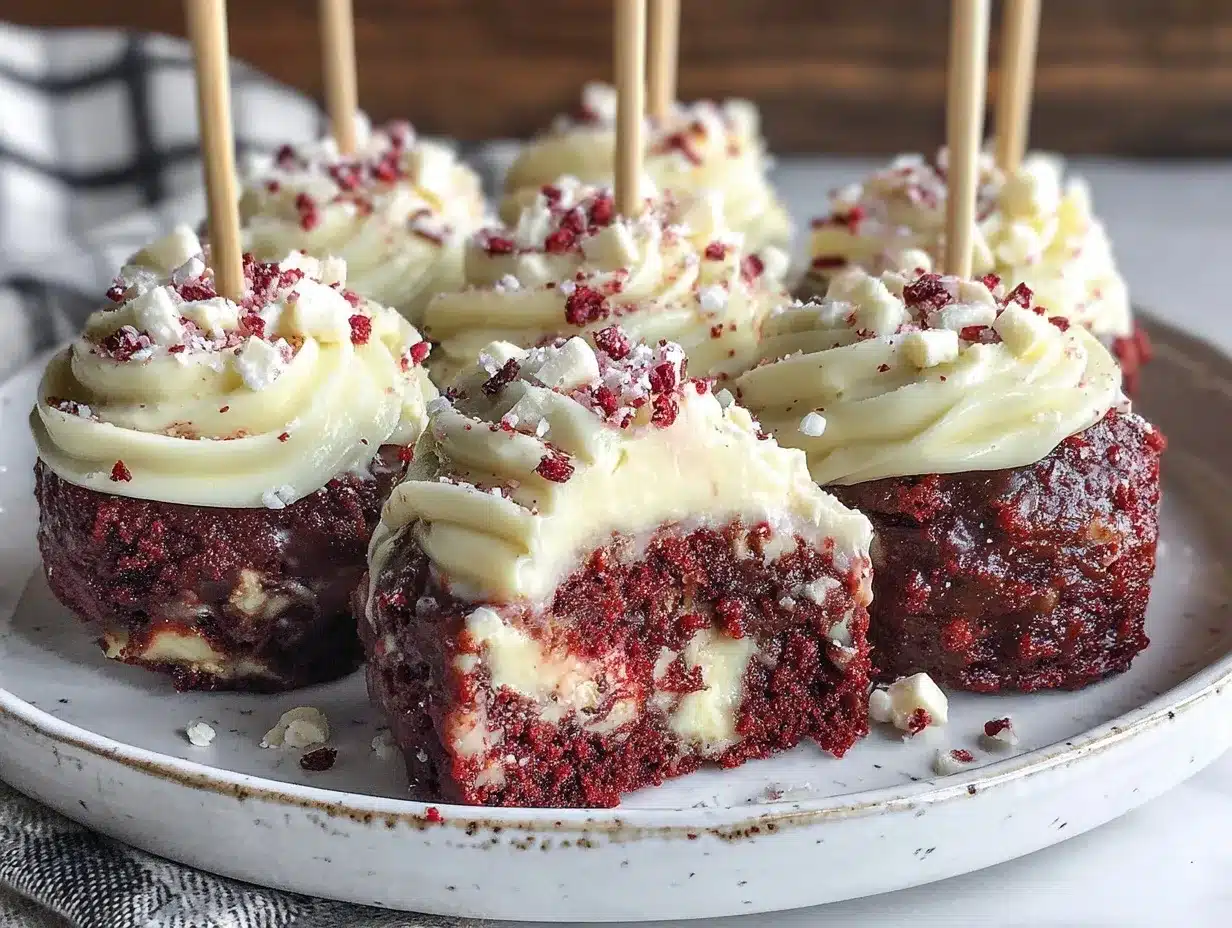
Let me tell you, the moment I pulled these Decadent Valentine’s Red Velvet Brownie Cheesecake Pops from the oven, the rich scent of cocoa, cream cheese, and just the right hint of vanilla filled my kitchen—it was the kind of aroma that wraps around you like a cozy blanket on a chilly February evening. The first time I baked these luscious treats was during a rainy weekend years ago, when I was knee-high to a grasshopper in baking enthusiasm but still figuring out how to blend flavors perfectly. I was instantly hooked; the kind of moment where you pause, take a deep breath, and just smile because you know you’re onto something truly special.
These pops quickly became my go-to Valentine’s Day gesture, perfect for sharing with friends, family, or that special someone. My family couldn’t stop sneaking them off the cooling rack (and honestly, I can’t really blame them). There’s something about the way the velvety red velvet brownie base melts into the creamy cheesecake center that feels like pure, nostalgic comfort—dangerously easy to make but fancy enough to brighten up any Pinterest cookie board or gift basket.
You know what makes these Red Velvet Brownie Cheesecake Pops stand out? They’re perfect for potlucks, sweet treats for your kids, or even as a romantic surprise that’s as delightful to make as it is to eat. I tested this recipe more times than I can count (in the name of research, of course), and it’s become a staple for family gatherings, gifting, and those moments when you just want to feel a warm hug wrapped in a bite. Trust me, you’re going to want to bookmark this one.
Why You’ll Love This Decadent Valentine’s Red Velvet Brownie Cheesecake Pops Recipe
Honestly, these pops have everything going for them. Having whipped these up countless times, I can say with confidence they hit just the right note between indulgence and ease. Here’s why this recipe keeps winning hearts:
- Quick & Easy: Comes together in under an hour, perfect for busy weeknights or last-minute Valentine’s Day gifts.
- Simple Ingredients: No fancy grocery runs needed; you likely already have most of these in your pantry or fridge.
- Perfect for Gifting: They look stunning and taste even better when wrapped up for friends, coworkers, or that special someone.
- Crowd-Pleaser: Adults and kids alike rave about the rich, creamy texture and the subtle tang from the cheesecake.
- Unbelievably Delicious: The fudgy brownie meets smooth cheesecake combo is next-level comfort food without all the fuss.
This isn’t just any red velvet brownie or cheesecake recipe—it’s the best version I’ve found. The trick? Blending cream cheese with a touch of lemon zest for that slight zing, and using high-quality cocoa powder to bring out the velvety chocolate notes. The pops have a perfect balance of sweet, tangy, and rich that makes your eyes close after the first bite. It’s comfort food reimagined for Valentine’s Day, healthier than some store-bought options but definitely not skimping on soul-soothing satisfaction.
Whether you’re aiming to impress guests without stress or simply want a decadent treat to cozy up with, these Red Velvet Brownie Cheesecake Pops fit the bill beautifully.
What Ingredients You Will Need
This recipe uses simple, wholesome ingredients to deliver bold flavor and satisfying texture without the fuss. Most are pantry staples, and a handful are easy to swap or adjust if needed.
- For the Brownie Base:
- 1/2 cup (115g) unsalted butter, melted (adds richness)
- 1 cup (200g) granulated sugar
- 2 large eggs, room temperature
- 1 teaspoon vanilla extract
- 3/4 cup (90g) all-purpose flour
- 1/4 cup (25g) unsweetened cocoa powder (I prefer Valrhona or Ghirardelli for best flavor)
- 1/4 teaspoon salt
- 2 tablespoons red food coloring (gel-based for vibrant color)
- For the Cheesecake Filling:
- 8 oz (225g) cream cheese, softened (Philadelphia brand works great)
- 1/4 cup (50g) granulated sugar
- 1 large egg
- 1 teaspoon lemon zest (adds subtle brightness)
- 1 teaspoon vanilla extract
- For the Coating & Decoration:
- 12 oz (340g) white chocolate or candy melts (use dairy-free if needed)
- Red and pink sprinkles or edible glitter (optional, for Valentine’s flair)
- 9–12 cake pop sticks
Substitution tips: For gluten-free, swap all-purpose flour with almond flour or a gluten-free baking mix. Use coconut yogurt in place of cream cheese for a dairy-free twist, though it will change the texture slightly. In summer, fresh raspberries can be added to the filling for a fruity touch.
Equipment Needed
- Baking pan (8×8 inch / 20×20 cm) — a glass or metal pan works fine; I prefer metal for even heat distribution.
- Mixing bowls — one large, one medium for batter and filling.
- Electric mixer or hand whisk — an electric mixer speeds things up but whisking by hand works too.
- Spatulas — silicone for folding and scraping batter.
- Measuring cups and spoons — precise measurements help with texture.
- Cooling rack — to cool the brownie layer before adding cheesecake filling.
- Cake pop sticks — bamboo sticks or reusable plastic ones.
- Microwave-safe bowl or double boiler — for melting chocolate or candy melts.
- Styrofoam block or cake pop stand — to hold pops upright while the coating sets. If you don’t have one, a simple glass filled with rice works wonders.
If you’re on a budget, you can often find cake pop sticks and stands cheaply online or at craft stores. Keeping your mixer attachments clean helps avoid any funky flavors mixing in future batches. Honestly, the right tools make this process smooth and fun.
Preparation Method
- Preheat your oven to 350°F (175°C). Grease your 8×8 inch (20×20 cm) baking pan and line it with parchment paper for easy removal.
- Make the brownie base: In a large bowl, mix melted butter and sugar until combined. Add eggs one at a time, beating well after each addition. Stir in vanilla extract and red food coloring until the batter is bright and even in color.
- In a separate bowl, sift together the all-purpose flour, cocoa powder, and salt. Gradually fold the dry ingredients into the wet mixture until just combined — don’t overmix or the brownies get tough.
- Pour the batter into the prepared pan, smoothing the top with a spatula. Bake for 20-22 minutes or until a toothpick inserted near the center comes out with a few moist crumbs (not wet batter!). Remove from oven and cool completely on a rack.
- Prepare the cheesecake filling: Using an electric mixer, beat softened cream cheese and sugar until smooth and creamy. Add the egg, lemon zest, and vanilla extract, mixing until just combined.
- Once the brownie layer is cool, gently spread the cheesecake filling over it evenly. Bake again for 25-30 minutes, or until the cheesecake sets but still has a slight jiggle in the center.
- Remove from oven and cool completely, then chill in the refrigerator for at least 2 hours. This step is key for firm pops that hold together nicely.
- Cut the chilled brownie-cheesecake slab into 1.5-inch (4 cm) squares. Insert a cake pop stick into each square halfway through.
- Melt white chocolate or candy melts in a microwave-safe bowl in 30-second intervals, stirring between each, until smooth. Dip each pop into the melted coating, tapping off excess. While still wet, decorate with sprinkles or edible glitter.
- Place the dipped pops upright in a styrofoam block or cake pop stand to set. Refrigerate for 15-20 minutes until the coating hardens.
Pro tip: Don’t rush the chilling steps! They’re crucial to keep the pops from falling apart when you dip them. If the coating thickens while you’re dipping, gently reheat it to keep it smooth. And if a pop falls off the stick, just reinsert it and dip again—happens to all of us.
Cooking Tips & Techniques
When making these Red Velvet Brownie Cheesecake Pops, a few tricks can save you time and frustration. First, always use room temperature ingredients, especially eggs and cream cheese—cold cream cheese can lead to lumps in your filling. I learned this the hard way the first time I whipped up a batch, and honestly, it makes a world of difference.
Mixing technique matters: gently fold your dry ingredients into the wet batter to keep the brownies tender and fudgy. Overmix and you’ll end up with a dense, chewy texture, which isn’t what you want here. The cheesecake layer should be just mixed enough to combine — overbeating can cause cracks during baking.
Another tip: let your brownies cool completely before adding the cheesecake layer. If it’s too warm, the filling can melt and ruin the texture. Patience is key, but it pays off! When dipping, temperature control of your coating is crucial. If it’s too hot, it’ll slide off; too cool, and it’ll clump.
Lastly, don’t skip the refrigeration after assembly. This chills the pops enough to hold together, making decorating way easier. Multitasking here helps: bake the brownie base first, prep the filling during the cooling, and melt your coating right before dipping. Trust me, it keeps the process smooth and fun.
Variations & Adaptations
These Valentine’s Red Velvet Brownie Cheesecake Pops are surprisingly versatile—here are some ways to shake things up:
- Nutty Twist: Add 1/2 cup (50g) chopped pecans or walnuts into the brownie batter for a crunchy surprise.
- Berry Burst: Fold fresh or thawed raspberries into the cheesecake filling for a fruity punch. Perfect for spring or summer gifting.
- Chocolate Lovers: Swap out white chocolate coating for dark or milk chocolate melts and sprinkle with mini chocolate chips before setting.
- Dairy-Free Option: Use dairy-free cream cheese and coconut-based candy melts to make these vegan-friendly (texture will be a bit different but still delicious!).
- Spicy Kick: Add a pinch of cinnamon and cayenne pepper to the brownie batter for a subtle, warming heat.
Personally, I’m fond of the berry burst version around Valentine’s Day—it adds a fresh pop of color and bright flavor that contrasts beautifully with the rich base. Feel free to customize the decorations too: heart-shaped sprinkles, edible gold dust, or even tiny fresh rose petals make these pops truly festive.
Serving & Storage Suggestions
Serve these Red Velvet Brownie Cheesecake Pops chilled or at room temperature—the coating has a lovely snap when cold, but the flavors soften beautifully if you leave them out for 15-20 minutes. Present them in a decorative box or on a cake stand lined with parchment paper for an extra special touch.
They pair wonderfully with a fresh cup of coffee, a glass of milk, or even a light rosé for a romantic twist. You can also serve alongside fresh strawberries or whipped cream for a decadent dessert platter.
To store, keep the pops refrigerated in an airtight container for up to 5 days. For longer storage, freeze them in a single layer on a baking sheet, then transfer to a freezer-safe bag for up to 3 months. When ready to enjoy, thaw in the fridge overnight and bring to room temperature before serving.
Reheating isn’t usually necessary, but if desired, warm gently in a microwave for 10-15 seconds to soften the cream cheese filling without melting the coating too much. Flavors tend to develop and mellow after resting, so making them a day ahead actually improves the depth of taste.
Nutritional Information & Benefits
Each Decadent Valentine’s Red Velvet Brownie Cheesecake Pop contains approximately 180-210 calories, depending on size and toppings. They provide a satisfying dose of protein and calcium from the cream cheese, and antioxidants from the cocoa powder.
While these treats are indulgent, using quality ingredients and homemade preparation avoids preservatives and artificial additives found in many store-bought sweets. The lemon zest adds a refreshing hint of vitamin C, and you can easily adjust sweetness by reducing sugar slightly.
Gluten-free and dairy-free options make this recipe accessible to many dietary needs. Just swap flours and dairy components accordingly, and you’re good to go. These pops are a sweet way to enjoy a festive treat without overdoing processed ingredients.
Conclusion
These Decadent Valentine’s Red Velvet Brownie Cheesecake Pops are truly a recipe worth trying, whether you’re a seasoned baker or just starting out. Their luscious layers, festive color, and crowd-pleasing taste make them perfect for gifting, parties, or treating yourself to something special. The best part? You can customize them easily to suit your preferences and dietary needs.
I love this recipe because it brings back sweet memories while still feeling fresh and fun to make. It’s a little slice of love you can share — or keep all to yourself. If you try them, please drop me a comment or share your version! I’m always excited to hear how you make these pops your own.
Happy baking, and may your Valentine’s Day be deliciously sweet!
Frequently Asked Questions About Red Velvet Brownie Cheesecake Pops
Can I make these pops ahead of time?
Absolutely! You can bake and assemble them up to 3 days in advance. Just keep them refrigerated in an airtight container until ready to dip and decorate.
What if I don’t have cake pop sticks?
You can use sturdy wooden skewers or even sturdy lollipop sticks. Just be gentle when inserting to avoid breaking the pops.
Can I freeze the cheesecake pops?
Yes, freeze them on a baking sheet first, then transfer to a freezer bag. Thaw overnight in the fridge before serving.
How do I prevent the coating from cracking?
Make sure the pops are well chilled before dipping and avoid rapid temperature changes. Also, melt your coating slowly and keep it smooth.
Can I use a different coating besides white chocolate?
Definitely! Dark or milk chocolate work great. You can also try colored candy melts to match any occasion.
Pin This Recipe!
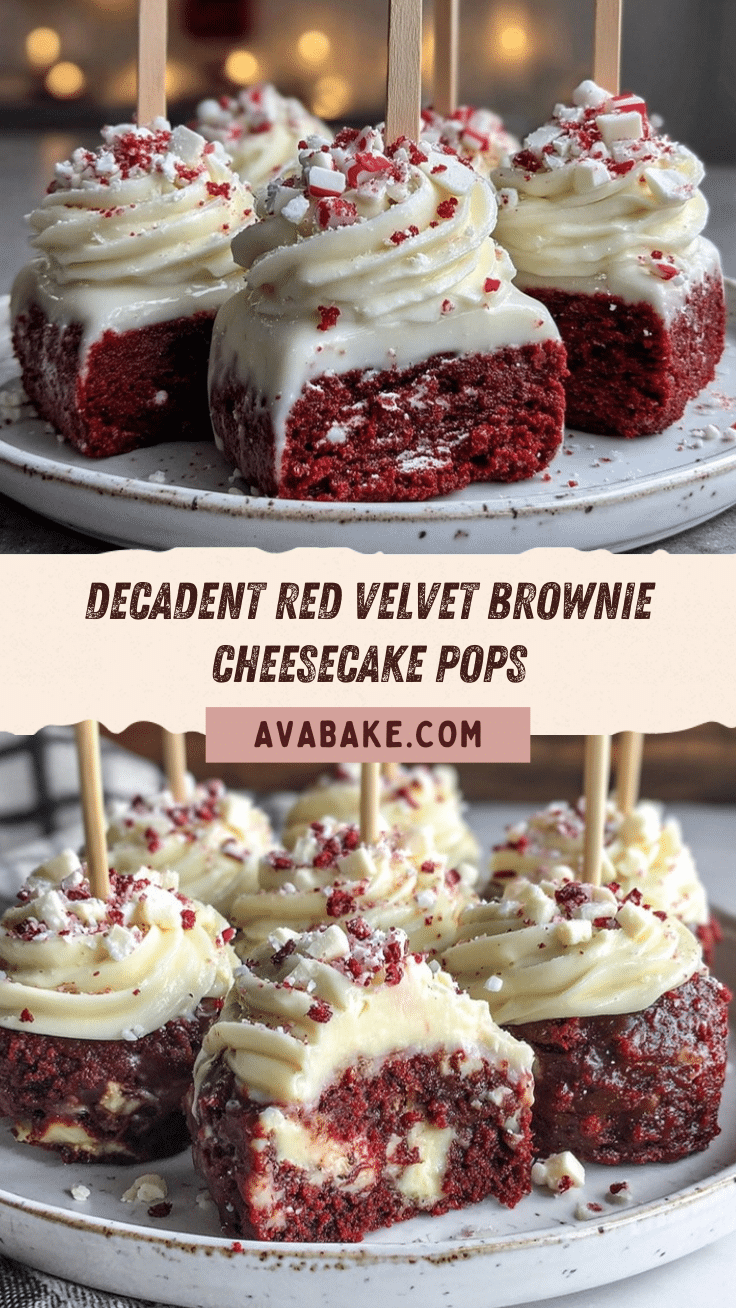
Decadent Valentine’s Red Velvet Brownie Cheesecake Pops
These Red Velvet Brownie Cheesecake Pops combine a fudgy red velvet brownie base with a creamy cheesecake center, coated in white chocolate and perfect for gifting or special occasions.
- Prep Time: 20 minutes
- Cook Time: 50 minutes
- Total Time: 3 hours 10 minutes
- Yield: 9-12 pops 1x
- Category: Dessert
- Cuisine: American
Ingredients
- 1/2 cup (115g) unsalted butter, melted
- 1 cup (200g) granulated sugar
- 2 large eggs, room temperature
- 1 teaspoon vanilla extract
- 3/4 cup (90g) all-purpose flour
- 1/4 cup (25g) unsweetened cocoa powder
- 1/4 teaspoon salt
- 2 tablespoons red food coloring (gel-based)
- 8 oz (225g) cream cheese, softened
- 1/4 cup (50g) granulated sugar
- 1 large egg
- 1 teaspoon lemon zest
- 1 teaspoon vanilla extract
- 12 oz (340g) white chocolate or candy melts
- Red and pink sprinkles or edible glitter (optional)
- 9–12 cake pop sticks
Instructions
- Preheat your oven to 350°F (175°C). Grease an 8×8 inch (20×20 cm) baking pan and line it with parchment paper.
- In a large bowl, mix melted butter and sugar until combined. Add eggs one at a time, beating well after each addition. Stir in vanilla extract and red food coloring until the batter is bright and even in color.
- In a separate bowl, sift together the all-purpose flour, cocoa powder, and salt. Gradually fold the dry ingredients into the wet mixture until just combined.
- Pour the batter into the prepared pan, smoothing the top with a spatula. Bake for 20-22 minutes or until a toothpick inserted near the center comes out with a few moist crumbs. Remove from oven and cool completely on a rack.
- Prepare the cheesecake filling by beating softened cream cheese and sugar until smooth and creamy. Add the egg, lemon zest, and vanilla extract, mixing until just combined.
- Once the brownie layer is cool, gently spread the cheesecake filling evenly over it. Bake again for 25-30 minutes, or until the cheesecake sets but still has a slight jiggle in the center.
- Remove from oven and cool completely, then chill in the refrigerator for at least 2 hours.
- Cut the chilled brownie-cheesecake slab into 1.5-inch (4 cm) squares. Insert a cake pop stick into each square halfway through.
- Melt white chocolate or candy melts in a microwave-safe bowl in 30-second intervals, stirring between each, until smooth.
- Dip each pop into the melted coating, tapping off excess. While still wet, decorate with sprinkles or edible glitter.
- Place the dipped pops upright in a styrofoam block or cake pop stand to set. Refrigerate for 15-20 minutes until the coating hardens.
Notes
Use room temperature ingredients for best results. Do not overmix batter to keep brownies tender. Chill pops thoroughly before dipping to prevent falling apart. Reheat coating gently if it thickens during dipping. Pops can be made ahead and stored refrigerated or frozen.
Nutrition
- Serving Size: 1 pop
- Calories: 180210
- Sugar: 17
- Sodium: 110
- Fat: 12
- Saturated Fat: 7
- Carbohydrates: 22
- Fiber: 1
- Protein: 3
Keywords: red velvet, brownie, cheesecake, cake pops, Valentine's Day, dessert, gifting, easy recipe


