Let me tell you, the aroma of rich chocolate mingling with fresh strawberries right out of the oven is enough to make anyone’s mouth water. The first time I put together this Cupid’s Strawberry Brownie Board, it was on a chilly February afternoon, the kind where you want something sweet and cozy to share. I was instantly hooked—the kind of moment where you pause, take a deep breath, and just smile because you know you’re onto something truly special.
Years ago, when I was knee-high to a grasshopper, my grandma used to make chocolate treats with fresh fruit for Valentine’s Day. This recipe feels like a modern nod to that tradition, with a twist that’s dangerously easy and perfect for sharing. Honestly, I wish I’d discovered it years ago because my family couldn’t stop sneaking bites off the board while I was still arranging it (and I can’t really blame them!).
You know what’s great about this Cupid’s Strawberry Brownie Board? It’s more than just a dessert—it’s a social centerpiece. Perfect for potlucks, date nights, or brightening up your Pinterest cookie board, this recipe delivers pure, nostalgic comfort with a fresh strawberry zing. I’ve tested it multiple times in the name of research, of course, and it’s become a staple for family gatherings and gift-giving alike. Trust me, this one feels like a warm hug, and you’re going to want to bookmark it for your next sweet occasion!
Why You’ll Love This Recipe
After countless trials and a few happy accidents, I can say this Cupid’s Strawberry Brownie Board recipe has it all. It’s not just another brownie dish—it’s a luscious, shareable experience that’s both simple and impressive. Here’s what makes it stand out:
- Quick & Easy: Comes together in under 45 minutes, perfect for busy weeknights or last-minute celebrations.
- Simple Ingredients: No fancy grocery trips needed; you likely already have everything in your pantry and fridge.
- Perfect for Sharing: Whether it’s a cozy dinner or a festive party, this board is designed to bring people together.
- Crowd-Pleaser: Kids and adults alike rave about the gooey brownies paired with sweet, juicy strawberries.
- Unbelievably Delicious: The combination of fudgy brownie texture with fresh strawberries and a hint of creamy topping is pure magic.
What really sets this recipe apart is the little trick of mixing in a touch of espresso powder into the brownie batter, which deepens the chocolate flavor without making it taste like coffee. Plus, layering the strawberries with a light cream cheese drizzle adds a tangy contrast that keeps every bite interesting. Honestly, after the first bite, you’ll close your eyes and savor the moment—it’s comfort food with a romantic twist. Perfect for impressing guests without the fuss or turning a simple night in into something memorable.
What Ingredients You Will Need
This recipe uses simple, wholesome ingredients to deliver bold flavor and satisfying texture without the fuss. Most are pantry staples, with fresh strawberries bringing that bright pop of color and taste.
- For the Brownie Batter:
- 1 cup (225g) unsalted butter, melted (adds richness and fudginess)
- 2 cups (400g) granulated sugar
- 4 large eggs, room temperature
- 1 tsp pure vanilla extract
- 1 cup (120g) all-purpose flour
- 1 cup (85g) unsweetened cocoa powder (I recommend Ghirardelli for best texture)
- ½ tsp salt
- 1 tsp espresso powder (optional but highly recommended for depth)
- For the Topping and Assembly:
- 2 cups fresh strawberries, hulled and halved (in spring, swap in fresh raspberries or blueberries)
- 4 oz (115g) cream cheese, softened (for tangy drizzle)
- ¼ cup (30g) powdered sugar, sifted
- 2 tbsp milk or cream (use dairy-free coconut milk if needed)
- 1 tsp lemon juice (adds brightness)
- Fresh mint leaves for garnish (optional)
If you want a gluten-free version, I suggest swapping the all-purpose flour with almond flour—it works surprisingly well! Also, you can replace butter with coconut oil for a dairy-free twist. I’ve tried both, and the results were deliciously satisfying.
Equipment Needed
- Baking pan (9×13 inches / 23×33 cm) – a glass or metal pan works fine. I prefer glass because it heats evenly.
- Mixing bowls – at least two, one for wet ingredients and one for dry.
- Electric mixer or sturdy whisk – to get that batter perfectly smooth.
- Spatula – for folding ingredients and scraping bowls.
- Measuring cups and spoons – accuracy matters here!
- Cooling rack – helps the brownies cool evenly before assembling the board.
- Optional: Piping bag or zip-top bag with a corner snipped for drizzling cream cheese topping neatly.
If you don’t have an electric mixer, no worries! I’ve whipped this up by hand more times than I can count (just takes a bit more elbow grease). As for the baking pan, if your pan is smaller, expect thicker brownies and adjust baking time accordingly. I once baked this in a round cake pan for a Valentine’s surprise, and it worked beautifully!
Preparation Method

- Preheat your oven to 350°F (175°C). Grease your 9×13 inch (23×33 cm) baking pan or line it with parchment paper for easy removal.
- Melt the butter in a microwave-safe bowl or on the stovetop. Let it cool slightly while you prepare the other ingredients (about 5 minutes).
- In a large bowl, whisk together the sugar and melted butter until well combined. The mixture should look glossy and smooth—this step is key for fudgy brownies.
- Add the eggs, one at a time, whisking after each addition. Stir in the vanilla extract. Your batter will start to thicken here.
- In a separate bowl, sift together the flour, cocoa powder, salt, and espresso powder. This ensures no lumps and even flavor distribution.
- Gradually fold the dry ingredients into the wet mixture using a spatula. Be gentle—overmixing can make the brownies tough. Stop when you see no streaks of flour.
- Pour the batter into your prepared pan, smoothing the top with your spatula.
- Bake for 28-32 minutes, or until a toothpick inserted near the center comes out with a few moist crumbs (not wet batter). Don’t overbake—this recipe shines with fudgy texture.
- While brownies bake, prepare the cream cheese drizzle. In a small bowl, beat softened cream cheese with powdered sugar, milk, and lemon juice until smooth and pourable. Add a tablespoon more milk if it’s too thick.
- Once baked, let the brownies cool completely on a wire rack. This usually takes about 45 minutes—patience pays off!
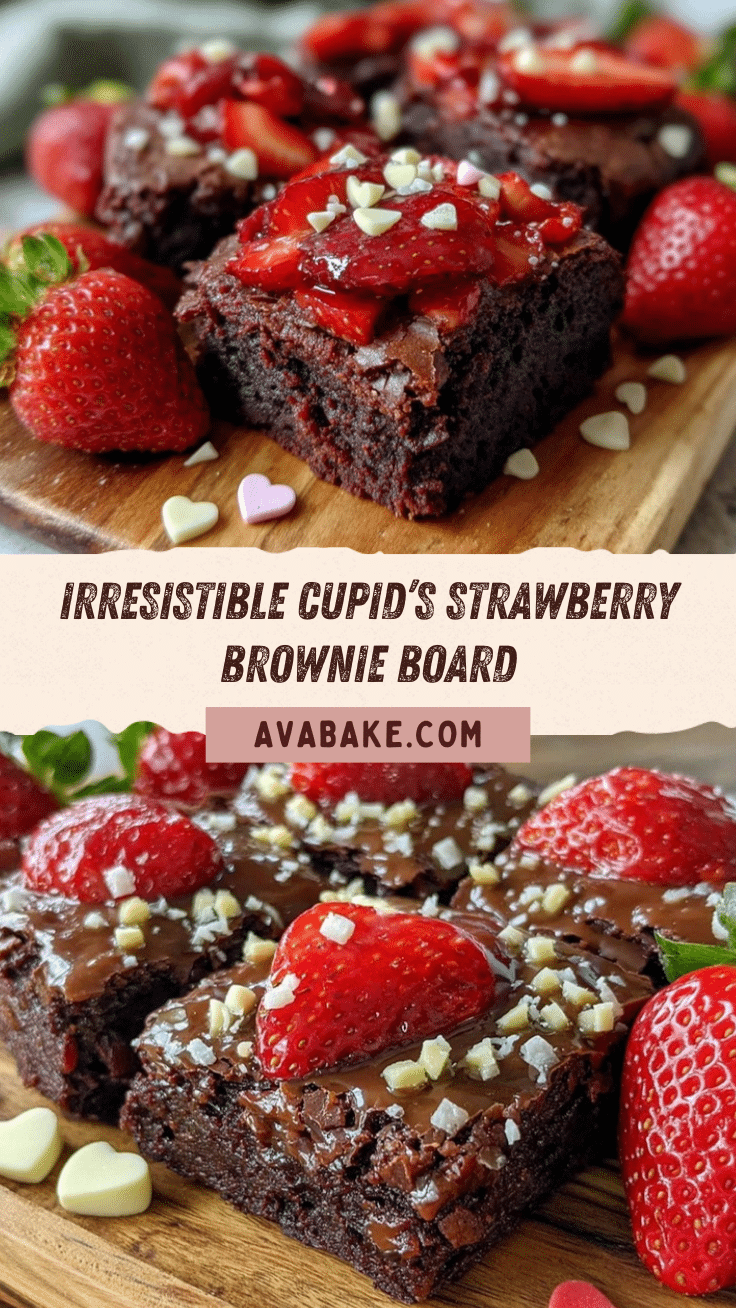
- Slice the brownies into bite-sized squares (around 1.5-inch / 4 cm pieces). Arrange them on a large serving board or platter.
- Top the brownies with halved strawberries, spacing them evenly across the board.
- Drizzle the cream cheese mixture over the strawberries and brownies using a spoon or piping bag for neat lines.
- Garnish with fresh mint leaves if you want that extra pop of color and aroma.
If your batter seems too thick, add a splash of milk before baking. And here’s a little secret—I sometimes sprinkle a pinch of flaky sea salt on top before baking for a subtle savory contrast. Try it, you’ll thank me later!
Cooking Tips & Techniques
To get those perfectly fudgy brownies, remember not to overmix your batter once you add the flour. Overworking it can lead to cakey brownies, which are lovely but not what this recipe aims for. When folding in dry ingredients, use a gentle hand.
Another tip: don’t skip the espresso powder. It doesn’t make the brownies taste like coffee; instead, it enhances the chocolate flavor, making it richer and more complex. I learned this trick from a chef friend, and it made a huge difference.
Baking time can vary depending on your oven. I recommend checking your brownies a few minutes before the minimum time. The toothpick test is your best friend here—go for moist crumbs, not clean and dry.
When it comes to drizzling the cream cheese topping, if you find it tricky to pipe, use a zip-top bag with the corner snipped off. It gives you control and looks fancy without the fuss. Also, chilling the cream cheese mixture briefly can help it hold its shape better.
Lastly, assemble your board just before serving to keep the strawberries fresh and the brownies from drying out. If you need to prep ahead, store the brownies and topping separately in the fridge and combine them about 30 minutes before guests arrive.
Variations & Adaptations
This Cupid’s Strawberry Brownie Board is super flexible, so you can tailor it to your taste or dietary needs.
- Dietary Variation: Swap all-purpose flour for a gluten-free blend or almond flour to make it gluten-free. Use coconut oil instead of butter for dairy-free brownies.
- Seasonal Variation: In summer, try swapping strawberries for fresh peaches, cherries, or blueberries. Each fruit brings a unique flair and color to your board.
- Flavor Twist: Add a handful of chopped nuts (walnuts or pecans) to the brownie batter for crunch. Or swirl in some peanut butter for a rich, nutty surprise.
- Cooking Method: If you prefer, bake the brownies in individual ramekins for single servings—great for parties and portion control.
Personally, I once tried this board with dark chocolate chunks folded into the batter and topped with toasted coconut flakes and strawberries. It was an unexpected hit at a Valentine’s potluck—people couldn’t get enough!
Serving & Storage Suggestions
Serve the Cupid’s Strawberry Brownie Board at room temperature for the best flavor and texture. The cream cheese drizzle tastes heavenly when it’s not too cold—you want it soft and creamy. I love presenting this board on a rustic wooden platter with some extra fresh mint scattered around for a pop of green.
Pair it with a light sparkling rosé or a classic hot chocolate for a cozy vibe. For a non-alcoholic option, a chilled strawberry lemonade complements the fruity notes beautifully.
Leftovers? Store the brownies and strawberries separately in airtight containers in the fridge for up to 3 days. The cream cheese drizzle can be stored in a small jar. When ready to eat, reassemble the board and let it sit at room temperature for about 20 minutes.
For longer storage, freeze the plain brownies (without toppings) wrapped tightly in foil and plastic wrap. Thaw overnight in the fridge. Avoid freezing the strawberries or cream cheese drizzle—they don’t freeze well and can get watery.
Nutritional Information & Benefits
Each serving of this Cupid’s Strawberry Brownie Board offers a satisfying mix of indulgence and a touch of nutrition from fresh fruit. The strawberries provide vitamin C, antioxidants, and fiber, balancing the rich chocolate’s decadence.
This recipe can be adapted for various dietary needs—gluten-free, dairy-free, and even lower sugar options by swapping regular sugar for coconut sugar or a sugar substitute. Just keep in mind the texture might shift slightly.
While this is a treat, the inclusion of real fruit and the option to customize ingredients means you can enjoy it with a bit less guilt. Personally, I think it’s worth every bite for the joy it brings, especially when shared with loved ones.
Conclusion
In the end, this Cupid’s Strawberry Brownie Board is worth every minute you spend making it. It’s easy, fun, and perfectly made for sharing those sweet moments with family or friends. Customize it your way—swap fruits, add nuts, or try different toppings. I love this recipe because it brings people together, with simple ingredients and no stress.
So go ahead, gather your favorite people, and whip up this board. Then come back and tell me how it turned out—I’d love to hear your twists and stories! Don’t forget to share this recipe if you loved it because everyone deserves a little chocolate-strawberry magic in their life.
Frequently Asked Questions
Can I make the brownies ahead of time?
Absolutely! Bake the brownies a day ahead, store them in an airtight container, and add the strawberries and cream cheese drizzle just before serving.
What can I use instead of cream cheese for the drizzle?
You can use Greek yogurt mixed with a touch of honey and lemon juice for a lighter, tangy drizzle or a dairy-free cream cheese alternative.
How do I keep the strawberries from getting soggy?
Only add the strawberries right before serving and avoid slicing them too thin. Keeping them in the fridge until assembly helps too.
Can I use frozen strawberries?
It’s best to use fresh strawberries because frozen ones can release too much water and make the brownies soggy.
What if I don’t have espresso powder?
No worries! You can skip it, but adding a teaspoon really boosts the chocolate flavor without any coffee taste.
Pin This Recipe!
Cupid’s Strawberry Brownie Board

A luscious, shareable brownie board featuring fudgy chocolate brownies topped with fresh strawberries and a tangy cream cheese drizzle, perfect for cozy gatherings and celebrations.
- Prep Time: 15 minutes
- Cook Time: 30 minutes
- Total Time: 45 minutes
- Yield: 12 servings 1x
- Category: Dessert
- Cuisine: American
Ingredients
- 1 cup (225g) unsalted butter, melted
- 2 cups (400g) granulated sugar
- 4 large eggs, room temperature
- 1 tsp pure vanilla extract
- 1 cup (120g) all-purpose flour
- 1 cup (85g) unsweetened cocoa powder
- ½ tsp salt
- 1 tsp espresso powder (optional)
- 2 cups fresh strawberries, hulled and halved
- 4 oz (115g) cream cheese, softened
- ¼ cup (30g) powdered sugar, sifted
- 2 tbsp milk or cream
- 1 tsp lemon juice
- Fresh mint leaves for garnish (optional)
Instructions
- Preheat your oven to 350°F (175°C). Grease a 9×13 inch (23×33 cm) baking pan or line it with parchment paper.
- Melt the butter and let it cool slightly (about 5 minutes).
- In a large bowl, whisk together the sugar and melted butter until glossy and smooth.
- Add the eggs one at a time, whisking after each addition, then stir in the vanilla extract.
- In a separate bowl, sift together the flour, cocoa powder, salt, and espresso powder.
- Gradually fold the dry ingredients into the wet mixture using a spatula until no streaks of flour remain. Do not overmix.
- Pour the batter into the prepared pan and smooth the top.
- Bake for 28-32 minutes or until a toothpick inserted near the center comes out with a few moist crumbs.
- While baking, prepare the cream cheese drizzle by beating cream cheese with powdered sugar, milk, and lemon juice until smooth and pourable. Add more milk if needed.
- Let the brownies cool completely on a wire rack (about 45 minutes).
- Slice the brownies into 1.5-inch (4 cm) squares and arrange on a serving board.
- Top the brownies evenly with halved strawberries.
- Drizzle the cream cheese mixture over the strawberries and brownies using a spoon or piping bag.
- Garnish with fresh mint leaves if desired.
Notes
Do not overmix the batter to keep brownies fudgy. Espresso powder enhances chocolate flavor without coffee taste. Use a zip-top bag for neat cream cheese drizzle. Assemble board just before serving to keep strawberries fresh. For gluten-free, substitute all-purpose flour with almond flour. For dairy-free, use coconut oil instead of butter and dairy-free milk.
Nutrition
- Serving Size: 1 brownie square wit
- Calories: 320
- Sugar: 28
- Sodium: 150
- Fat: 18
- Saturated Fat: 10
- Carbohydrates: 38
- Fiber: 3
- Protein: 4
Keywords: brownies, strawberry brownie board, chocolate dessert, cream cheese drizzle, Valentine's Day dessert, easy brownie recipe, shareable dessert


