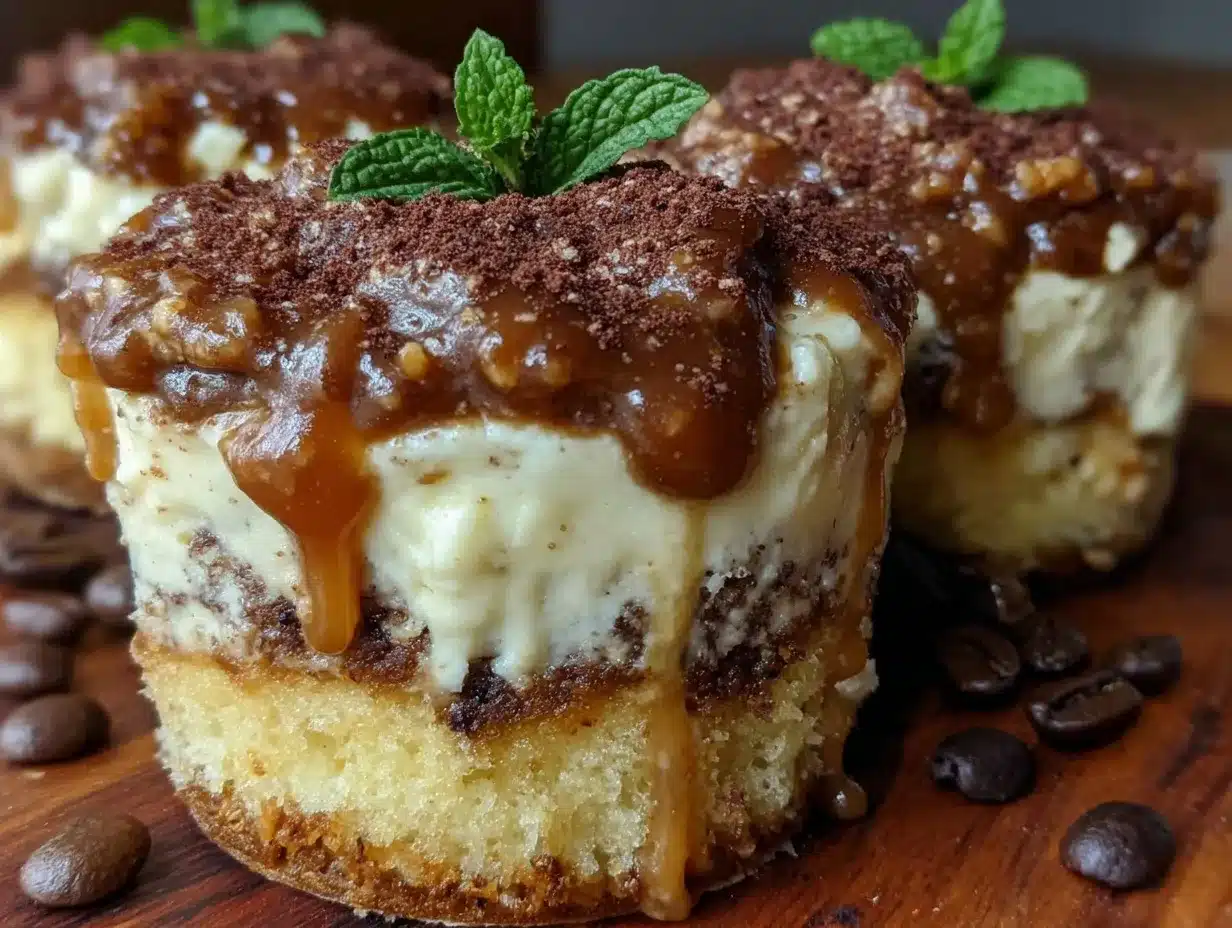
Let me tell you, the smell of freshly baked tiramisu cups wafting through the kitchen is downright irresistible. There’s this beautiful crunch that hits you first—crispy edges giving way to a creamy, dreamy mascarpone center, all kissed by a sweet, sticky brown sugar glaze that’s just the right touch of caramelized magic. The first time I made these crispy tiramisu cups with brown sugar glaze, I was instantly hooked. You know the kind of moment where you pause, take a deep breath, and just smile because you realize you’re onto something truly special? That was it for me.
Years ago, when I was knee-high to a grasshopper, my grandma used to make this classic tiramisu that was all about soft layers and bold coffee flavor. But these crispy tiramisu cups? They’re like that nostalgic comfort food with a fun, modern twist. I stumbled upon the idea on a blustery weekend when I was trying to recreate tiramisu in a more portable, finger-food style for a family potluck. Honestly, my family couldn’t stop sneaking them off the cooling rack (and I can’t really blame them).
These crispy tiramisu cups with brown sugar glaze are dangerously easy and deliver pure, nostalgic comfort in every bite. They’re perfect for impressing guests at dinner parties or just treating yourself after a long day. And after testing this recipe multiple times — in the name of research, of course — it has become a staple for family gatherings, gifting, and those sweet moments when you just want to feel like you’re wrapped in a warm hug. You’re definitely going to want to bookmark this one.
Why You’ll Love This Crispy Tiramisu Cups Recipe
Honestly, this recipe checks all the boxes for why a dessert should be your go-to. I’ve spent countless hours perfecting it, so you get the best balance of texture and flavor with minimal fuss. Here’s why this crispy tiramisu cups recipe stands out:
- Quick & Easy: Comes together in under 45 minutes, making it perfect for last-minute dessert cravings or busy weeknights.
- Simple Ingredients: You likely have most of these staples in your pantry and fridge already—no fancy shopping trips required.
- Perfect for Any Occasion: Whether it’s a brunch, holiday gathering, or casual dinner, these cups fit right in and steal the show.
- Crowd-Pleaser: Kids and adults alike love the crispy yet creamy combo, making it a guaranteed hit at parties.
- Unbelievably Delicious: The brown sugar glaze adds a luscious caramel note that takes this tiramisu to another level.
What makes this recipe different? Well, the secret is in the crispy cups themselves. Instead of soggy ladyfingers, you get a crunchy shell that holds a smooth mascarpone filling, layered with espresso-soaked goodness. Plus, the brown sugar glaze isn’t just a topping—it’s a game-changer that adds depth and a little sweetness that keeps you coming back for more. This isn’t just another tiramisu; it’s a crispy, caramel-kissed delight with soul. It’s the kind of dessert that makes you close your eyes after the first bite and say, “Yep, that’s the one.”
What Ingredients You Will Need
This recipe uses simple, wholesome ingredients to deliver bold flavor and satisfying texture without the fuss. Most are pantry staples, but I’ll highlight a few tips for the best results.
- For the Crispy Cups:
- Ladyfinger cookies (about 24 pieces) – I prefer Savoiardi brand for best texture
- Unsalted butter (4 tbsp, melted) – adds richness and helps crispness
- Granulated sugar (2 tbsp) – balances the buttery flavor
- For the Mascarpone Filling:
- Mascarpone cheese (8 oz / 225 g, room temperature) – use fresh for creamy texture
- Heavy cream (1 cup / 240 ml, chilled) – whips up fluffy
- Powdered sugar (1/4 cup / 30 g) – sweetens gently
- Vanilla extract (1 tsp) – for warmth and aroma
- For the Espresso Soak:
- Strong brewed espresso or coffee (1 cup / 240 ml, cooled) – the soul of tiramisu
- Dark rum or coffee liqueur (2 tbsp, optional) – adds a boozy kiss
- For the Brown Sugar Glaze:
- Brown sugar (1/2 cup / 110 g) – packed for deep caramel notes
- Unsalted butter (3 tbsp) – helps create that glossy shine
- Heavy cream (1/4 cup / 60 ml) – smooths and enriches the glaze
- Vanilla extract (1/2 tsp) – ties flavors together beautifully
- Pinch of salt – to balance sweetness
If you want to switch things up, use almond flour instead of ladyfingers for a gluten-free option, or swap heavy cream with coconut cream if you prefer dairy-free. For espresso, a strong cold brew works just as well. I’ve found that using fresh mascarpone and quality espresso really makes a noticeable difference in flavor and texture.
Equipment Needed
- Mini muffin tin or silicone molds – perfect for shaping the crispy cups
- Mixing bowls – one for the filling, another for glaze
- Electric mixer or stand mixer – helps whip the mascarpone filling to fluffy perfection
- Small saucepan – for cooking the brown sugar glaze
- Measuring cups and spoons – for accurate ingredient amounts
- Spatula and whisk – essential for mixing without deflating the cream
If you don’t have a mini muffin tin, silicone molds are a fantastic budget-friendly alternative and make popping the cups out a breeze. I personally like using a silicone brush to apply the melted butter to the ladyfingers—makes the coating even and helps achieve that golden crisp. Keep your mixer bowl chilled before whipping the cream; it makes a big difference in how well it whips up. And trust me, having a good non-stick small saucepan helps prevent the glaze from burning during cooking.
Preparation Method
- Prepare the Crispy Cups (15-20 minutes): Preheat your oven to 350°F (175°C). Lightly coat the mini muffin tin with butter or cooking spray. Take each ladyfinger and brush both sides with melted butter mixed with granulated sugar. Press one ladyfinger into each mini muffin cup, bending slightly to form a cup shape. Bake for 12-15 minutes or until golden and crispy. Remove and let cool completely before carefully removing from the tin.
- Make the Espresso Soak (5 minutes): Combine brewed espresso or coffee with rum or coffee liqueur if using. Set aside to cool.
- Whip the Mascarpone Filling (10 minutes): In a chilled bowl, beat mascarpone cheese until smooth. In another bowl, whip heavy cream with powdered sugar and vanilla extract until stiff peaks form. Gently fold whipped cream into the mascarpone until combined but still fluffy—don’t overmix!
- Assemble the Cups (10 minutes): Quickly dip each cup into the espresso soak to moisten (avoid soaking too long to keep cups crispy). Spoon or pipe a generous dollop of mascarpone filling into each cup. Chill in the fridge while making the glaze.
- Prepare the Brown Sugar Glaze (10 minutes): In a small saucepan over medium heat, melt butter and brown sugar, stirring constantly until sugar dissolves and mixture gently bubbles. Slowly whisk in heavy cream, vanilla, and salt. Bring to a simmer for 1-2 minutes until glaze thickens slightly. Remove from heat and cool slightly.
- Finish and Serve: Drizzle the warm brown sugar glaze over each tiramisu cup just before serving. Optionally, dust with cocoa powder or finely grated dark chocolate for a classic touch.
Pro tip: Don’t skip chilling the cups after assembly; it helps the filling set and flavors meld beautifully. If the glaze thickens too much while cooling, gently rewarm it on low heat, stirring constantly.
Cooking Tips & Techniques
To get those perfectly crispy tiramisu cups, brushing the ladyfingers with melted butter and sugar is key. It’s what gives them that golden crunch instead of soggy sogginess. I’ve learned the hard way that skipping this step leads to cups that collapse or get soggy too quickly.
When whipping the mascarpone filling, keep your cream cold and fold gently to preserve the airy texture. Overmixing will deflate the cream and make the filling dense—definitely not what you want for these delicate cups.
Timing is everything. Dip your cups just before filling to avoid sogginess. You want a little espresso flavor but still keep that crunch. And when making the brown sugar glaze, constant stirring and moderate heat prevent burning. I’ve scorched many batches before I figured out that patience pays off here.
Try multitasking by baking your cups while brewing espresso. That way, you’re not waiting around, and the whole process flows smoothly. Also, chilling assembled cups for at least an hour helps the flavors marry and the filling firm up nicely.
Variations & Adaptations
- Seasonal Twist: Swap espresso soak for a spiced chai tea soak in cooler months for a cozy flavor profile.
- Dairy-Free Version: Use coconut cream whipped with powdered sugar in place of heavy cream and dairy-free cream cheese instead of mascarpone.
- Chocolate Lover’s Edition: Add a teaspoon of cocoa powder to the mascarpone filling and drizzle melted dark chocolate over the glaze.
- Fruit-Infused: Layer fresh raspberries or sliced strawberries inside the cup before adding the mascarpone filling for a bright contrast.
- Alcohol-Free: Simply skip the rum or coffee liqueur in the espresso soak; the flavor is still rich and satisfying.
One personal variation I adore is adding a pinch of cinnamon into the brown sugar glaze. It gives an unexpected warmth that pairs beautifully with the espresso and creamy filling. Play around with these ideas depending on your mood and pantry, and you’ll never get bored of this recipe.
Serving & Storage Suggestions
Serve these crispy tiramisu cups chilled or at room temperature. They’re stunning on a dessert platter, especially when drizzled with extra brown sugar glaze and a dusting of cocoa powder. Pair with a rich espresso or a smooth dessert wine for a delightful finish.
Store leftovers in an airtight container in the refrigerator for up to 3 days. The cups will soften a bit but remain delicious. To retain some crispness, keep the brown sugar glaze separate and drizzle just before serving the next day.
If you want to freeze them, assemble without the glaze, and freeze in a single layer on a tray. Once solid, transfer to a freezer-safe container. Thaw overnight in the fridge and add glaze fresh when ready to serve.
Over time, the flavors deepen, and the creamy filling becomes even more luscious. Honestly, these cups taste like they’ve been lovingly made over days when you let them rest a bit—though it’s always hard to wait!
Nutritional Information & Benefits
Each crispy tiramisu cup contains approximately 250-300 calories, depending on portion size and optional ingredients. The mascarpone cheese provides a good source of calcium and healthy fats, while the espresso offers a gentle caffeine kick.
This dessert is gluten-containing due to ladyfingers but can be made gluten-free with almond flour or gluten-free cookies. It’s naturally low in carbs if you skip the sugar glaze or use a sugar substitute. Keep in mind, mascarpone and cream add richness, so this is definitely a treat to enjoy in moderation.
From a wellness perspective, sharing this dessert with family and friends brings joy and connection, which is just as nourishing as the food itself. And hey, a little indulgence now and then never hurt anyone, especially when it tastes this good!
Conclusion
So there you have it—crispy tiramisu cups with brown sugar glaze that bring together crunch, creaminess, and caramel sweetness in a way that feels both classic and fresh. You’re going to want to customize these little cups based on your own taste buds—maybe more glaze, extra espresso soak, or a sprinkle of cinnamon like I do.
I love this recipe because it’s approachable, fun, and truly a crowd-pleaser. It’s perfect for those moments when you want to impress without stress, or simply need a little dessert that feels like a warm hug. Give it a try, and don’t forget to come back and share your tweaks and stories—I’d love to hear how your crispy tiramisu cups turned out!
Frequently Asked Questions About Crispy Tiramisu Cups
Can I make these tiramisu cups ahead of time?
Absolutely! You can assemble the cups a day in advance and keep them chilled. Just add the brown sugar glaze right before serving to keep the cups crispy.
What if I don’t have a mini muffin tin?
No worries! Silicone molds or even small ramekins work well. Just shape the ladyfingers carefully, and adjust baking time if needed.
How do I keep the ladyfingers crispy?
Brush them with melted butter and sugar before baking, and only briefly dip them in espresso to avoid sogginess. Adding the glaze just before serving also helps maintain crispness.
Can I use regular coffee instead of espresso?
Yes! Just brew a strong cup of coffee to get that rich flavor. Cold brew also works great if you want a smoother taste.
Is there a dairy-free alternative for the mascarpone filling?
You can substitute mascarpone with dairy-free cream cheese and heavy cream with coconut cream. Whip well to get a similar fluffy texture.
Pin This Recipe!

Crispy Tiramisu Cups Recipe with Easy Brown Sugar Glaze
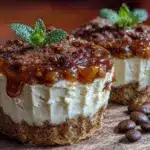
Crispy tiramisu cups with a crunchy ladyfinger shell, creamy mascarpone filling, and a luscious brown sugar glaze. Perfect for desserts, parties, and special occasions.
- Prep Time: 20 minutes
- Cook Time: 25 minutes
- Total Time: 45 minutes
- Yield: 24 servings 1x
- Category: Dessert
- Cuisine: Italian
Ingredients
- 24 ladyfinger cookies (Savoiardi brand preferred)
- 4 tbsp unsalted butter, melted
- 2 tbsp granulated sugar
- 8 oz (225 g) mascarpone cheese, room temperature
- 1 cup (240 ml) heavy cream, chilled
- 1/4 cup (30 g) powdered sugar
- 1 tsp vanilla extract
- 1 cup (240 ml) strong brewed espresso or coffee, cooled
- 2 tbsp dark rum or coffee liqueur (optional)
- 1/2 cup (110 g) brown sugar, packed
- 3 tbsp unsalted butter
- 1/4 cup (60 ml) heavy cream
- 1/2 tsp vanilla extract
- Pinch of salt
Instructions
- Preheat oven to 350°F (175°C). Lightly coat mini muffin tin with butter or cooking spray.
- Brush both sides of each ladyfinger with melted butter mixed with granulated sugar.
- Press one ladyfinger into each mini muffin cup, bending slightly to form a cup shape.
- Bake for 12-15 minutes until golden and crispy. Let cool completely before removing from tin.
- Combine brewed espresso or coffee with rum or coffee liqueur if using. Set aside to cool.
- In a chilled bowl, beat mascarpone cheese until smooth.
- In another bowl, whip heavy cream with powdered sugar and vanilla extract until stiff peaks form.
- Gently fold whipped cream into mascarpone until combined but still fluffy.
- Quickly dip each cup into espresso soak to moisten, avoiding soaking too long to keep cups crispy.
- Spoon or pipe a generous dollop of mascarpone filling into each cup. Chill in fridge.
- In a small saucepan over medium heat, melt butter and brown sugar, stirring constantly until sugar dissolves and mixture bubbles gently.
- Slowly whisk in heavy cream, vanilla, and salt. Simmer 1-2 minutes until glaze thickens slightly. Remove from heat and cool slightly.
- Drizzle warm brown sugar glaze over each tiramisu cup just before serving.
- Optionally dust with cocoa powder or finely grated dark chocolate.
Notes
Brush ladyfingers with melted butter and sugar to achieve crispy cups. Keep cream chilled before whipping to get fluffy texture. Dip cups briefly in espresso to avoid sogginess. Rewarm glaze gently if it thickens too much. Chill assembled cups for at least an hour to set filling and meld flavors.
Nutrition
- Serving Size: 1 crispy tiramisu cu
- Calories: 275
- Sugar: 18
- Sodium: 70
- Fat: 18
- Saturated Fat: 11
- Carbohydrates: 22
- Fiber: 0.5
- Protein: 4
Keywords: tiramisu, crispy tiramisu cups, brown sugar glaze, mascarpone dessert, easy tiramisu, party dessert, finger food dessert


