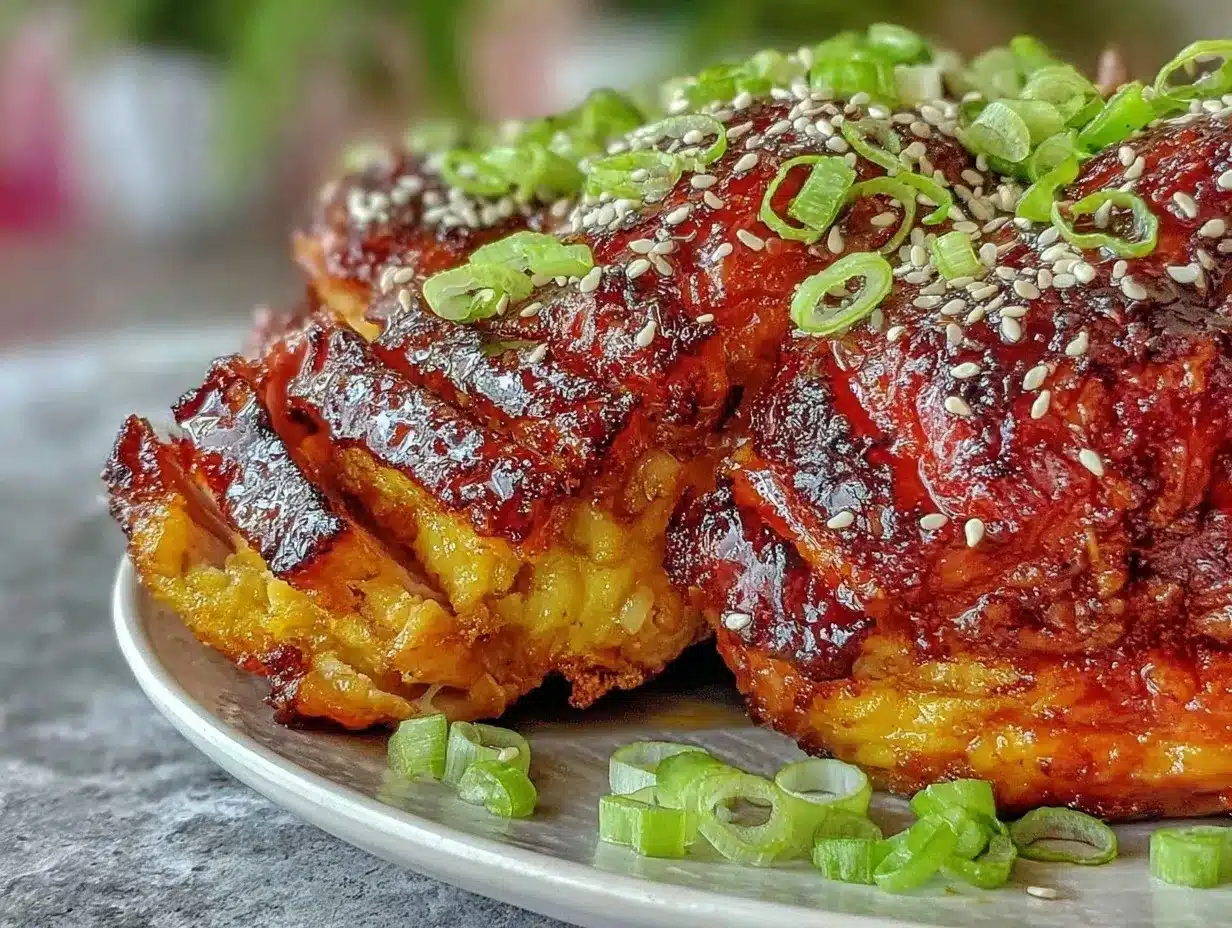
“I wasn’t expecting much when my neighbor, Mrs. Patel, casually mentioned her ‘foolproof spring chicken’ recipe while we were chatting over the fence last April. Honestly, I was more curious about her garden than her cooking skills. But then, one breezy Saturday, I found myself standing in her kitchen, watching a golden, crispy chicken sizzle away under a sticky, shiny glaze. The smell alone pulled me in from the driveway—like warm honey and a whisper of soy mingling with fresh herbs. It was one of those moments that made me forget I’d just tripped over a loose tile and spilled half the spice jar. Maybe you’ve been there—caught between a kitchen mess and a mouthwatering aroma that’s impossible to resist.
That crispy spring chicken with sticky teriyaki glaze recipe quickly became my go-to for impressing friends without hours of fuss. It’s the kind of dish where the skin crackles just right, the glaze clings like a sweet hug, and the meat stays juicy underneath. I keep going back to it because it’s simple, satisfying, and honestly, it feels like a little celebration on a plate. Whether it’s a busy weeknight or a chance to show off just a tiny bit, this recipe has been quietly winning hearts ever since that accidental kitchen disaster turned delight. Let me tell you, it’s worth every sticky finger and happy mess.”
Why You’ll Love This Recipe
After testing this crispy spring chicken recipe over several weekends (and yes, once with a curious toddler trying to ‘help’), I’m confident it’s one of those dishes that hits all the right notes. It’s approachable enough for cooks who aren’t pros but still delivers restaurant-quality flavor that makes you look like you spent hours fussing. Here’s why it’s a keeper:
- Quick & Easy: From start to finish, you’re looking at about 40 minutes—perfect when you want something special without the wait.
- Simple Ingredients: No need for exotic items; most are pantry staples or easy to find at your local market.
- Perfect for Spring & Early Summer Dinners: Bright, fresh flavors with a sticky-sweet twist that feels just right as the weather warms up.
- Crowd-Pleaser: Whether it’s a family dinner or casual get-together, this chicken disappears fast.
- Unbelievably Delicious: The crispy skin paired with a luscious teriyaki glaze gives you a delightful contrast of textures and flavors you won’t forget.
This isn’t your average teriyaki chicken. The secret is in the glaze’s balance—sweet but not cloying, with a hint of tang and umami that makes every bite crave-worthy. Plus, the technique of air-drying the chicken skin before cooking helps get that irresistible crispiness. Honestly, it feels like a little magic trick I stumbled upon, and I’m here to share it with you.
What Ingredients You Will Need
This recipe uses simple, wholesome ingredients to deliver bold flavor and satisfying texture without the fuss. Most of these items are pantry staples, but if you want to switch things up, I’ll share substitutions along the way.
- Whole spring chicken (about 3-4 lbs / 1.4-1.8 kg): Young chicken with tender meat and thinner skin for crispiness. You can also use skin-on chicken thighs if preferred.
- Salt: For seasoning and drawing out moisture from the skin to crisp it up.
- Black pepper, freshly ground: Adds a mild heat and depth.
- Vegetable oil or canola oil (2-3 tbsp): For roasting; neutral oils work best for crisping skin without burning.
- Soy sauce (⅓ cup / 80 ml): I recommend Kikkoman for a balanced flavor.
- Honey (3 tbsp): Gives the glaze its sticky sweetness—raw or wildflower honey adds extra complexity.
- Rice vinegar (2 tbsp): Provides a subtle tang to balance the sweetness of the honey.
- Fresh ginger (1 tbsp, grated): Brings a warm, zesty kick.
- Garlic (2 cloves, minced): For aromatic depth.
- Sesame oil (1 tsp): Adds a nutty aroma to the glaze.
- Optional garnish: Toasted sesame seeds and thinly sliced green onions for fresh crunch and presentation.
If you need gluten-free options, swap soy sauce with tamari or coconut aminos. For a vegan-friendly glaze (to use on tofu or veggies), replace honey with maple syrup or agave nectar. In summer, fresh lemon zest makes a lovely addition to brighten the glaze further. I like to keep these ingredients on hand because they’re versatile and pack a punch in so many dishes.
Equipment Needed
- Roasting pan or ovenproof skillet: A heavy-bottomed pan helps crisp the skin evenly; I use a cast iron skillet when possible.
- Wire rack: To elevate the chicken and allow air circulation, boosting the crispy skin effect. If you don’t have one, place the chicken on thickly sliced onions or carrots.
- Small saucepan: For making the teriyaki glaze.
- Meat thermometer: Optional but highly recommended for perfectly cooked chicken (target internal temp 165°F / 74°C).
- Brush or spoon: To apply the glaze evenly.
- Sharp knife and cutting board: For prepping and carving.
If you’re on a budget, a simple baking sheet lined with foil works fine, though you might miss a bit of crispiness without the rack. For cleanup, I’ve found that soaking pans right after cooking saves a lot of scrubbing later. Honestly, investing in a good meat thermometer changed my cooking game—no more guessing if the chicken is done!
Preparation Method
- Prep the Chicken (10 minutes): Pat the whole spring chicken dry with paper towels—this step is crucial. Then, season generously inside and out with salt and freshly ground black pepper. I like to do this the night before and leave it uncovered in the fridge to dry the skin further, but if you’re short on time, at least 30 minutes at room temperature works.
- Preheat the Oven to 425°F (220°C): A hot oven is key for crisp skin.
- Set Up the Roasting Pan: Place a wire rack inside your roasting pan or skillet. If you don’t have a rack, scatter thick vegetable slices (onions, carrots) on the pan to lift the chicken off the surface.
- Roast the Chicken (35-40 minutes): Place the chicken breast side up on the rack. Drizzle with 2-3 tablespoons of vegetable oil, rubbing it evenly over the skin. Roast in the preheated oven until the skin is golden and crispy and the internal temperature reaches 165°F (74°C). Start checking at 35 minutes to avoid overcooking. If the skin browns too quickly, tent loosely with foil.
- Make the Teriyaki Glaze (10 minutes): While the chicken roasts, combine soy sauce, honey, rice vinegar, grated ginger, minced garlic, and sesame oil in a small saucepan. Bring to a simmer over medium heat, stirring occasionally. Reduce heat to low and let it thicken slightly, about 5-7 minutes. Watch closely to avoid burning.
- Glaze the Chicken: When the chicken is done, remove it from the oven. Using a brush or spoon, generously coat the skin with the sticky teriyaki glaze. Return the chicken to the oven for an additional 5 minutes to set the glaze.
- Rest Before Serving (10 minutes): Let the chicken rest on a cutting board, loosely tented with foil. This helps juices redistribute and keeps the meat juicy.
- Carve and Garnish: Slice the chicken and sprinkle with toasted sesame seeds and green onions if desired. Serve warm.
Pro tip: If your glaze is too thick, add a splash of water to loosen it. Also, keep an eye on the oven during glazing to avoid burning the sugars. The crackle and shine of that final glaze layer always remind me why this recipe’s stuck around.
Cooking Tips & Techniques
Getting a crispy skin with sticky glaze can feel tricky, but a few things have saved me from disaster more than once. Here’s what I’ve learned:
- Dry the Skin Thoroughly: Moisture is the enemy of crispiness. Patting the chicken dry and air-drying it in the fridge for a few hours or overnight tightens the skin, helping it crisp beautifully.
- High Heat Roasting: Cooking at 425°F (220°C) helps render fat quickly and crisps the skin without drying the meat.
- Don’t Skip the Rest: Resting the chicken after roasting keeps it juicy. I’ve made the mistake of carving too soon—dry chicken is no fun.
- Make the Glaze Last Minute: Prepare your glaze while the chicken roasts, but apply it only at the end to keep that fresh, sticky texture.
- Use a Meat Thermometer: Guesswork leads to over- or under-cooked chicken. 165°F (74°C) internal temp is your safe zone.
- Watch the Glaze Closely: Sugars can burn quickly. Stir often and reduce heat if needed.
I once tried glazing too early, and the sugars burnt into a bitter mess. Since then, I apply it at the last moment, and the sticky coating stays shiny and delicious. Also, a little extra sesame oil in the glaze gives it a subtle nuttiness that rounds out the sweetness. Honestly, sometimes it’s the tiny details that make all the difference.
Variations & Adaptations
This crispy spring chicken with sticky teriyaki glaze is flexible and welcoming to tweaks. Here are a few ways to make it your own:
- Spicy Twist: Add 1 teaspoon of chili flakes or a splash of sriracha to the glaze for a gentle heat that wakes up the sweetness.
- Herb-Infused: Toss fresh thyme or rosemary under the chicken skin before roasting for an earthy aroma that complements the glaze.
- Gluten-Free Option: Swap regular soy sauce with tamari or coconut aminos to keep it safe for gluten-sensitive eaters.
- Different Cuts: Use bone-in, skin-on chicken thighs or drumsticks if you prefer dark meat—they roast a bit faster but work wonderfully with the glaze.
- Vegetarian Version: Try this glaze on roasted cauliflower or tofu cubes for a similar flavor profile. Press tofu well and roast until crispy before glazing.
One time, I tried adding orange zest and juice to the glaze for a citrusy zing. It was a hit at a spring potluck—bright and refreshing without overwhelming the classic flavors. Feel free to experiment with what you have on hand; this dish is pretty forgiving.
Serving & Storage Suggestions
Serve this crispy spring chicken warm to fully enjoy the contrast between crunchy skin and juicy meat. I like plating it with steamed jasmine rice and sautéed greens like bok choy or snap peas for a balanced meal. A simple cucumber salad on the side adds a cool crunch that complements the sticky glaze perfectly.
Leftovers keep well in an airtight container in the fridge for up to 3 days. When reheating, I recommend using a toaster oven or regular oven at 350°F (175°C) for about 10-15 minutes to bring back some crispness; microwave reheating tends to soften the skin, which is a bummer.
Flavors often deepen overnight, so if you can wait, the chicken tastes even better the next day. Just glaze it fresh before serving again to revive that sticky-sweet coating. If freezing, wrap tightly and consume within 2 months for best quality.
Nutritional Information & Benefits
This crispy spring chicken with sticky teriyaki glaze offers a balanced mix of protein and moderate carbohydrates from the glaze ingredients. A typical serving (about 6 oz / 170 g of cooked chicken plus glaze) contains approximately:
| Nutrient | Amount |
|---|---|
| Calories | 350-400 kcal |
| Protein | 35 g |
| Fat | 20 g (mostly from skin and oil) |
| Carbohydrates | 10-15 g (mainly from honey and soy sauce) |
| Sodium | Varies depending on soy sauce used |
The chicken is a great source of lean protein, essential for muscle repair and energy. Ginger and garlic add antioxidants and anti-inflammatory benefits. Using honey instead of refined sugar gives a more natural sweetener with trace vitamins.
Be mindful of sodium content if watching salt intake—choosing low-sodium soy sauce can help. This recipe is naturally gluten-free if you swap in tamari, and it’s friendly for most balanced diets. For me, it strikes a satisfying balance between indulgence and wholesomeness.
Conclusion
This crispy spring chicken with sticky teriyaki glaze is a recipe I keep returning to—not just because it tastes amazing, but because it’s reliable and surprisingly easy. It’s perfect for anyone who wants to impress without stress or who just craves that satisfying crunch paired with sweet-savory flavors. Don’t be afraid to make it your own by adjusting the glaze or seasoning to your liking.
I hope you enjoy making and sharing this dish as much as I do. If you try it, drop a comment below and let me know your favorite variations or any tips you discovered along the way. Sharing food stories and recipes like this one is what makes cooking fun and meaningful. Happy cooking, and here’s to many sticky, crispy, delicious meals ahead!
FAQs
Can I use chicken thighs instead of a whole spring chicken?
Absolutely! Bone-in, skin-on thighs work great and cook a bit faster. Just watch the timing—usually around 25-30 minutes at 425°F (220°C).
How do I get the chicken skin extra crispy?
Pat the skin dry thoroughly and salt it well. If you have time, let the chicken air-dry uncovered in the fridge for a few hours or overnight before roasting.
What can I substitute for honey in the teriyaki glaze?
Maple syrup or agave nectar are good alternatives if you want a vegan option or don’t have honey on hand.
Is it okay to make the glaze ahead of time?
You can prepare the glaze in advance, but it’s best to apply it right before finishing the chicken in the oven to keep that sticky texture.
How should I store leftovers to keep the skin crispy?
Store leftovers in an airtight container in the fridge. Reheat in the oven or toaster oven at 350°F (175°C) for 10-15 minutes to help restore crispiness. Avoid microwaving if possible.
Pin This Recipe!

Crispy Spring Chicken Recipe with Easy Sticky Teriyaki Glaze

A quick and easy recipe for crispy spring chicken with a sticky, sweet-savory teriyaki glaze that delivers restaurant-quality flavor and juicy meat.
- Prep Time: 10 minutes
- Cook Time: 40-45 minutes
- Total Time: 50-55 minutes
- Yield: 4 servings
- Category: Main Course
- Cuisine: Asian
Ingredients
- Whole spring chicken (about 3-4 lbs / 1.4-1.8 kg)
- Salt
- Black pepper, freshly ground
- Vegetable oil or canola oil (2-3 tbsp)
- Soy sauce (⅓ cup / 80 ml)
- Honey (3 tbsp)
- Rice vinegar (2 tbsp)
- Fresh ginger (1 tbsp, grated)
- Garlic (2 cloves, minced)
- Sesame oil (1 tsp)
- Optional garnish: Toasted sesame seeds and thinly sliced green onions
Instructions
- Pat the whole spring chicken dry with paper towels. Season generously inside and out with salt and freshly ground black pepper. For best results, do this the night before and leave uncovered in the fridge to dry the skin further, or at least 30 minutes at room temperature.
- Preheat the oven to 425°F (220°C).
- Place a wire rack inside your roasting pan or ovenproof skillet. If you don’t have a rack, scatter thick vegetable slices (onions, carrots) on the pan to lift the chicken off the surface.
- Place the chicken breast side up on the rack. Drizzle with 2-3 tablespoons of vegetable oil, rubbing it evenly over the skin.
- Roast in the preheated oven for 35-40 minutes until the skin is golden and crispy and the internal temperature reaches 165°F (74°C). Start checking at 35 minutes to avoid overcooking. Tent loosely with foil if the skin browns too quickly.
- While the chicken roasts, combine soy sauce, honey, rice vinegar, grated ginger, minced garlic, and sesame oil in a small saucepan. Bring to a simmer over medium heat, stirring occasionally. Reduce heat to low and let it thicken slightly, about 5-7 minutes. Watch closely to avoid burning.
- Remove the chicken from the oven. Using a brush or spoon, generously coat the skin with the sticky teriyaki glaze.
- Return the chicken to the oven for an additional 5 minutes to set the glaze.
- Let the chicken rest on a cutting board, loosely tented with foil, for 10 minutes to allow juices to redistribute.
- Carve the chicken and sprinkle with toasted sesame seeds and green onions if desired. Serve warm.
Notes
Pat the chicken skin dry thoroughly and air-dry in the fridge for several hours or overnight for extra crispiness. Use a meat thermometer to ensure the chicken reaches 165°F (74°C) internal temperature. Apply the glaze at the end to keep it sticky and shiny. If glaze thickens too much, add a splash of water to loosen it. Reheat leftovers in the oven or toaster oven to maintain crispiness; avoid microwaving.
Nutrition
- Serving Size: Approximately 6 oz (
- Calories: 350400
- Fat: 20
- Carbohydrates: 1015
- Protein: 35
Keywords: crispy chicken, spring chicken, teriyaki glaze, easy chicken recipe, sticky chicken, oven roasted chicken, quick dinner, gluten-free option