“You gotta try this,” my neighbor Jim insisted one late summer evening, holding up a can of beer like it was a secret weapon. I wasn’t exactly sold at first — I mean, chicken on a beer can? It sounded like one of those backyard myths. But honestly, as the grill hummed and that unmistakable sizzle started, I found myself pulled in by the smell wafting down the block. Jim wasn’t just playing around; he was onto something seriously tasty.
It was one of those moments where you’re caught between curiosity and skepticism. The chicken, perched awkwardly on that can, looked a bit absurd, but the promise of crispy, juicy meat was too tempting. I made a mess trying to get it set up myself, almost knocking over the grill lighter, but the result? Pure magic.
Maybe you’ve been there — standing outside, the sun dipping low, the neighbors chatting, and that smell of grilled chicken that just makes everything else fade away. This recipe isn’t just about the technique; it’s about those shared moments, the laughs over spilled seasoning, and the surprise of a simple beer can turning dinner into a conversation piece. That’s why I keep coming back to it — it’s easy, it’s fun, and honestly, it tastes like a little weekend celebration every time.
Why You’ll Love This Crispy Beer Can Chicken on the Grill Recipe
This beer can chicken recipe has been through the wringer in my grill experiments, and I’m confident it’s one of the best for several reasons:
- Quick & Easy: Ready in under 90 minutes, it fits well into busy weekend plans without feeling rushed.
- Simple Ingredients: No need for fancy spices or hard-to-find items — most are pantry staples.
- Perfect for Outdoor Gatherings: Whether it’s a casual barbecue or a family get-together, this recipe always impresses.
- Crowd-Pleaser: Kids and adults alike are drawn to the crispy skin and juicy meat combo.
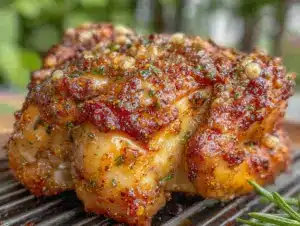
- Unbelievably Delicious: The dry rub brings a balanced savory flavor while the beer keeps the chicken unbelievably moist.
What makes this version stand out is the savory dry rub — it’s a blend I tweaked after a few too many burnt attempts to find just the right balance of spices that gives the chicken a crispy, flavorful crust without overpowering its natural taste. Plus, grilling on a beer can isn’t just a gimmick; it’s a clever way to steam the inside while crisping the outside. That little trick is the difference between dry, overcooked bird and one that makes you close your eyes after the first bite.
What Ingredients You Will Need
This recipe uses straightforward, wholesome ingredients that come together to create bold flavor and a satisfying texture without fuss. Here’s what you’ll need:
- Whole chicken, about 4 to 5 pounds (1.8 to 2.3 kg), thawed and patted dry
- Beer, one 12-ounce (355 ml) can of your favorite lager or pale ale (helps steam and flavor the chicken)
- Olive oil, 2 tablespoons (adds moisture and helps rub stick)
For the savory dry rub:
- Paprika, 2 tablespoons (smoked paprika if you want a subtle smoky touch)
- Brown sugar, 1 tablespoon (balances the savoriness with a touch of sweetness)
- Garlic powder, 1 tablespoon (adds depth)
- Onion powder, 1 teaspoon
- Dried thyme, 1 teaspoon
- Dried oregano, 1 teaspoon
- Cayenne pepper, 1/2 teaspoon (optional, for a mild kick)
- Salt, 1 1/2 teaspoons (adjust to taste)
- Black pepper, 1 teaspoon, freshly ground
Ingredient tips: I prefer using a lager for its mild flavor, but a pale ale works great too. For the chicken, make sure it’s dry before applying the rub for the crispiest skin. I usually grab organic chicken when I can — it just tastes cleaner to me.
Equipment Needed
- Charcoal or gas grill: A grill with a lid is essential for this recipe to create that indirect heat environment.
- Beer can chicken holder (optional): It helps stabilize the chicken on the can, but if you don’t have one, you can balance it carefully.
- Meat thermometer: Crucial for checking the internal temperature to avoid undercooking or drying out.
- Brush or spoon: For applying the olive oil and rub evenly.
- Tongs and heat-resistant gloves: For safe handling of the hot chicken and grill.
If you’re on a budget, a simple wire rack or even a sturdy aluminum foil ring can help hold the chicken upright. I once used a heavy mug when I forgot the holder — worked in a pinch but was a bit wobbly! Always keep your thermometer handy; nothing beats that peace of mind when grilling.
Preparation Method
- Prepare the chicken: Remove any giblets from the cavity. Pat the chicken dry thoroughly with paper towels (this helps the skin crisp up). Let the chicken come to room temperature for about 20 minutes before seasoning.
- Make the dry rub: In a small bowl, combine paprika, brown sugar, garlic powder, onion powder, thyme, oregano, cayenne pepper (if using), salt, and black pepper. Mix well to combine all flavors evenly.
- Apply olive oil: Rub the entire chicken with olive oil. This helps the dry rub stick and encourages crispy skin.
- Season the chicken: Generously coat the chicken inside and out with the dry rub. Don’t be shy — get it into the cavity and under the skin if you can.
- Prepare the beer can: Open the beer can and drink or pour out about half (or save it for sipping!). Optionally, you can add a few cloves of garlic or herbs inside the can for extra aroma.
- Mount the chicken: Carefully place the chicken cavity over the beer can, balancing it upright. The legs should be touching the grill to stabilize the bird.
- Preheat the grill: Set up your grill for indirect medium heat — around 350°F (175°C). If using charcoal, bank the coals to one side; for gas, turn off the burners directly under the chicken.
- Grill the chicken: Place the chicken upright on the grill grate, cover, and cook for about 60 to 75 minutes. Use a meat thermometer inserted into the thickest part of the thigh (avoiding the bone) to check for doneness. The safe internal temperature is 165°F (74°C).
- Check and rotate: About halfway through, rotate the chicken if your grill has hot spots. Keep the lid closed as much as possible to maintain temperature.
- Rest the chicken: Once cooked, carefully remove the chicken (watch out for hot beer steam!) and let it rest for 10 to 15 minutes before carving. This lets the juices reabsorb for moist meat.
Pro tip: If the skin isn’t as crispy as you like at the end, move the chicken directly over the heat for a few minutes, watching carefully to prevent burning. Also, be patient with the resting time — it’s tempting to dig in immediately, but it really makes a difference.
Cooking Tips & Techniques for Crispy Beer Can Chicken
Getting that crispy skin and juicy interior perfect isn’t always a walk in the park, but these tricks have saved me more than once:
- Patience is key: Letting the chicken dry and rest before cooking helps the skin crisp up nicely.
- Use indirect heat: Direct heat will burn the skin before the inside cooks through. Indirect grilling gently crisps without drying.
- Thermometer love: I can’t stress enough how a good instant-read thermometer prevents guesswork and dry chicken.
- Don’t forget to rotate: Grills often have hot spots, so turning the chicken halfway ensures even cooking and an all-around golden crust.
- Be cautious when removing: The beer can and chicken are hot and unstable. Use heat-resistant gloves and sturdy tongs or a spatula to steady the bird.
- Experiment with rubs: Once you nail the basic technique, try adding your favorite herbs or spices to the rub to customize flavor.
I once rushed the resting phase and ended up with juices running all over the cutting board. Lesson learned: a few extra minutes off the heat make carving cleaner and meat moister.
Variations & Adaptations
- Herb-Infused Beer Can: Add fresh rosemary, thyme, or garlic cloves inside the beer can to infuse subtle herbal notes into the chicken while it cooks.
- Spicy Kick: Boost the cayenne pepper to 1 teaspoon or add a pinch of smoked chili powder for a deeper smoky heat.
- Gluten-Free Option: Ensure your dry rub spices are gluten-free (most are, but double-check), and use a gluten-free beer or substitute the beer can with a can of sparkling water for steaming.
- Oven Roasting Alternative: If the weather’s off or no grill is available, roast the chicken upright on a beer can in a 375°F (190°C) oven for about 1 hour 15 minutes, checking temperature as usual.
- Personal Twist: I once swapped the beer for a can of apple cider and added a touch of cinnamon to the rub — the result was surprisingly sweet and savory, a nice change for fall grilling.
Serving & Storage Suggestions
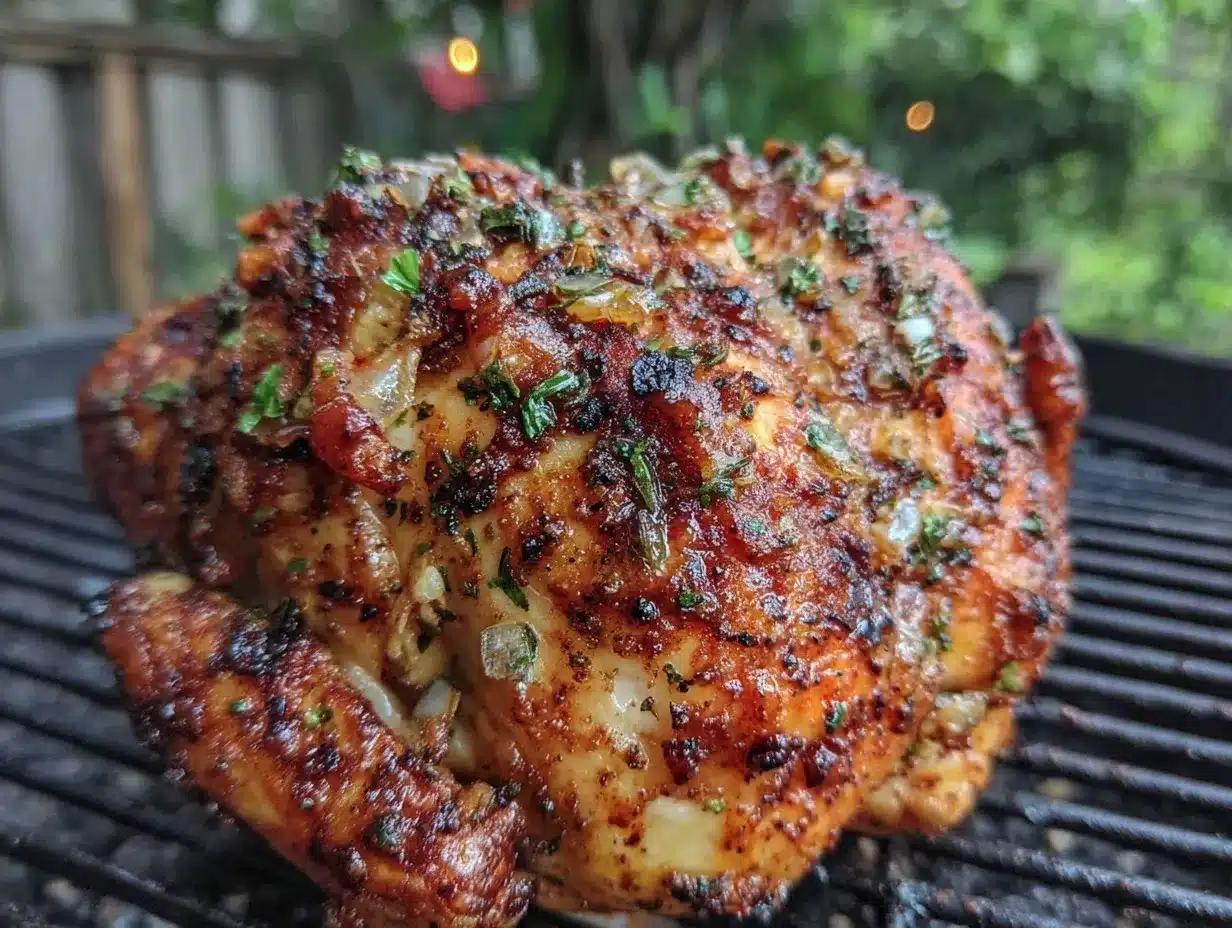
Serve this crispy beer can chicken hot off the grill, carving it into juicy slices right at the table. It pairs beautifully with grilled vegetables, corn on the cob, or a light, tangy coleslaw to balance the savory crust.
Leftovers? No problem. Store any remaining chicken in an airtight container in the fridge for up to 3 days. Reheat gently in the oven at 300°F (150°C) covered with foil to keep it moist. Avoid microwaving if you want to keep the skin crispy — it tends to turn rubbery.
Flavors often deepen after a day in the fridge, so sometimes I find leftover slices taste even better the next day. The savory rub melds with the meat, making for quick sandwiches or salads.
Nutritional Information & Benefits
This recipe is a solid choice if you’re keeping an eye on protein intake and want a flavorful meal without excessive calories. A typical serving (about 6 ounces or 170 grams of cooked chicken) provides roughly:
| Nutrient | Amount |
|---|---|
| Calories | 280 |
| Protein | 35 grams |
| Fat | 14 grams |
| Carbohydrates | 2 grams (mostly from the dry rub sugars) |
Chicken is an excellent source of lean protein, important for muscle repair and satiety. The dry rub uses natural spices, which have antioxidant properties. Just watch the sodium if you’re salt-sensitive, as the rub contains salt.
For gluten-free or dairy-free diets, this recipe fits perfectly with minor substitutions, keeping it accessible to many.
Conclusion
This crispy beer can chicken on the grill is one of those recipes that feels both special and approachable. It’s not just the crispy skin or the juicy meat — it’s the whole experience, from prepping the rub to the satisfying sizzle on the grill. I love how it brings people together without any fuss and always sparks a few curious questions (and laughs) about the beer can trick.
Feel free to tweak the rub or try different beers to match your taste. Honestly, once you nail this technique, it’s going to become your go-to for weekend barbecues and casual dinners alike.
Give it a try, and if you do, I’d love to hear how your version turned out — don’t hesitate to share your tweaks or stories in the comments below. Happy grilling, and may your skin always be crispy!
FAQs About Crispy Beer Can Chicken on the Grill
Can I use any type of beer for beer can chicken?
Yes! Most lagers, pilsners, or pale ales work well. Avoid overly bitter or dark beers if you prefer a milder flavor, but feel free to experiment.
Is it safe to cook chicken on a beer can?
Yes, as long as you use a standard, unopened beer can and position the chicken securely. The beer steams the chicken from the inside, adding moisture.
How do I know when the chicken is fully cooked?
Use a meat thermometer to check the thickest part of the thigh (without touching bone). It should reach 165°F (74°C).
Can I prepare the chicken ahead of time?
Absolutely. You can apply the dry rub and refrigerate the chicken overnight for deeper flavor, then bring it to room temperature before grilling.
What if I don’t have a grill?
You can roast the chicken upright on a beer can in the oven at 375°F (190°C) for about 1 hour 15 minutes, checking for doneness with a thermometer.
Pin This Recipe!

Crispy Beer Can Chicken on the Grill Easy Savory Dry Rub Recipe
A flavorful and juicy beer can chicken grilled to crispy perfection using a savory dry rub. Perfect for outdoor gatherings and easy weekend barbecues.
- Prep Time: 25 minutes
- Cook Time: 75 minutes
- Total Time: 1 hour 40 minutes
- Yield: 4 to 6 servings
- Category: Main Course
- Cuisine: American
Ingredients
- Whole chicken, about 4 to 5 pounds (1.8 to 2.3 kg), thawed and patted dry
- Beer, one 12-ounce (355 ml) can of your favorite lager or pale ale
- Olive oil, 2 tablespoons
- Paprika, 2 tablespoons (smoked paprika optional)
- Brown sugar, 1 tablespoon
- Garlic powder, 1 tablespoon
- Onion powder, 1 teaspoon
- Dried thyme, 1 teaspoon
- Dried oregano, 1 teaspoon
- Cayenne pepper, 1/2 teaspoon (optional)
- Salt, 1 1/2 teaspoons (adjust to taste)
- Black pepper, 1 teaspoon, freshly ground
Instructions
- Remove any giblets from the cavity. Pat the chicken dry thoroughly with paper towels and let it come to room temperature for about 20 minutes before seasoning.
- In a small bowl, combine paprika, brown sugar, garlic powder, onion powder, thyme, oregano, cayenne pepper (if using), salt, and black pepper. Mix well.
- Rub the entire chicken with olive oil to help the dry rub stick and encourage crispy skin.
- Generously coat the chicken inside and out with the dry rub, including inside the cavity and under the skin if possible.
- Open the beer can and drink or pour out about half. Optionally add garlic cloves or herbs inside the can for extra aroma.
- Carefully place the chicken cavity over the beer can, balancing it upright with the legs touching the grill for stability.
- Preheat the grill for indirect medium heat around 350°F (175°C). For charcoal, bank coals to one side; for gas, turn off burners directly under the chicken.
- Place the chicken upright on the grill grate, cover, and cook for 60 to 75 minutes. Use a meat thermometer to check the thickest part of the thigh for an internal temperature of 165°F (74°C).
- About halfway through cooking, rotate the chicken if your grill has hot spots. Keep the lid closed as much as possible.
- Once cooked, carefully remove the chicken and let it rest for 10 to 15 minutes before carving to allow juices to redistribute.
- If skin is not crispy enough, move chicken directly over heat for a few minutes, watching carefully to prevent burning.
Notes
Use indirect heat to avoid burning the skin. Let the chicken rest after cooking for juicier meat. Use a meat thermometer to ensure safe cooking temperature. If skin isn’t crispy enough, finish over direct heat briefly. For gluten-free option, use gluten-free beer or substitute beer can with sparkling water can.
Nutrition
- Serving Size: About 6 ounces (170
- Calories: 280
- Fat: 14
- Carbohydrates: 2
- Protein: 35
Keywords: beer can chicken, grilled chicken, dry rub chicken, crispy chicken, barbecue chicken, outdoor grilling, easy chicken recipe