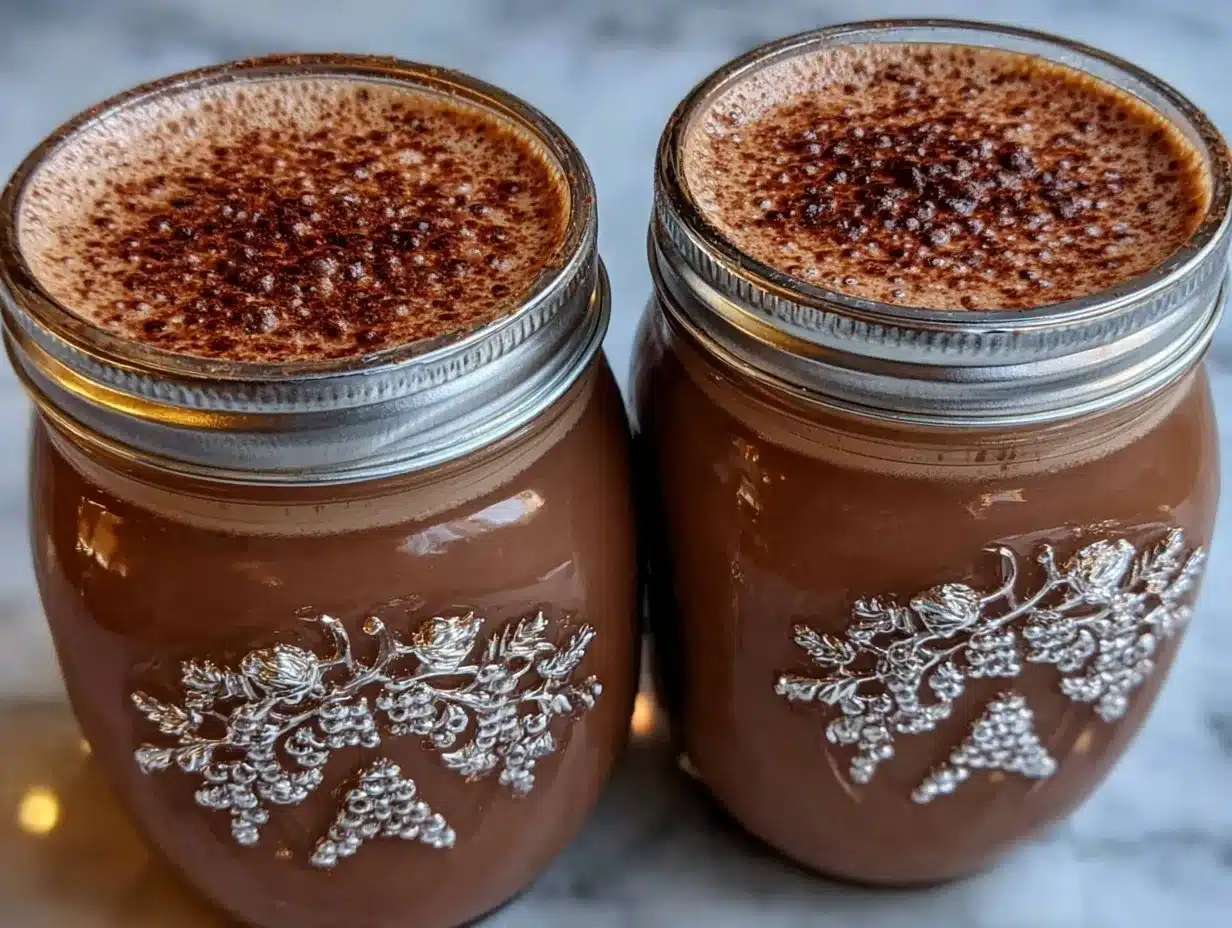
Let me paint you a picture: the aroma of rich cocoa powder, velvety milk, and a whisper of vanilla swirling together in your favorite mug, steam curling up like little clouds, and that first silky sip warming you from the inside out. Honestly, the scent alone is enough to lure my kids from their bedrooms (and let’s face it, me from the laundry pile). There’s something magical about whipping up a batch of creamy homemade hot cocoa mix—especially when the wind is howling and the frost paints patterns on the windows.
The first time I made this cocoa mix, it was during one of those long, snowy weekends when the roads were closed and we were all hunkered down at home. I just wanted to recreate the hot chocolate my grandma used to make when I was knee-high to a grasshopper—no fancy powders, no artificial taste, just pure, nostalgic comfort. I remember pausing after the first taste, closing my eyes, and smiling. You know you’ve stumbled onto something special when your family starts asking for seconds before you’ve even had a chance to sit down. My husband couldn’t stop sneaking spoonfuls of the mix straight from the jar (I can’t blame him—it’s dangerously tempting).
Years ago, I would have reached for the store-bought packets, never realizing how easy and affordable it could be to make your own hot cocoa mix at home. Now, this recipe’s become a staple for family movie nights, holiday gifting, and those random Tuesday evenings when everyone needs a pick-me-up. It really does feel like a warm hug in a mug. If you’re looking for something to brighten up your Pinterest board or a sweet treat to share with friends, this creamy homemade hot cocoa mix is the perfect answer. Trust me—I’ve tested and tweaked it more times than I can count (in the name of research, of course!). You’re going to want to bookmark this one for every cozy winter night.
Why You’ll Love This Creamy Homemade Hot Cocoa Mix
As someone who’s tested too many cocoa recipes to count, I have to say this one stands out for all the right reasons. It’s not just about the rich chocolate flavor—this mix is about pure comfort and fuss-free happiness in every sip. I’ve made it for family, friends, and even as little holiday gifts, and the feedback is always the same: “Can I have the recipe?” Here’s why you’ll love it:
- Quick & Easy: Comes together in under 10 minutes, perfect for busy evenings or spontaneous cravings.
- Simple Ingredients: No weird additives or hard-to-find stuff—just pantry basics you probably already have.
- Perfect for Winter Nights: Whether it’s a snow day, a holiday party, or a quiet evening in, this cocoa mix is always a hit.
- Crowd-Pleaser: Kids and adults alike rave about how creamy and flavorful it is.
- Unbelievably Delicious: The texture is silky-smooth, and the flavor is rich without being overwhelming.
The secret is in the balance—the right blend of cocoa powder, real milk powder, and a touch of cornstarch for that extra creamy finish. I also add a pinch of salt and a dash of vanilla powder (if you have it—totally optional!) to round out the flavors. A lot of hot cocoa mixes are either too sweet or too chalky. This one? It’s just right. You don’t have to be a chef to nail it, and you won’t be left with a sticky mess in the kitchen. Plus, you can easily personalize it—add mini marshmallows, crushed peppermint, or spice it up with a hint of cinnamon.
Honestly, this cocoa mix is more than just a drink—it’s a little ritual. It turns a regular evening into something special, no matter how ordinary the day. So if you’re looking for a recipe that’s as comforting as it is practical, my creamy homemade hot cocoa mix for cozy nights is a must-try. It’s the kind of treat that makes you close your eyes after that first sip, and sometimes, that’s all you need.
What Ingredients You Will Need
This creamy homemade hot cocoa mix uses simple, wholesome ingredients to deliver bold flavor and a satisfying texture without any fuss. Most of these are pantry staples, so you won’t need to run around town hunting for anything fancy (promise!). Here’s what you’ll need:
- For the cocoa mix:
- Unsweetened cocoa powder (Dutch-process or natural, about 1 cup / 100g) – For rich, deep chocolate flavor. I like Ghirardelli or Hershey’s.
- Powdered sugar (1 ½ cups / 180g) – Helps the mix dissolve easily and gives a smooth sweetness.
- Nonfat dry milk powder (2 cups / 200g) – This is what makes the cocoa extra creamy. Carnation or Bob’s Red Mill are both good options.
- Cornstarch (2 tablespoons / 16g) – Adds thickness and a silky mouthfeel (don’t skip it, even if it sounds odd!).
- Salt (½ teaspoon / 3g) – Balances and enhances the chocolate flavor (yes, salt in cocoa—trust me).
- Vanilla powder (1 teaspoon / 2g, optional) – Adds a hint of warmth and depth. You can skip or swap for a splash of vanilla extract when mixing.
- For serving:
- Whole milk or any milk of choice (for preparing each mug) – I prefer whole milk for maximum creaminess, but almond or oat milk work well for dairy-free.
- Mini marshmallows (optional) – For topping!
- Whipped cream (optional) – You know, for the full “Pinterest-worthy” effect.
- Chocolate shavings or sprinkles (optional) – For extra flair.
You can easily adjust the sweetness by reducing the powdered sugar, or swap in coconut sugar for a slightly deeper flavor. If you’re looking for a dairy-free option, use coconut or soy milk powder instead of regular milk powder. For a gluten-free mix, double-check your powdered sugar and milk powder brands (most are gluten-free, but it never hurts to check). If you want to switch things up seasonally, try adding a pinch of cinnamon or cardamom for a holiday twist. Honestly, the ingredients are flexible—make it your own!
Equipment Needed
You don’t need anything fancy to whip up this creamy homemade hot cocoa mix. Here’s what I use:
- Large mixing bowl – For combining all the dry ingredients. If you don’t have one, any big saucepan will do.
- Whisk – Helps break up clumps and ensures the cocoa powder is evenly distributed. A fork works in a pinch, but a whisk is better.
- Measuring cups and spoons – Accuracy matters for the perfect balance (trust me, I learned this the hard way).
- Airtight storage container or mason jar – Keeps the mix fresh and makes for a cute gift. I’ve used everything from old pasta sauce jars to fancy flip-top containers.
- Sifter (optional) – Great if you want the smoothest mix possible, but not required.
If you’re making cocoa for a crowd, a slow cooker can keep it warm and ready all evening. And if your storage jars have rubber seals, check them for cracks to keep the mix dry. Budget-wise, you can get most of these at any dollar store or thrift shop—nothing needs to be top-of-the-line. (My favorite whisk is from a garage sale!)
Preparation Method
-
Combine the dry ingredients:
In a large mixing bowl, add 1 cup (100g) unsweetened cocoa powder, 1 ½ cups (180g) powdered sugar, 2 cups (200g) nonfat dry milk powder, 2 tablespoons (16g) cornstarch, and ½ teaspoon (3g) salt. If using vanilla powder, add 1 teaspoon (2g) now.
Note: Sift the cocoa powder and powdered sugar if they’re lumpy. This helps avoid clumps in your finished mix. -
Whisk until uniform:
Using a whisk (or fork), stir everything together until the mixture looks even in color and texture. This should take about 2 minutes.
Tip: Scrape the bottom and sides of the bowl to catch any hidden pockets of cocoa or sugar. -
Transfer to storage container:
Pour the cocoa mix into an airtight jar or container. Seal tightly. Store in a cool, dry place for up to 3 months.
Warning: Make sure your container is totally dry—any moisture can cause clumping. -
To make hot cocoa:
For each mug, add 3 tablespoons (about 30g) of cocoa mix to 1 cup (240ml) of hot milk (any milk works). Whisk until smooth. Heat gently on the stove or microwave for 1-2 minutes, stirring halfway.
Sensory cue: The cocoa should look glossy, with no visible lumps. It’ll smell chocolatey and inviting. -
Customize and serve:
Top with mini marshmallows, whipped cream, chocolate shavings, or a sprinkle of cinnamon, as desired.
Personal tip: Want it extra thick? Use 4 tablespoons of mix per cup of milk. For a lighter version, try 2 tablespoons.
Troubleshooting: If the mix doesn’t dissolve well, try sifting the ingredients twice, or stir with a small whisk in your mug. If it tastes too sweet, cut the powdered sugar by ¼ cup next time. If you get clumps, make sure your milk is hot enough (cold milk and cocoa powder don’t play nice together!). Efficiency tip: Make a double batch and gift half to a friend—the mix lasts for months and makes winter so much easier.
Cooking Tips & Techniques
After lots of trial and error, I’ve picked up a few tricks that really make this creamy homemade hot cocoa mix shine. Here’s what I’ve learned (sometimes the hard way):
- Mix dry ingredients thoroughly: Clumps of cocoa powder or powdered sugar can ruin the texture. Sifting isn’t required, but whisking until absolutely uniform is worth the extra minute.
- Use hot milk, not water: Milk gives that dreamy, creamy texture. Water works in a pinch, but it can taste thin and flat. Whole milk is best, but any milk will do.
- Don’t overheat: If you boil the cocoa, it can scorch and taste bitter. Gently heat on the stove until steaming but not boiling. If microwaving, stir halfway through—hot spots are sneaky!
- A pinch of salt goes a long way: I used to skip the salt, but honestly, it makes the chocolate flavor pop.
- Batch prep for busy weeks: Make a big batch and store in jars. It makes after-school snacks or impromptu snow-day treats a breeze.
- Consistency matters: If you want extra thick cocoa, up the cornstarch by a teaspoon. If you prefer it lighter, reduce the cornstarch or use low-fat milk.
I’ve burned my fair share of cocoa on the stove—don’t walk away while it’s heating! Timing-wise, I usually start heating the milk while I set the table, then whisk in the mix for the final touch. Multitasking tip: You can prep toppings while the cocoa heats. For recipe success, always taste and tweak. Some days you want it sweeter, some days you want it extra chocolatey. That’s the beauty of homemade hot cocoa mix—make it yours!
Variations & Adaptations
This creamy homemade hot cocoa mix is super versatile. Here are a few ways you can shake things up, whether you’re working around dietary needs or just looking for a fresh twist:
- Dairy-Free: Swap the nonfat dry milk powder for coconut or soy milk powder, and use almond or oat milk to prepare each mug. It’s just as creamy, with a subtle new flavor.
- Spiced Hot Cocoa: Stir in 1-2 teaspoons ground cinnamon, a pinch of nutmeg, or even a dash of cayenne for a spicy kick. Perfect for holiday gatherings!
- Mocha Cocoa: Add 2-3 tablespoons instant espresso powder to the mix for a coffee-flavored twist. This one is my personal favorite for long study nights—so good!
- Low-Sugar/Low-Carb: Use a sugar substitute like stevia or monk fruit in place of powdered sugar. You’ll need to adjust amounts for sweetness, but it works well for those watching sugar intake.
- Flavor Add-ins: Crushed peppermint candies, orange zest, or a splash of caramel syrup can totally change the vibe. My kids love a marshmallow and peanut butter cocoa (just swirl in a spoonful of peanut butter while heating).
- Allergen-Friendly: Check ingredient labels for gluten-free certification if needed. For nut allergies, stick to regular milk and avoid almond/oat milk.
I’ve tried a cinnamon-cardamom cocoa for a winter brunch—honestly, it was a hit! The best part is, you can make a batch to suit everyone’s preferences. One mix, endless possibilities.
Serving & Storage Suggestions
For the best experience, serve this creamy homemade hot cocoa mix piping hot—just below boiling temperature. Pour into your favorite mug and top with mini marshmallows or a generous swirl of whipped cream. For a festive touch, sprinkle chocolate shavings or crushed peppermint on top (especially fun for holiday get-togethers!).
This mix pairs beautifully with warm cookies, cinnamon rolls, or a slice of banana bread. If you’re hosting, set up a hot cocoa bar with toppings and let everyone customize their mugs. For beverages, a glass of cold milk or a shot of espresso makes a nice companion.
To store, keep the cocoa mix in an airtight container at room temperature for up to 3 months. If you want to freeze it, portion the mix into zip-top bags and freeze for up to 6 months—just bring to room temp before using. If you make a prepared mug and have leftovers, refrigerate for up to 2 days and reheat gently on the stove (don’t microwave at high power or it can separate). Honestly, the flavors deepen a bit after a day, so leftover cocoa is a treat of its own!
Nutritional Information & Benefits
This homemade hot cocoa mix is a treat, but it’s a little kinder to your body than most store-bought versions. Each serving (about 3 tablespoons mix + 1 cup whole milk) contains roughly:
- Calories: 180-220
- Protein: 6-8g (from milk powder)
- Sugar: 20-25g (varies by milk and sugar used)
- Fat: 4-8g
Cocoa powder is rich in antioxidants and magnesium, while milk powder provides calcium and protein. You can make this gluten-free by checking your ingredient labels, and it’s easy to adapt for low-carb or dairy-free diets. If you have nut allergies, stick to regular milk and avoid nut-based milks. Honestly, a mug of creamy homemade hot cocoa now and then is good for the soul—sometimes wellness is about comfort, too.
Conclusion
If you’ve ever wanted a mug of comfort that feels homemade, heartfelt, and just a little bit magical, this creamy homemade hot cocoa mix for cozy nights is it. You don’t need fancy ingredients or special skills—just a few pantry staples and a craving for something warm. Whether you make it for family movie night, a snowy afternoon, or a holiday party, it’s sure to become a staple in your kitchen.
Customize it to fit your taste, dietary needs, or the season. That’s the beauty of a homemade mix—you’re in control. I love this recipe because it brings people together and turns ordinary evenings into cozy memories. If you try it, let me know how you tweak it! Share your favorite toppings, mix-ins, or memories in the comments. Bookmark this post, pin it, and don’t forget to spread the cocoa love. Here’s to many more warm, chocolatey nights ahead!
Frequently Asked Questions
How long does homemade hot cocoa mix last?
Stored in an airtight container at room temperature, this mix will stay fresh for up to 3 months. If you freeze it, it’ll last up to 6 months—just thaw before using.
Can I use water instead of milk to prepare the hot cocoa?
You can, but the cocoa will be less creamy. Milk gives it the rich, velvety texture everyone loves. Plant-based milks work great, too!
Is this hot cocoa mix gluten-free?
Most cocoa powder and powdered sugar are gluten-free, but always check the labels to be sure. You can easily adapt the recipe to be gluten-free.
What’s the best way to make a single serving?
Just mix 3 tablespoons of hot cocoa mix with 1 cup (240ml) hot milk, whisk until smooth, and top with your favorite add-ins. Adjust the mix for stronger or lighter cocoa as you like.
Can I make this cocoa mix as a gift?
Absolutely! Pour the mix into a mason jar, add a festive ribbon, and include a tag with instructions. It’s a thoughtful homemade gift for holidays, teachers, or neighbors.
Pin This Recipe!
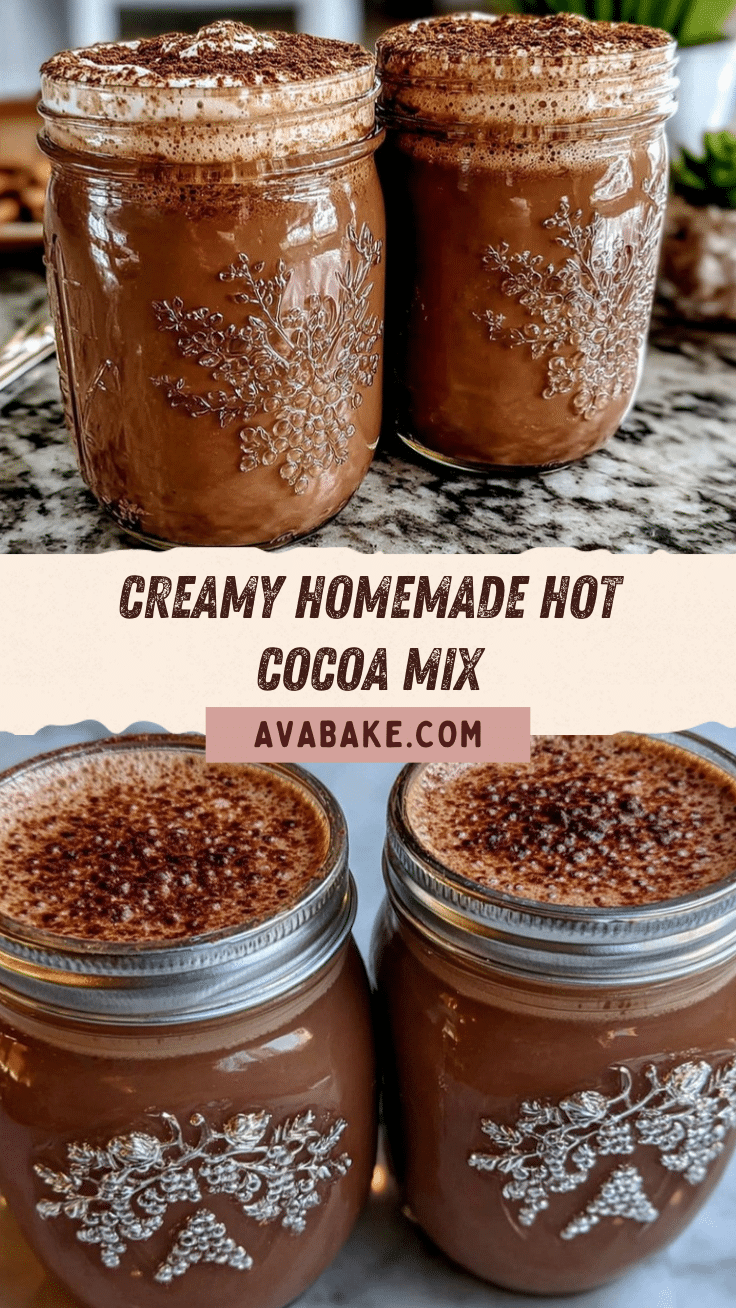
Creamy Homemade Hot Cocoa Mix Recipe for Cozy Winter Nights
This creamy homemade hot cocoa mix is rich, velvety, and easy to make with pantry staples. Perfect for cozy winter nights, holiday gifting, or family movie nights, it delivers pure comfort in every mug.
- Prep Time: 10 minutes
- Cook Time: 2 minutes
- Total Time: 12 minutes
- Yield: 16 servings 1x
- Category: Beverage
- Cuisine: American
Ingredients
- 1 cup unsweetened cocoa powder (Dutch-process or natural)
- 1 1/2 cups powdered sugar
- 2 cups nonfat dry milk powder
- 2 tablespoons cornstarch
- 1/2 teaspoon salt
- 1 teaspoon vanilla powder (optional)
- Whole milk or any milk of choice (for preparing each mug)
- Mini marshmallows (optional, for topping)
- Whipped cream (optional, for topping)
- Chocolate shavings or sprinkles (optional, for topping)
Instructions
- In a large mixing bowl, add cocoa powder, powdered sugar, nonfat dry milk powder, cornstarch, salt, and vanilla powder (if using).
- Sift the cocoa powder and powdered sugar if they’re lumpy to avoid clumps.
- Whisk all dry ingredients together until the mixture looks even in color and texture (about 2 minutes). Scrape the bottom and sides of the bowl to catch any hidden pockets.
- Transfer the cocoa mix into an airtight jar or container. Seal tightly and store in a cool, dry place for up to 3 months.
- To make hot cocoa: For each mug, add 3 tablespoons of cocoa mix to 1 cup hot milk. Whisk until smooth. Heat gently on the stove or microwave for 1-2 minutes, stirring halfway.
- Top with mini marshmallows, whipped cream, chocolate shavings, or a sprinkle of cinnamon as desired.
- For extra thick cocoa, use 4 tablespoons of mix per cup of milk. For a lighter version, use 2 tablespoons.
Notes
For dairy-free, use coconut or soy milk powder and plant-based milk. Adjust sweetness by reducing powdered sugar or using a sugar substitute. Sift ingredients for a smoother mix. Store in an airtight container for up to 3 months. Customize with spices, espresso powder, or flavor add-ins. Always use hot milk for best texture.
Nutrition
- Serving Size: 1 mug (3 tablespoons
- Calories: 200
- Sugar: 22
- Sodium: 150
- Fat: 6
- Saturated Fat: 3
- Carbohydrates: 30
- Fiber: 2
- Protein: 7
Keywords: hot cocoa mix, homemade hot chocolate, winter drinks, cozy recipes, easy cocoa mix, holiday gift, creamy hot cocoa, chocolate beverage


