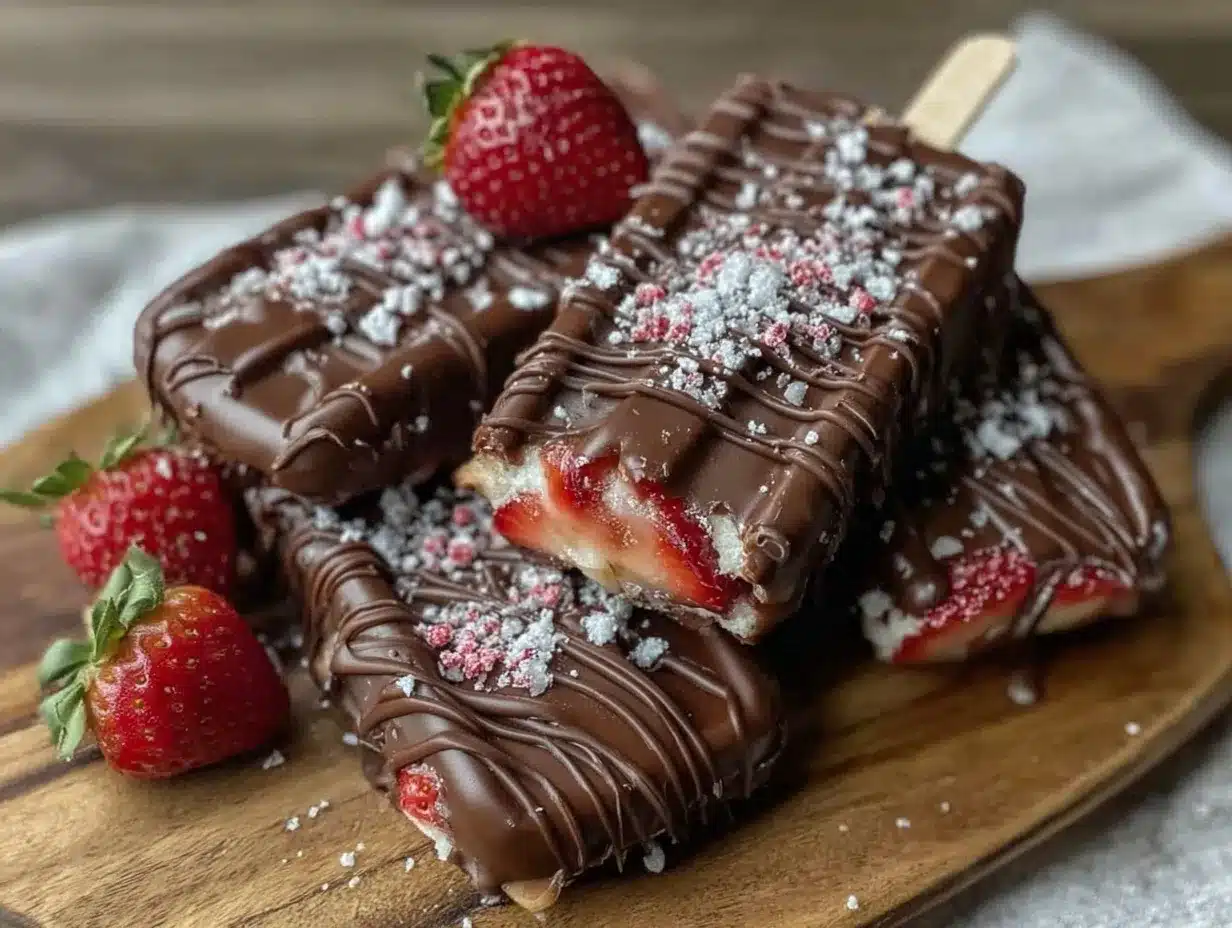
Let me tell you, the scent of fresh strawberries mingling with rich chocolate and fluffy marshmallow is enough to make anyone’s mouth water. The first time I made these creamy chocolate-covered strawberry marshmallow popsicles, I was instantly hooked—the kind of moment where you pause, take a deep breath, and just smile because you know you’re onto something truly special. I remember sitting on my porch on a warm afternoon, biting into one and feeling that perfect blend of cold creaminess, sweet strawberry bursts, and the satisfying snap of chocolate coating.
Years ago, when I was knee-high to a grasshopper, my grandma used to make simple strawberry treats, but nothing quite like this. I stumbled upon the idea during a rainy weekend when I was craving something fun and nostalgic but with a grown-up twist. Honestly, these popsicles bring back that pure, nostalgic comfort with a modern flair. My family couldn’t stop sneaking them off the cooling rack (and I can’t really blame them). These popsicles quickly became a staple for family gatherings and summer parties, always disappearing faster than you’d expect.
Let’s face it, creamy chocolate-covered strawberry marshmallow popsicles are dangerously easy to make and perfect for brightening up your Pinterest cookie board or impressing friends at your next potluck. Whether you’re looking for a sweet treat for your kids or a refreshing dessert to cap off a cozy dinner, you’re going to want to bookmark this one. After testing the recipe multiple times—in the name of research, of course—I can say these popsicles feel like a warm hug on a stick, and they’re just waiting for you to try them.
Why You’ll Love This Recipe
Having spent quite a bit of time perfecting this recipe, I can confidently say it ticks all the boxes for a crowd-pleasing summer treat. Here’s why this creamy chocolate-covered strawberry marshmallow popsicle recipe stands out:
- Quick & Easy: Comes together in under 30 minutes, perfect for busy weeknights or last-minute sweet cravings.
- Simple Ingredients: No fancy grocery trips needed; you likely already have everything in your kitchen or can grab it quickly.
- Perfect for Summer: Great for backyard barbecues, pool parties, or just cooling off on a hot day.
- Crowd-Pleaser: Kids and adults alike rave about the creamy texture and the delightful contrast of chocolate and strawberry.
- Unbelievably Delicious: The combination of velvety marshmallow cream, fresh strawberry pieces, and a crisp chocolate shell is next-level comfort food.
This isn’t just another frozen treat. The marshmallow base gives the popsicles a luxuriously creamy texture that’s different from your typical icy pops. Plus, the chocolate coating adds a satisfying crunch that makes every bite an experience. I’ve found that using high-quality dark chocolate for the coating balances the sweetness and brings out the strawberry flavor beautifully. This recipe is comfort food reimagined—healthier, faster, but with all the soul-soothing satisfaction you want on a hot day. Whether you want to impress guests without breaking a sweat or treat yourself to something special, these popsicles deliver.
What Ingredients You Will Need
This recipe uses simple, wholesome ingredients to deliver bold flavor and satisfying texture without the fuss. Most of these are pantry staples, with fresh strawberries adding that seasonal pop. Here’s what you’ll need:
- Fresh Strawberries – hulled and chopped (about 1 cup/150g; ripe and juicy for best flavor)
- Marshmallow Fluff or Marshmallow Cream – 1 cup (for that creamy, sweet base; I prefer Jet-Puffed for consistency)
- Whole Milk or Half-and-Half – 1 cup (adds creaminess; use dairy-free milk like oat or almond if needed)
- Sweetened Condensed Milk – 1/2 cup (helps with sweetness and smooth texture)
- Vanilla Extract – 1 teaspoon (enhances flavor depth)
- Semi-Sweet or Dark Chocolate – 1 cup (chopped or chips, for coating; Ghirardelli or Lindt recommended)
- Coconut Oil – 1 tablespoon (helps chocolate coating harden smooth and shiny)
- Wooden Popsicle Sticks – 8–10 (standard size; reusable molds work great too)
Optional:
- Freeze-Dried Strawberries – for extra crunch and strawberry punch on the chocolate coating
- Sprinkles or Crushed Nuts – for garnish and texture variation
If fresh strawberries aren’t available, frozen can work in a pinch—just thaw and drain excess moisture. For a dairy-free version, swap condensed milk with coconut cream and use dairy-free marshmallow fluff.
Equipment Needed
- Popsicle Molds: Essential for shaping your popsicles. Silicone molds work best for easy removal, but plastic molds with a sturdy base are fine too.
- Mixing Bowls: A medium bowl for the marshmallow base and a smaller one for melting chocolate.
- Whisk or Hand Mixer: To blend marshmallow fluff with milk smoothly. I like using a hand mixer for quick, lump-free results.
- Double Boiler or Microwave-safe Bowl: For melting chocolate gently—avoid burning by stirring frequently.
- Spoon or Small Ladle: To fill molds neatly and drizzle chocolate coating.
- Freezer Space: You’ll need a flat surface in your freezer to chill popsicles for at least 4–6 hours.
If you don’t have popsicle molds, you can use small paper cups and cover them with foil, poking sticks through the foil—a handy budget-friendly alternative. I’ve found silicone molds last for years if you rinse and dry them well after each use, keeping them flexible and non-sticky.
Preparation Method
- Prepare the Strawberries: Hull and chop about 1 cup (150g) of fresh strawberries into small pieces. Set aside. This step takes about 5 minutes.
- Make the Marshmallow Base: In a medium bowl, whisk together 1 cup marshmallow fluff, 1 cup whole milk (or substitute), 1/2 cup sweetened condensed milk, and 1 teaspoon vanilla extract. Use a hand mixer or whisk vigorously until the mixture is smooth and creamy. This should take around 3–5 minutes. The texture should be pourable but thick enough to hold strawberry pieces.
- Fold in Strawberries: Gently stir the chopped strawberries into the marshmallow base. Be careful not to overmix; you want the fruit to stay intact rather than mushy. This will add bursts of fresh flavor and little pops of color in your popsicles.
- Fill the Popsicle Molds: Carefully spoon the mixture into your popsicle molds, leaving a small gap at the top for expansion during freezing. Insert the wooden sticks and gently tap the molds on the counter to remove air bubbles. This takes about 5 minutes.
- Freeze: Place molds on a flat surface in the freezer and freeze for at least 4–6 hours, preferably overnight for best firmness.
- Prepare Chocolate Coating: Once popsicles are frozen solid, melt 1 cup chopped semi-sweet or dark chocolate with 1 tablespoon coconut oil in a microwave-safe bowl. Heat in 20-second bursts, stirring in between, until smooth and glossy. This step takes about 3–4 minutes.
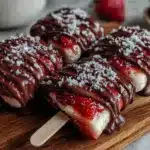
- Dip Popsicles: Remove popsicles from molds by running warm water briefly on the outside. Holding the stick, dip each popsicle into the melted chocolate, letting excess drip off. If desired, quickly sprinkle with crushed freeze-dried strawberries or nuts for extra texture. Place popsicles on a parchment-lined tray.
- Freeze Again to Set: Return the dipped popsicles to the freezer for 15–20 minutes to let the chocolate coating harden. Then they’re ready to enjoy!
Pro Tip: If your chocolate starts to thicken before you finish dipping, gently reheat it for a few seconds to keep it smooth. Also, dipping quickly but carefully helps avoid melting the popsicle surface.
Cooking Tips & Techniques
One key technique here is blending the marshmallow fluff with milk and condensed milk to create a creamy yet firm base that freezes well without turning icy. I learned this the hard way after a few failed batches that were too icy or crumbly. Using sweetened condensed milk adds both sweetness and a silky texture that you won’t get from milk alone.
When melting chocolate, patience is your friend. I always recommend using a double boiler or microwave in short bursts to avoid burning. Adding coconut oil thins the chocolate, making it easier to coat the popsicles smoothly and gives that beautiful shine.
Another trick is to make sure your popsicles are completely frozen solid before dipping. If they’re even a little soft, the chocolate can melt or slide off, so overnight freezing is ideal. And when dipping, hold the popsicle firmly by the stick and dip quickly but confidently to get an even coat.
Multitasking by preparing the marshmallow base while washing and chopping strawberries saves time. Also, keeping your workspace clean and parchment paper ready for dipped popsicles keeps things tidy and stress-free.
Variations & Adaptations
Want to switch things up? Here are a few ways to customize these creamy chocolate-covered strawberry marshmallow popsicles:
- Dietary Swap: Use coconut cream and dairy-free marshmallow fluff for a vegan and dairy-free version. Almond or oat milk works great here.
- Flavor Boost: Add a tablespoon of fresh lemon juice or a pinch of cinnamon to the marshmallow base for a zingy twist. You can also swap strawberries for raspberries or blueberries depending on the season.
- Chocolate Variations: Use white chocolate for a sweeter, creamier coating or sprinkle sea salt over dark chocolate dip for a sweet-salty combo.
- Extra Crunch: Roll the chocolate-coated popsicles in crushed nuts, toasted coconut, or freeze-dried fruit pieces immediately after dipping.
Personally, I once tried adding a swirl of homemade strawberry jam into the marshmallow base before freezing—it added a lovely surprise layer of flavor that everyone loved. You can also experiment with different shapes and sizes of molds for fun presentation.
Serving & Storage Suggestions
Serve these popsicles straight from the freezer for that icy-cold, creamy delight. They’re perfect as a refreshing dessert on a sunny afternoon or a sweet treat after dinner. Present them on a platter with a sprinkle of crushed freeze-dried strawberries or fresh mint leaves for a pretty touch.
Complement these popsicles with a light sparkling lemonade or a cup of iced herbal tea to balance the sweetness. They also pair nicely with a simple fruit salad or crisp cookies for a little textural contrast.
To store, keep the popsicles in their molds or wrap individually in parchment paper and place in an airtight container in the freezer. They’ll stay fresh for up to 2 weeks. When ready to enjoy, let them sit at room temperature for 2–3 minutes to soften slightly for easier biting.
Flavors deepen after a day or two in the freezer, so if you have patience, letting them rest can improve the experience. Just don’t wait too long or they might develop ice crystals.
Nutritional Information & Benefits
While these creamy chocolate-covered strawberry marshmallow popsicles are definitely a treat, they do bring some nutritional perks. Fresh strawberries provide a good dose of vitamin C and antioxidants, which support immune health. The dairy adds calcium and protein, while dark chocolate offers beneficial flavonoids that can boost mood.
Each popsicle contains approximately 150–200 calories, depending on size, with moderate sugars and fats. For those watching carbs, using a sugar-free marshmallow fluff or a dark chocolate with higher cocoa content can help reduce sugar load.
Note that these popsicles contain dairy and coconut oil, so they’re not suitable for those with allergies to these ingredients unless substitutions are made. The recipe is naturally gluten-free, making it accessible to many dietary needs.
From a wellness perspective, this treat satisfies sweet cravings in a portion-controlled way that feels indulgent without overdoing it. It’s a nice balance of fresh fruit and creamy indulgence that doesn’t leave you feeling weighed down.
Conclusion
These creamy chocolate-covered strawberry marshmallow popsicles are a must-try if you want a dessert that’s simple to make, fun to eat, and bursting with flavor. The combination of fluffy marshmallow cream, fresh strawberries, and a crisp chocolate shell hits all the right notes for summer fun—or any time you need a little sweet escape.
Feel free to customize with your favorite berries, chocolate types, or toppings to make the recipe truly yours. I love how versatile these popsicles are and how they bring smiles to every occasion, from family cookouts to quiet afternoons on the porch.
If you try this recipe, I’d love to hear what variations you come up with or how your family reacts! Drop a comment below or share your photos—let’s keep the sweet inspiration flowing. Remember, sometimes the simplest treats bring the biggest joy, and these popsicles definitely do just that.
FAQs About Creamy Chocolate-Covered Strawberry Marshmallow Popsicles
How long do these popsicles take to freeze completely?
They usually need at least 4–6 hours, but overnight freezing is best to ensure they’re fully solid and easy to dip.
Can I use frozen strawberries instead of fresh?
Yes, just thaw and drain them well to avoid excess water, which can make popsicles icy.
What’s the best way to remove popsicles from molds?
Run warm water briefly over the outside of the molds to loosen them, then gently pull on the sticks.
Can I make these popsicles ahead for a party?
Absolutely! They keep well in the freezer for up to two weeks. Just dip in chocolate closer to serving time for best texture.
Is there a dairy-free option for this recipe?
Yes, swap whole milk and condensed milk for coconut cream and use dairy-free marshmallow fluff and chocolate.
Pin This Recipe!

Creamy Chocolate-Covered Strawberry Marshmallow Popsicles
These creamy chocolate-covered strawberry marshmallow popsicles combine fluffy marshmallow cream, fresh strawberries, and a crisp chocolate shell for a refreshing and indulgent summer treat.
- Prep Time: 15 minutes
- Cook Time: 5 minutes
- Total Time: 5 hours 20 minutes
- Yield: 8–10 popsicles 1x
- Category: Dessert
- Cuisine: American
Ingredients
- 1 cup fresh strawberries, hulled and chopped (about 150g)
- 1 cup marshmallow fluff or marshmallow cream
- 1 cup whole milk or half-and-half (dairy-free alternatives like oat or almond milk can be used)
- 1/2 cup sweetened condensed milk
- 1 teaspoon vanilla extract
- 1 cup semi-sweet or dark chocolate, chopped or chips
- 1 tablespoon coconut oil
- 8–10 wooden popsicle sticks
Instructions
- Hull and chop about 1 cup (150g) of fresh strawberries into small pieces. Set aside.
- In a medium bowl, whisk together 1 cup marshmallow fluff, 1 cup whole milk (or substitute), 1/2 cup sweetened condensed milk, and 1 teaspoon vanilla extract until smooth and creamy.
- Gently fold the chopped strawberries into the marshmallow base, being careful not to overmix.
- Spoon the mixture into popsicle molds, leaving a small gap at the top. Insert wooden sticks and tap molds to remove air bubbles.
- Freeze molds on a flat surface for at least 4–6 hours or overnight for best firmness.
- Melt 1 cup chopped semi-sweet or dark chocolate with 1 tablespoon coconut oil in a microwave-safe bowl in 20-second bursts, stirring until smooth.
- Remove popsicles from molds by running warm water briefly on the outside. Dip each popsicle into the melted chocolate, letting excess drip off. Optionally sprinkle with freeze-dried strawberries or crushed nuts.
- Place dipped popsicles on a parchment-lined tray and freeze for 15–20 minutes to let the chocolate harden before serving.
Notes
Use high-quality dark chocolate for best flavor balance. For dairy-free version, substitute coconut cream for condensed milk and use dairy-free marshmallow fluff and chocolate. Freeze popsicles overnight for best firmness before dipping. Reheat chocolate gently if it thickens during dipping.
Nutrition
- Serving Size: 1 popsicle
- Calories: 150200
- Sugar: 20
- Sodium: 50
- Fat: 8
- Saturated Fat: 5
- Carbohydrates: 25
- Fiber: 2
- Protein: 2
Keywords: popsicles, strawberry, chocolate, marshmallow, summer dessert, frozen treat, easy recipe


