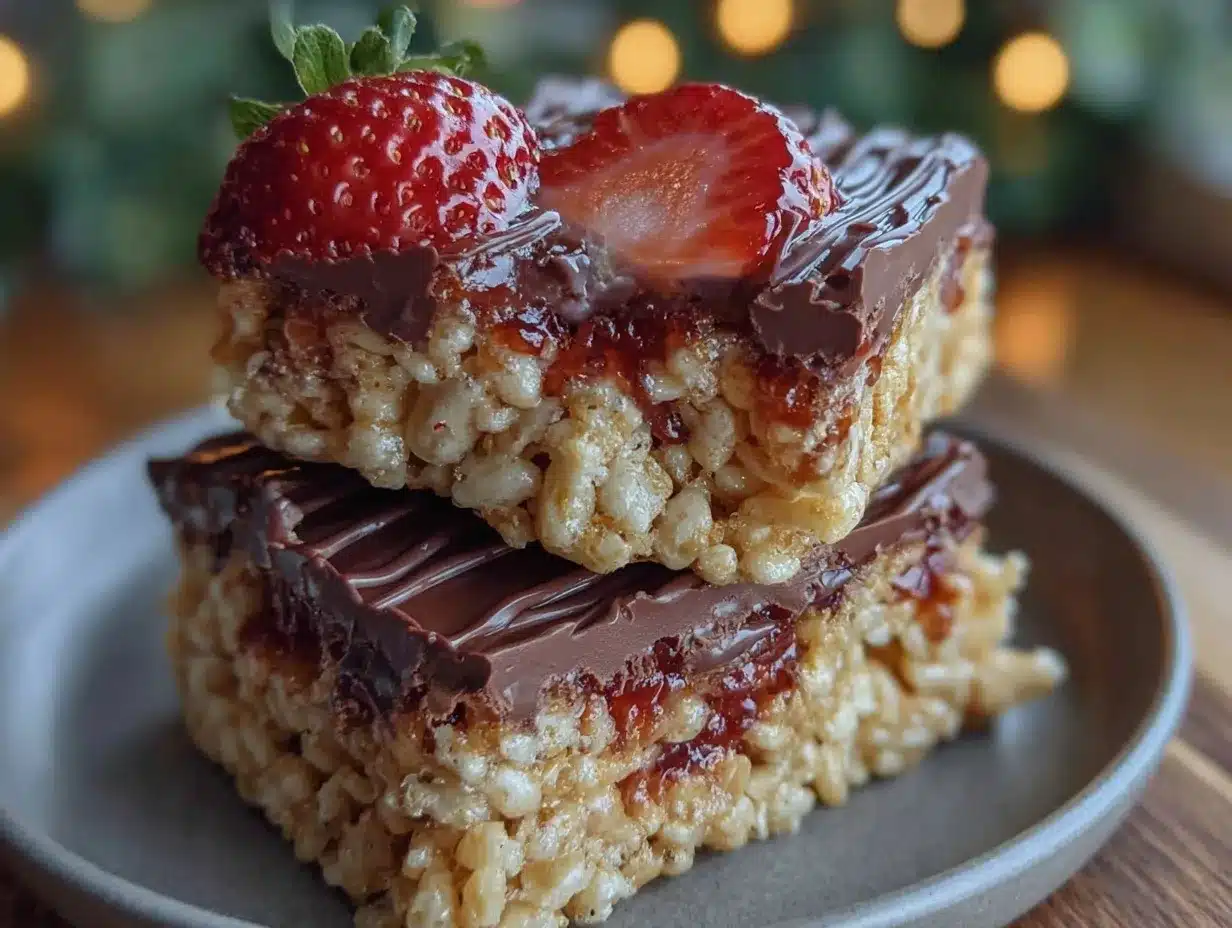
Let me tell you, the moment you unwrap one of these chocolate-covered strawberry rice crisp bars, the sweet scent of ripe strawberries mingling with rich chocolate is enough to make anyone’s mouth water. The first time I baked these bars, I was instantly hooked—the kind of moment where you pause, take a deep breath, and just smile because you know you’re onto something truly special. Years ago, when I was knee-high to a grasshopper, my grandma used to make fruit and chocolate treats, but nothing quite like this. I stumbled upon this recipe on a rainy weekend when I wanted a sweet treat that felt nostalgic but with a fresh twist.
Honestly, my family couldn’t stop sneaking them off the cooling rack (and I can’t really blame them). These bars are dangerously easy to make and offer pure, nostalgic comfort wrapped up in every bite. Perfect for potlucks, a sweet treat for your kids, or just brightening up your Pinterest cookie board, these chocolate-covered strawberry rice crisp bars have become a staple for family gatherings and gifting. After testing the recipe multiple times (in the name of research, of course), I can say with confidence that you’re going to want to bookmark this one and make it again and again.
Why You’ll Love This Recipe
Coming from someone who has baked countless treats, these chocolate-covered strawberry rice crisp bars stand out for a bunch of reasons. Here’s what makes them a winner in my kitchen:
- Quick & Easy: Comes together in under 30 minutes, perfect for busy weeknights or last-minute cravings.
- Simple Ingredients: No fancy grocery trips needed; you likely already have everything in your pantry or fridge.
- Perfect for Any Occasion: Great for brunch, potlucks, cozy dinners, or even holiday mornings with a cup of coffee.
- Crowd-Pleaser: Always gets rave reviews from kids and adults alike—trust me, they’ll be asking for seconds.
- Unbelievably Delicious: The way the crispy rice cereal combines with juicy strawberry bits and smooth chocolate is next-level comfort food.
What really sets this recipe apart is the balance of flavors and textures. The strawberry pieces keep things fresh and fruity without overpowering the chocolate, and the crisp rice adds that satisfying crunch you don’t always find in homemade bars. Plus, I’ve found that folding in a little melted butter and marshmallows creates the perfect sticky, chewy base that holds everything together without being too heavy. This isn’t just another rice crisp bar recipe—it’s the best version you’ll find, one that makes you close your eyes after the first bite and savor the moment.
What Ingredients You Will Need
This recipe uses simple, wholesome ingredients to deliver bold flavor and satisfying texture without the fuss. Most of these are pantry staples, with a few fresh or frozen add-ins that make the bars pop with flavor.
- Rice Crisp Cereal: About 6 cups (150g) – I recommend Kellogg’s Rice Krispies for the best texture.
- Strawberries: 1 cup, chopped (fresh or frozen works fine) – fresh strawberries add brightness, but frozen work great if you thaw and drain well.
- Unsalted Butter: 4 tablespoons (57g), melted – adds richness and helps bind the bars.
- Mini Marshmallows: 4 cups (about 120g) – these create that classic chewy texture; look for Jet-Puffed or equivalent.
- Milk Chocolate Chips: 1 1/2 cups (270g) – I prefer Ghirardelli for smooth melting and rich flavor.
- Strawberry Jam or Preserves: 1/4 cup (60g) – adds extra strawberry punch and moisture.
- Vanilla Extract: 1 teaspoon – brings out the sweetness and ties flavors together.
- Sea Salt: A pinch – balances the sweetness and enhances flavor.
Substitution notes: Use almond flour-based rice crisp cereal if you need a gluten-free option (just double-check the packaging). You can swap dairy milk chocolate chips for dairy-free or dark chocolate chips if you prefer less sweetness. For a vegan twist, try a plant-based butter and vegan marshmallows, but results may vary slightly.
Equipment Needed
- Large Mixing Bowl: For combining all your ingredients comfortably.
- Microwave-Safe Bowl or Saucepan: To melt butter and marshmallows.
- 8×8 or 9×9 Inch Baking Pan: For pressing the mixture into bars; I like glass pans for even heat distribution.
- Spatula or Wooden Spoon: For stirring and pressing down the mixture evenly.
- Knife: To chop strawberries and cut bars after chilling.
If you don’t have a glass pan, a metal one works just fine (just grease it well). I’ve tried silicone pans too—they’re great for easy removal but sometimes make pressing tricky, so just take your time. For melting marshmallows, a double boiler is nice but honestly, the microwave method works just as well and is faster. A sturdy spatula with a flat edge helps get the bars packed tight, which I think makes all the difference.
Preparation Method
- Prep your pan: Lightly grease an 8×8 inch (20×20 cm) baking pan with butter or nonstick spray. This helps the bars release easily later.
- Melt the butter and marshmallows: In a microwave-safe bowl, melt 4 tablespoons (57g) unsalted butter on high for 30 seconds. Stir, then add 4 cups (120g) mini marshmallows. Microwave in 30-second intervals, stirring between, until completely melted and smooth. This should take about 1-2 minutes total.
- Add vanilla and jam: Stir in 1 teaspoon vanilla extract and 1/4 cup (60g) strawberry jam into the melted marshmallow mixture until well combined. The jam adds moisture and a lovely fruity layer.
- Combine cereal and strawberries: In a large bowl, gently fold 6 cups (150g) rice crisp cereal and 1 cup chopped strawberries into the marshmallow mixture. Be careful not to mash the strawberries; you want them to stay chunky for bursts of flavor.
- Press into pan: Transfer the mixture into your prepared pan. Using a buttered spatula or wax paper, press down firmly and evenly, so the bars hold together well. This usually takes about 3-5 minutes of gentle but firm pressing.
- Chill: Let the bars cool and set in the fridge for at least 30 minutes to firm up.
- Melt the chocolate: While bars chill, melt 1 1/2 cups (270g) milk chocolate chips in a microwave-safe bowl, heating in 30-second bursts and stirring until smooth.
- Coat the bars: Once chilled, pour the melted chocolate evenly over the top of the bars. Use a spatula to spread if needed. Sprinkle a tiny pinch of sea salt on top to balance the sweetness.
- Final chill: Place the bars back in the fridge for another 15-20 minutes or until the chocolate is set.
- Slice and serve: Remove from pan, cut into squares or rectangles with a sharp knife, and enjoy!
Pro tip: If your chocolate starts to harden too fast while spreading, just warm it up again gently for 10 seconds. Also, don’t rush pressing the bars into the pan—compact is key for bars that won’t crumble apart.
Cooking Tips & Techniques
Making these chocolate-covered strawberry rice crisp bars is pretty straightforward, but a few little tricks can make all the difference. First off, melting the marshmallows and butter slowly prevents scorching and keeps the mixture silky smooth. I’ve learned the hard way that rushing this step can leave you with clumps that don’t blend well.
When mixing in the strawberries, be gentle. The goal is to keep those juicy chunks intact to surprise your taste buds in every bite. If your strawberries are very wet (especially frozen ones), drain them well and pat dry to avoid soggy bars.
Pressing the mixture firmly into the pan is a game changer. I like to use a piece of wax paper or a buttered spatula to press evenly without sticking. Without this step, your bars might fall apart after cutting.
For the chocolate topping, patience is key. Let the bars chill fully before pouring melted chocolate. Pouring it too soon can cause the chocolate to sink in or mix with the marshmallow layer, which isn’t the look or texture you want. Also, a pinch of sea salt on top after coating adds a little something special—don’t skip it!
Finally, timing your chilling steps helps with clean cuts. Chill the bars thoroughly before slicing, and use a sharp knife, wiping it clean between cuts. This keeps your bars looking neat and professional.
Variations & Adaptations
One of the best things about this recipe is how easy it is to switch things up based on what you have on hand or your preferences. Here are a few versions I’ve tried and loved:
- Berry Medley Bars: Swap the strawberries for a mix of fresh raspberries, blueberries, and blackberries for a burst of different berry flavors.
- Peanut Butter Chocolate: Stir in 1/4 cup creamy peanut butter with the melted butter and marshmallows for a nutty twist. Top with dark chocolate instead of milk chocolate for a richer finish.
- Vegan-Friendly: Use vegan marshmallows and dairy-free chocolate chips. Substitute vegan butter or coconut oil for regular butter. The texture is slightly different but still delicious.
For a gluten-free variation, make sure your rice crisp cereal is certified gluten-free, and you’re good to go. You can also add chopped nuts or seeds for extra crunch—or sprinkle shredded coconut over the chocolate topping before chilling for a tropical vibe.
Personally, I once made a batch with freeze-dried strawberry pieces mixed in instead of fresh, and the flavor was more concentrated and slightly tangy, which was a fun change. It’s a great way to store bars longer without worrying about fresh fruit going bad.
Serving & Storage Suggestions
These chocolate-covered strawberry rice crisp bars taste best chilled but not ice-cold. Let them sit at room temperature for about 5-10 minutes before serving so the chocolate softens just a bit, making every bite melt in your mouth. They’re perfect served alongside a hot cup of tea or coffee for an afternoon pick-me-up.
If you’re bringing these to a party or packing them for snacks, wrap individual bars in parchment paper or store them in an airtight container. They keep well at room temperature for a day or two, but for longer freshness, refrigerate them. Stored in the fridge, they last up to a week, and you can freeze them for up to 3 months—just thaw in the fridge overnight before serving.
Reheating isn’t really necessary, but if you want to soften the bars slightly, pop one in the microwave for 10 seconds. Keep in mind the chocolate might soften too much if heated too long.
Interestingly, after a day or two, the flavors meld, and the strawberry jam inside seems to get even tastier, making leftovers just as irresistible as fresh bars.
Nutritional Information & Benefits
Each serving of these chocolate-covered strawberry rice crisp bars offers a sweet treat with a bit of nutritional value thanks to real fruit and a moderate amount of chocolate. Here’s an estimate per bar (assuming 12 bars): approximately 180 calories, 4g fat, 30g carbohydrates, and 2g protein.
The strawberries bring vitamin C and antioxidants, while the rice crisp cereal provides quick energy from carbs. Butter and marshmallows add fat and sweetness, so these bars are definitely a treat—not something to eat every day, but perfect for special moments.
If you’re mindful of allergens, these bars contain dairy (butter, chocolate), gluten (unless you use gluten-free cereal), and possibly soy (in chocolate). For those with dietary restrictions, the variations section offers some useful swaps.
From a wellness point of view, I appreciate that these bars offer a nostalgic, homemade treat without artificial preservatives or weird additives—just simple ingredients you recognize and trust.
Conclusion
These chocolate-covered strawberry rice crisp bars are worth every minute spent making them. The combination of crispy cereal, juicy strawberries, gooey marshmallows, and luscious chocolate topping creates a treat that’s both comforting and exciting. I love how customizable they are, letting you tweak flavors or ingredients to suit your mood or pantry. Honestly, this recipe feels like a warm hug in bar form—perfect for sharing or savoring solo.
Give it a try, and don’t be shy about making it your own. Leave a comment to tell me how you adapted it or what your favorite variation is—I’m always eager to hear your kitchen stories! If you enjoyed this recipe, please share it with friends or pin it for later. Happy baking and snacking!
FAQs
Can I use frozen strawberries instead of fresh?
Yes! Just thaw and drain frozen strawberries well before mixing to avoid excess moisture that can make the bars soggy.
How long do these bars last at room temperature?
They keep well for about 1-2 days at room temperature in an airtight container. For longer storage, refrigerate or freeze.
Can I make these bars nut-free?
Absolutely. This recipe is naturally nut-free unless you add nuts as a variation. Just double-check your chocolate and marshmallows to ensure they’re processed in nut-free facilities if needed.
What’s the best way to cut the bars cleanly?
Use a sharp knife and wipe it clean between cuts. Chilling the bars thoroughly before slicing helps prevent crumbling.
Can I use dark chocolate instead of milk chocolate?
Yes, dark chocolate works well and adds a richer, slightly less sweet flavor. Adjust sweetness by choosing the percentage you like.
Pin This Recipe!
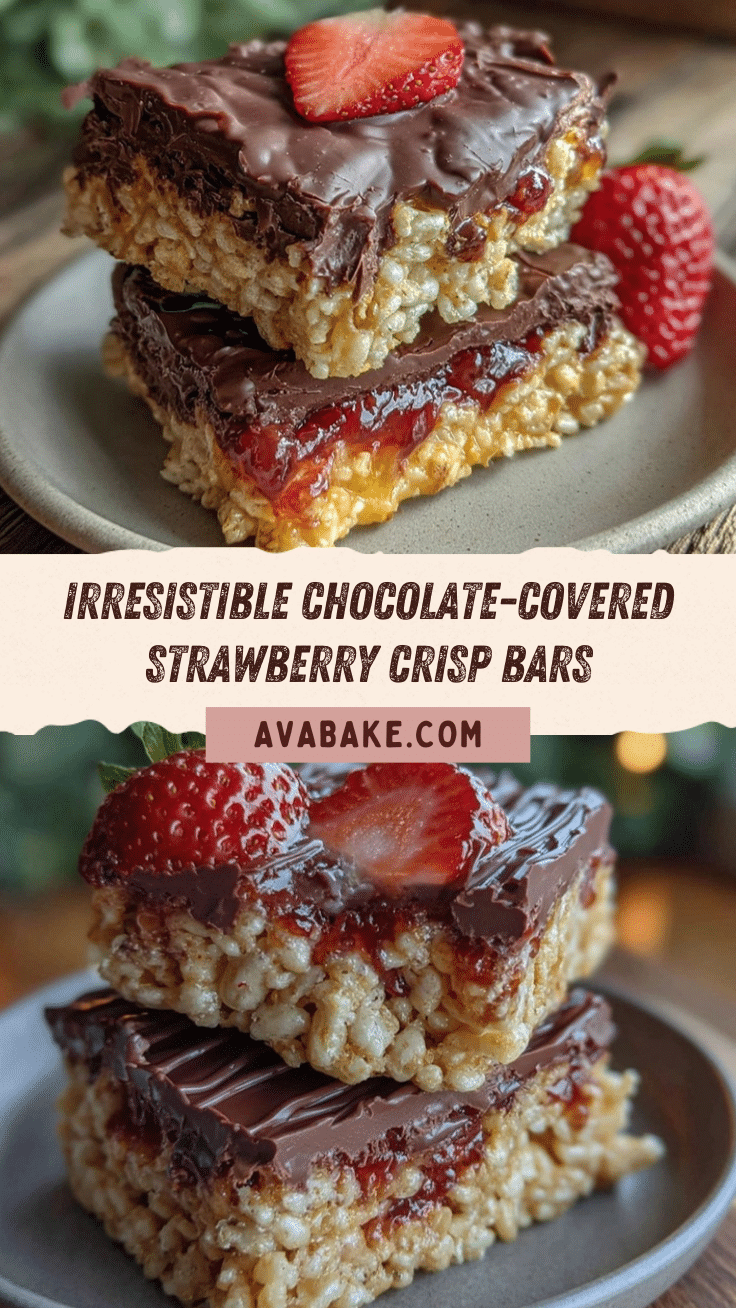
Chocolate-Covered Strawberry Rice Crisp Bars

These chocolate-covered strawberry rice crisp bars combine crispy rice cereal, juicy strawberries, gooey marshmallows, and luscious chocolate topping for a nostalgic and delicious treat that’s quick and easy to make.
- Prep Time: 10 minutes
- Cook Time: 15 minutes
- Total Time: 45 minutes
- Yield: 12 bars 1x
- Category: Dessert
- Cuisine: American
Ingredients
- 6 cups (150g) Rice Crisp Cereal (e.g., Kellogg’s Rice Krispies)
- 1 cup chopped strawberries (fresh or frozen, thawed and drained if frozen)
- 4 tablespoons (57g) unsalted butter, melted
- 4 cups (120g) mini marshmallows
- 1 1/2 cups (270g) milk chocolate chips
- 1/4 cup (60g) strawberry jam or preserves
- 1 teaspoon vanilla extract
- A pinch of sea salt
Instructions
- Lightly grease an 8×8 inch (20×20 cm) baking pan with butter or nonstick spray.
- In a microwave-safe bowl, melt 4 tablespoons (57g) unsalted butter on high for 30 seconds. Stir, then add 4 cups (120g) mini marshmallows. Microwave in 30-second intervals, stirring between, until completely melted and smooth (about 1-2 minutes total).
- Stir in 1 teaspoon vanilla extract and 1/4 cup (60g) strawberry jam into the melted marshmallow mixture until well combined.
- In a large bowl, gently fold 6 cups (150g) rice crisp cereal and 1 cup chopped strawberries into the marshmallow mixture, being careful not to mash the strawberries.
- Transfer the mixture into the prepared pan. Using a buttered spatula or wax paper, press down firmly and evenly for 3-5 minutes.
- Chill the bars in the fridge for at least 30 minutes to firm up.
- Melt 1 1/2 cups (270g) milk chocolate chips in a microwave-safe bowl, heating in 30-second bursts and stirring until smooth.
- Pour the melted chocolate evenly over the chilled bars. Spread with a spatula if needed and sprinkle a tiny pinch of sea salt on top.
- Place the bars back in the fridge for another 15-20 minutes or until the chocolate is set.
- Remove from pan, cut into squares or rectangles with a sharp knife, and serve.
Notes
Use almond flour-based rice crisp cereal for gluten-free option. Swap dairy milk chocolate chips for dairy-free or dark chocolate chips for less sweetness. For vegan, use plant-based butter and vegan marshmallows. Press bars firmly into pan to avoid crumbling. Chill bars thoroughly before slicing for clean cuts. Warm chocolate gently if it hardens too fast while spreading.
Nutrition
- Serving Size: 1 bar
- Calories: 180
- Fat: 4
- Carbohydrates: 30
- Protein: 2
Keywords: chocolate-covered, strawberry, rice crisp bars, homemade, easy recipe, marshmallows, chocolate chips, snack, dessert


