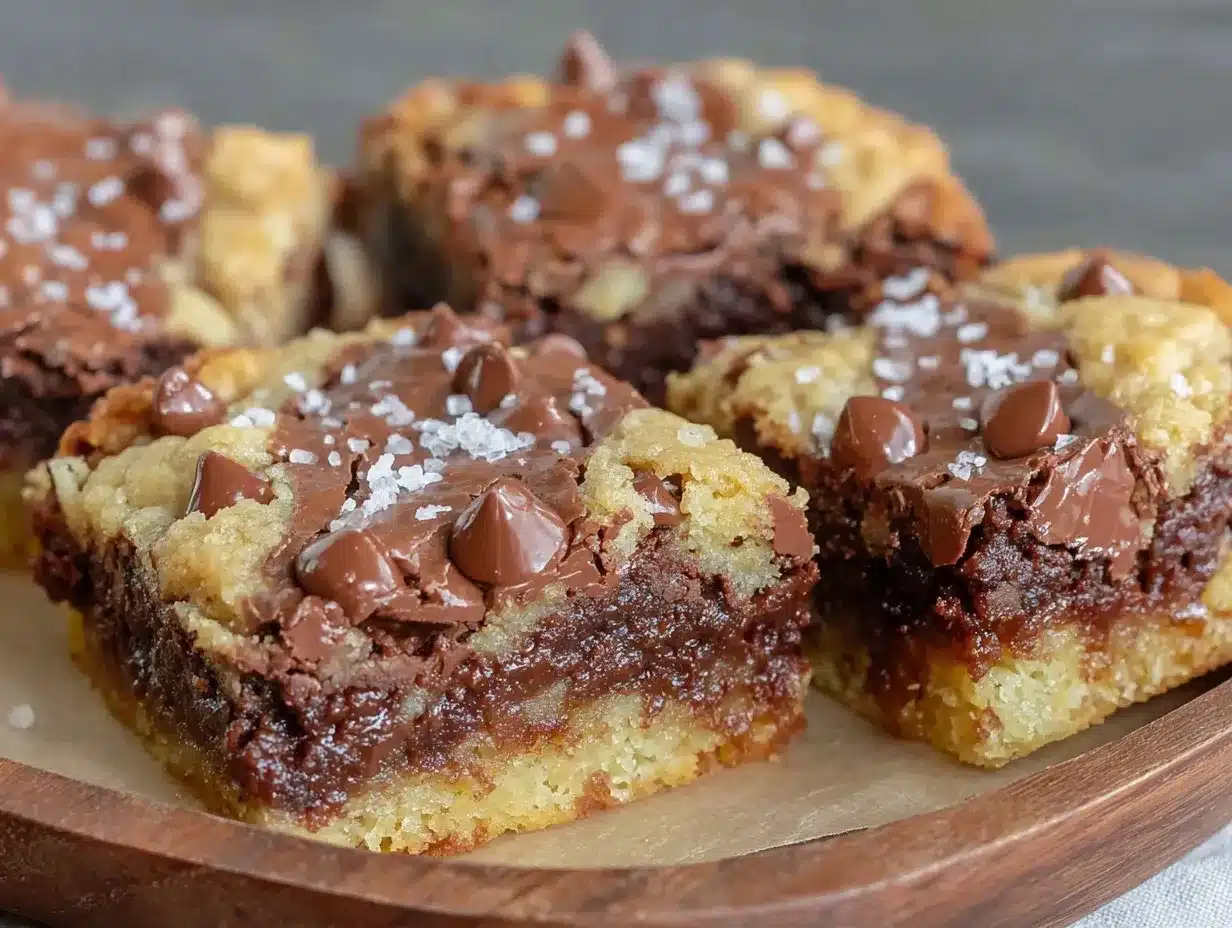
Let me just set the scene—picture the smell of deep, rich chocolate swirling through your kitchen, warm vanilla and brown sugar hugging the air, and the kind of gooey, golden goodness that practically begs you to sneak a bite before they’ve even cooled. When you pull a pan of Brookies Dessert Bars from the oven, it’s a sensory experience that stops you in your tracks (honestly, I’ve lost count of how many times I’ve hovered over the cooling rack, fork in hand). The first time I made these brookies, I was knee-high to a grasshopper, standing on a wobbly stool while my grandma coached me through her “secret technique” for getting the cookie layer perfectly chewy. That was the kind of moment where you pause, take a deep breath, and just smile because you know you’re onto something truly special.
Years ago, I stumbled upon the idea of combining my two favorite desserts—classic brownies and chewy chocolate chip cookies—after a rainy weekend fueled by sheer boredom and a half-empty pantry. The result? Absolute magic. My family couldn’t stop sneaking them off the tray, and even my picky cousin (the one who swears he hates chocolate) came back for seconds. It’s now a staple for family gatherings, late-night cravings, and yes, gifting to neighbors who need a little pick-me-up. There’s something about the contrast—the fudgy base with a slightly crisp top, the buttery cookie layer melting into the rich brownie—that turns ordinary moments into pure, nostalgic comfort. You know what? I wish I’d discovered brookies dessert bars years ago. They’re dangerously easy and, let’s face it, belong on every Pinterest board that celebrates homemade treats.
I’ve tested this recipe more times than I’d like to admit (in the name of research, of course) and every batch feels like a warm hug. These brookies dessert bars are perfect for potlucks, sweet treats for your kids, and those days when you just need a little extra something. Trust me, you’re going to want to bookmark this one!
Why You’ll Love These Brookies Dessert Bars
There’s a reason these brookies dessert bars have become the go-to sweet treat in my house. Over the years, I’ve tweaked and tested every layer to make sure you get that perfect bite—chewy, fudgy, and loaded with chocolate. Whether you’re a seasoned baker or just starting out, these bars are a guaranteed win (I’ve never met a batch that lasted more than a day around here!). Here’s what sets this brookies dessert bars recipe apart:
- Quick & Easy: Comes together in under 45 minutes—seriously, you can whip these up on a whim for last-minute guests or your own midnight cravings.
- Simple Ingredients: No fancy grocery trips required; you probably have everything in your pantry already.
- Perfect for Any Occasion: These brookies dessert bars shine at potlucks, family brunches, school bake sales, and cozy holiday mornings.
- Crowd-Pleaser: Kids and adults alike rave about the gooey brownie layer and the chewy cookie top (my neighbor’s toddler asked for the recipe—true story).
- Unbelievably Delicious: The combination of deep chocolate and buttery cookie is next-level comfort food. Every bite is a balance of sweet nostalgia and pure indulgence.
What makes these brookies different? I use a touch of espresso powder in the brownie layer for depth, and chill the cookie dough just long enough for perfect texture. It’s not just another brownie-cookie mashup—it’s the version that turns a simple treat into a memory. Whether you’re looking to impress guests with minimal effort or just want to treat yourself, these brookies dessert bars deliver every time. They’re comfort food reimagined—still fast, still easy, but packed with flavor that makes you close your eyes after the first bite. If you want to turn an ordinary day into something memorable, this is the recipe for you!
What Ingredients You Will Need
This brookies dessert bars recipe uses classic, pantry-friendly ingredients to create layers of fudgy brownie and chewy cookie bliss. Each ingredient adds its own magic—richness, chewiness, chocolate heaven—without any fuss. You can swap or tweak a few things if needed, but these are the basics I reach for every single time.
- For the Brownie Layer:
- 1/2 cup (115g) unsalted butter, melted (adds richness and helps create that fudgy texture)
- 1 cup (200g) granulated sugar
- 2 large eggs, room temperature
- 1/3 cup (40g) unsweetened cocoa powder (I love Ghirardelli or Hershey’s)
- 1/2 cup (65g) all-purpose flour
- 1/4 tsp salt
- 1/2 tsp espresso powder (optional, but it deepens the chocolate flavor—trust me)
- 1 tsp vanilla extract
- For the Cookie Layer:
- 1/2 cup (115g) unsalted butter, softened
- 1/2 cup (100g) light brown sugar, packed
- 1/4 cup (50g) granulated sugar
- 1 large egg
- 1 tsp vanilla extract
- 1 1/4 cups (160g) all-purpose flour
- 1/2 tsp baking soda
- 1/4 tsp salt
- 3/4 cup (135g) semi-sweet chocolate chips (I recommend Guittard or Nestle)
Ingredient Tips & Substitutions:
- Use dairy-free butter for a vegan version—just swap eggs for flax eggs.
- Try almond flour in the cookie layer for a gluten-free adaptation (texture will be slightly crumblier).
- If you’re out of espresso powder, don’t sweat it—the brownies will still be delicious, just a smidge less intense.
- For seasonal flair, fold in chopped nuts, white chocolate chips, or even mini marshmallows in the cookie layer.
- If you have dark chocolate chips, toss a few into the brownie layer for an extra hit of chocolate.
Almost everything here is a pantry staple. No need for fancy extracts or specialty flours—just the basics, done right. The only thing I always splurge on is good cocoa powder; it makes a world of difference in that fudgy brownie base.
Equipment Needed
You don’t need a pro kitchen to make brookies dessert bars—just a few reliable tools and maybe a little elbow grease. Here’s what I always grab:
- 8×8-inch (20×20 cm) baking pan (metal pans give the crispiest edges, glass works too)
- Parchment paper (makes lifting the bars out a breeze—no more stuck corners!)
- Mixing bowls—two medium, one for each layer
- Whisk and spatula (I use silicone spatulas for easy scraping)
- Hand mixer or a sturdy wooden spoon (hand mixer helps get the cookie layer fluffy)
- Measuring cups and spoons
If you don’t have an 8×8-inch pan, a 9-inch round pan works—just adjust baking time down by a few minutes. My grandma used to grease her pan with butter and dust with flour, but parchment paper is a real game-changer (less mess, more bars intact). For those on a budget, thrift store mixing bowls and spatulas work just fine—just give them a good scrub before use. And if you invest in only one specialty item, make it parchment paper. It’s worth every penny for easy cleanup and perfect brookie bars.
Preparation Method
- Prep Your Pan: Line your 8×8-inch (20×20 cm) baking pan with parchment paper—leave a little overhang for easy lifting. Preheat the oven to 350°F (175°C).
- Make the Brownie Layer:
- In a medium bowl, whisk together 1/2 cup (115g) melted butter and 1 cup (200g) granulated sugar until glossy and smooth—about 1 minute.
- Add 2 large eggs, whisking until just incorporated. Stir in 1/3 cup (40g) cocoa powder, 1/2 cup (65g) flour, 1/4 tsp salt, 1/2 tsp espresso powder, and 1 tsp vanilla. Mix until combined; don’t overmix, or your brownies may turn cakey.
- Spread the brownie batter evenly in the pan. Use a spatula to smooth the top. The batter should look thick and shiny.
- Make the Cookie Layer:
- In a separate bowl, beat 1/2 cup (115g) softened butter, 1/2 cup (100g) brown sugar, and 1/4 cup (50g) granulated sugar until light and fluffy—about 2 minutes with a hand mixer.
- Add 1 large egg and 1 tsp vanilla; beat until just combined.
- In another bowl, mix 1 1/4 cups (160g) flour, 1/2 tsp baking soda, and 1/4 tsp salt. Gradually add dry ingredients to wet, mixing until a soft dough forms. Fold in 3/4 cup (135g) chocolate chips.
- Chill dough for 10 minutes in the fridge if you want a thicker cookie layer (optional, but I always do this for best texture).
- Drop spoonfuls of cookie dough over the brownie layer. Gently spread with a spatula or your fingers—try not to press down too hard, just enough to cover most of the brownie batter. It’s okay if some brownie peeks through.
- Bake:
- Bake for 28-32 minutes, until the cookie layer is golden and a toothpick inserted in the center comes out with a few moist crumbs (not wet batter).
- If edges start to brown too quickly, cover loosely with foil for the last 5 minutes.
- Let brookies cool in the pan for at least 30 minutes. They’ll set up as they cool (resist the urge to slice early—trust me, they’re worth the wait!).
- Slice & Serve:
- Lift bars out using the parchment overhang. Slice into 16 squares. For clean edges, use a sharp knife and wipe between cuts.
- Enjoy warm for extra gooeyness, or let cool for firmer, chewy bars.
Troubleshooting Tips:
- If the cookie layer is browning but the brownies aren’t done, cover with foil and lower your oven temp by 10°F (5°C).
- Brownie layer too thick? Add a tablespoon of milk to loosen the batter.
My best tip for brookies dessert bars: Don’t rush the cooling. The layers need time to settle and slice up beautifully. Patience pays off!
Cooking Tips & Techniques
After baking more pans of brookies dessert bars than I care to admit (some turned out less than perfect, but hey, that’s how you learn), here are my tried-and-true tips for flawless results:
- Don’t Overmix: Stir each layer just until combined—overmixing creates tough, cakey bars. Trust the process.
- Chill Cookie Dough: Even a short chill (10 minutes) helps the cookie layer hold its shape and bake up chewy. Skipping this step can give you a thin, spread-out top.
- Layering Technique: I use damp fingers to gently spread the cookie dough over the brownie batter. It’s less messy and gives a more even top.
- Timing Matters: Check your brookies at 28 minutes—ovens vary, and overbaked bars lose their gooey magic. I’ve learned this the hard way (crunchy brookies are still tasty, just not quite the same).
- Clean Slicing: For neat squares, let the bars cool fully. Use a sharp knife, and clean between cuts.
- Testing Doneness: Look for a golden cookie top and slightly set brownie edges. A few moist crumbs on the toothpick is perfect.
One big lesson from my kitchen: If your brookies seem underbaked, let them set in the pan—residual heat works wonders. And if you’re multitasking (like wrangling kids while baking), set a timer. These bars go from perfect to dry in just a couple minutes. Consistency is all about those little steps—mixing, layering, and cooling. Stick with it and you’ll be the brookies dessert bars expert of your block!
Variations & Adaptations
Brookies dessert bars are endlessly customizable—here’s how you can tweak this recipe to fit your tastes, dietary needs, or what’s in your pantry:
- Gluten-Free Brookies: Swap all-purpose flour for a 1:1 gluten-free blend. Almond flour in the cookie layer adds a chewy, nutty twist (texture will be a bit different, but still delish).
- Vegan Adaptation: Use dairy-free butter and flax eggs (1 tbsp ground flax + 3 tbsp water per egg) for both layers. Opt for vegan chocolate chips.
- Nutty Brookies: Fold 1/2 cup (60g) chopped walnuts or pecans into the brownie layer for crunch and extra flavor.
- Peanut Butter Swirl: Drop spoonfuls of peanut butter on top of the brownie batter, swirl gently before adding cookie dough.
- Seasonal Add-ins: In fall, add cinnamon and a handful of butterscotch chips. In winter, stir in crushed peppermint candies or white chocolate chips.
- Mini Brookies: Make them in muffin tins for single-serve treats. Reduce baking time to 16-18 minutes.
My personal favorite adaptation? Adding a pinch of flaky sea salt on top right after baking—it’s a little detail that takes each bite to the next level. Don’t be afraid to experiment. This brookies dessert bars recipe is a blank canvas for your cravings!
Serving & Storage Suggestions
Brookies dessert bars are best enjoyed warm, when the chocolate chips are still a little melty and the brownie layer is gooey. Serve them straight from the pan with a scoop of vanilla ice cream (my kids swear by this combo) or alongside a cup of strong coffee for the grown-ups.
- Presentation: Slice into neat squares and stack them on a pretty plate for parties, or pack them into lunchboxes for a sweet surprise.
- Serving Temperature: Warm is best, but room temperature works fine. Microwave individual squares for 10 seconds if you want that fresh-from-the-oven vibe.
- Storage: Store in an airtight container at room temperature for up to 3 days. For longer storage, refrigerate for up to a week (they stay chewy!).
- Freezing: Freeze individually wrapped bars for up to 2 months. Thaw at room temperature or gently warm in the microwave.
- Flavor Development: The chocolate flavor deepens and the layers meld together after a day—if you can wait that long!
If you’re gifting, wrap cooled brookies bars in parchment and tie with twine for a rustic, homemade touch. They travel well and still taste amazing a day later, so they’re perfect for bake sales or road trips.
Nutritional Information & Benefits
Each brookies dessert bar (1/16 of the pan) is estimated to contain:
- Calories: ~220
- Fat: 11g
- Carbohydrates: 28g
- Protein: 3g
Key ingredients like cocoa powder bring antioxidants, while eggs offer protein and structure. If you use almond flour or add nuts, you boost healthy fats and fiber. For those watching gluten or dairy, it’s easy to adapt (see above for swaps). Potential allergens include gluten, dairy, and eggs—so check your substitutions!
Personally, I love that you can control exactly what goes in—you know, homemade always beats store-bought when it comes to quality. Brookies dessert bars are a treat, for sure, but there’s something satisfying about knowing every ingredient is chosen by you.
Conclusion
After dozens of batches and more taste tests than I’ll ever admit, I can say with confidence: these brookies dessert bars are worth every minute in the kitchen. They’re the kind of treat that brings people together (kids, neighbors, even the mailman if you’re feeling generous) and turns everyday moments into little celebrations. Whether you stick to the classic recipe or put your own spin on it, you’ll end up with a pan full of fudgy, chewy, chocolatey goodness that never disappoints.
I hope you bookmark this brookies dessert bars recipe and make it your own! Share your favorite twists or adaptations in the comments—honestly, I love seeing how everyone personalizes their bars. If you try it, snap a photo and tag me (let’s make Pinterest proud!). There’s always room for a little more sweetness, so bake a batch, share with loved ones, and enjoy every gooey bite.
Happy baking—wishing you warm kitchens and even warmer smiles!
FAQs About Brookies Dessert Bars
Can I double this brookies dessert bars recipe for a larger crowd?
Absolutely! Just use a 9×13-inch (23×33 cm) pan and double all ingredients. Baking time may increase by 5-8 minutes—watch for golden cookie tops and set brownie edges.
What’s the best way to get clean slices?
Let the bars cool completely, then use a sharp knife. Wipe the knife between cuts for neat edges—patience makes all the difference!
Can I make brookies dessert bars ahead of time?
Yes! Bake, cool, and store in an airtight container for up to 3 days. The flavors actually deepen after a day, so they’re even better the next day.
Do I have to use espresso powder?
Nope! It just boosts the chocolate flavor. Leave it out if you prefer, or swap with instant coffee granules for a similar effect.
Can I freeze brookies dessert bars?
Yes—wrap individual squares tightly and freeze for up to 2 months. Thaw at room temperature or warm gently before serving for best texture.
Pin This Recipe!
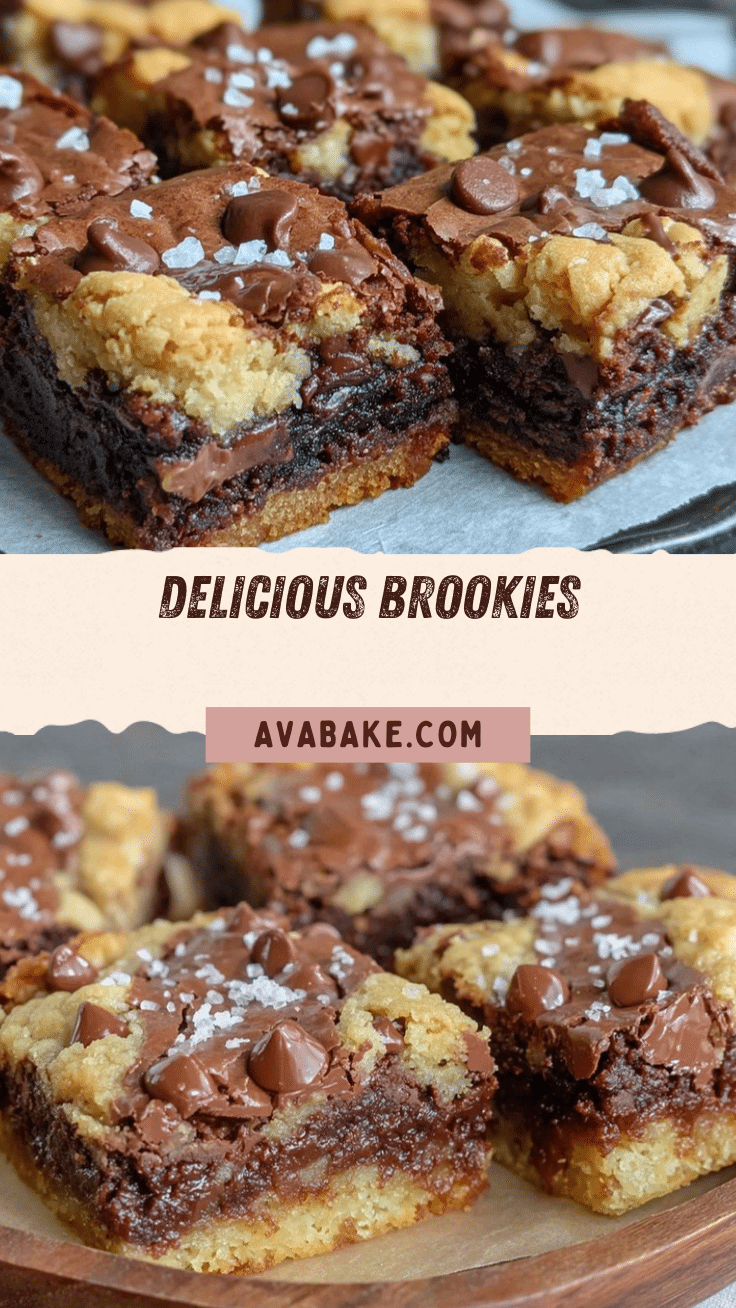
Brookies Dessert Bars Recipe: Easy Fudgy Brownie Cookie Layers for Homemade Treats
These brookies dessert bars combine the best of fudgy brownies and chewy chocolate chip cookies in one irresistible treat. Perfect for potlucks, family gatherings, or a cozy night in, they’re quick to make and guaranteed to please any crowd.
- Prep Time: 15 minutes
- Cook Time: 30 minutes
- Total Time: 45 minutes
- Yield: 16 bars 1x
- Category: Dessert
- Cuisine: American
Ingredients
- For the Brownie Layer:
- 1/2 cup unsalted butter, melted
- 1 cup granulated sugar
- 2 large eggs, room temperature
- 1/3 cup unsweetened cocoa powder
- 1/2 cup all-purpose flour
- 1/4 tsp salt
- 1/2 tsp espresso powder (optional)
- 1 tsp vanilla extract
- For the Cookie Layer:
- 1/2 cup unsalted butter, softened
- 1/2 cup light brown sugar, packed
- 1/4 cup granulated sugar
- 1 large egg
- 1 tsp vanilla extract
- 1 1/4 cups all-purpose flour
- 1/2 tsp baking soda
- 1/4 tsp salt
- 3/4 cup semi-sweet chocolate chips
Instructions
- Line an 8×8-inch baking pan with parchment paper, leaving an overhang for easy lifting. Preheat oven to 350°F (175°C).
- Make the brownie layer: In a medium bowl, whisk together melted butter and granulated sugar until glossy and smooth. Add eggs and whisk until just incorporated. Stir in cocoa powder, flour, salt, espresso powder (if using), and vanilla extract. Mix until combined, but do not overmix. Spread the brownie batter evenly in the prepared pan and smooth the top.
- Make the cookie layer: In a separate bowl, beat softened butter, brown sugar, and granulated sugar until light and fluffy (about 2 minutes with a hand mixer). Add egg and vanilla extract; beat until just combined. In another bowl, mix flour, baking soda, and salt. Gradually add dry ingredients to wet, mixing until a soft dough forms. Fold in chocolate chips. Chill dough for 10 minutes in the fridge for a thicker cookie layer (optional).
- Drop spoonfuls of cookie dough over the brownie layer. Gently spread with a spatula or damp fingers to cover most of the brownie batter. It’s okay if some brownie peeks through.
- Bake for 28-32 minutes, until the cookie layer is golden and a toothpick inserted in the center comes out with a few moist crumbs. If edges brown too quickly, cover loosely with foil for the last 5 minutes.
- Let brookies cool in the pan for at least 30 minutes before slicing. Lift bars out using the parchment overhang and slice into 16 squares. For clean edges, use a sharp knife and wipe between cuts.
- Serve warm for extra gooeyness or let cool for firmer, chewy bars.
Notes
For best results, chill the cookie dough for 10 minutes before layering. Don’t overmix either layer to keep bars chewy and fudgy. Let bars cool fully before slicing for clean edges. Add nuts, peanut butter, or seasonal mix-ins for variety. Bars can be stored in an airtight container for up to 3 days or frozen for up to 2 months.
Nutrition
- Serving Size: 1 bar (1/16 of pan)
- Calories: 220
- Fat: 11
- Carbohydrates: 28
- Protein: 3
Keywords: brookies, dessert bars, brownie cookie bars, homemade treats, easy dessert, chocolate chip cookie, fudgy brownies, potluck dessert, chewy bars, baking recipe


