“You know that feeling when a scorching summer day has you craving something cool, sweet, and just a little bit fancy? Well, I wasn’t expecting to find the perfect beach snack from my neighbor’s impromptu porch party last July. There she was, casually threading grapes and cheese cubes onto little skewers—and honestly, the way those frozen treats glistened in the sun, I was hooked before the first bite.
It was a simple moment, just a cracked plastic bowl of grapes and a block of sharp cheddar cheese, but watching my neighbor, Lisa, put those ingredients together reminded me that sometimes the most refreshing recipes come from the easiest ideas. I forgot to bring a snack that day, and before I knew it, she was handing me one of those frozen grape and cheese skewers, and let me tell you, the chill from the grapes paired with the savory cheese was unlike anything I’d tried before.
Maybe you’ve been there—trying to find a snack that’s both satisfying and doesn’t turn into a sticky mess under the sun. This recipe has stuck with me ever since, and I keep making it whenever the beach calls or even just for a backyard chill session. It’s simple, quick, and the kind of food that makes you close your eyes and smile, even if you’re just sitting on a towel in the sand.
Why You’ll Love This Recipe
- Quick & Easy: Comes together in under 15 minutes, perfect for last-minute beach packing or spontaneous picnics.
- Simple Ingredients: No need to hunt for fancy items; just grapes, cheese, and skewers—easy pantry and fridge staples.
- Perfect for Beach Days: Refreshing and cool, these skewers beat the heat and keep you energized.
- Crowd-Pleaser: Kids, adults, and even picky eaters love the sweet-and-savory combo.
- Unbelievably Delicious: The texture contrast between frozen grapes and creamy cheese keeps every bite interesting.
This recipe isn’t just another cheese and fruit snack. I’ve tried versions with different cheeses, but blending a sharp cheddar with sweet grapes gives it a balanced zing that makes you want to keep popping those skewers all afternoon. Plus, freezing them before your beach day means you get a cold treat that lasts through the sun’s hottest hours. Honestly, it’s my go-to for casual entertaining, and it’s saved me more than once when I forgot to pack the usual chips or sandwiches.
What Ingredients You Will Need
This recipe uses straightforward, wholesome ingredients to deliver a refreshing snack that’s both satisfying and fuss-free. All you need are a few pantry staples and a little prep time before your beach outing.
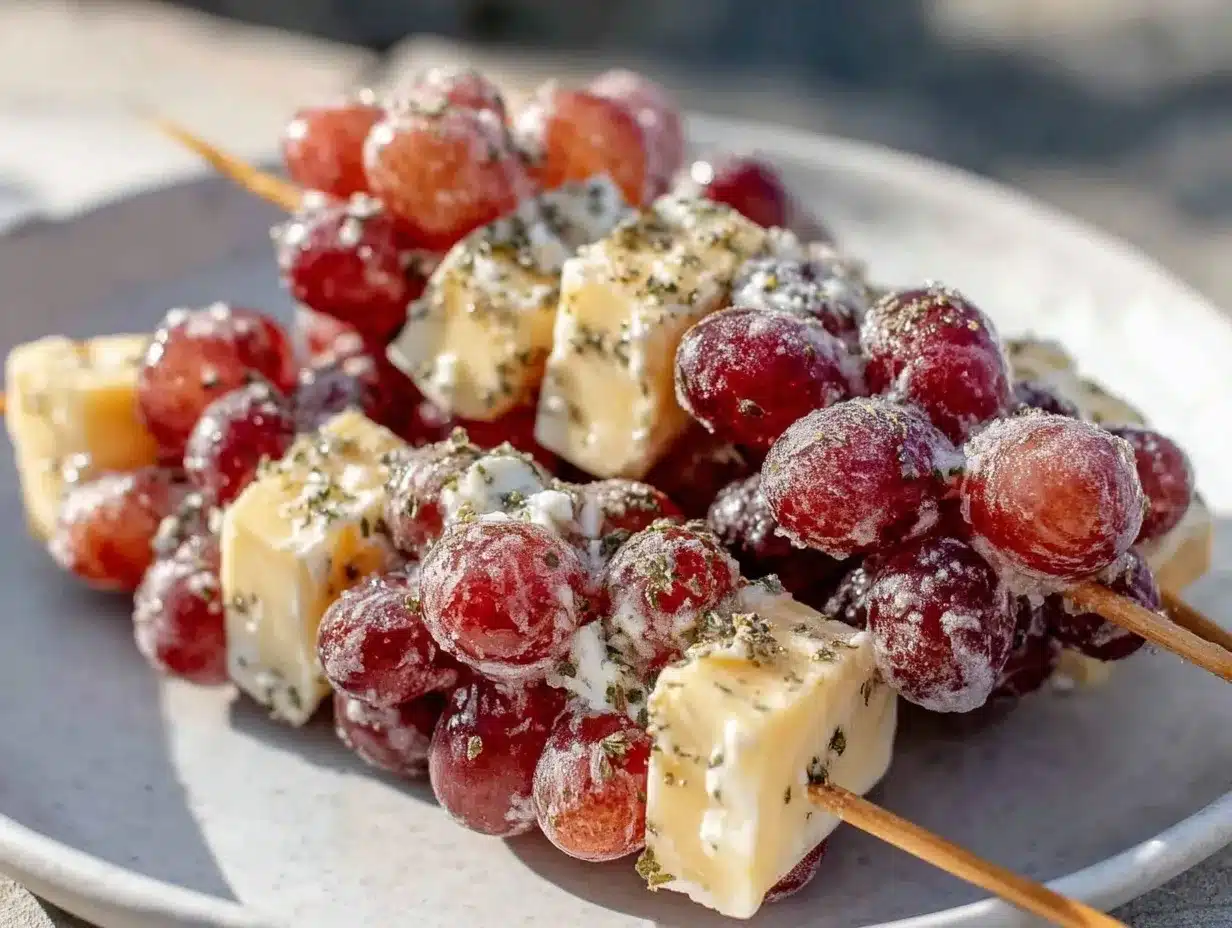
- Seedless red or green grapes: about 2 cups, washed and patted dry (I prefer red for their natural sweetness, but green works great too)
- Sharp cheddar cheese: 8 ounces, cut into 1-inch cubes (I like Cabot brand for its rich flavor)
- Wooden or bamboo skewers: 12-inch length, trimmed if needed (these are affordable and easy to find in most grocery stores)
- Optional: a squeeze of fresh lemon juice to toss the grapes in before freezing (helps keep grapes fresh and adds a subtle zing)
For substitutions, you can swap cheddar for mozzarella if you want a milder cheese, or try gouda for a creamy twist. If you’re dairy-free, firm vegan cheese blocks work surprisingly well here. When selecting grapes, pick firm, plump ones without wrinkles for the best texture after freezing.
Equipment Needed
- Cutting board and a sharp knife: for cubing the cheese neatly (trust me, a dull knife just makes a mess!)
- Baking sheet or tray: lined with parchment paper or a silicone mat to lay out the skewers for freezing
- Plastic wrap or airtight container: to store the skewers in the freezer without freezer burn
- Mixing bowl: optional, if you want to toss grapes with lemon juice before freezing
- Kitchen timer or clock: handy for keeping track of freezing times so you don’t forget them in the freezer like I once did (resulted in grape popsicles, not a bad mistake but not the goal!)
If you don’t have wooden skewers, sturdy toothpicks can work for smaller bites, though they’re a bit more fragile. For a budget-friendly option, bamboo skewers are widely available and reusable if cleaned properly. I recommend washing them after use and letting them dry fully to keep them in good shape for your next beach day.
Preparation Method
- Prepare the grapes: Rinse about 2 cups of seedless grapes under cold water. Pat them dry thoroughly with paper towels—wet grapes won’t freeze well and tend to form ice crystals.
- Optional step: Place grapes in a mixing bowl and toss with a teaspoon of fresh lemon juice. This helps maintain color and adds a subtle brightness. Let sit for 5 minutes, then drain any excess liquid.
- Cut the cheese: Using a sharp knife, cut 8 ounces of sharp cheddar into 1-inch cubes. Try to keep the cubes uniform for even freezing and better presentation.
- Thread the skewers: Take a wooden skewer and alternate threading grapes and cheese cubes. For a balanced bite, I usually do two grapes, one cheese cube, then two grapes again. Leave about an inch at the end of each skewer for easy handling.
- Arrange on baking sheet: Lay the assembled skewers flat on a parchment-lined baking sheet, making sure they don’t touch each other to freeze evenly.
- Freeze: Place the tray in the freezer for at least 2 hours, or until the grapes are completely frozen and the cheese is firm but not rock-hard. This timing keeps the texture perfect—not too icy, not too soft.
- Storage: Once frozen, transfer the skewers to an airtight container or zip-top freezer bag. This way, you can grab a few for your beach day whenever you want without thawing the whole batch.
- Serving: Pack your skewers in a cooler with ice packs to keep them cold until you’re ready to enjoy. They’re best eaten within 24 hours of freezing but can last up to 3 days if stored properly.
Quick tip: If you want to prep the night before your trip, you can safely freeze the skewers overnight. Just remember to lay them out flat first to avoid sticking together. And if you ever find your cheese a little too firm after freezing, let the skewers sit at room temperature for 5 minutes before eating—it brings back that creamy texture perfectly.
Cooking Tips & Techniques
Honestly, the trickiest part here is getting the freezing time just right. Too long, and the cheese turns rock solid; too short, and the grapes aren’t cold enough to offer that refreshing chill.
- Choose the right grapes: Firm, seedless grapes freeze best and avoid watery messes.
- Pat dry thoroughly: Moisture on grapes can cause ice crystals and soggy cheese edges.
- Uniform cheese cubes: Cut cheese into consistent sizes so they freeze evenly and look pretty on the skewer.
- Don’t overcrowd freezing tray: Give skewers space so cold air circulates and freezes them quickly.
- Freeze cheese first (optional): If you want to avoid cheese sticking to the grapes, freeze the cheese cubes separately for 30 minutes before assembling.
- Timing is key: Set a timer! I once lost track and ended up with grape popsicles rather than skewers—but hey, that was a tasty happy accident.
- Handling frozen skewers: Use tongs to avoid warming the cheese or grapes too soon.
Multitasking tip: While your skewers freeze, use the time to pack your beach bag or prep drinks. It’s a great way to maximize your pre-beach hustle without rushing at the last minute.
Variations & Adaptations
- Cheese swap: Try mozzarella balls or gouda cubes for a milder flavor. For a creamier bite, little cubes of cream cheese work surprisingly well, too.
- Fruit alternatives: Swap grapes for frozen blueberries, cherry tomatoes (for a savory twist), or even small chunks of watermelon for extra summer vibes.
- Herb twist: Thread a small basil leaf between grapes and cheese for an herbal freshness that’s unexpected but delightful.
- Dietary adaptations: Use vegan cheese blocks for a dairy-free snack. Just make sure to pick a firm type that freezes well.
- Cooking method variation: Instead of freezing, try chilling the skewers in the fridge for a softer, room-temp snack perfect for cooler evenings.
One time, I added a drizzle of honey and a sprinkle of crushed pistachios right before serving, which made these skewers feel like a fancy appetizer at a summer party. It was a hit and still a favorite way I jazz them up for backyard get-togethers.
Serving & Storage Suggestions
Frozen grape and cheese skewers are best enjoyed cold straight from the freezer or after a 5-minute rest at room temperature to soften the cheese slightly. They make a fantastic finger food, perfect for beach blankets or picnic tables.
- Serve alongside a crisp white wine or sparkling lemonade for a refreshing pairing.
- Complement the skewers with light crackers or a fresh green salad for a fuller snack spread.
- Store leftover skewers in an airtight container in the freezer for up to 3 days. Avoid refreezing once thawed to maintain texture.
- To reheat slightly, leave skewers out for about 5-10 minutes; this softens cheese without losing the coolness of grapes.
- Flavors mellow and blend over time, so letting skewers sit chilled for 30 minutes before serving can build a subtle depth.
Nutritional Information & Benefits
Each skewer offers a balanced bite of protein, natural sugar, and fat, making it a smart and tasty snack for warm days. Here’s a rough estimate per skewer:
| Calories | 70-90 kcal |
|---|---|
| Protein | 4-5 grams |
| Fat | 5-7 grams (mostly from cheese) |
| Carbohydrates | 5-7 grams (natural sugars from grapes) |
Grapes bring antioxidants and hydration, while cheese offers calcium and protein to keep you full longer. This combo makes the frozen grape and cheese skewers a satisfying low-carb option with gluten-free potential if you avoid crackers or bread sides. Just a heads-up if you’re dairy sensitive: this recipe contains cheese, but swapping in vegan cheese can keep it allergy-friendly.
Conclusion
Refreshing frozen grape and cheese skewers are just the kind of no-fuss, delicious snack that makes summer days better. They’re easy to prepare, perfect for sharing, and keep you cool when the sun’s blazing. I love how this recipe feels both casual and a little special—simple ingredients with a thoughtful twist.
Feel free to customize these skewers based on what you love or what’s in your fridge—you might find your own favorite combo that becomes your beach day tradition. If you try this recipe, I’d love to hear how yours turned out or what variations you added. Don’t be shy—drop a comment or share with friends who’d also appreciate a snack that’s as refreshing as it is tasty.
So next time you’re packing for the beach, throw these skewers in your cooler and enjoy a little bite of chill and cheer. Trust me, your taste buds will thank you!
FAQs
Can I use frozen grapes straight from the store instead of freezing them myself?
Frozen grapes from the store work fine if they’re seedless and firm, but I recommend rinsing and drying them before skewering to avoid excess ice buildup.
How long can I store these grape and cheese skewers in the freezer?
They stay best for up to 3 days. Longer storage may affect texture and flavor, especially of the cheese.
What’s the best cheese to use for these skewers?
Sharp cheddar is my favorite for its bold flavor and firm texture, but mozzarella and gouda are great alternatives depending on your taste.
Are these skewers kid-friendly?
Absolutely! Kids tend to love the sweet and savory combo, and the bite-sized pieces are easy for little hands to manage.
Can I prepare these skewers ahead of time for a party?
Yes, you can assemble and freeze them a day before your event. Just keep them in an airtight container and transfer to a cooler when heading out.
Pin This Recipe!
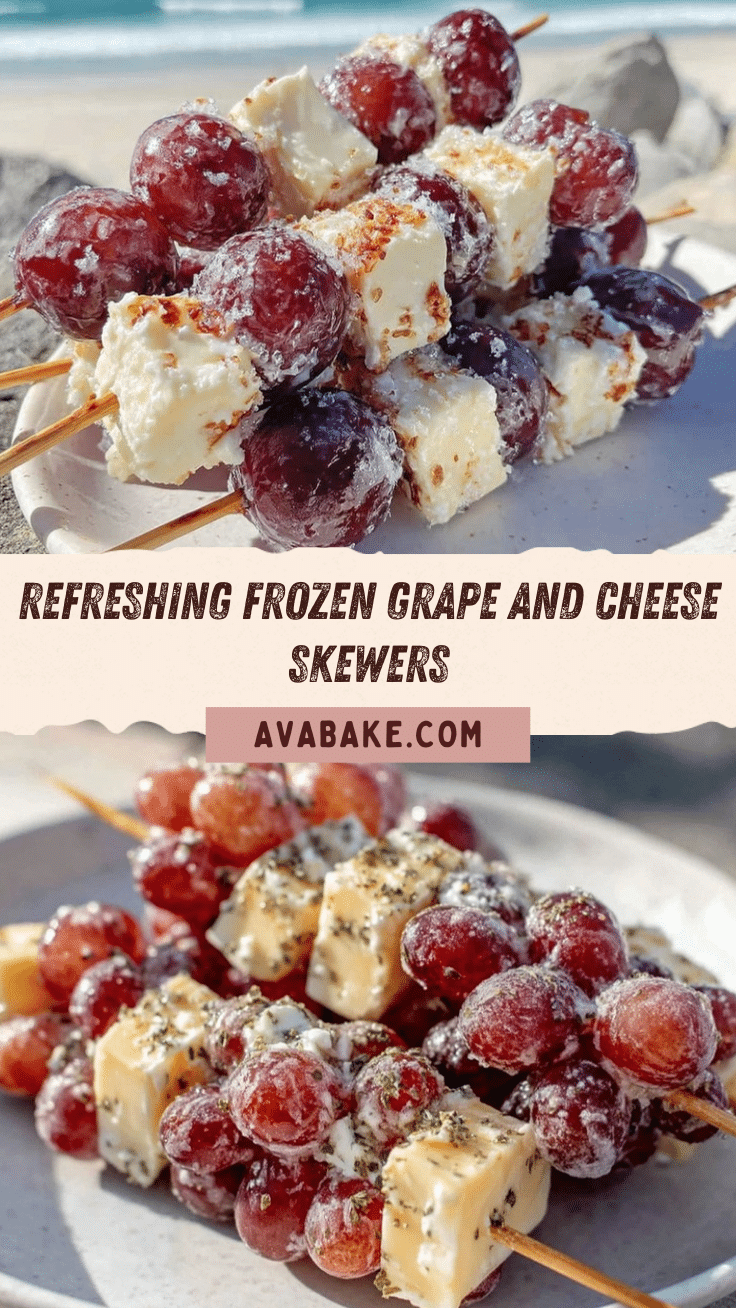
Refreshing Frozen Grape and Cheese Skewers
A quick and easy snack combining frozen grapes and sharp cheddar cheese cubes on skewers, perfect for beach days or casual entertaining.
- Prep Time: 10 minutes
- Cook Time: 2 hours (freezing time)
- Total Time: 2 hours 10 minutes
- Yield: 12 skewers 1x
- Category: Snack
- Cuisine: American
Ingredients
- 2 cups seedless red or green grapes, washed and patted dry
- 8 ounces sharp cheddar cheese, cut into 1-inch cubes
- Wooden or bamboo skewers, 12-inch length
- Optional: 1 teaspoon fresh lemon juice
Instructions
- Rinse about 2 cups of seedless grapes under cold water and pat dry thoroughly with paper towels.
- Optional: Toss grapes with 1 teaspoon fresh lemon juice in a mixing bowl, let sit for 5 minutes, then drain excess liquid.
- Cut 8 ounces of sharp cheddar cheese into 1-inch cubes using a sharp knife.
- Thread the skewers by alternating two grapes, one cheese cube, then two grapes again, leaving about an inch at the end for handling.
- Arrange the assembled skewers flat on a parchment-lined baking sheet, ensuring they do not touch each other.
- Freeze the skewers for at least 2 hours until grapes are completely frozen and cheese is firm but not rock-hard.
- Transfer frozen skewers to an airtight container or zip-top freezer bag for storage.
- Pack skewers in a cooler with ice packs and enjoy within 24 hours, or store up to 3 days in the freezer.
Notes
Pat grapes dry thoroughly to avoid ice crystals. Freeze skewers flat and spaced apart to prevent sticking. Let skewers sit at room temperature for 5 minutes before eating if cheese is too firm. Use tongs to handle frozen skewers to avoid warming.
Nutrition
- Serving Size: 1 skewer
- Calories: 80
- Sugar: 5
- Sodium: 150
- Fat: 6
- Saturated Fat: 3.5
- Carbohydrates: 6
- Fiber: 0.5
- Protein: 4.5
Keywords: frozen grapes, cheese skewers, beach snack, summer snack, easy appetizer, quick snack, cheddar cheese, healthy snack


