“You know that moment when you’re craving something sweet, creamy, and peanut buttery but don’t want to turn on the oven? That exact night, last summer, I found myself rummaging through my fridge and pantry, hoping to whip up a quick treat before the heat really kicked in. Honestly, I wasn’t expecting to create anything memorable — just some kind of snack to satisfy a late-night sweet tooth. But then, a little happy accident happened. I grabbed the wrong kind of cream cheese (there was a half-used tub hidden behind the yogurt), mixed it with peanut butter, and tossed it on a crumbly crust. It was sticky, smooth, and totally dreamy. The next day, I brought these bars to a backyard barbecue, and let me tell you, my neighbor Lisa was sneaking second pieces before anyone else even got a slice.
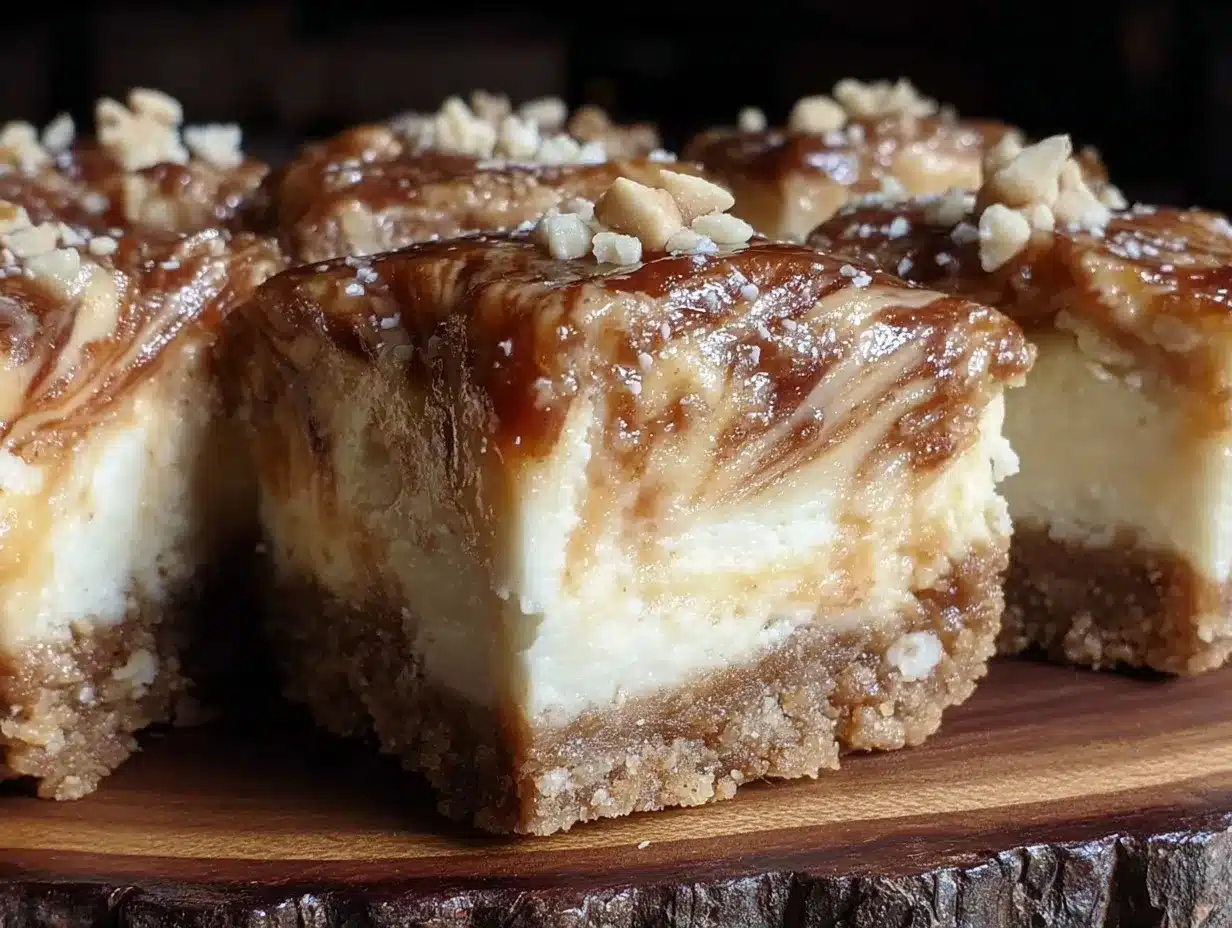
Maybe you’ve been there too—wanting a dessert that’s indulgent yet fuss-free, perfect for summer when the last thing you want is to bake. These Creamy No-Bake Peanut Butter Cheesecake Bars fit that vibe perfectly. They’re rich but light, peanut buttery but not overpowering, and just the right texture to feel like a treat without the heaviness. Plus, they come together in under 30 minutes, and you don’t even need an oven! I mean, who wouldn’t love that?
There was one tiny mess-up—I forgot to line the pan with parchment paper and had to wrestle the bars out in chunks. Lesson learned! But honestly, that slightly rustic look just made them feel more homemade and cozy. This recipe stuck with me because it’s that rare kind of dessert that’s both effortless and show-stopping, perfect for warm days and anytime you want a peanut buttery pick-me-up.
Why You’ll Love This Recipe
This recipe isn’t just another cheesecake bar—it’s a simple, reliable way to get creamy, dreamy peanut butter goodness without the oven hassle. Here’s why it might just become your new favorite:
- Quick & Easy: Ready in under 30 minutes, no baking required, making it ideal for busy summer days or last-minute dessert emergencies.
- Simple Ingredients: Most are pantry staples like creamy peanut butter, cream cheese, and graham crackers—no need to hunt down anything fancy.
- Perfect for Summer: Served chilled, these bars are refreshingly cool and satisfying, perfect for picnics, potlucks, or a casual family dinner.
- Crowd-Pleaser: Kids, adults, peanut butter lovers, even skeptics—I’ve yet to meet someone who didn’t ask for seconds.
- Unbelievably Delicious: The smooth, velvety cheesecake layer pairs beautifully with a crunchy, buttery crust and a hint of salt to balance the sweetness.
What sets this recipe apart is the silky-smooth texture of the cheesecake layer, achieved by whipping the cream cheese and peanut butter just right. Plus, the crust has just enough crunch to contrast the creamy filling without being crumbly. I’ve tweaked the sugar ratio and chilling time over a few tries to get it just right—it’s not too sweet, just perfectly peanut buttery. Honestly, after the first bite, you might find yourself closing your eyes and savoring that nutty richness. Perfect for impressing guests without breaking a sweat, or just treating yourself on a hot day.
What Ingredients You Will Need
This recipe uses simple, wholesome ingredients to deliver bold flavor and satisfying texture without the fuss. Most are pantry basics you probably have on hand already.
- For the crust:
- 1 ½ cups graham cracker crumbs (about 12 full sheets; I like Honey Maid for consistent texture)
- 6 tablespoons unsalted butter, melted (adds richness and helps the crust stick)
- 2 tablespoons granulated sugar (balances the buttery flavor)
- For the cheesecake layer:
- 16 ounces cream cheese, softened (use full-fat for best creaminess; Philadelphia brand works well)
- 1 cup creamy peanut butter (natural or standard, depending on your preference; I used Skippy Smooth)
- ¾ cup powdered sugar, sifted (helps keep the filling smooth)
- 1 teaspoon vanilla extract (adds depth and aroma)
- 1 cup heavy cream, cold (helps achieve a fluffy, light texture)
- Pinch of salt (balances sweetness and enhances peanut flavor)
Ingredient notes: You can swap the graham cracker crust for crushed digestive biscuits if you’re outside the U.S. or want a slightly different flavor. For a dairy-free option, try coconut cream cheese and dairy-free butter, but keep in mind the texture will differ slightly. If you like a little extra crunch, stir in chopped roasted peanuts or a sprinkle of chopped chocolate on top before chilling.
Equipment Needed
- 8×8-inch (20×20 cm) square baking pan – I recommend a non-stick or glass pan for easy removal; if you don’t have this size, a similarly sized dish will work.
- Mixing bowls – one large for the crust and another for the filling.
- Electric hand mixer or stand mixer – essential for whipping the cream and smoothing the cream cheese mixture.
- Rubber spatula – for scraping down bowl sides and folding ingredients gently.
- Measuring cups and spoons – for accuracy.
- Parchment paper – highly recommended to line the pan to help lift the bars out cleanly; I learned this after a sticky first attempt!
For budget-friendly alternatives, if you don’t have a mixer, a sturdy whisk and some elbow grease can work, but expect a bit more arm workout. A silicone spatula is great for scraping bowls clean and folding without deflating the whipped cream. If you want to get fancy, a food processor can crush the graham crackers quickly, but a rolling pin and ziplock bag works just as well.
Preparation Method
- Prepare the crust (10 minutes): Line your 8×8-inch pan with parchment paper, leaving some overhang for easy removal later. In a medium bowl, combine 1 ½ cups graham cracker crumbs, 6 tablespoons melted butter, and 2 tablespoons sugar. Stir until the crumbs look evenly coated and feel like damp sand.
- Press the crust: Transfer the crumb mixture to the pan and press firmly into an even layer using the back of a spoon or a flat-bottomed glass. You want it compact enough to hold together but not overly packed. Chill the crust in the fridge while you prepare the filling.
- Make the cheesecake filling (15 minutes): In a large bowl, beat the softened cream cheese and peanut butter with an electric mixer on medium speed until smooth and creamy, about 2-3 minutes. Add the powdered sugar, vanilla extract, and a pinch of salt, mixing until combined.
- Whip the cream: In a separate bowl, beat the cold heavy cream until stiff peaks form. This should take about 3-4 minutes on high speed. Be careful not to overbeat or it will turn grainy.
- Fold the whipped cream: Gently fold the whipped cream into the peanut butter mixture with a rubber spatula. Use a light hand to keep the filling airy and fluffy. The mixture should look smooth and slightly thickened.
- Assemble the bars: Pour the filling over the chilled crust and spread evenly with a spatula. Smooth the top carefully to avoid air bubbles.
- Chill: Cover the pan with plastic wrap and refrigerate for at least 4 hours, preferably overnight. The longer it chills, the firmer and more sliceable the bars will be.
- Serve: Use the parchment overhang to lift the bars out of the pan. Cut into 12 squares with a sharp knife. If the knife sticks, run it under hot water and dry before slicing.
- Troubleshooting tips: If your filling feels too soft after chilling, it might be under-whipped cream or too much peanut butter added. Next time, try whipping the cream a bit longer or use slightly less peanut butter. If the crust crumbles when cutting, press more firmly or chill longer before cutting.
Cooking Tips & Techniques
One key to these bars’ creamy texture is the order and method of mixing. Beat the cream cheese and peanut butter first to avoid lumps, then add powdered sugar gradually, which helps keep the filling silky. Whipping the cream to stiff peaks is essential; it adds lightness and prevents the bars from feeling dense or heavy.
A common mistake is folding the whipped cream too aggressively, which deflates the air bubbles and results in a dense texture. Use a gentle folding motion—cut through the center, scoop around the edges, and repeat until fully combined.
Also, don’t rush the chilling time. Though tempting, less than 4 hours usually leads to the filling being too soft to cut cleanly. Patience here really pays off.
When pressing the crust, avoid pressing too hard or you’ll end up with a hard base that’s tough to bite through. The goal is a firm but crumbly texture that complements the soft filling.
For multitasking, prepare the crust first and pop it in the fridge while you clean up and mix the filling. This helps keep things moving smoothly and cuts down on waiting time.
Variations & Adaptations
- Chocolate Swirl: Before chilling, gently drop spoonfuls of melted dark chocolate on top of the filling and swirl with a knife for a marbled effect.
- Gluten-Free: Use gluten-free graham crackers or almond flour crust instead of regular crumbs to make the crust safe for gluten sensitivities.
- Vegan Version: Swap cream cheese with a cashew-based vegan cheese, use coconut cream instead of heavy cream, and a plant-based butter substitute for the crust. Expect a slightly different texture but still delicious.
- Crunchy Peanut Butter: Try crunchy peanut butter in the filling for added texture and a nutty bite.
- Salted Caramel Topping: Drizzle salted caramel sauce over the bars just before serving for a sweet-salty twist.
My personal favorite variation is adding a thin layer of melted chocolate over the crust before spreading the filling. It adds a subtle crunch and chocolate flavor that pairs beautifully with the peanut butter. I discovered this on a whim one afternoon and now it’s a crowd favorite in my circle.
Serving & Storage Suggestions
Serve these bars chilled for the best texture and flavor. They’re excellent on their own but pair wonderfully with a dollop of whipped cream or a few fresh berries on the side. For drinks, a cold glass of milk or iced coffee complements the peanut butter richness perfectly.
Store any leftovers in an airtight container in the refrigerator for up to 5 days. They actually taste better after a day or two since the flavors have time to meld. You can also freeze the bars for up to 2 months—wrap individual pieces tightly in plastic wrap and place them in a freezer-safe container. Thaw overnight in the fridge before serving.
When reheating, just bring them to room temperature for about 20 minutes; microwaving isn’t recommended as it can cause the filling to soften too much and lose its creamy texture.
Nutritional Information & Benefits
Each bar (assuming 12 servings) contains approximately:
| Calories | 320 |
|---|---|
| Protein | 7g |
| Fat | 25g |
| Carbohydrates | 18g |
| Fiber | 2g |
Peanut butter is an excellent source of plant-based protein and healthy fats, which support heart health and provide lasting energy. Cream cheese adds calcium and a creamy texture, while the graham crust offers some whole grain if you choose whole wheat crumbs. This recipe is gluten-free adaptable and can be made dairy-free with substitutions.
I personally appreciate this recipe because it feels indulgent without being overloaded with processed sugars or artificial ingredients. It’s a treat that fits well into a balanced lifestyle, especially when you crave something homemade and comforting during warmer months.
Conclusion
These Creamy No-Bake Peanut Butter Cheesecake Bars are a total win if you want an easy, crowd-pleasing dessert that doesn’t heat up your kitchen. They strike the perfect balance between rich and light, sweet and salty, crunchy and creamy. Plus, you can tweak them to suit your tastes or dietary needs, which makes them a versatile addition to your recipe box.
I keep coming back to this recipe because it reminds me of those warm summer nights when quick fixes become unexpected favorites. Give it a try, and I bet it’ll become a go-to for your own summer gatherings or anytime you want a fuss-free peanut butter treat.
Don’t forget to drop a comment below if you try the recipe or have your own twists to share—I love hearing your stories. And hey, share it around if you think someone else deserves a peanut butter moment too!
FAQs
Can I make these bars ahead of time?
Absolutely! These bars actually taste better after chilling overnight. Just keep them covered in the fridge until serving.
How do I prevent the crust from getting soggy?
Press the crust firmly and chill it before adding the filling. You can also add a thin layer of melted chocolate on the crust to create a moisture barrier.
What peanut butter is best for this recipe?
Creamy peanut butter works best for a smooth texture, but crunchy peanut butter is a great option if you want extra texture.
Can I freeze the cheesecake bars?
Yes, wrap individual bars tightly and freeze for up to 2 months. Thaw in the fridge overnight before serving.
Is there a dairy-free version?
Yes, substitute cream cheese with a vegan cashew-based cheese, use coconut cream instead of heavy cream, and dairy-free butter for the crust. Texture will vary slightly but still delicious.
Pin This Recipe!
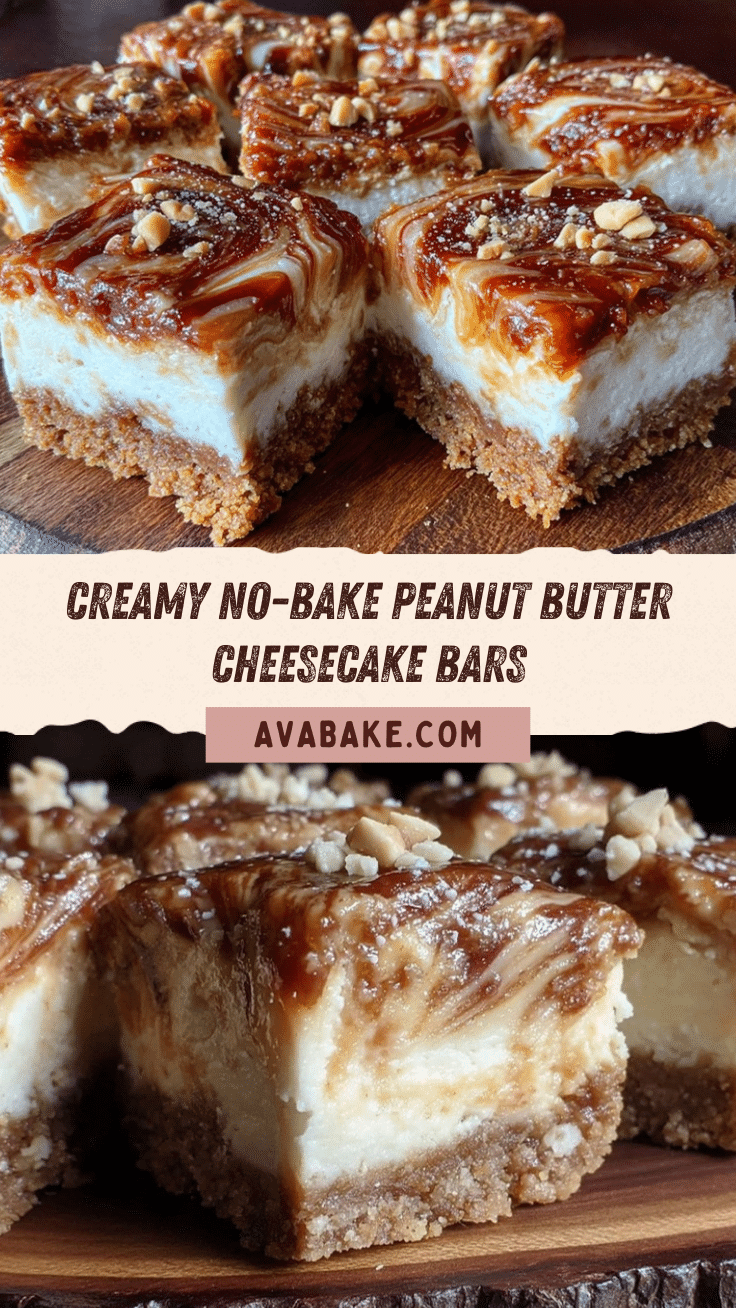
Creamy No-Bake Peanut Butter Cheesecake Bars
These no-bake peanut butter cheesecake bars are creamy, dreamy, and perfect for summer. Ready in under 30 minutes with a crunchy graham cracker crust and a smooth peanut butter cheesecake layer.
- Prep Time: 15 minutes
- Cook Time: 0 minutes
- Total Time: 4 hours 15 minutes
- Yield: 12 servings 1x
- Category: Dessert
- Cuisine: American
Ingredients
- 1 ½ cups graham cracker crumbs (about 12 full sheets)
- 6 tablespoons unsalted butter, melted
- 2 tablespoons granulated sugar
- 16 ounces cream cheese, softened
- 1 cup creamy peanut butter
- ¾ cup powdered sugar, sifted
- 1 teaspoon vanilla extract
- 1 cup heavy cream, cold
- Pinch of salt
Instructions
- Line your 8×8-inch pan with parchment paper, leaving some overhang for easy removal later.
- In a medium bowl, combine graham cracker crumbs, melted butter, and sugar. Stir until crumbs are evenly coated and feel like damp sand.
- Transfer the crumb mixture to the pan and press firmly into an even layer using the back of a spoon or flat-bottomed glass. Chill the crust in the fridge while preparing the filling.
- In a large bowl, beat the softened cream cheese and peanut butter with an electric mixer on medium speed until smooth and creamy, about 2-3 minutes.
- Add powdered sugar, vanilla extract, and a pinch of salt to the cream cheese mixture and mix until combined.
- In a separate bowl, beat the cold heavy cream until stiff peaks form, about 3-4 minutes on high speed.
- Gently fold the whipped cream into the peanut butter mixture using a rubber spatula, keeping the filling airy and fluffy.
- Pour the filling over the chilled crust and spread evenly with a spatula. Smooth the top carefully to avoid air bubbles.
- Cover the pan with plastic wrap and refrigerate for at least 4 hours, preferably overnight.
- Use the parchment overhang to lift the bars out of the pan. Cut into 12 squares with a sharp knife. If the knife sticks, run it under hot water and dry before slicing.
Notes
Line the pan with parchment paper to help lift the bars out cleanly. Do not overbeat the cream to avoid grainy texture. Chill for at least 4 hours for best slicing results. For a firmer crust, press firmly and chill longer. Variations include adding chocolate swirl, using gluten-free crust, or making vegan substitutions.
Nutrition
- Serving Size: 1 bar (1 of 12 squar
- Calories: 320
- Fat: 25
- Carbohydrates: 18
- Fiber: 2
- Protein: 7
Keywords: no-bake, peanut butter, cheesecake bars, summer dessert, easy dessert, no oven, creamy, peanut butter dessert


