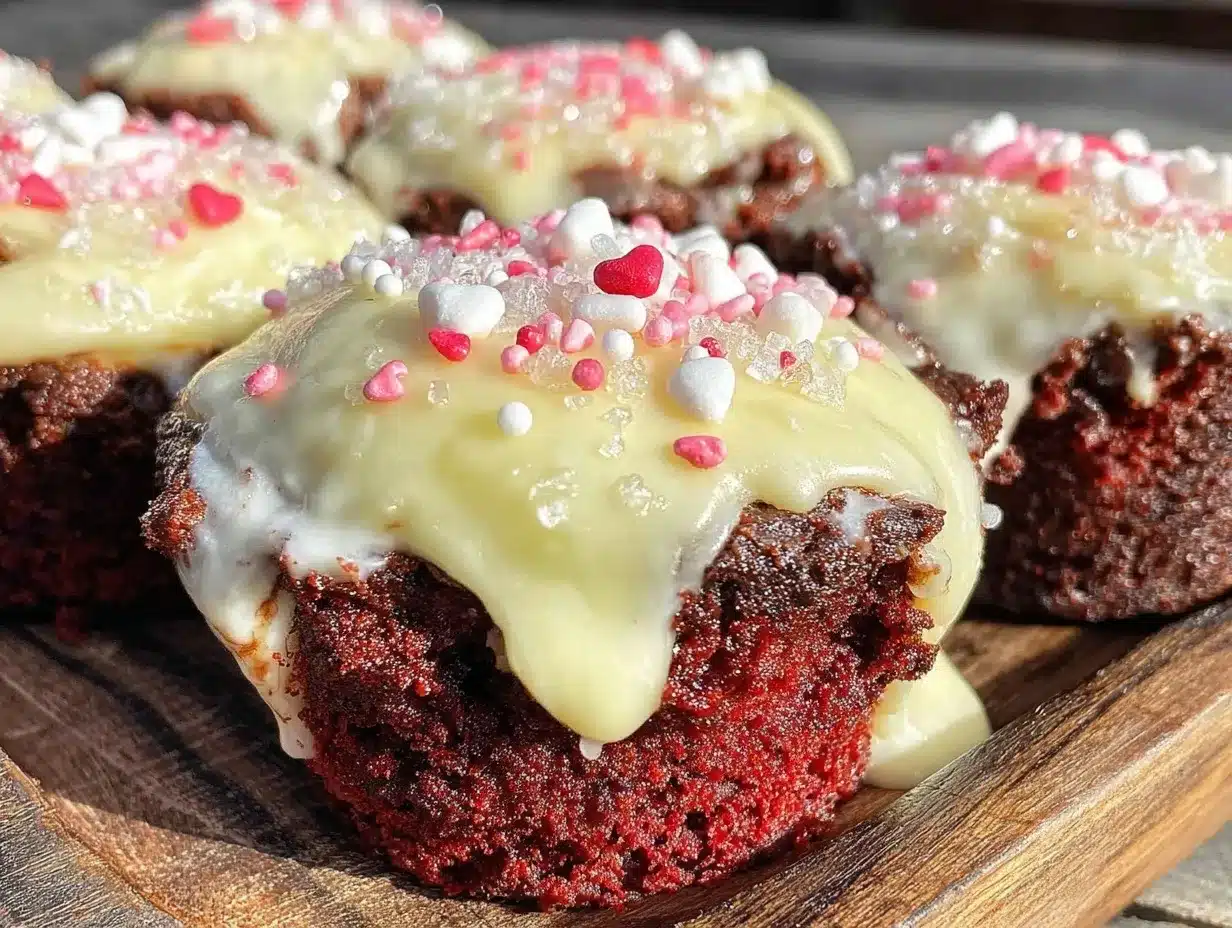
Let me tell you, the scent of rich cocoa mingled with sweet marshmallows baking in the oven is enough to make anyone’s mouth water. The first time I made these Red Velvet Marshmallow Cups, it was a chilly February afternoon, and honestly, they felt like a warm hug on a plate. I was instantly hooked—the kind of moment where you pause, take a deep breath, and just smile because you know you’re onto something truly special. Years ago, when I was knee-high to a grasshopper, Valentine’s Day treats always meant boxed chocolates or store-bought candies, but stumbling upon this recipe changed everything for me.
My family couldn’t stop sneaking these little cups off the cooling rack (and I can’t really blame them). This red velvet marshmallow cups recipe is dangerously easy to whip up yet delivers pure, nostalgic comfort with every bite. You know what’s great? They’re perfect for potlucks, sweet treats for your kids, or just brightening up your Pinterest cookie board. After testing this recipe multiple times—in the name of research, of course—they’ve become a staple for family gatherings and gifting. If you’re looking for a Valentine’s Day treat that feels like a warm hug, you’re going to want to bookmark this one.
Why You’ll Love This Recipe
Honestly, this Red Velvet Marshmallow Cups recipe has all the right moves. Here’s why it’s become a favorite around here:
- Quick & Easy: Comes together in under 30 minutes, perfect for busy evenings or last-minute Valentine’s Day prep.
- Simple Ingredients: No fancy grocery runs needed—you likely have most of these in your pantry already.
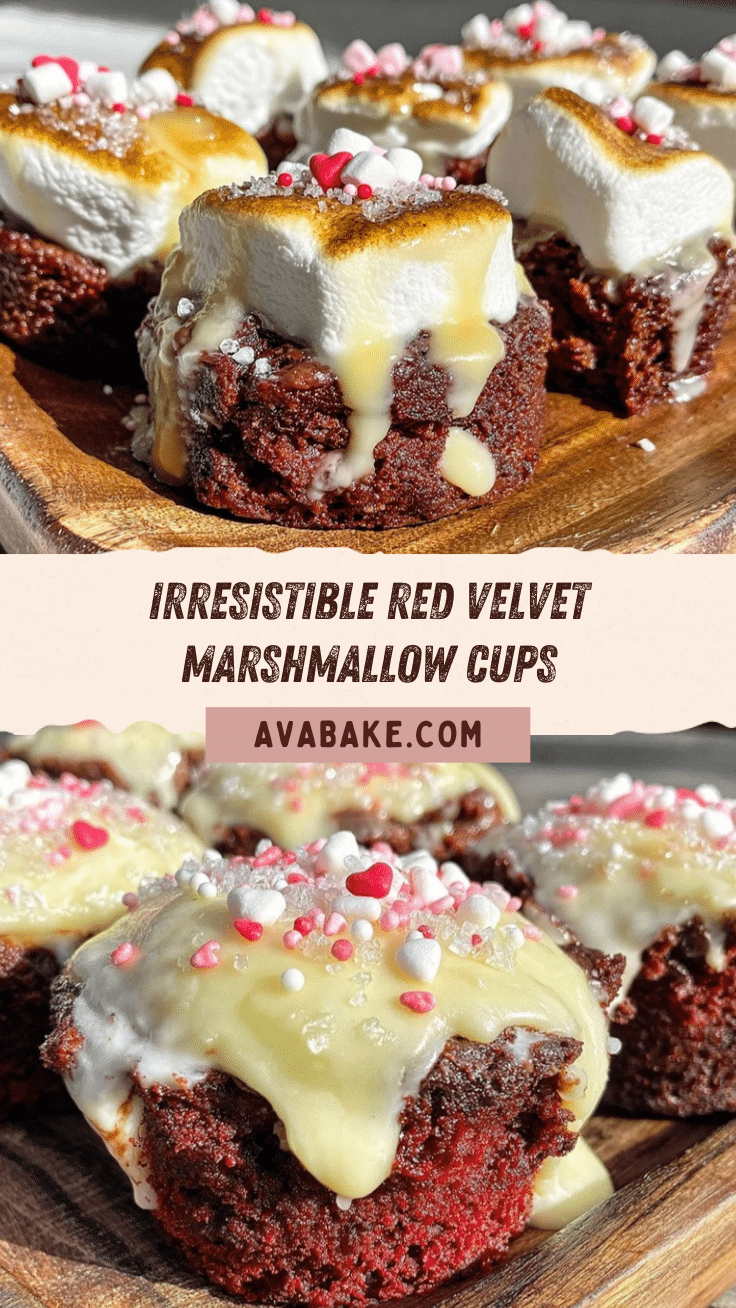
- Perfect for Valentine’s Day: The vibrant red color and gooey marshmallow filling make it a showstopper for any romantic occasion.
- Crowd-Pleaser: Kids and adults alike keep coming back for more, trust me.
- Unbelievably Delicious: That tender red velvet crumb paired with the melty marshmallow is next-level comfort food.
What sets this recipe apart? It’s the delicate balance of flavors and textures—not too sweet, not too dense. The cocoa gives depth, while the marshmallow adds that irresistible gooey surprise. Plus, the homemade touch means you can tweak it to your liking—maybe a hint of cinnamon or a splash of vanilla to make it your own. This recipe isn’t just good; it’s the kind that makes you close your eyes after the first bite. Whether you’re impressing guests without stress or turning a simple dessert into something unforgettable, these red velvet marshmallow cups have got you covered.
What Ingredients You Will Need
This recipe uses simple, wholesome ingredients to deliver bold flavor and satisfying texture without the fuss. Most are pantry staples, and substitutions are easy if needed.
- For the Red Velvet Cupcakes:
- All-purpose flour (1 1/4 cups / 160 g)
- Sugar (3/4 cup / 150 g)
- Cocoa powder, unsweetened (1 tablespoon)
- Baking soda (1/2 teaspoon)
- Salt (1/4 teaspoon)
- Buttermilk (3/4 cup / 180 ml), room temperature (can substitute with milk + 1 tsp lemon juice)
- Vegetable oil (1/4 cup / 60 ml)
- Egg (1 large), room temperature
- Vanilla extract (1 teaspoon)
- Red food coloring (1 tablespoon) – I use gel food coloring for the best vibrant color
- White vinegar (1/2 teaspoon)
- For the Marshmallow Filling:
- Large marshmallows (about 12 pieces, or use mini marshmallows – 1 cup / 50 g)
- For the Frosting (Optional but recommended):
- Cream cheese (4 ounces / 115 g), softened
- Unsalted butter (1/4 cup / 60 g), softened
- Powdered sugar (1 cup / 120 g), sifted
- Vanilla extract (1/2 teaspoon)
If you’re aiming for gluten-free, swapping the all-purpose flour for a gluten-free blend works just fine. And if dairy is a no-go, there are great plant-based milk and butter alternatives that hold up well here. For marshmallows, I recommend classic brand marshmallows, but if you can find artisan ones with vanilla notes, even better. In summer, you might swap the marshmallow filling for a fruit jam or cream cheese swirl for a fun twist.
Equipment Needed
- Standard muffin tin with 12 cups – I find a non-stick version works best for easy release
- Muffin liners or silicone cupcake cups – silicone is reusable and budget-friendly
- Mixing bowls – at least two, one for wet ingredients and one for dry
- Electric mixer or handheld whisk – makes batter smooth and easy to combine
- Measuring cups and spoons – precise measurements help keep the red velvet just right
- Small saucepan or microwave-safe bowl for melting marshmallows if needed
If you don’t have an electric mixer, no worries—you can whisk by hand; just be prepared for a little arm workout! Also, silicone cups can double as lovely serving vessels and clean up easily. Keeping your equipment clean and dry ensures batter doesn’t stick or clump, which I learned the hard way one busy Valentine’s Day.
Preparation Method
- Preheat the oven to 350°F (175°C). Line your muffin tin with cupcake liners or grease well if you prefer no liners.
- Mix dry ingredients: In a medium bowl, sift together 1 1/4 cups (160 g) all-purpose flour, 3/4 cup (150 g) sugar, 1 tablespoon cocoa powder, 1/2 teaspoon baking soda, and 1/4 teaspoon salt. Whisk gently to combine evenly.
- Combine wet ingredients: In a separate large bowl, whisk 3/4 cup (180 ml) buttermilk, 1/4 cup (60 ml) vegetable oil, 1 large egg, 1 teaspoon vanilla extract, 1 tablespoon red food coloring, and 1/2 teaspoon white vinegar until smooth and well blended.
- Gradually add dry to wet: Slowly add the dry mixture to the wet ingredients, stirring gently until just combined. Do not overmix—some lumps are okay. The batter should be smooth with a vibrant red hue.
- Fill cupcake cups: Spoon batter evenly into the lined muffin cups, filling each about halfway (roughly 2 tablespoons or 30 ml). This allows room for the marshmallow topping.
- Add marshmallows: Place one large marshmallow (or a small handful of mini marshmallows) on top of each cupcake. Gently press the marshmallow into the batter so it stays in place but doesn’t sink to the bottom.
- Bake: Bake in preheated oven for 15-18 minutes. The cupcakes should spring back lightly when touched, and marshmallows will be puffed and golden on top. Avoid overbaking or marshmallows will get too hard.
- Cool: Remove from oven and let cupcakes cool in the pan for 5 minutes, then transfer to a wire rack to cool completely. The marshmallow topping will soften as they cool—trust me, that’s the magic moment!
- Optional frosting: While cupcakes cool, beat together 4 ounces (115 g) softened cream cheese, 1/4 cup (60 g) softened unsalted butter, 1 cup (120 g) powdered sugar, and 1/2 teaspoon vanilla extract until smooth. Spread or pipe over cooled cupcakes for an extra creamy finish.
Tip: If your marshmallows brown too quickly, tent the cupcakes loosely with foil halfway through baking. And remember, the batter’s red color will deepen as it bakes but don’t worry if it looks a bit pale when raw.
Cooking Tips & Techniques
Working with red velvet and marshmallows together can be a bit tricky, but here’s what I’ve learned:
- Don’t overmix the batter. Overworking flour can make cupcakes tough, and that’s the last thing you want. Mix until ingredients just come together.
- Use gel food coloring. Liquid coloring can thin the batter, leading to flat cupcakes. Gel keeps that signature red vibrant without messing with texture.
- Room temperature eggs and buttermilk help the batter blend evenly. Cold ingredients can cause lumps.
- Watch the marshmallows closely. They melt and puff quickly. If they start to brown too much before cupcake is done, cover with foil.
- Don’t skip the vinegar. It reacts with baking soda to give red velvet that light crumb and slight tang.
- Test for doneness by gently pressing the cupcake top—not the marshmallow. It should bounce back lightly.
- Multitasking tip: While cupcakes bake, whip up the cream cheese frosting so you’re ready to frost as soon as they cool.
I remember one Valentine’s Day when I left the marshmallows unattended and came back to a scorched mess. Lesson learned: keep an eye on that golden puff! These tips keep the process smooth and the results picture-perfect.
Variations & Adaptations
Mixing things up is half the fun, especially with a recipe this versatile. Here are some ways to make these red velvet marshmallow cups your own:
- Dietary swaps: Use almond flour for a gluten-free twist or coconut oil instead of vegetable oil for dairy-free baking.
- Flavor twists: Add a pinch of cinnamon or espresso powder to the batter for a warm, cozy note. Or swirl in cream cheese filling before baking for a surprise center.
- Seasonal spin: In summer, swap marshmallows for fresh raspberries or strawberry jam for a fruity surprise.
- Cooking method: Tried baking these in silicone muffin molds on a baking sheet for easier release, and it worked beautifully.
- Personal favorite: I once sprinkled crushed peppermint candies on top after baking—it was a festive hit and added a fun crunch.
Allergen-wise, these are adaptable if you swap key ingredients thoughtfully. Just remember marshmallows sometimes contain gelatin, so vegan marshmallows are your friend if needed.
Serving & Storage Suggestions
These red velvet marshmallow cups are best served at room temperature to enjoy that melty marshmallow topping. For Valentine’s Day, arrange them on a pretty platter with some fresh strawberries or a dusting of powdered sugar for extra charm.
Pair them with a warm cup of coffee, hot chocolate, or even a glass of cold milk to balance out the sweetness. They also make adorable gifts wrapped in cellophane tied with a red ribbon—trust me, they disappear fast.
Store leftover cupcakes in an airtight container at room temperature for up to 2 days to keep marshmallows soft. For longer storage, refrigerate for up to 5 days but bring to room temperature before serving. You can freeze unfrosted cupcakes in a sealed container for up to 2 months—thaw overnight and add frosting fresh.
Reheat gently in a microwave for 10-15 seconds if desired, but be careful not to melt the marshmallow topping too much. Over time, flavors meld beautifully, making these even better the next day if you can wait that long!
Nutritional Information & Benefits
Each red velvet marshmallow cup (without frosting) contains approximately 180 calories, 7 grams of fat, 25 grams of carbohydrates, and 2 grams of protein. While definitely a treat, the moderate portion size helps keep indulgence in check.
Key ingredients like cocoa powder provide antioxidants, and buttermilk adds a nice dose of calcium. Using vegetable oil keeps the texture moist without adding heaviness. If you opt for cream cheese frosting, count on a bit more richness but also some protein from the dairy.
This recipe can be tailored to fit gluten-free or dairy-free diets with simple swaps, making it accessible for many. Just a heads up for those with allergies—marshmallows often contain gelatin, so substitute accordingly if needed.
From a wellness perspective, these cups satisfy sweet cravings with a nostalgic twist, helping you enjoy special moments without going overboard. Honestly, sometimes that’s just what the heart needs.
Conclusion
So there you have it—a red velvet marshmallow cups recipe that’s easy, fun, and downright delicious. Whether you’re new to baking or a seasoned pro, these treats bring a little extra love to your Valentine’s Day table. Feel free to customize the flavors, toppings, and frosting to match your style and dietary needs.
I adore this recipe because it combines the best parts of red velvet cake and gooey marshmallows into one perfect bite. It’s become a family favorite that always sparks smiles and happy memories. If you give it a try, I’d love to hear how you made it your own—drop a comment or share your variations!
Get ready to impress with minimal fuss, and remember: the best treats are the ones made with a little love (and a lot of marshmallow). Happy baking!
FAQs
Can I make these Red Velvet Marshmallow Cups ahead of time?
Yes! You can bake them a day in advance and store in an airtight container at room temperature. Add frosting just before serving for best results.
What if I don’t have buttermilk?
No problem! Use regular milk with 1 teaspoon of lemon juice or vinegar added. Let it sit for 5 minutes before using to mimic buttermilk’s tang.
Can I use mini marshmallows instead of large ones?
Absolutely. Mini marshmallows work well; just use about a tablespoon per cup and press them gently into the batter.
How do I prevent marshmallows from burning during baking?
Keep an eye on baking time and consider tenting cupcakes with foil halfway through if marshmallows brown too quickly.
Is there a vegan version of this recipe?
Yes! Use dairy-free milk and butter substitutes, and swap marshmallows for vegan-friendly ones made without gelatin. Adjust baking times slightly as needed.
Pin This Recipe!
Red Velvet Marshmallow Cups Recipe Easy Homemade Valentine Treats
These Red Velvet Marshmallow Cups combine tender red velvet cupcakes with a gooey marshmallow topping, perfect for Valentine’s Day or any special occasion. Quick and easy to make, they deliver nostalgic comfort with every bite.
- Prep Time: 10 minutes
- Cook Time: 18 minutes
- Total Time: 28 minutes
- Yield: 12 servings 1x
- Category: Dessert
- Cuisine: American
Ingredients
- 1 1/4 cups (160 g) all-purpose flour
- 3/4 cup (150 g) sugar
- 1 tablespoon unsweetened cocoa powder
- 1/2 teaspoon baking soda
- 1/4 teaspoon salt
- 3/4 cup (180 ml) buttermilk, room temperature (or milk + 1 tsp lemon juice)
- 1/4 cup (60 ml) vegetable oil
- 1 large egg, room temperature
- 1 teaspoon vanilla extract
- 1 tablespoon red food coloring (gel recommended)
- 1/2 teaspoon white vinegar
- About 12 large marshmallows (or 1 cup / 50 g mini marshmallows)
- Optional Frosting:
- 4 ounces (115 g) cream cheese, softened
- 1/4 cup (60 g) unsalted butter, softened
- 1 cup (120 g) powdered sugar, sifted
- 1/2 teaspoon vanilla extract
Instructions
- Preheat the oven to 350°F (175°C). Line a 12-cup muffin tin with cupcake liners or grease well if not using liners.
- In a medium bowl, sift together the flour, sugar, cocoa powder, baking soda, and salt. Whisk gently to combine.
- In a separate large bowl, whisk together the buttermilk, vegetable oil, egg, vanilla extract, red food coloring, and white vinegar until smooth.
- Gradually add the dry ingredients to the wet ingredients, stirring gently until just combined. Do not overmix; some lumps are okay.
- Spoon batter evenly into the muffin cups, filling each about halfway (approximately 2 tablespoons or 30 ml).
- Place one large marshmallow (or a small handful of mini marshmallows) on top of each cupcake, gently pressing it into the batter so it stays in place.
- Bake for 15-18 minutes until cupcakes spring back lightly when touched and marshmallows are puffed and golden. Tent with foil if marshmallows brown too quickly.
- Remove from oven and let cupcakes cool in the pan for 5 minutes, then transfer to a wire rack to cool completely. The marshmallow topping will soften as they cool.
- Optional: While cupcakes cool, beat together cream cheese, butter, powdered sugar, and vanilla extract until smooth. Spread or pipe over cooled cupcakes.
Notes
Use gel food coloring for vibrant red color without thinning batter. Do not overmix batter to avoid tough cupcakes. Tent cupcakes with foil if marshmallows brown too quickly. Room temperature eggs and buttermilk help batter blend evenly. For gluten-free, substitute flour with gluten-free blend. For dairy-free, use plant-based milk and butter alternatives and vegan marshmallows.
Nutrition
- Serving Size: 1 cupcake
- Calories: 180
- Fat: 7
- Carbohydrates: 25
- Protein: 2
Keywords: red velvet, marshmallow cups, Valentine treats, easy dessert, cupcakes, homemade, marshmallow topping


