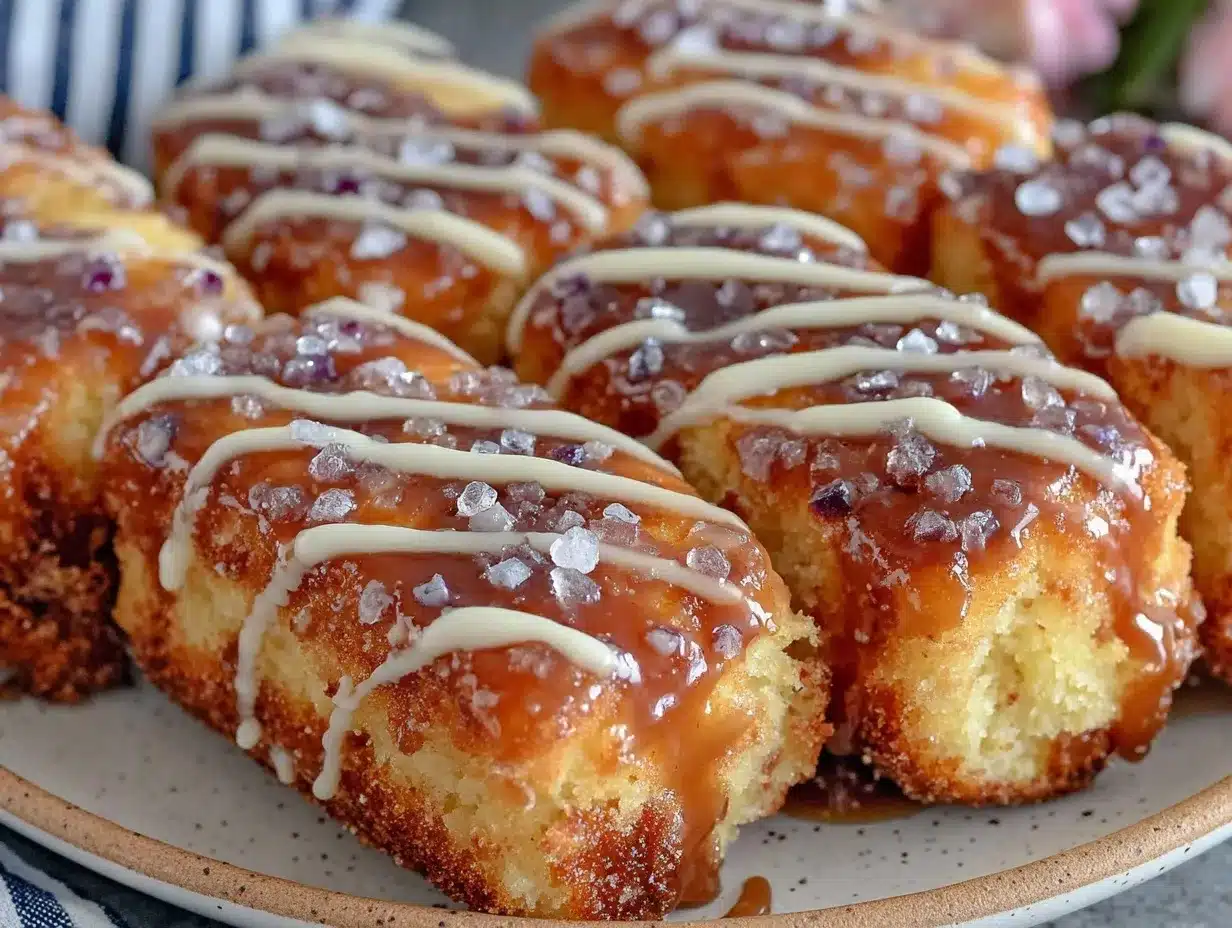
Let me just say, the warm, sweet aroma of maple syrup mixing with buttery dough in my kitchen is a downright showstopper—every time I whip up these Fluffy Maple Donut Bars with Rich Maple Glaze & Crunchy Sugar, the whole house smells like a cozy bakery. The first time I made these, it was a rainy Saturday, and honestly, I was just trying to cheer up my kids after their soccer game got cancelled. I’d stumbled on an old family recipe card (tucked behind a stack of cookbooks) and thought, “Why not make something a little special?” You know that moment when the glaze starts to set and the sugar crystals sparkle in the morning light? It was the kind of moment where you pause, take a deep breath, and just smile because you know you’re onto something truly special.
Years ago, when I was knee-high to a grasshopper, my grandma used to make maple treats for church bake sales—these bars are a riff on her classic, but with a fluffier texture and that irresistible crunchy topping. My family couldn’t stop sneaking little pieces off the cooling rack (and I can’t really blame them). Even my neighbor popped over just to ask what smelled so good. Honestly, I wish I’d figured out this maple donut bars recipe sooner. It’s the sort of treat that brings everyone to the kitchen, fork in hand.
They’re dangerously easy—pure, nostalgic comfort in bar form, perfect for weekend brunches, potlucks, or just brightening up your Pinterest dessert board. And let’s face it, I’ve road-tested these more times than I care to admit (in the name of research, of course!). Now, they’re a staple for family gatherings, gifting, and, frankly, those days when you need a little extra sweetness. These fluffy maple donut bars feel like a warm hug, and you’re going to want to bookmark this one!
Why You’ll Love This Recipe
From my kitchen to yours, here’s why these maple donut bars are my go-to for a crowd—and why they might just become yours, too. I’ve tweaked, tested, and tasted this recipe more times than I can count. The results? Consistently fluffy bars, a luscious glaze, and that signature crunchy sugar topping that makes folks close their eyes and savor every bite.
- Quick & Easy: Ready in under 45 minutes, so you can satisfy those maple cravings even on busy mornings or last-minute get-togethers.
- Simple Ingredients: You probably have everything you need in your pantry right now. There’s no need for a fancy grocery run or searching for weird specialty items.
- Perfect for Any Occasion: These bars shine at brunch, potlucks, holiday breakfasts, or just as a sweet treat for your kids after school.
- Crowd-Pleaser: My own family (even the picky ones!) and friends always ask for seconds. They’re kid-approved and adult-adored.
- Unbelievably Delicious: The combo of tender, fluffy dough, rich maple glaze, and crunchy sugar on top is next-level comfort food.
What sets my maple donut bars recipe apart? It’s all about the technique: gently folding the wet and dry ingredients for maximum fluff, using real maple syrup (not the imitation stuff), and finishing with a generous layer of crunchy sugar that gives every bite a little pop. Plus, the glaze—made with both maple syrup and a hint of vanilla—sets beautifully and adds that bakery-style finish. I’ve learned through plenty of trial and error that these details matter.
If you’re searching for a treat that’s as easy as it is irresistible, you’ve found it. This is comfort food reimagined—faster, lighter, and every bit as soul-soothing as the classics. Whether you want to impress guests with something homemade, or just sneak a quiet moment of sweetness, these bars deliver. Go ahead, indulge a little!
What Ingredients You Will Need
This maple donut bars recipe uses simple, wholesome ingredients to deliver bold flavor and that signature fluffy texture. Most are pantry staples, and a few can easily be swapped to fit what you have on hand. Let’s break it down:
- For the Bars:
- 2 1/4 cups (270g) all-purpose flour (use gluten-free blend if needed)
- 1 teaspoon baking powder
- 1/2 teaspoon baking soda
- 1/2 teaspoon salt
- 1/2 cup (115g) unsalted butter, softened (adds richness)
- 3/4 cup (150g) granulated sugar
- 2 large eggs, room temperature
- 1/2 cup (120ml) pure maple syrup (I love Anderson or Trader Joe’s for flavor)
- 1/2 cup (120ml) whole milk (feel free to swap in almond or oat milk)
- 1 teaspoon vanilla extract (real is best, but imitation works in a pinch)
- For the Maple Glaze:
- 1 1/2 cups (180g) powdered sugar, sifted
- 1/4 cup (60ml) pure maple syrup (don’t skimp!)
- 2 tablespoons (30ml) milk (adjust for consistency)
- 1/2 teaspoon vanilla extract
- Pinch of salt
- For the Crunchy Sugar Topping:
- 1/4 cup (50g) turbinado sugar or demerara sugar (for crunch)
- Optional: Pinch of cinnamon (for a little cozy warmth)
Ingredient Tips: If you’re out of whole milk, half-and-half works for extra richness. For a dairy-free option, swap butter with coconut oil (solid, not melted). I sometimes use a splash of buttermilk for tang. If you want a deeper maple flavor, try adding 1/2 teaspoon maple extract to the batter or glaze.
Seasonal twists? In autumn, I sometimes fold in 1/2 cup finely chopped toasted pecans. In spring, a handful of fresh berries works wonders. For a nut-free version, just skip the add-ins. Keep it simple or make it fancy—these bars are forgiving!
Equipment Needed
Here’s what you’ll need to make these maple donut bars—and honestly, nothing too wild is required.
- 9×13-inch (23x33cm) baking pan (I use glass for even browning, but metal works fine)
- Mixing bowls (at least two—one for wet, one for dry)
- Whisk and spatula (I love silicone spatulas for scraping every last bit of batter)
- Hand mixer or stand mixer (optional, but makes creaming butter much easier)
- Measuring cups and spoons (accuracy matters!)
- Small saucepan (for gently warming the glaze if needed)
- Wire cooling rack (not strictly necessary, but helps the glaze set evenly)
If you don’t have a 9×13 pan, use two 8-inch square pans and adjust the bake time down by a few minutes. When I was just starting out, I used a simple metal pan from a thrift store (worked like a charm!). For mixing, good old wooden spoons do the job, though a mixer makes creaming butter a breeze. Don’t forget to wipe down your gear after using maple syrup—it can get sticky!
Budget tip: If you’re missing a wire rack, just flip over your oven rack and use that for cooling. For glaze, even a regular soup spoon works to drizzle. These donut bars don’t need fancy tools—just a little patience and a pinch of love.
Preparation Method
- Preheat & Prep: Preheat your oven to 350°F (175°C). Grease or line your 9×13-inch (23x33cm) pan with parchment paper. (Tip: Overhang the paper for easy lifting later!)
- Mix Dry Ingredients: In a medium bowl, whisk together 2 1/4 cups (270g) flour, 1 tsp baking powder, 1/2 tsp baking soda, and 1/2 tsp salt. (You want everything well combined so there are no pockets of soda—trust me!)
- Cream Butter & Sugar: In a large bowl, beat 1/2 cup (115g) softened butter with 3/4 cup (150g) sugar until light and fluffy (about 2-3 minutes with a mixer, or 4-5 minutes by hand). It should look pale and creamy.
- Add Eggs: Beat in the eggs one at a time, mixing well after each addition. Scrape down the bowl so everything gets incorporated. (If the mixture looks a bit curdled, don’t panic—it’ll smooth out once you add the flour.)
- Add Wet Ingredients: Pour in 1/2 cup (120ml) maple syrup, 1/2 cup (120ml) milk, and 1 tsp vanilla. Mix until just combined. The batter will be loose—don’t worry!
- Combine Wet & Dry: Add the dry ingredients to the wet in two additions, folding gently with a spatula. Stop as soon as no flour streaks remain. (Over-mixing = tough bars. Learned that the hard way!)
- Pour & Smooth: Spread the batter evenly into your prepared pan. Use a spatula to nudge it into corners. Tap the pan lightly on the counter to remove air bubbles.
- Bake: Bake for 22-28 minutes, until the bars are golden, set, and a toothpick comes out clean (or with just a few moist crumbs). You’ll smell the maple magic when they’re done.
- Cool: Let the bars cool in the pan for 10 minutes, then lift out (if you used parchment). Transfer to a wire rack and cool completely before glazing. (If you rush this, the glaze will melt right off!)
- Make the Glaze: In a bowl, whisk together 1 1/2 cups (180g) powdered sugar, 1/4 cup (60ml) maple syrup, 2 tbsp (30ml) milk, 1/2 tsp vanilla, and a pinch of salt. For a thinner glaze, add a touch more milk; for thicker, add more sugar. (If lumps persist, warm gently in a saucepan—just until smooth.)
- Glaze & Top: Pour the glaze over cooled bars, spreading evenly. Sprinkle 1/4 cup (50g) turbinado sugar (and cinnamon, if using) over the top while glaze is still wet.
- Set & Slice: Allow glaze to set for 15-20 minutes. Slice into bars—about 16 generous pieces. (Tip: Use a serrated knife for neat edges.)
Troubleshooting: If your bars sink in the middle, check your baking powder and soda—they might be old. If the glaze seems too runny, whisk in extra powdered sugar. For sticky bars, let them cool longer before slicing. And if you want to speed up cooling, pop them in the fridge for 10 minutes!
Personal tip: I always set aside one “corner piece” for myself—those have the best crunch from the sugar!
Cooking Tips & Techniques
Having made these maple donut bars more times than I care to count, I’ve picked up a few tricks (and learned from plenty of mistakes!). Here’s what really makes a difference:
- Don’t Overmix: Once you combine wet and dry ingredients, fold gently—just until combined. Overmixing leads to dense, chewy bars instead of fluffy ones. Trust me, I’ve done it.
- Room Temperature Ingredients: Eggs and butter blend better when not cold. If you forget, set eggs in a bowl of warm water for 5 minutes.
- Accurate Measuring: Spoon flour into your cup then level off. Scooping packs too much in and makes bars dry. A kitchen scale is even better.
- Glaze Consistency: If your glaze is too thick, add milk a teaspoon at a time. Too thin? Extra powdered sugar does the trick. Warm it slightly for a glossy finish.
- Crunchy Sugar Timing: Sprinkle the sugar on while the glaze is wet, not set—this makes sure it sticks and gives that signature crunch.
- Bar Thickness: Don’t spread the batter too thin—aim for about 1-inch thickness. If your pan is bigger, adjust the bake time down.
- Multitasking: While bars bake, prep your glaze and set out cooling rack and knife. This saves time and makes the process feel smooth (and a bit pro!).
Honestly, the first time I tried these, I rushed things and ended up with a sticky mess. Now, I always cool the bars completely before glazing. If you want extras for later, double the batch and freeze half (the flavor actually gets richer). Little tricks like these make all the difference for maple donut bar success!
Variations & Adaptations
Love variety? Me too. This maple donut bars recipe is super flexible, so you can tweak it for just about any craving or dietary need. Here are a few of my favorite spins:
- Gluten-Free: Swap the all-purpose flour for your favorite gluten-free baking blend (I like King Arthur or Bob’s Red Mill). The texture stays fluffy—just check that your baking powder is GF.
- Dairy-Free: Use plant-based butter and almond or oat milk. The bars still rise beautifully and the flavor is spot on.
- Seasonal: Fold in 1/2 cup chopped toasted pecans or walnuts for autumn. In spring, add 1/2 cup fresh blueberries or raspberries for a fruity twist.
- Flavor Boost: Stir 1/2 teaspoon maple extract into the batter for extra punch, or sprinkle cinnamon-sugar over the glaze for cozy warmth.
- Different Cooking Methods: If you don’t want to bake in a pan, try muffin tins for individual maple donut “cups”—reduce bake time by about 8 minutes.
- Nut-Free Option: Skip any added nuts and use sunflower butter for richness if you like.
Honestly, my favorite riff was adding chopped candied bacon on top for a sweet-savory treat (don’t knock it till you try!). If your family likes things less sweet, cut the sugar in the batter by 2 tablespoons. These bars are forgiving, so experiment away!
Serving & Storage Suggestions
These maple donut bars taste best served at room temperature, with the glaze fully set and the sugar topping nice and crunchy. For parties, slice into bite-sized squares and pile high on a pretty platter—they look gorgeous with that shiny glaze sparkling under the light.
Pair with hot coffee, spiced chai, or even a cold glass of milk for the ultimate comfort combo. For brunch, I like to serve them alongside fresh fruit or scrambled eggs for balance. If you’re feeling extra, a scoop of vanilla ice cream on warm bars is pure heaven.
Storage: Keep the bars in an airtight container at room temperature for up to 3 days. For longer storage, refrigerate for up to 1 week (they stay moist!). You can also freeze unglazed bars for up to 2 months—thaw and glaze when ready to serve.
Reheating: Warm individual bars in the microwave for 10-12 seconds or in a low oven (300°F/150°C) for 5 minutes. The glaze may soften, but the flavor deepens over time. Honestly, they’re just as good (if not better) the next day!
Nutritional Information & Benefits
Here’s the scoop: each maple donut bar (based on 16 bars) has about 220 calories, 8g fat, 34g carbs, 2g protein, and 18g sugar. Not exactly “health food,” but you get a good dose of energy and some trace minerals from real maple syrup.
Key Health Benefits: Maple syrup is a natural sweetener with antioxidants and manganese. If you use whole wheat flour, you’ll sneak in extra fiber. Swap in plant-based milk for a lower cholesterol option.
Dietary Notes: Easily made gluten-free or dairy-free as mentioned above. Contains wheat, eggs, and dairy (so watch out for allergies). Enjoy as an occasional treat—these bars are all about balance and joy.
I always say: food should make you happy. These bars do just that!
Conclusion
If you’re searching for a dessert that’s easy, crowd-pleasing, and packed with cozy maple flavor, this maple donut bars recipe is your answer. The fluffy texture, rich glaze, and crunchy sugar topping make it a treat you’ll come back to again and again.
Don’t be afraid to tweak the recipe for your family’s favorites—swap in a different milk, add nuts, or make them gluten-free. That’s the beauty of baking at home! Personally, I love these bars because they remind me of family, tradition, and the joy of sharing something homemade.
Give this recipe a whirl, and let me know how it turns out. Share your variation in the comments, pin it on Pinterest, or tag me in your baking adventures. Here’s to sweet moments and fluffy maple donut bars—happy baking!
FAQs
Can I make maple donut bars ahead of time?
Absolutely! Bake the bars up to two days ahead, glaze and top with sugar just before serving for freshest crunch.
Can I use pancake syrup instead of real maple syrup?
You can, but the flavor won’t be as rich or authentic. Real maple syrup makes a big difference in taste and aroma.
What if I don’t have turbinado sugar for the topping?
Try demerara sugar or even regular granulated sugar. You’ll still get a nice crunch, though the sparkle will be a bit less pronounced.
How do I make these bars gluten-free?
Use a gluten-free all-purpose flour blend in place of regular flour. Make sure your baking powder is also gluten-free.
Can I freeze maple donut bars?
Yes! Freeze unglazed bars for up to two months. Thaw and glaze before serving for the best texture and flavor.
Pin This Recipe!
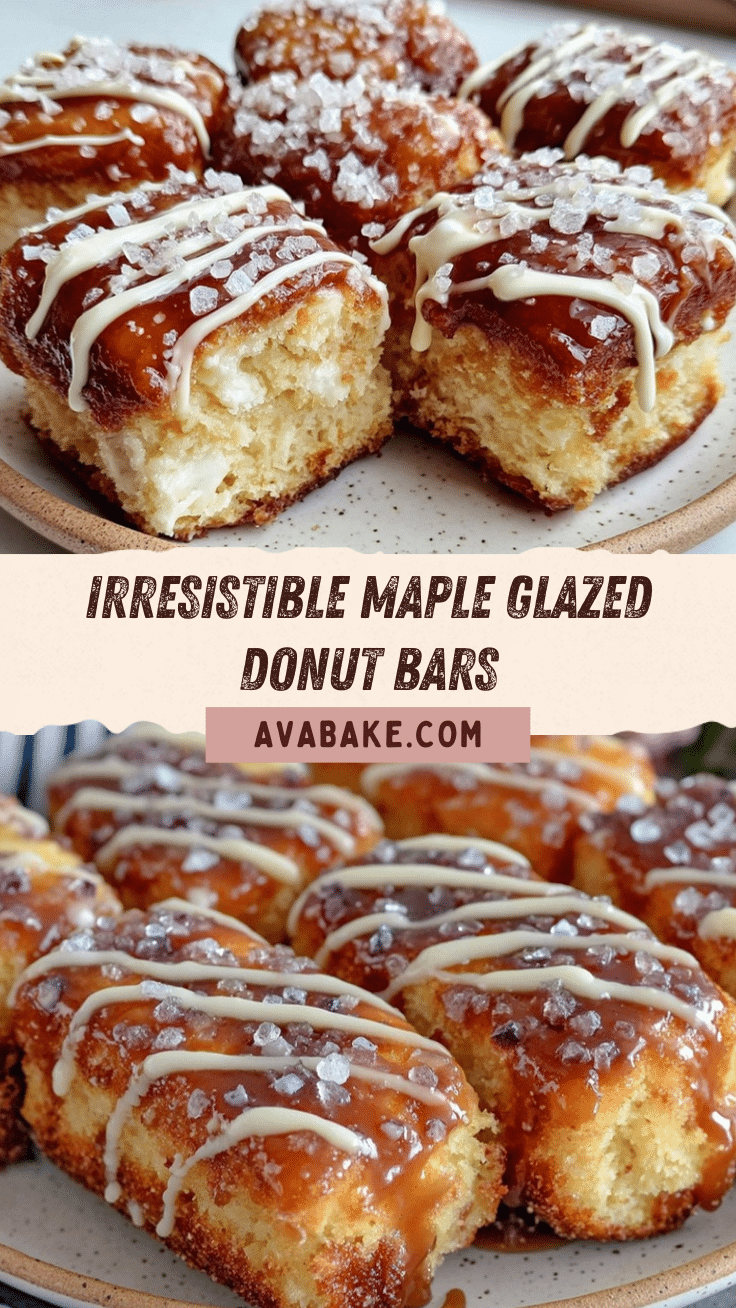
Maple Donut Bars Recipe – Easy Fluffy Treat with Glaze and Crunchy Sugar
These fluffy maple donut bars feature a tender, buttery dough, a rich maple glaze, and a crunchy sugar topping. Perfect for brunch, potlucks, or a cozy homemade dessert, they come together quickly and deliver nostalgic comfort in every bite.
- Prep Time: 15 minutes
- Cook Time: 25 minutes
- Total Time: 40 minutes
- Yield: 16 bars 1x
- Category: Dessert
- Cuisine: American
Ingredients
- 2 1/4 cups all-purpose flour (or gluten-free blend)
- 1 teaspoon baking powder
- 1/2 teaspoon baking soda
- 1/2 teaspoon salt
- 1/2 cup unsalted butter, softened
- 3/4 cup granulated sugar
- 2 large eggs, room temperature
- 1/2 cup pure maple syrup
- 1/2 cup whole milk (or almond/oat milk)
- 1 teaspoon vanilla extract
- 1 1/2 cups powdered sugar, sifted
- 1/4 cup pure maple syrup (for glaze)
- 2 tablespoons milk (for glaze)
- 1/2 teaspoon vanilla extract (for glaze)
- Pinch of salt (for glaze)
- 1/4 cup turbinado sugar or demerara sugar (for topping)
- Optional: Pinch of cinnamon (for topping)
Instructions
- Preheat oven to 350°F (175°C). Grease or line a 9×13-inch pan with parchment paper, leaving an overhang for easy lifting.
- In a medium bowl, whisk together flour, baking powder, baking soda, and salt until well combined.
- In a large bowl, beat softened butter and granulated sugar until light and fluffy (2-3 minutes with mixer, 4-5 minutes by hand).
- Beat in eggs one at a time, mixing well after each addition and scraping down the bowl.
- Add maple syrup, milk, and vanilla extract to the butter mixture; mix until just combined.
- Add dry ingredients to wet in two additions, folding gently with a spatula until no flour streaks remain. Do not overmix.
- Spread batter evenly into prepared pan and smooth the top. Tap pan lightly to remove air bubbles.
- Bake for 22-28 minutes, until golden and a toothpick comes out clean or with a few moist crumbs.
- Cool bars in pan for 10 minutes, then lift out and transfer to a wire rack to cool completely before glazing.
- For the glaze: In a bowl, whisk together powdered sugar, maple syrup, milk, vanilla, and a pinch of salt until smooth. Adjust consistency with more milk or sugar as needed.
- Pour glaze over cooled bars and spread evenly. Sprinkle turbinado sugar (and cinnamon, if using) over glaze while still wet.
- Allow glaze to set for 15-20 minutes. Slice into 16 bars using a serrated knife for neat edges.
Notes
For gluten-free bars, use a GF flour blend and check baking powder. For dairy-free, swap butter and milk for plant-based alternatives. Don’t overmix for fluffiest texture. Sprinkle sugar topping while glaze is wet for best crunch. Bars freeze well unglazed; thaw and glaze before serving.
Nutrition
- Serving Size: 1 bar
- Calories: 220
- Sugar: 18
- Sodium: 120
- Fat: 8
- Saturated Fat: 5
- Carbohydrates: 34
- Fiber: 1
- Protein: 2
Keywords: maple donut bars, maple glaze, brunch dessert, easy bar recipe, fluffy donut bars, maple syrup, potluck treat, bakery style bars, crunchy sugar topping


