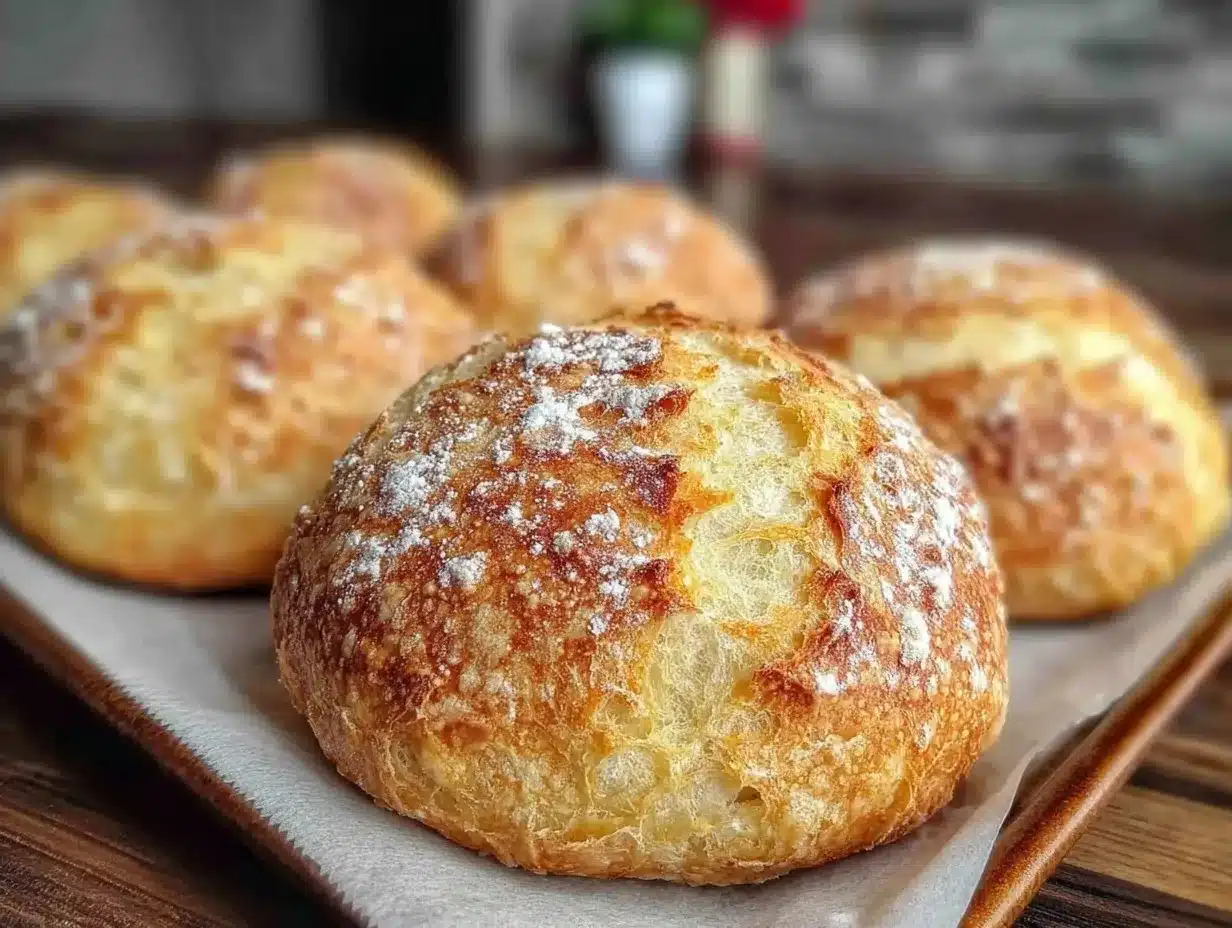
Let me tell you, the first time the aroma of freshly baked bread rolls – golden, warm, and a little sweet – filled my kitchen, I genuinely had to pause and just take it all in. The scent is like a comforting hug, all yeasty goodness and that hint of nostalgia you only get from homemade bread. You know, there’s something magical about seeing a tray of gluten-free bread rolls puffing up perfectly in the oven, especially when you’re used to dense, crumbly alternatives. The moment I tore one open and saw the soft, pillowy interior, I was instantly hooked. It’s the kind of moment where you pause, take a deep breath, and just smile because you know you’re onto something truly special.
Years ago, when I was knee-high to a grasshopper, my grandma used to make bread rolls for Sunday suppers, and I’d watch her hands move with practiced ease. Fast-forward to me, years later, standing in my own kitchen, determined to create gluten-free bread rolls that are just as fluffy and satisfying – honestly, I wish I’d figured this out sooner. It all started on a rainy weekend when my youngest asked for “the soft rolls like at school lunch, but gluten-free.” I’ll admit, it took a few tries (and a couple of flour explosions), but when my family couldn’t stop sneaking them off the cooling rack, I knew I’d cracked the code.
These rolls are dangerously easy, providing pure, nostalgic comfort with every bite. Perfect for potlucks, cozy dinners, or brightening up your Pinterest bread board, they fit right into busy routines and special occasions alike. Honestly, I’ve tested this recipe more times than I care to admit – in the name of research, of course. Now it’s become a staple for family gatherings and gifting. If you’re searching for fluffy gluten-free bread rolls that feel like home, you’re going to want to bookmark this one!
Why You’ll Love This Fluffy Gluten-Free Bread Rolls Recipe
If you’ve ever been disappointed by gluten-free breads that turn out dry, heavy, or just plain bland, you’re in for a treat. I’ve spent months testing and tweaking this recipe, pulling from my years as a bread-obsessed home baker and listening to feedback from my gluten-free family members. Trust me, these rolls deliver everything you want and more.
- Quick & Easy: Ready in under 1 hour, these rolls are perfect for busy weeknights, last-minute meal plans, or when the craving strikes out of nowhere.
- Simple Ingredients: No fancy flour blends needed – you probably have most of what you need in your kitchen right now.
- Perfect for Any Occasion: These are fantastic for brunch, potlucks, holiday dinners, or just as a cozy side for soup.
- Crowd-Pleaser: Even the gluten-eaters in my house ask for seconds. Kids love the softness, adults love the flavor.
- Unbelievably Delicious: The texture is light, airy, and just the right amount of chewy. You get that classic bread roll taste – you know, the kind that makes you close your eyes after the first bite.
What really sets this recipe apart? You’re not just substituting wheat flour and hoping for the best. The balance of starches, a touch of apple cider vinegar, and a clever proofing trick turn out rolls that are soft and fluffy – no weird aftertaste, no gritty texture. I mix in a bit of psyllium husk (trust me, it’s a game-changer for structure) and use a warm oven to help them puff up just right. Whether you’re gluten-free by choice or necessity, these rolls bring back all those comforting bread memories – but without any of the gluten worries.
This isn’t just another bread roll recipe. It’s the kind you’ll turn to when you want comfort food reimagined: healthier, easier, and every bit as satisfying. You can impress guests without stressing, or simply bring a little extra joy to a weekday dinner. After all, what’s better than sharing fluffy gluten-free bread rolls that actually taste like the real deal?
What Ingredients You Will Need
This recipe uses simple, wholesome ingredients to deliver bold flavor and a satisfying texture without the fuss. Most of these are pantry staples, and a few special touches make all the difference in achieving that fluffy rise. If you’ve got a well-stocked gluten-free shelf, you’re already halfway there!
- For the Dough:
- 2 cups (240g) gluten-free all-purpose flour blend (I recommend King Arthur or Bob’s Red Mill for best texture)
- 1/2 cup (60g) tapioca starch (adds chewiness)
- 1/4 cup (30g) potato starch (for softness)
- 1 tablespoon (8g) psyllium husk powder (helps bind and give structure – don’t skip it!)
- 2 tablespoons (25g) granulated sugar (for a touch of sweetness and feeding the yeast)
- 1 packet (7g) instant yeast (or 2 1/4 teaspoons)
- 1 teaspoon (5g) salt (fine sea salt works best)
- 1 cup (240ml) warm milk (use dairy-free milk if needed – almond, oat, or soy all work)
- 2 tablespoons (28g) unsalted butter, melted (or dairy-free alternative)
- 2 large eggs, room temperature (or 1/4 cup applesauce for egg-free)
- 1 tablespoon (15ml) apple cider vinegar (boosts rise and flavor)
- For Brushing:
- 1 tablespoon (14g) melted butter (optional, for a glossy finish)
Ingredient Tips: For the flour blend, make sure it has xanthan gum already included; otherwise, add 1 teaspoon per batch. Tapioca and potato starch really help with that fluffiness, so don’t swap these unless you have to. Psyllium husk is my secret weapon – if you can’t find it, ground flaxseed works in a pinch but won’t give quite the same pillowy texture.
Substitution Ideas: If you’re dairy-free, swap the milk and butter with your favorite plant-based versions. For egg-free rolls, applesauce or a flax egg (1 tablespoon ground flaxseed + 3 tablespoons water) does the trick, though the rolls will be slightly less airy. In summer, toss in a handful of fresh herbs or chives for a fun flavor boost – and if you’re out of potato starch, cornstarch is a decent stand-in.
Equipment Needed
Good news – you don’t need any fancy gadgets to whip up these fluffy gluten-free bread rolls. I’ve tried making them with all sorts of kitchen setups, and they turn out great every time.
- Mixing Bowls: At least two, preferably one large for the dough and a medium for whisking wet ingredients.
- Whisk and Wooden Spoon: For mixing and combining – a stand mixer with a paddle attachment makes it even easier, but isn’t necessary.
- Baking Sheet or 9-inch (23cm) Round Cake Pan: Both work well. The pan gives you pull-apart rolls, while the sheet makes crustier edges.
- Measuring Cups and Spoons: Accuracy really helps with gluten-free baking, so don’t eyeball it!
- Kitchen Scale: Optional, but I swear by it for consistent results (especially with gluten-free flours).
- Pastry Brush: For brushing melted butter on top.
- Clean Kitchen Towel or Plastic Wrap: To cover the rolls while rising.
If you don’t have a stand mixer, a sturdy wooden spoon and a bit of elbow grease will do just fine. I’ve had success with budget baking sheets and pans; just check they’re not warped for even baking. To keep specialty tools (like a kitchen scale) running smoothly, wipe them down after each use and store in a dry spot. Honestly, the most important equipment is your hands – and a bit of patience!
How to Make Fluffy Gluten-Free Bread Rolls
Ready to bake? Here’s my step-by-step method for fluffy gluten-free bread rolls. I’ve included plenty of little notes learned from trial and error – trust me, these make all the difference!
- Prep the Ingredients: Measure out all your ingredients before you start. Warm the milk to about 110°F (43°C) – it should feel just warm, not hot. Melt the butter and let it cool slightly.
- Mix Dry Ingredients: In a large bowl, whisk together the gluten-free flour blend, tapioca starch, potato starch, psyllium husk, sugar, yeast, and salt. Make sure everything is evenly combined – no lumps!
- Combine Wet Ingredients: In a separate bowl, whisk the warm milk, melted butter, eggs, and apple cider vinegar until smooth. If using an egg substitute, whisk it in here.
- Form the Dough: Pour the wet ingredients into the dry mix. Stir with a wooden spoon or paddle attachment (if using a stand mixer) until no streaks remain. The dough will look sticky and shaggy – that’s normal for gluten-free!
- Knead & Rest: If mixing by hand, use the spoon or your hands to knead until everything comes together – about 2-3 minutes. The dough should feel soft and slightly tacky, but not runny. If it’s too dry, add a tablespoon of milk; too wet, sprinkle in a bit more flour blend.
- Shape the Rolls: Lightly oil your hands. Divide the dough into 8 equal pieces (about 85g each) and roll into balls. Place them on a greased baking sheet or snugly in a cake pan.
- Proof the Dough: Cover with a clean towel or plastic wrap. Let rise in a warm spot (like inside a turned-off oven with the light on) for 30-40 minutes, until puffed and almost doubled in size. They won’t rise quite as much as wheat rolls, but should look plump and soft.
- Preheat the Oven: While rolls are proofing, preheat your oven to 375°F (190°C).
- Bake: Remove cover and brush tops with melted butter for extra flavor and browning. Bake for 18-22 minutes, until golden brown and they sound hollow when tapped. If they’re browning too quickly, tent with foil for the last 5 minutes.
- Cool: Let the rolls cool for 10 minutes in the pan, then transfer to a wire rack. They’ll feel slightly soft at first but firm up as they cool.
Troubleshooting: If the dough feels too wet, add a tablespoon of flour at a time. If it’s dry, a splash of milk helps. Rolls too dense? Check your yeast freshness and proofing time. If they spread too much, you may need a touch more psyllium husk next time.
Efficiency Tip: I usually prep the dough and shape the rolls while preheating the oven – multitasking saves time! Let the shaped rolls proof right on the pan for easy transfer. And don’t be shy about getting your hands a little sticky – it’s part of the fun.
Cooking Tips & Techniques for Success
Let’s face it – gluten-free baking has its quirks. Here’s what I’ve learned through a lot of trial and error (and a few bread roll flops):
- Don’t Rush the Proof: Gluten-free doughs need a little extra time to rise, especially if your kitchen is chilly. I use my oven’s light as a gentle warmer.
- Use Psyllium Husk: It’s essential for structure and helps trap steam, creating fluffy interiors. I learned the hard way – my first batch without it was more like crackers!
- Measure Precisely: Gluten-free flours can be finicky. Weighing your ingredients gives more consistent results than measuring by cup.
- Don’t Overbake: Rolls go from perfect to dry in a flash. Start checking at the 18-minute mark. A little softness is good – they’ll set as they cool.
- For Even Baking: Arrange rolls so they’re just touching in the pan for soft sides, or spaced apart on a sheet for crustier edges.
- Egg-Free Adjustments: If skipping eggs, expect rolls to be slightly less airy. Adding a pinch more psyllium husk helps compensate.
- Multitasking: Mix the dough while your oven preheats, and clean up while the rolls proof. Keeps you ahead!
I’ve burned, undercooked, and flattened more gluten-free rolls than I care to admit. If you’re worried about rise, double-check your yeast – old yeast is a sneaky culprit for dense bread. And if you’re new to gluten-free, remember: the dough will always look stickier and softer than wheat dough. It’s normal (I promise)!
Consistency comes with repetition. Take notes on what works in your kitchen – humidity, flour brands, oven quirks. Every batch gets better, and honestly, it’s part of the journey. Stick with it, and you’ll be baking fluffy gluten-free bread rolls like a pro in no time.
Variations & Adaptations
One of the best things about these gluten-free bread rolls is how easy they are to customize. Whether you’re changing up flavors or adapting for dietary needs, here are a few tried-and-true ideas:
- Dairy-Free: Swap the milk and butter with unsweetened almond or oat milk, and use vegan butter. I’ve done this for friends, and nobody could tell the difference!
- Herbed Rolls: Add 2 tablespoons of chopped fresh herbs (like rosemary, thyme, or chives) to the dough for a savory twist. Perfect for pairing with soups or salads.
- Seeded Rolls: Sprinkle sesame, poppy, or sunflower seeds on top before baking for extra crunch and nutrition.
- Sweet Breakfast Rolls: Stir in 1/4 cup dried cranberries or raisins, and brush with honey for a breakfast treat. My kids love these with a smear of jam.
- Low-Carb Option: Substitute 1/2 cup almond flour for 1/2 cup of the all-purpose blend. Rolls will be slightly denser but still delicious.
- Egg-Free: Use a flax egg or applesauce as noted before. Works well, especially if you add a pinch more psyllium husk.
If you want to bake these in a muffin tin, you’ll get mini rolls with crisp edges (great for lunchboxes). For a cheesy twist, mix in 1/2 cup shredded cheese – cheddar or parmesan are my favorites. I’ve even tried a version with a swirl of pesto, which was a hit at a summer picnic. Don’t be afraid to experiment – the dough is forgiving, and you might just stumble onto your new favorite combo!
Serving & Storage Suggestions
I love serving these fluffy gluten-free bread rolls warm from the oven, with a pat of butter melting into each bite. They’re perfect alongside hearty stews, fresh salads, or even as a base for little sandwiches. If you’re hosting brunch, arrange them in a bread basket lined with a colorful towel – it looks so inviting!
For the ultimate comfort, serve with a bowl of tomato soup or creamy potato leek soup. A mug of herbal tea or a crisp apple cider pairs beautifully, too. If you’re planning ahead, these rolls hold up well for a couple days.
- Room Temperature: Store in an airtight container for up to 2 days. They’ll stay soft and fresh.
- Refrigerator: Keep for up to 5 days. Let them come to room temperature or warm gently in the oven before serving.
- Freezer: Freeze rolls individually wrapped for up to 2 months. Thaw overnight and reheat at 350°F (175°C) for 8-10 minutes.
As the rolls sit, the flavors deepen and the texture remains satisfying. I find that a quick warm-up in the oven brings back that “just-baked” magic. For leftover rolls, slice and toast for sandwiches or breakfast with jam. It’s honestly hard to keep them around long enough to worry about storage!
Nutritional Information & Benefits
Each fluffy gluten-free bread roll (based on 8 per batch) is approximately:
- Calories: 160
- Protein: 4g
- Carbs: 28g
- Fat: 4g
- Fiber: 2g
- Sugar: 3g
These rolls are naturally gluten-free, making them a safe and tasty option for those with celiac disease or gluten sensitivities. Psyllium husk adds a bit of fiber, while the combination of starches keeps the carb count reasonable for bread. With dairy-free and egg-free options, it’s easy to make them fit most dietary needs. Just a heads-up: if you use almond flour or add seeds, you’ll boost the protein and healthy fat content. Main allergens to watch for include dairy and eggs (if using the original recipe), so always double-check your substitutions.
From my personal wellness journey, these bread rolls feel lighter and easier to digest than traditional wheat rolls. Everyone deserves fluffy, delicious bread – and with these, you can enjoy every bite without worry!
Conclusion – Fluffy Gluten-Free Bread Rolls Worth Baking
If you’ve been searching for gluten-free bread rolls that are truly fluffy, soft, and full of classic bread flavor, this recipe is absolutely worth a try. I love how easy it is to customize, whether you’re baking for a crowd or just want a little homemade comfort on a Tuesday night. There’s something special about pulling a tray of golden rolls from the oven and watching everyone reach for seconds (or thirds!).
Don’t be afraid to make these your own – swap in your favorite herbs, go dairy-free, or shape as mini rolls for a fun twist. Honestly, I make these at least once a week, and they never last long in my house. If homemade bread feels intimidating, this recipe is your friendly gateway.
Give these fluffy gluten-free bread rolls a shot, and let me know how they turn out! Share your adaptations, tag your photos, or leave a comment below – I love seeing how others make this recipe their own. Happy baking, and may your kitchen always smell this good!
FAQs – Fluffy Gluten-Free Bread Rolls
Can I make these rolls without eggs?
Absolutely! Substitute 1/4 cup applesauce or use a flax egg (1 tablespoon ground flaxseed + 3 tablespoons water). Your rolls will still be soft, just a bit less airy.
What gluten-free flour blend works best?
I recommend King Arthur or Bob’s Red Mill gluten-free all-purpose blends. Look for one with xanthan gum included for best results.
How do I know when the rolls are fully baked?
The rolls should be golden brown and sound hollow when tapped. Start checking at 18 minutes; if they’re browning too fast, tent with foil.
Can I freeze these bread rolls?
Yes, you can freeze them! Wrap each roll individually and keep for up to 2 months. Reheat at 350°F (175°C) for 8-10 minutes for that fresh-baked taste.
Why did my rolls turn out dense?
Dense rolls usually mean the yeast wasn’t active enough or the dough didn’t proof long enough. Check your yeast freshness and let the rolls rise until they look puffy.
Pin This Recipe!
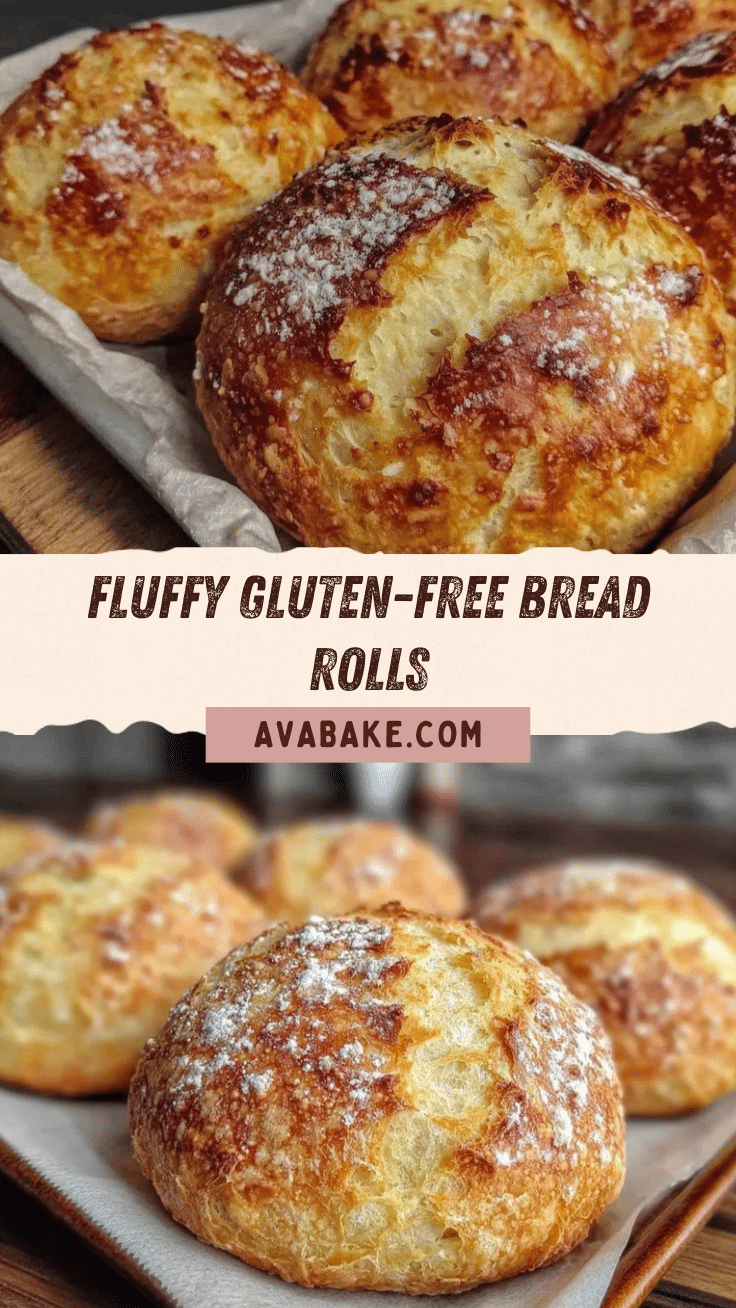
Fluffy Gluten-Free Bread Rolls
These homemade gluten-free bread rolls are soft, pillowy, and golden, with a comforting aroma and classic bread flavor. Easy to make in under an hour, they’re perfect for family dinners, potlucks, or cozy weeknight meals.
- Prep Time: 20 minutes
- Cook Time: 20 minutes
- Total Time: 1 hour
- Yield: 8 rolls 1x
- Category: Bread
- Cuisine: American
Ingredients
- 2 cups (240g) gluten-free all-purpose flour blend (with xanthan gum, e.g., King Arthur or Bob’s Red Mill)
- 1/2 cup (60g) tapioca starch
- 1/4 cup (30g) potato starch
- 1 tablespoon (8g) psyllium husk powder
- 2 tablespoons (25g) granulated sugar
- 1 packet (7g) instant yeast (or 2 1/4 teaspoons)
- 1 teaspoon (5g) salt (fine sea salt)
- 1 cup (240ml) warm milk (or dairy-free milk: almond, oat, or soy)
- 2 tablespoons (28g) unsalted butter, melted (or dairy-free alternative)
- 2 large eggs, room temperature (or 1/4 cup applesauce for egg-free)
- 1 tablespoon (15ml) apple cider vinegar
- 1 tablespoon (14g) melted butter (optional, for brushing)
Instructions
- Measure out all ingredients. Warm the milk to about 110°F (43°C). Melt the butter and let it cool slightly.
- In a large bowl, whisk together gluten-free flour blend, tapioca starch, potato starch, psyllium husk, sugar, yeast, and salt until evenly combined.
- In a separate bowl, whisk together warm milk, melted butter, eggs, and apple cider vinegar until smooth. If using egg substitute, whisk it in here.
- Pour wet ingredients into dry mix. Stir with a wooden spoon or paddle attachment until no streaks remain. Dough will be sticky and shaggy.
- Knead by hand or with a spoon for 2-3 minutes until dough comes together and feels soft and slightly tacky. Adjust with milk or flour blend if needed.
- Lightly oil hands. Divide dough into 8 equal pieces (about 85g each) and roll into balls. Place on a greased baking sheet or snugly in a cake pan.
- Cover with a clean towel or plastic wrap. Let rise in a warm spot for 30-40 minutes, until puffed and almost doubled in size.
- Preheat oven to 375°F (190°C) while rolls are proofing.
- Remove cover and brush tops with melted butter. Bake for 18-22 minutes, until golden brown and hollow-sounding when tapped. Tent with foil if browning too quickly.
- Cool rolls for 10 minutes in the pan, then transfer to a wire rack. Rolls will firm up as they cool.
Notes
For best results, use a gluten-free flour blend with xanthan gum. Psyllium husk is essential for structure; ground flaxseed can substitute but won’t be as fluffy. Proof dough in a warm spot for optimal rise. Rolls can be customized with herbs, seeds, or dried fruit. For dairy-free or egg-free, use plant-based milk/butter and applesauce or flax egg. Store at room temperature for 2 days, refrigerate for 5 days, or freeze for up to 2 months.
Nutrition
- Serving Size: 1 roll
- Calories: 160
- Sugar: 3
- Sodium: 220
- Fat: 4
- Saturated Fat: 2
- Carbohydrates: 28
- Fiber: 2
- Protein: 4
Keywords: gluten-free bread rolls, fluffy bread, homemade rolls, easy gluten-free baking, dairy-free option, egg-free bread, soft gluten-free rolls, comfort food, potluck bread, baking guide


