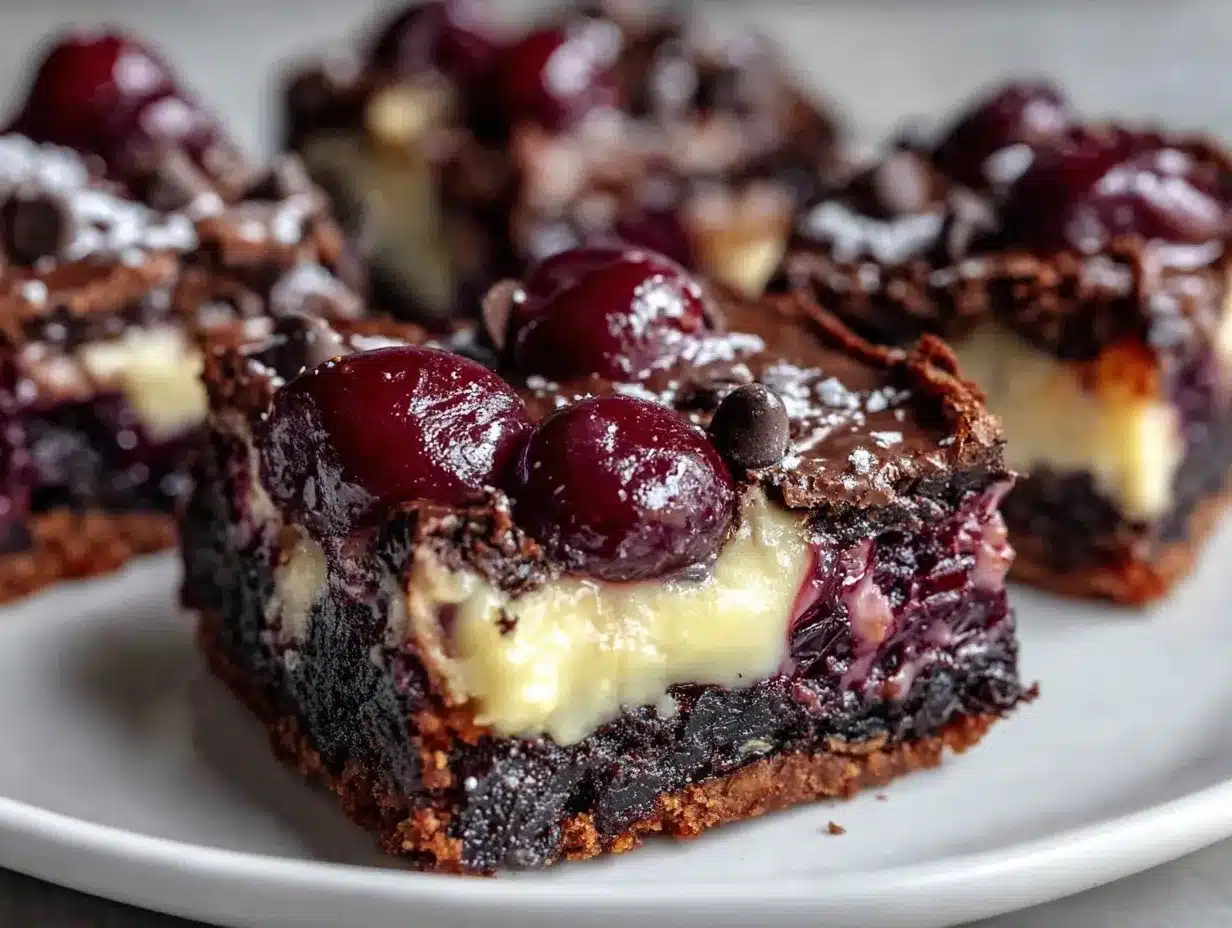
Let me just say—when the smell of rich chocolate, sweet cherries, and buttery graham crackers drifts through my kitchen, the whole house practically stops in its tracks. There’s something about the gooey, creamy layers of these Chocolate Covered Cherry Magic Bars that grabs your senses and won’t let go. The first time I made these bars, I remember pulling them from the oven and watching the silky chocolate melt and mingle with the ruby-red cherries—pure, nostalgic comfort. Honestly, I was instantly hooked, and so was everyone who walked through my front door that day.
These bars remind me of those old-fashioned holiday trays my grandma used to make when I was knee-high to a grasshopper. She’d have a rainbow of treats, but the ones with chocolate and cherries always disappeared first. I stumbled onto this recipe during a rainy weekend, trying to recreate those flavors with a modern twist—something dangerously easy but still irresistibly decadent. You know what? I wish I’d discovered this combo years ago!
From the first batch, my family couldn’t stop sneaking pieces right off the cooling rack (and I can’t really blame them). There’s always that one kid who tries to claim the corner piece with the most chocolate drizzle. These magic bars have become a staple for gatherings, bake sales, and sweet gifts—because they just feel like a warm hug in dessert form. And, let’s face it, if you want to brighten up your Pinterest dessert board or show off at a potluck, these are your ticket.
After testing (okay, taste-testing) this recipe more times than I care to admit—in the name of research, of course—I can promise you’re going to want to bookmark this one. It’s the kind of dessert people ask for again and again, and honestly, it never gets old.
Why You’ll Love This Recipe
If you’re anything like me, you want dessert recipes that deliver huge flavor with minimum fuss. These Chocolate Covered Cherry Magic Bars are a total game changer. I’ve tinkered with countless bar recipes, but this one stands out every single time.
- Quick & Easy: Comes together in under 15 minutes of prep—just layer, bake, and let the oven work its magic. No fancy techniques needed!
- Simple Ingredients: You probably already have everything on hand—think pantry staples like graham crackers, sweetened condensed milk, and chocolate chips. No wild grocery hunts required.
- Perfect for Any Occasion: These bars shine at potlucks, holiday parties, after-school treats, or just as a cozy weekend bake. They’re a Pinterest-worthy showstopper.
- Crowd-Pleaser: Whether it’s picky kids or chocolate-loving adults, these bars always get rave reviews. I’ve even had neighbors request them for birthdays!
- Unbelievably Delicious: The layers of chocolate, creamy condensed milk, and tangy cherries create a flavor combo that’s pure comfort food—but with a little extra drama.
Here’s what makes this recipe different: I use a blend of semi-sweet and dark chocolate for a richer taste, plus a sprinkle of sea salt that brings out the flavors. The cherry layer is made with whole, tart cherries (not just the syrupy canned stuff), and the creamy condensed milk holds everything together in luscious, gooey perfection. It’s not just another magic bar—it’s my best version, born from trial, error, and a few happy accidents along the way.
Honestly, these bars are that “close your eyes and savor” kind of treat. They’re comfort food reimagined—quick, a little healthier thanks to the real fruit, and just as satisfying as grandma’s secret stash. Whether you want to impress guests with almost zero stress or just give yourself a sweet moment of joy, these bars are your go-to. Trust me, you’ll be making them again and again.
What Ingredients You Will Need
This recipe uses simple, wholesome ingredients to deliver bold flavor and that crave-worthy, creamy texture—no complicated steps or exotic products. You can find almost everything in your pantry or local store, and I’ve included easy substitutions for dietary needs or personal preferences.
- For the base:
- 2 cups (200g) graham cracker crumbs (classic base—use gluten-free if needed)
- 1/2 cup (115g) unsalted butter, melted (adds richness and helps bind the crust)
- 1/4 cup (50g) brown sugar (for a deeper, molasses-like sweetness)
- For the creamy layer:
- 1 (14 oz / 396g) can sweetened condensed milk (the “magic” glue that brings everything together)
- For the chocolate layer:
- 1 cup (175g) semi-sweet chocolate chips (I love Ghirardelli for meltiness)
- 1/2 cup (90g) dark chocolate chips (for extra depth—swap for milk chocolate if you prefer)
- For the cherry layer:
- 1 cup (150g) dried tart cherries (I recommend Montmorency cherries for bold flavor)
- 1/2 cup (120g) maraschino cherries, drained and chopped (for color and sweetness—use more if you love cherry!)
- For the creamy topping:
- 1/2 cup (120ml) heavy cream (optional, whipped for a finishing swirl)
- 1/4 cup (30g) slivered almonds (adds crunch—skip if nut-free)
- Pinch of flaky sea salt (brings out all the flavors—don’t skip!)
Ingredient Tips: If you want to go dairy-free, substitute coconut condensed milk and use vegan chocolate chips. For a gluten-free option, swap in almond flour or gluten-free graham crackers. You can also use frozen cherries—just thaw and drain well. I’ve tried this with dark sweet cherries too, and it’s a whole new vibe.
Honestly, the best thing about these magic bars is how flexible they are. Got a nut allergy? Skip the almonds! Want something even richer? Add a layer of white chocolate chips. You can really make it your own, and that’s what keeps me coming back for more.
Equipment Needed
You don’t need a fancy kitchen to make Chocolate Covered Cherry Magic Bars—just a few reliable tools. I’ve made these bars with everything from my grandma’s old Pyrex dish to a shiny new nonstick pan, and each one has its own charm.
- 9×13-inch (23×33 cm) baking pan (glass or metal—glass gives a softer crust, metal makes it a bit crisper)
- Parchment paper or nonstick spray (for easy release—it’s a lifesaver, trust me)
- Medium mixing bowl (for stirring the crust and toppings)
- Small saucepan (for melting butter—microwave works too)
- Measuring cups and spoons (accuracy matters!)
- Spatula (for even spreading)
- Sharp knife (for chopping cherries and slicing bars)
If you don’t have a 9×13 pan, you can use two 8×8 pans or even a rimmed baking sheet. Just watch the baking time—it’ll cook faster in a shallower pan. For cleaning up sticky condensed milk, I use a silicone spatula—it doesn’t cling to the gooey stuff as much. And if you’re on a budget, you can find great pans at thrift stores or dollar shops—no need to break the bank on equipment.
One tip: Keep parchment paper handy. It makes lifting and slicing so much easier. If you use a metal pan, give it a quick swipe with nonstick spray for good measure. Maintenance-wise, just soak pans with stuck-on chocolate overnight; it’ll wipe clean the next day (learned that the hard way!).
Preparation Method
-
Prepare your pan: Line a 9×13-inch (23×33 cm) baking pan with parchment paper, leaving a slight overhang for easy lifting. Preheat your oven to 350°F (175°C).
Note: Parchment makes cleanup a breeze and helps prevent sticking. -
Make the crust: In a medium bowl, combine 2 cups (200g) graham cracker crumbs, 1/2 cup (115g) melted butter, and 1/4 cup (50g) brown sugar. Stir until the mixture looks like wet sand.
Sensory cue: The crust should feel moist and hold together when pressed. If it’s too dry, add a splash more melted butter. -
Press the crust: Pour the mixture into your prepared pan. Use a spatula or the bottom of a measuring cup to press it firmly into an even layer.
Tip: Don’t leave gaps—press into the corners! -
Add creamy layer: Drizzle 1 can (14 oz/396g) sweetened condensed milk evenly over the crust.
Warning: Pour slowly so it doesn’t pool in one spot. It should cover the crust like a thick blanket. -
Layer the chocolate: Sprinkle 1 cup (175g) semi-sweet chocolate chips and 1/2 cup (90g) dark chocolate chips over the condensed milk. Spread evenly.
Troubleshooting: If chips clump, gently spread with a spatula. -
Layer the cherries: Scatter 1 cup (150g) dried tart cherries and 1/2 cup (120g) chopped maraschino cherries over the chocolate.
Sensory cue: You want bright pops of red throughout—don’t let all the cherries pile up in one corner! -
Top and finish: Sprinkle 1/4 cup (30g) slivered almonds and a pinch of flaky sea salt across the top. If using, dollop whipped cream (1/2 cup/120ml, whipped) in scattered swirls.
Tip: The almonds will toast as the bars bake, adding nutty flavor. -
Bake: Slide the pan into your preheated oven and bake for 25-30 minutes, until the edges are golden and the center is set but still a little wobbly.
Sensory cue: You’ll smell sweet cherries and chocolate mingling—trust your nose! -
Cool: Let the bars cool in the pan for at least 1 hour. For best slicing, chill in the refrigerator for another hour.
Warning: If you slice too soon, the layers may slide. Patience pays off here. -
Slice and serve: Lift the bars from the pan using the parchment overhang. Use a sharp knife to cut into squares or rectangles.
Efficiency tip: Wipe your knife between cuts for clean edges.
These steps make sure every bite is creamy, chocolatey, and loaded with cherry goodness. If your bars turn out crumbly, double-check the butter in your crust. Too gooey? Chill a bit longer. The first batch I made was a mess—sticky hands, crumbly bits, but worth every bite!
Cooking Tips & Techniques
After making these Chocolate Covered Cherry Magic Bars more times than I can count, I’ve picked up a few tricks that make them foolproof. Here’s what I wish I’d known from the start:
- Layering matters: Pour the condensed milk slowly and evenly. Rushing this step can cause uneven baking and gooey pockets. (Been there!)
- Don’t overbake: The bars should be just set in the center when you pull them out. If you wait for a totally firm center, they’ll be dry once cooled.
- Chill for clean cuts: Slicing warm bars is tempting, but chilling helps the layers firm up for those Pinterest-perfect squares.
- Multitasking tip: Prep your toppings while the crust is baking, if you want to toast the almonds separately for an extra crunch.
- Use good chocolate: Better chocolate chips melt smoother and taste richer. I learned that the hard way using off-brand chips that turned grainy.
- Prevent sticking: Parchment paper is your friend. If you forget it, let the pan cool and use a thin spatula to loosen edges.
- Adjust for altitude: If you’re baking at high altitude, reduce baking time by 2-3 minutes to avoid dry bars.
Honestly, I’ve burned a batch or two by getting distracted (kids, pets, you name it), but a little attention makes all the difference. Keep an eye on the edges—they should be golden, not dark brown. For consistent results, weigh your ingredients where possible. And don’t be afraid to tweak the cherry-to-chocolate ratio—sometimes I double the cherries for extra tang!
Variations & Adaptations
One of the best parts of this recipe is how easy it is to make it your own. Here are a few of my favorite tweaks for different tastes and dietary needs:
- Gluten-Free: Swap graham cracker crumbs for almond flour or certified gluten-free cookie crumbs. You won’t miss the wheat—promise!
- Nut-Free: Leave out the almonds and add toasted coconut flakes for crunch. Safe for allergies and just as delicious.
- Vegan: Use coconut condensed milk and vegan chocolate chips. Substitute plant-based butter and skip the cream topping.
- Seasonal Twist: In summer, swap in fresh pitted cherries or raspberries for the dried cherries. This adds juicy bursts of flavor.
- Flavor Boost: Mix in white chocolate chips or swirl a little cherry jam on top before baking for extra punch.
- Cooking Method: For a firmer bar, bake in a metal pan. For softer, cake-like bars, use glass and reduce baking time by 2 minutes.
I’ve tried tossing in chopped pecans and even a splash of almond extract—it gives the bars a cherry-almond cookie vibe. If you love extra chocolate, drizzle melted chocolate on top after baking. These bars are a canvas for creativity, and every batch is a little different (in the best way).
Serving & Storage Suggestions
These Chocolate Covered Cherry Magic Bars taste best slightly chilled, which firms up the creamy layers and keeps the chocolate snappy. Serve them straight from the fridge, sliced into neat squares. For presentation, arrange on a pretty platter (or stack them high for that irresistible Pinterest look).
Pair with a cold glass of milk, hot coffee, or even a scoop of vanilla ice cream for true decadence. For parties, I like to garnish with extra cherries or a dusting of cocoa powder.
To store, keep bars in an airtight container in the refrigerator for up to 5 days—they taste even better after a day or two as the flavors mingle. For longer storage, freeze individual bars between layers of wax paper, and thaw at room temperature for about 30 minutes before serving. Reheat gently in the microwave if you want a gooey, melty treat (just 10 seconds per piece does the trick).
Tip: Over time, the cherry flavor deepens and the layers meld for extra richness. Honestly, hiding a few bars in the back of the freezer is my secret weapon for late-night cravings!
Nutritional Information & Benefits
Each serving (about 1 bar) packs approximately 220 calories, 4g protein, 9g fat, and 30g carbohydrates. The dried cherries offer antioxidants and a punch of vitamin C, while the dark chocolate brings in flavonoids for heart health. Almonds add healthy fats and a little protein boost.
Dietary notes: These bars can be made gluten-free and nut-free with simple swaps. They do contain dairy (condensed milk, chocolate chips), so if you need a dairy-free version, use coconut condensed milk and vegan chips. Be aware that maraschino cherries sometimes contain red dye, so opt for natural brands if you’re sensitive.
From a wellness perspective, I love that you can control the sugar and make these bars with wholesome ingredients. They’re a treat, for sure, but with real fruit and nuts, you’re getting a little goodness in every bite. (Just don’t ask me to count how many I’ve eaten in one sitting!)
Conclusion
If you’re looking for a dessert that’s decadent, easy, and guaranteed to impress, these Chocolate Covered Cherry Magic Bars are the answer. They mix nostalgia with modern ease, and every bite is a sweet, creamy hug that brightens your day. Whether you’re baking for a crowd, gifting to friends, or just treating yourself, these bars are pure magic.
Customize them any way you like—swap, tweak, and add your own twist. That’s the joy of home baking! Personally, I love how these bars bring people together and spark those little moments of joy around the table.
If you try this recipe, leave a comment below and let me know your favorite variation. Share with friends, pin to your dessert board, or post your own creative adaptations. I can’t wait to hear how these bars light up your kitchen. Happy baking—and save me a piece!
FAQs
Can I use fresh cherries instead of dried or maraschino cherries?
Yes! Just pit and chop fresh cherries, and drain any excess juice. The bars may be a little softer, but the flavor is incredible.
How do I make these bars gluten-free?
Swap graham cracker crumbs for almond flour, gluten-free cookie crumbs, or gluten-free graham crackers. The texture will still be delicious.
Can I freeze Chocolate Covered Cherry Magic Bars?
Absolutely. Slice and freeze the bars between layers of wax paper in an airtight container. Thaw at room temperature before serving.
What if I don’t have sweetened condensed milk?
You can use coconut condensed milk for a dairy-free option, or make your own by simmering milk and sugar until thick and sweet.
Can I add other mix-ins, like coconut or nuts?
Definitely! Toasted coconut, chopped pecans, or even white chocolate chips make great additions. Just sprinkle them on before baking for extra texture and flavor.
Pin This Recipe!
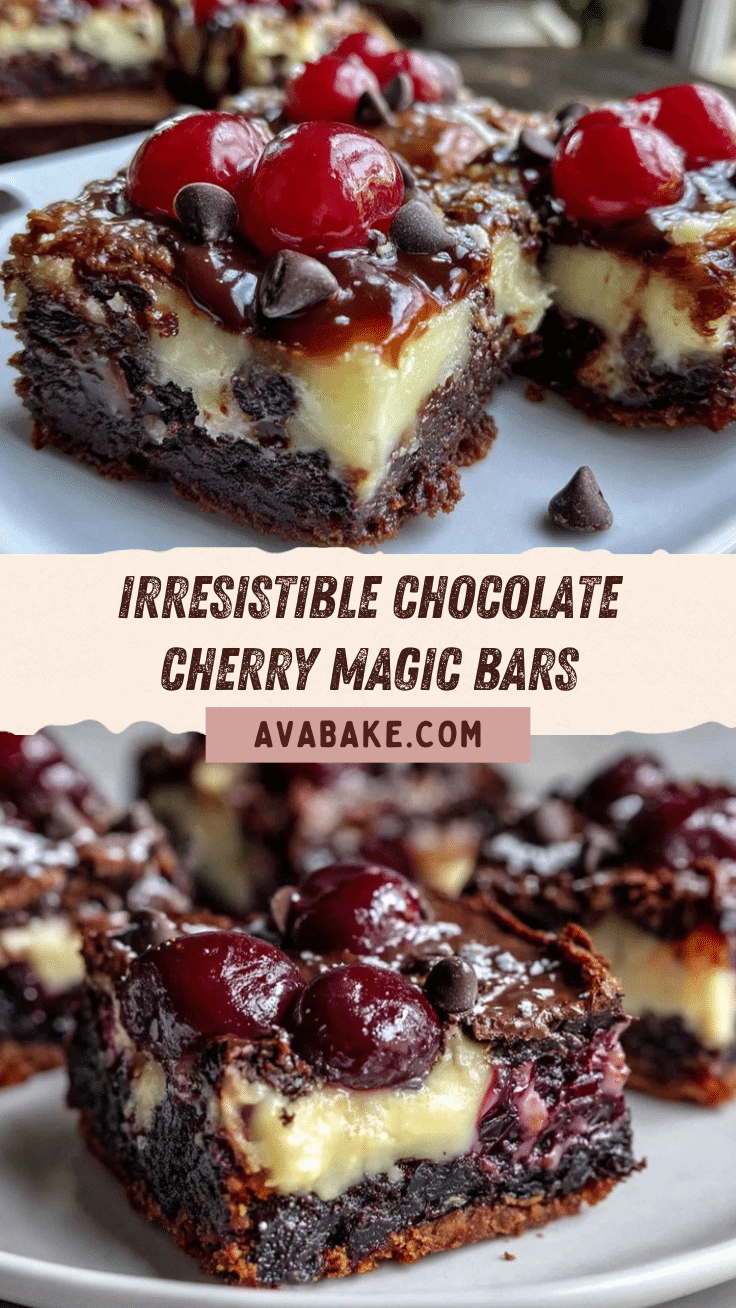
Chocolate Covered Cherry Magic Bars

Chocolate Covered Cherry Magic Bars are a decadent layered dessert featuring a buttery graham cracker crust, creamy condensed milk, rich chocolate chips, and tangy cherries. These easy-to-make bars are perfect for gatherings, bake sales, or a cozy treat at home.
- Prep Time: 15 minutes
- Cook Time: 25-30 minutes
- Total Time: 1 hour 45 minutes
- Yield: 16 bars 1x
- Category: Dessert
- Cuisine: American
Ingredients
- 2 cups graham cracker crumbs
- 1/2 cup unsalted butter, melted
- 1/4 cup brown sugar
- 1 (14 oz) can sweetened condensed milk
- 1 cup semi-sweet chocolate chips
- 1/2 cup dark chocolate chips
- 1 cup dried tart cherries
- 1/2 cup maraschino cherries, drained and chopped
- 1/2 cup heavy cream (optional, whipped for topping)
- 1/4 cup slivered almonds
- Pinch of flaky sea salt
Instructions
- Line a 9×13-inch baking pan with parchment paper, leaving an overhang for easy lifting. Preheat oven to 350°F (175°C).
- In a medium bowl, combine graham cracker crumbs, melted butter, and brown sugar. Stir until mixture resembles wet sand.
- Press the crust mixture firmly and evenly into the prepared pan.
- Drizzle sweetened condensed milk evenly over the crust.
- Sprinkle semi-sweet and dark chocolate chips evenly over the condensed milk.
- Scatter dried tart cherries and chopped maraschino cherries over the chocolate layer.
- Sprinkle slivered almonds and a pinch of flaky sea salt on top. If using, dollop whipped cream in scattered swirls.
- Bake for 25-30 minutes, until edges are golden and center is set but slightly wobbly.
- Cool in the pan for at least 1 hour, then chill in the refrigerator for another hour for best slicing.
- Lift bars from the pan using the parchment overhang and slice into squares or rectangles with a sharp knife.
Notes
For gluten-free bars, use gluten-free graham crackers or almond flour. For nut-free, omit almonds or substitute toasted coconut. Chill bars before slicing for clean edges. Use quality chocolate chips for best flavor and texture. Bars can be frozen for up to 2 months.
Nutrition
- Serving Size: 1 bar
- Calories: 220
- Sugar: 20
- Sodium: 90
- Fat: 9
- Saturated Fat: 5
- Carbohydrates: 30
- Fiber: 2
- Protein: 4
Keywords: chocolate cherry bars, magic bars, layered dessert, easy dessert, holiday baking, potluck dessert, cherry chocolate recipe


