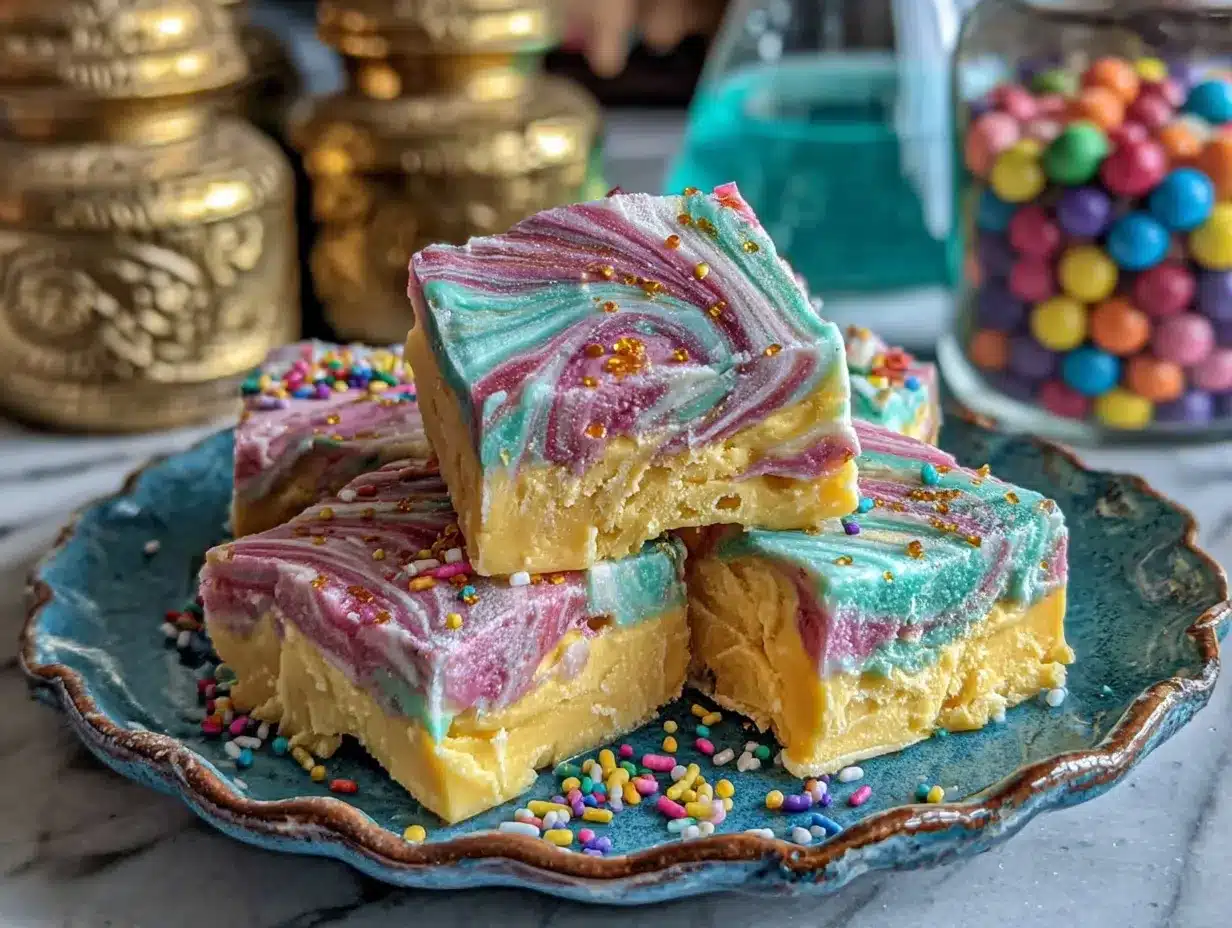
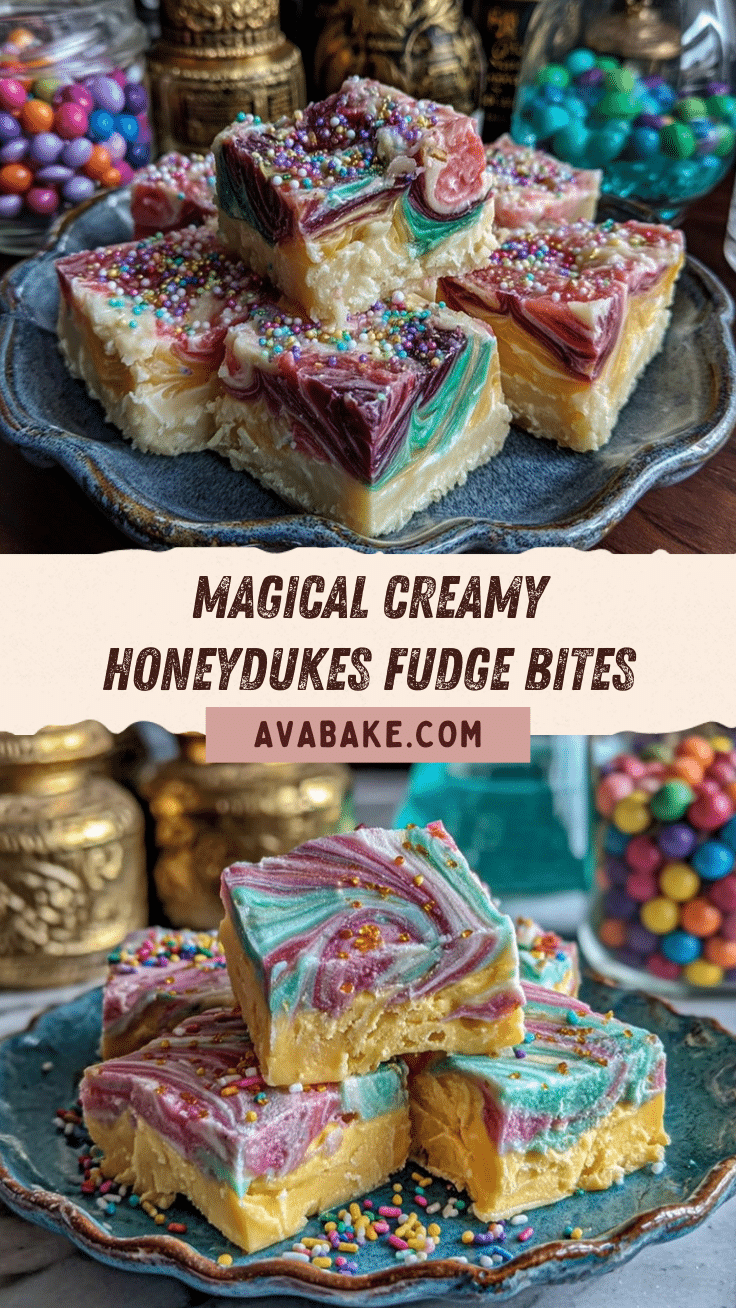
Let me tell you, the moment the aroma of warm butter and sweet vanilla started swirling through my kitchen, I felt like I’d just stepped inside the legendary Honeydukes sweet shop in Hogsmeade. The creamy, dreamy swirl of this Honeydukes fudge recipe is pure wizardry for your senses—soft, melt-in-your-mouth squares that glisten and beckon with every glance. There’s something about that glossy creaminess that makes you want to sneak an extra piece (or three) when no one’s looking. The first time I made this fudge, I was instantly hooked—honestly, it was the kind of moment where you pause, take a deep breath, and just smile because you know you’re onto something truly special.
Years ago, when I was knee-high to a grasshopper, my grandma would whip up her famous fudge for birthdays, holidays, and any “just-because” occasion. I remember the way my cousins and I would hover around the counter, waiting for her to slice those perfect little squares. This magical creamy Honeydukes fudge reminds me so much of those days, but with a touch of Hogwarts whimsy that makes it perfect for a Harry Potter movie night or a magical-themed party. I stumbled upon the inspiration for this recipe after a late-night rereading of “The Prisoner of Azkaban.” Suddenly, I was craving something enchanted and sweet—so began my mission to recreate Honeydukes fudge at home!
My family couldn’t stop sneaking pieces off the cooling rack (and I can’t really blame them). It’s dangerously easy, honestly—each batch disappears faster than you can say “Accio fudge!” Whether you’re whipping up a batch for a Potterhead’s birthday, adding a little magic to your Pinterest dessert board, or just treating yourself to some pure, nostalgic comfort, this fudge is a showstopper. After testing and tweaking (in the name of research, of course), it’s become a staple for family gatherings, gifts, and rainy weekends. Feels like a warm hug in every bite—you’re going to want to bookmark this one!
Why You’ll Love This Honeydukes Fudge Recipe
After endless batches, taste-tests, and a few kitchen mishaps, I can say with confidence—this Honeydukes fudge recipe truly delivers. It’s not just about the spellbinding flavor; it’s the little details that make it stand out from every other fudge you’ve ever tried. Here’s why you’ll fall in love:
- Quick & Easy: Comes together in under 30 minutes (plus cooling time), so you’re not stuck in the kitchen all day. Perfect for busy weeknights, last-minute parties, or when the craving strikes out of nowhere.
- Simple Ingredients: You don’t need anything fancy—just basic pantry staples and a touch of magic. Odds are, you already have everything you need right in your cupboard.
- Perfect for All Occasions: This fudge is a hit at Harry Potter movie marathons, themed parties, bake sales, and even as homemade gifts. It’s one of those recipes that fits right in, no matter the event.
- Crowd-Pleaser: Kids, teens, and grown-ups all go wild for these creamy squares. I’ve never seen a batch last longer than a day in my house!
- Unbelievably Delicious: The texture is silky, melt-in-your-mouth, and just the right amount of chocolatey without overwhelming sweetness. It’s the kind of comfort food that makes you close your eyes after the first bite.
What makes this fudge truly magical? Well, I use a special technique—carefully heating the mixture to the perfect temperature for a smooth, creamy finish without any graininess. Plus, a dash of honey gives it a subtle, enchanted sweetness that’s straight out of Honeydukes. I’ve tried dozens of fudge recipes, and this one gets the balance just right. It’s comfort food reimagined—faster, easier, and every bit as satisfying as the fudge you remember from childhood.
Whether you’re looking to impress your guests (without any stress) or want to add a bit of magic to your week, this fudge recipe is the answer. Trust me—this isn’t just another fudge. It’s the best version I’ve ever made, and I can’t wait for you to try it!
What Ingredients You Will Need
This magical creamy Honeydukes fudge recipe uses simple, wholesome ingredients to deliver bold flavor and that lush, creamy texture. Nothing complicated here—just easy-to-find pantry staples and a few tricks for that signature Honeydukes charm. Here’s what you’ll need:
- For the fudge base:
- 2 cups (400g) granulated sugar (go for superfine if you want extra smooth texture)
- 1/2 cup (120ml) whole milk (or evaporated milk for a richer finish)
- 1/2 cup (115g) unsalted butter, cubed and at room temperature
- 1/4 cup (60ml) honey (the secret ingredient for magical sweetness)
- 12 oz (340g) white chocolate chips (I recommend Ghirardelli for best flavor)
- 1/2 tsp pure vanilla extract (Madagascar vanilla is my favorite)
- 1/4 tsp fine sea salt (balances the sweetness perfectly)
- For optional toppings and magic:
- Sprinkles, edible glitter, or gold dust (for that true Honeydukes sparkle)
- Chopped nuts (pecans or walnuts—optional, for a crunchy twist)
- Mini marshmallows or freeze-dried raspberries (for extra whimsy)
I always use local honey for a subtle floral note, but clover or wildflower honey works great too. If you need a dairy-free option, swap the butter and milk with plant-based alternatives (Earth Balance and oat milk are my go-tos). For chocolate, white chocolate chips make the fudge super creamy, but you can use milk or dark chocolate chips for a different vibe. If you’re gluten-free, double-check your vanilla and toppings—most are safe, but it’s worth verifying.
These ingredients are mostly pantry staples, so you won’t be running around town looking for rare magical items (unless you want to add edible glitter, which is totally worth it!). During summer, I sometimes swap in fresh berries for a fruity twist, and in winter, a dash of cinnamon or nutmeg brings a cozy warmth. Whatever you choose, this fudge is endlessly adaptable—and always enchanting.
Equipment Needed
- Medium saucepan: Sturdy, heavy-bottomed pans work best for even heating (I’ve burned fudge in thin ones—lesson learned!).
- Wooden spoon or heatproof spatula: You’ll need this for constant stirring. Silicone spatulas make cleanup easier.
- Candy thermometer: Not strictly necessary, but it helps you hit the perfect temperature for creamy fudge. If you don’t have one, you can use the “soft ball” test (see below).
- 8×8-inch (20x20cm) square baking pan: Lined with parchment or foil for easy removal.
- Mixing bowl: For combining melted chocolate and other ingredients.
- Sharp knife: For slicing neat squares once it’s set.
If you don’t have a candy thermometer, don’t worry! Just drop a little of the cooked mixture into cold water—if it forms a soft ball, you’re good to go. For budget-friendly options, I’ve used simple aluminum pans and wooden spoons from the dollar store, and they work just fine. Just make sure your pan’s not too thin, or you risk uneven heating (and burnt fudge—yikes!).
To keep your tools in tip-top shape, soak the pan and spoon in hot water right after use—fudge can be sticky. And if you ever upgrade to a silicone spatula, you’ll wonder why you waited so long!
Preparation Method
-
Line your pan:
Line an 8×8-inch (20x20cm) square baking pan with parchment paper or foil, leaving an overhang for easy lifting later. Lightly butter or spray the lining for extra insurance against sticking.
-
Combine base ingredients:
In your medium saucepan, mix together 2 cups (400g) granulated sugar, 1/2 cup (120ml) whole milk, 1/2 cup (115g) unsalted butter, and 1/4 cup (60ml) honey. Stir constantly over medium heat until the butter melts and everything is well blended (about 2 minutes).
-
Heat to the magic temperature:
Continue stirring and bring the mixture to a gentle boil. Attach your candy thermometer and cook until it reaches 235°F (113°C)—the “soft ball” stage. If you don’t have a thermometer, drop a little into cold water; it should form a soft, pliable ball. Watch closely—don’t let it scorch.
-
Add chocolate and flavor:
Remove the pan from heat. Stir in 12 oz (340g) white chocolate chips, 1/2 tsp vanilla extract, and 1/4 tsp sea salt. Mix quickly and thoroughly—the fudge will start to thicken fast. Stir until silky and smooth (about 2-3 minutes).
-
Pour and decorate:
Scrape the mixture into your prepared pan, smoothing the top with a spatula. Sprinkle with your chosen toppings: sprinkles, edible glitter, nuts, or marshmallows. Press them in gently so they stick.
-
Set and slice:
Let the fudge cool at room temperature for 2 hours, then transfer to the fridge for another 1-2 hours until firm. Once set, lift out using the parchment overhang and slice into bite-sized squares with a sharp knife.
Prep Notes: If the mixture seems grainy, it may have cooked too fast—try lowering the heat next time. For extra smooth fudge, use superfine sugar and stir gently but constantly. If you see the fudge “seizing up” before you can pour it, add an extra tablespoon of milk and stir quickly. The fudge should look glossy and creamy, smell sweet with a hint of honey, and feel just slightly tacky when set.
Personal tip: Set out all your ingredients and tools before you start—this recipe moves fast once you begin. And don’t rush the cooling time, even if you’re tempted!
Cooking Tips & Techniques
Let’s face it, fudge can be a little fussy if you’re not careful. After more kitchen fails than I care to admit, I’ve picked up some tricks that keep my Honeydukes fudge recipe consistently magical:
- Use a heavy-bottomed pan: Thin pans heat unevenly and can cause burning. If you’ve got a cast iron or thick stainless steel pan, use it for best results.
- Don’t skimp on stirring: Fudge needs regular stirring—especially after the mixture begins to boil. Stir in a steady, gentle motion to keep sugar crystals from forming.
- Watch your temperature: Overcooked fudge turns grainy; undercooked fudge won’t set. Invest in a candy thermometer or master the “soft ball” water test. Trust me, this tiny detail makes all the difference.
- Prep your toppings early: The fudge sets quickly once poured, so have your sprinkles, nuts, or edible glitter ready to go.
- Don’t rush the cooling: Patience pays off! Trying to slice warm fudge will just result in a sticky mess (learned that one the hard way).
If you’re multitasking, set a timer for each stage—missing the soft ball mark by even a minute can change the texture. If your fudge separates or looks greasy, it likely overheated; try gently folding it a few more times before pouring. And if you’re making double batches (which I do all the time for parties), work in two pans to avoid overcrowding. Consistency comes from practice and attention—don’t let distractions pull you away at key moments.
Variations & Adaptations
The best part about this creamy Honeydukes fudge recipe? It’s endlessly customizable. Here are some of my favorite ways to mix things up:
- Dietary swaps: For a dairy-free version, substitute plant-based butter and oat milk. Use vegan white chocolate chips—Enjoy Life makes a great option.
- Seasonal flavors: Add a teaspoon of pumpkin pie spice in the fall, or swirl in raspberry puree for a fruity summer treat. For winter, a dash of cinnamon or peppermint extract makes it festive.
- Chocolate twist: Swap half the white chocolate chips for dark or milk chocolate for a marbled effect. Layer the two for a dramatic look.
- Allergen-free: For nut allergies, simply skip the nuts or try sunflower seeds for crunch. Confirm all toppings are safe for your needs.
- Cooking methods: If you prefer, microwave the base mixture in short bursts—just watch closely and stir often.
My personal favorite? Adding a handful of freeze-dried raspberries and a sprinkle of edible gold dust. It gives the fudge a true Honeydukes look and a pop of flavor that’s irresistible. Try mixing and matching your own—there’s no wrong way to make this recipe your own!
Serving & Storage Suggestions
This magical creamy Honeydukes fudge is best served at room temperature for maximum melt-in-your-mouth factor. Arrange the squares on a pretty platter with a sprinkle of edible glitter or gold dust for that enchanting Harry Potter vibe. Perfect for movie nights, themed parties, or as a sweet surprise tucked into lunchboxes.
Pair with a steaming mug of butterbeer, hot cocoa, or a fruity iced tea for a true Hogwarts treat. For something savory, try alongside salty snacks like popcorn or pretzels—the sweet and salty combo is always a winner.
For storage, keep the fudge in an airtight container at room temperature for up to 5 days. If your kitchen is warm, pop it in the fridge—just let it come back to room temp before serving. Fudge also freezes well; wrap tightly in plastic, then foil, and store for up to 2 months. To thaw, move to the fridge overnight, then bring out to room temp. Honestly, the flavors deepen after a day or two, making leftovers even more magical!
Nutritional Information & Benefits
Each square of Honeydukes fudge (about 1-inch/2.5cm) contains roughly:
- Calories: 120
- Fat: 6g
- Sugar: 14g
- Protein: 1g
- Carbs: 18g
While this fudge is definitely a treat, there are a few redeeming qualities! Honey adds trace antioxidants and minerals, white chocolate offers a creamy mouthfeel with less bitterness than dark varieties, and you can sneak in nuts or seeds for a little healthy fat. If you make it with dairy-free options, it’s suitable for lactose-intolerant folks. Always check for nut, dairy, or gluten allergens in your ingredients and toppings. In my house, treats like this are all about balance—enjoy a square, savor the moment, and let the magic lift your spirits.
Conclusion
If you’re searching for a recipe that brings pure joy, nostalgia, and a little bit of wizarding wonder, this magical creamy Honeydukes fudge is it. It’s easy to make, endlessly adaptable, and always a hit—whether you’re celebrating a birthday, hosting a Harry Potter night, or just craving something sweet and special. I love this recipe because it’s a slice of childhood, a dash of fantasy, and a guaranteed crowd-pleaser all rolled into one.
Don’t be afraid to put your own spin on it—add your favorite toppings, swap flavors, or make it allergy-friendly. I’d love to hear how you make it yours! Leave a comment below, share your fudge photos, or tag me on social media with your enchanting creations. Honestly, nothing makes me happier than seeing fellow Potterheads enjoy a little homemade magic. Happy baking, and may your fudge always be creamy and bright!
FAQs
Can I make Honeydukes fudge without a candy thermometer?
Absolutely! Use the “soft ball” test—drop a bit of hot mixture into cold water. If it forms a soft, pliable ball, you’re good to go. Just watch the mixture closely as it cooks.
How do I keep the fudge from getting grainy?
Stir gently and constantly, and heat slowly. Using superfine sugar helps, and don’t let the mixture boil too rapidly. If it does turn grainy, it’s still tasty—just not as smooth.
Can I freeze Honeydukes fudge?
Yes! Wrap the cooled fudge tightly in plastic and foil, then freeze for up to 2 months. Thaw in the fridge overnight, then bring to room temperature before serving.
Is this fudge recipe gluten-free?
The base ingredients are gluten-free, but double-check your vanilla extract, chocolate chips, and any toppings for hidden gluten. Most major brands are safe, but it’s always best to check.
What can I use instead of white chocolate chips?
You can swap in milk or dark chocolate chips, or use chopped baking chocolate. The texture will change a little, but you’ll get a delicious twist on the classic Honeydukes fudge!
Pin This Recipe!
Honeydukes Fudge Recipe: Easy Creamy Harry Potter Treats to Make

This magical creamy Honeydukes fudge is a melt-in-your-mouth treat inspired by the legendary sweet shop in Harry Potter. Quick, easy, and endlessly adaptable, it’s perfect for movie nights, parties, or as a nostalgic homemade gift.
- Prep Time: 10 minutes
- Cook Time: 15 minutes
- Total Time: 3 hours
- Yield: 25 squares 1x
- Category: Dessert
- Cuisine: American
Ingredients
- 2 cups granulated sugar (superfine preferred for smooth texture)
- 1/2 cup whole milk (or evaporated milk for richer finish)
- 1/2 cup unsalted butter, cubed and at room temperature
- 1/4 cup honey
- 12 oz white chocolate chips
- 1/2 tsp pure vanilla extract
- 1/4 tsp fine sea salt
- Sprinkles, edible glitter, or gold dust (optional, for topping)
- Chopped nuts (pecans or walnuts, optional)
- Mini marshmallows or freeze-dried raspberries (optional)
Instructions
- Line an 8×8-inch square baking pan with parchment paper or foil, leaving an overhang for easy lifting. Lightly butter or spray the lining.
- In a medium saucepan, mix together sugar, milk, butter, and honey. Stir constantly over medium heat until butter melts and mixture is well blended (about 2 minutes).
- Continue stirring and bring the mixture to a gentle boil. Attach a candy thermometer and cook until it reaches 235°F (soft ball stage). If you don’t have a thermometer, drop a little into cold water; it should form a soft, pliable ball.
- Remove pan from heat. Stir in white chocolate chips, vanilla extract, and sea salt. Mix quickly and thoroughly until silky and smooth (about 2-3 minutes).
- Scrape mixture into prepared pan, smoothing the top with a spatula. Sprinkle with chosen toppings and press gently.
- Let fudge cool at room temperature for 2 hours, then transfer to fridge for another 1-2 hours until firm.
- Lift out using parchment overhang and slice into bite-sized squares with a sharp knife.
Notes
For extra smooth fudge, use superfine sugar and stir gently but constantly. If mixture seizes before pouring, add an extra tablespoon of milk and stir quickly. Prep all ingredients and toppings before starting, as the recipe moves fast. Fudge can be made dairy-free with plant-based butter and milk, and vegan white chocolate chips.
Nutrition
- Serving Size: 1 square (about 1-in
- Calories: 120
- Sugar: 14
- Sodium: 40
- Fat: 6
- Saturated Fat: 4
- Carbohydrates: 18
- Protein: 1
Keywords: Honeydukes fudge, Harry Potter dessert, creamy fudge, easy fudge recipe, white chocolate fudge, magical treats, party dessert, movie night snacks


