Picture this: the kitchen is alive with the hum of holiday excitement, strings of twinkling lights reflecting off the countertops, and the oven radiating warmth that makes chilly winter mornings feel a little less frosty. The moment the first batch of Monster Cookies for Christmas hits the oven, the scent—peanut butter mingling with brown sugar and a hint of vanilla—fills the house in a way that always reminds me of my childhood. You know, those days when I was knee-high to a grasshopper, sneaking dough from grandma’s mixing bowl (she pretended not to notice, but I’m pretty sure she did).
The first time I made these cookies was on a snowy afternoon, just trying to recreate that pure, nostalgic comfort I remembered from holiday cookie trays at family gatherings. I was instantly hooked—the kind of moment where you pause, take a deep breath, and just smile because you know you’re onto something truly special. Honestly, these cookies have become a staple for Christmas parties, classroom treats, and, let’s face it, midnight snacks (research purposes, of course!).
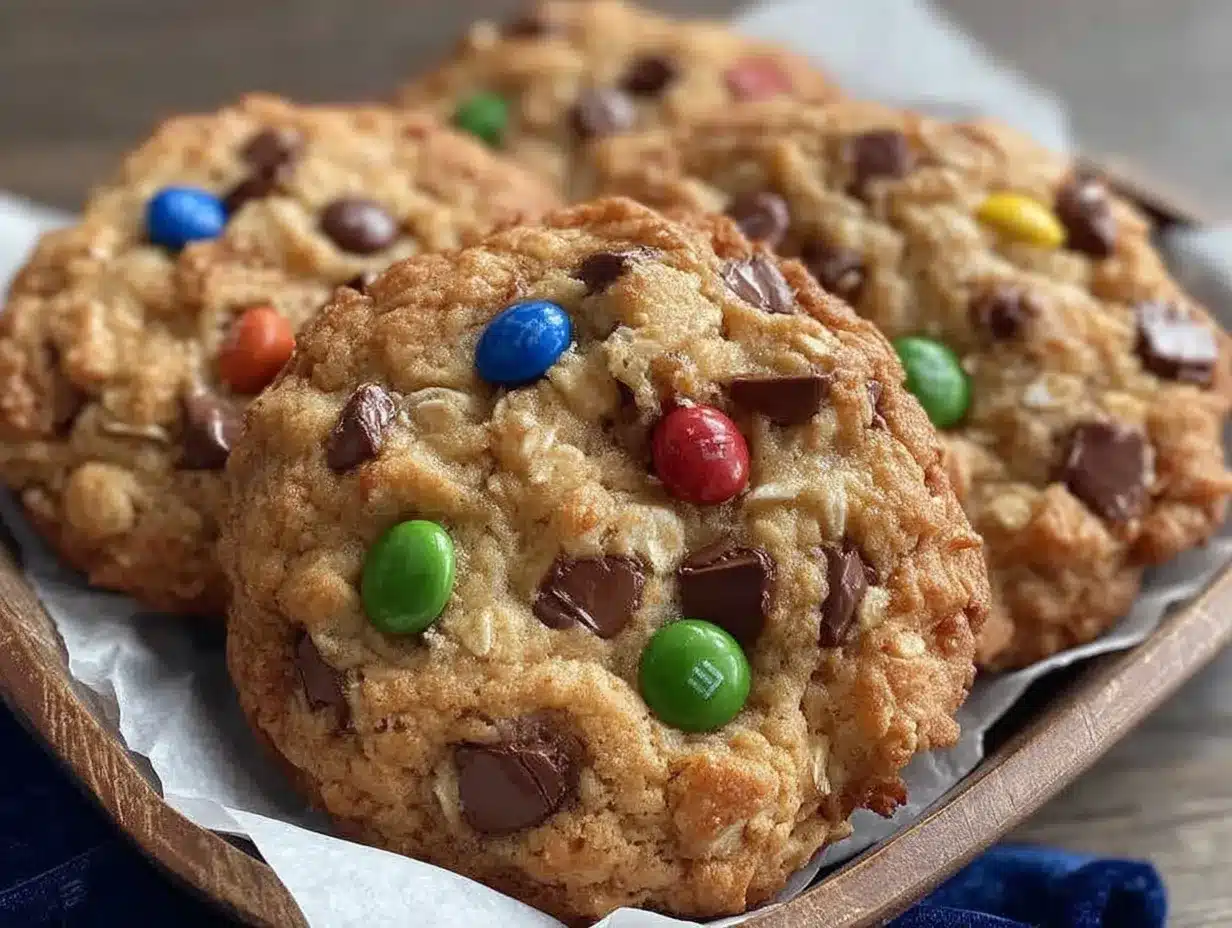
My family couldn’t stop sneaking them off the cooling rack. My youngest called them “the happiest cookies ever,” and my husband, who claims not to have a sweet tooth, stashed a few away for himself. There’s just something about the combo of oats, peanut butter, chocolate chips, and those colorful festive candies that makes Monster Cookies the star of any holiday cookie tray. If you’re hunting for the perfect sweet treat for your kids or a showstopper for your Christmas potluck, these cookies are dangerously easy, irresistibly chewy, and so festive they’ll brighten up your entire Pinterest board.
You’re going to want to bookmark this one—these Monster Cookies for Christmas deliver pure holiday joy, one bite at a time. Let’s get cozy and bake some magic!
Why You’ll Love These Monster Cookies for Christmas
Let’s talk about why these Monster Cookies for Christmas are a total game-changer for holiday cookie trays. I’ve tested this recipe more times than I can count—different ovens, swaps, and secret tricks—so when I say these are the best, I mean it. Here’s what makes them stand out:
- Quick & Easy: You can whip up a batch in under 30 minutes, start to finish. Perfect for those last-minute “oh no, I forgot the cookies!” moments.
- Simple Ingredients: No need for a fancy grocery run. Odds are, you’ve already got oats, peanut butter, and chocolate chips in your pantry.
- Perfect for Any Occasion: These cookies are a hit at Christmas parties, family movie nights, cookie exchanges, and even as edible gifts for neighbors.
- Crowd-Pleaser: Kids love the candy colors, adults love the chewy texture, and honestly, everyone grabs seconds. Zero leftovers, every time.
- Unbelievably Delicious: The secret is the balance—chewy oats, creamy peanut butter, and just the right amount of chocolate. It’s comfort food in cookie form.
What sets my version apart? I blend creamy peanut butter for an ultra-smooth base, use quick oats for the best chewy texture, and toss in both semi-sweet and milk chocolate chips for layers of flavor. Plus, festive red and green candies make these cookies pop on any holiday tray. It’s not just another monster cookie recipe—it’s the one you’ll come back to every December.
There’s something magical about sharing homemade cookies at Christmas, isn’t there? These Monster Cookies aren’t just easy—they’re the kind that make you close your eyes after the first bite and just savor the holiday moment. Whether you’re trying to impress a crowd or just want a cozy treat by the fireplace, you’ll love how these cookies turn a simple evening into a memory. So grab your mixing bowl and let’s make some cookie magic!
What Ingredients You Will Need
This recipe uses simple, wholesome ingredients to deliver bold flavor and satisfying texture without the fuss. Most of these are pantry staples, and you can swap a few things to suit your needs or holiday cravings. Here’s what you’ll need for the best Monster Cookies for Christmas:
- For the Base:
- Old-fashioned oats (2 cups / 200g) – For classic chewiness. Quick oats work if you want a softer texture.
- All-purpose flour (1/2 cup / 60g) – Helps bind the cookies together.
- Baking soda (1 tsp / 5g) – Gives the cookies a little lift.
- Salt (1/2 tsp / 3g) – Just enough to balance the sweetness.
- For Richness & Flavor:
- Creamy peanut butter (1 cup / 240g) – I love Skippy or Jif for the best texture.
- Unsalted butter, softened (1/2 cup / 115g) – Adds richness. Use plant-based butter for a dairy-free option.
- Granulated sugar (1/2 cup / 100g) – For sweetness and a touch of crispness.
- Brown sugar, packed (3/4 cup / 150g) – Adds moisture and depth.
- Large eggs, room temperature (2) – Helps everything hold together.
- Pure vanilla extract (2 tsp / 10ml) – Real vanilla makes a big difference.
- For Festive Mix-ins:
- Semi-sweet chocolate chips (3/4 cup / 130g) – For that melty chocolate bite.
- Milk chocolate chips (1/2 cup / 90g) – Adds a creamy, sweet contrast.
- Red and green candy-coated chocolates (M&M’s or similar, 1 cup / 180g) – Makes them pop for Christmas trays.
Substitution notes:
- Use almond flour for gluten-free cookies—swap 1:1 with the all-purpose flour.
- Peanut allergies? Try sunflower seed butter or almond butter instead.
- Want to go dairy-free? Use coconut oil or plant-based butter in place of the regular butter.
- For a nut-free version, you can skip the peanut butter and use Wowbutter (a soy-based alternative).
- Mix in dried cranberries or chopped pecans for extra festive flavor.
These Monster Cookies for Christmas are totally adaptable—just use what you have, and don’t stress about perfection. The holiday spirit is all about making do and having fun, after all!
Equipment Needed
You don’t need fancy gadgets to whip up these Monster Cookies for Christmas, but a few reliable kitchen tools make the job easier. Here’s what I use and recommend:
- Large mixing bowl – Big enough to handle all that dough.
- Hand mixer or stand mixer – I’ve mixed by hand, but an electric mixer saves your arms (especially for the peanut butter).
- Rubber spatula – Helps scrape down every last bit of dough.
- Baking sheets (2) – Lined with parchment paper for easy clean-up.
- Cookie scoop (medium, about 2 Tbsp / 30ml) – For even cookie sizes. A regular spoon works too, but scoops make for prettier cookies.
- Wire cooling rack – Lets cookies cool evenly without getting soggy bottoms.
- Measuring cups and spoons – Accurate measurements matter, and I’m partial to stainless steel sets for durability.
If you don’t have a cookie scoop, two spoons are fine (just expect a bit of a rustic look). I like to use parchment paper because it keeps the cookies from sticking and makes clean-up a breeze. If you’re using older baking sheets, line them well—trust me, it saves on scrubbing. For budget-friendly options, I’ve picked up most of these supplies at local dollar stores or thrift shops, and they work just as well as the fancy stuff!
Maintenance tip: If your wire rack is getting a little rusty, scrub it with baking soda and a damp sponge. Good-as-new for next time!
Preparation Method
Ready to make the best Monster Cookies for Christmas ever? Here’s my step-by-step process, complete with tips learned the hard way:
- Preheat your oven: Set to 350°F (175°C). Line two baking sheets with parchment paper.
- Mix dry ingredients: In a large bowl, stir together 2 cups (200g) oats, 1/2 cup (60g) flour, 1 tsp (5g) baking soda, and 1/2 tsp (3g) salt. Set aside.
- Cream butter and sugars: In another bowl, beat 1/2 cup (115g) softened unsalted butter, 1 cup (240g) creamy peanut butter, 1/2 cup (100g) granulated sugar, and 3/4 cup (150g) packed brown sugar until light and fluffy, about 2-3 minutes. It should look pale and feel airy.
- Add eggs and vanilla: Beat in 2 large eggs (room temp) one at a time, followed by 2 tsp (10ml) pure vanilla extract. Mix until well combined.
- Combine wet and dry: Gradually add the dry mixture to the wet ingredients, mixing on low until just combined. The dough will be thick—don’t over-mix or the cookies will turn out tough.
- Fold in mix-ins: Stir in 3/4 cup (130g) semi-sweet chocolate chips, 1/2 cup (90g) milk chocolate chips, and 1 cup (180g) red/green candy-coated chocolates. I like to save a handful of candies to press on top for extra color.
- Scoop dough: Use a medium cookie scoop (2 Tbsp / 30ml) to drop rounds onto the prepared baking sheets, spacing about 2 inches (5cm) apart. If you use a spoon, aim for walnut-sized mounds.
- Bake: Bake for 10-12 minutes, until edges are set but centers look just a tad underdone. Trust me, they’ll finish cooking as they cool (the secret to that chewy center!).
- Cool: Let cookies sit on the baking sheet for 5 minutes, then transfer to a wire rack. Sneak one while it’s still warm if you dare!
Prep tips:
- If your dough is too sticky, chill it for 20 minutes before scooping.
- Don’t skip the parchment paper—these cookies like to stick.
- Dough freezes well: scoop, freeze on a tray, then bag for future baking.
- For a festive look, gently press a few extra candies on top while the cookies are still warm.
Sensory cues: The cookies should be golden on the edges but soft in the middle. When you press them gently, they should hold their shape but feel slightly springy. The house will smell like a peanut butter-chocolate dream!
Cooking Tips & Techniques
Baking Monster Cookies for Christmas is mostly foolproof, but I’ve had my share of “learning moments” over the years. Here’s what I wish I’d known sooner:
- Don’t over-bake: The difference between chewy and crunchy is just a minute or two. Pull them when the edges are golden but the centers still look soft—they’ll set up as they cool.
- Chill the dough: If your kitchen is warm, chilling the dough prevents spreading. I usually pop it in the fridge for 15-20 minutes, especially if I’m making a big batch.
- Use parchment paper: I learned the hard way that these cookies love to stick. Parchment saves you from prying them off and losing half your cookie.
- Mix-ins matter: If you add too many candies or chips, the cookies can fall apart. Stick to the measurements for best results.
- Multitasking: While one batch bakes, scoop the next—keeps things moving and the kitchen smelling amazing.
- Consistency: Using a cookie scoop gives you evenly sized cookies, which bake uniformly. If you go by hand, just try to keep them about the same size.
Personal fail: Once, I doubled the recipe and forgot to double the baking soda. The cookies were delicious but super dense (not a bad snack, but not quite right for holiday trays). So, always double-check your measurements!
If you want extra festive cookies, press a few candy pieces on top right after baking. They’ll melt just a bit and look gorgeous. And keep an eye on the oven—every oven is a little different, so don’t be afraid to check early.
Variations & Adaptations
One of the best things about Monster Cookies for Christmas is how easy they are to adapt. Here are a few tried-and-true variations:
- Gluten-Free: Swap all-purpose flour for almond flour or a gluten-free blend—just make sure your oats are certified gluten-free.
- Nut-Free: Use Wowbutter or sunflower seed butter instead of peanut butter. Skip the nuts entirely and load up on extra festive candies or mini marshmallows.
- Vegan: Replace eggs with flaxseed “eggs” (2 Tbsp ground flaxseed + 5 Tbsp water, let sit until gelled). Use plant-based butter and vegan chocolate chips.
- Seasonal Mix-ins: Add dried cranberries, chopped pecans, or festive sprinkles for extra holiday flair.
- Flavor Twists: Stir in a half teaspoon of cinnamon or orange zest for a cozy winter note.
- Baking Method: These cookies can also be baked in a 9×13” pan for monster cookie bars—just adjust baking time to 20-25 minutes.
One year, I made a batch with mini white chocolate chips and crushed peppermint candies—kids went wild for them. Don’t be afraid to play around with mix-ins. If you’re baking for allergies, check labels and keep your mix-ins simple. The goal is cozy, festive, and stress-free.
Serving & Storage Suggestions
These Monster Cookies for Christmas are best served slightly warm, with the chocolate still a little melty and the candies glistening. Perfect for piling up on a holiday cookie tray—pair with hot cocoa, mulled wine, or a glass of cold milk.
- Presentation: Arrange cookies in a single layer on a festive platter. Add a sprig of holly or a dusting of powdered sugar for extra holiday magic.
- Complementary dishes: Serve alongside gingerbread men, sugar cookies, or snickerdoodles for a full cookie tray experience.
- Storage: Store in an airtight container at room temperature for up to 5 days. For longer storage, freeze in layers separated by wax paper—thaw at room temperature before serving.
- Reheating: Pop cookies in the microwave for 10 seconds for that “fresh-from-the-oven” feel. (Trust me, it’s worth it!)
- Flavor development: The peanut butter and oats deepen in flavor after a day, making these cookies even better as leftovers.
These cookies also travel well, so they’re perfect for gifting or sharing at holiday parties. Let them cool completely before packaging to avoid condensation (and soggy cookies). If you’re making them ahead, freeze the dough balls and bake fresh for the best flavor.
Nutritional Information & Benefits
Each Monster Cookie for Christmas (about 2 Tbsp dough) contains approximately:
- Calories: 180
- Fat: 8g
- Carbs: 23g
- Protein: 4g
- Sugar: 12g
Health highlights:
- Oats provide fiber and lasting energy.
- Peanut butter adds plant-based protein and healthy fats.
- Gluten-free and nut-free options make these cookies inclusive for most diets.
Potential allergens: Contains peanuts, dairy, eggs, and gluten (unless adapted). Always check candy labels for hidden allergens. From my own wellness journey, I love that these cookies deliver comfort without crazy amounts of sugar—they’re satisfying in just a couple bites. If you’re watching carbs or sugar, try swapping some of the sugar for coconut sugar or use sugar-free candies.
Conclusion
If you’re searching for the ultimate holiday cookie, Monster Cookies for Christmas are a must-try. They’re easy, festive, and packed with cozy flavors that just scream “holiday cheer.” Honestly, they’ve become my go-to for Christmas parties, classroom treats, and cozy nights in.
Don’t be afraid to tweak the mix-ins or swap ingredients to suit your family’s tastes. That’s part of the fun! I love these cookies because they’re a little messy, a little colorful, and totally delicious—just like the holidays themselves.
If you bake these, let me know how they turn out! Drop a comment, share your photos, or tell me about your favorite mix-in. Wishing you a warm, sweet holiday season filled with good cookies and great memories—now go make some cookie magic!
FAQs About Monster Cookies for Christmas
How do I keep Monster Cookies soft and chewy?
Bake until the edges are golden but the centers are still a little underdone. Let them cool on the baking sheet for 5 minutes before moving to a wire rack.
Can I freeze Monster Cookie dough?
Absolutely! Scoop the dough onto a tray, freeze until solid, then transfer to a freezer bag. Bake from frozen, adding 1-2 extra minutes to the bake time.
Can I make Monster Cookies nut-free?
Yes! Use sunflower seed butter or Wowbutter instead of peanut butter, and check candy labels to make sure they’re nut-free.
What’s the best way to get bright colors for Christmas trays?
Use holiday-themed candy-coated chocolates (like red and green M&M’s) and press a few extra on top of each cookie after baking for maximum festive flair.
Why did my Monster Cookies spread too much?
If your dough is too warm or the butter too soft, the cookies can spread. Chill the dough for 15-20 minutes before baking to help them hold their shape.
Pin This Recipe!

Monster Cookies for Christmas: Best Easy Holiday Cookie Tray Recipe

These Monster Cookies for Christmas are chewy, festive, and packed with oats, peanut butter, chocolate chips, and colorful candies. Perfect for holiday cookie trays, parties, or cozy nights in, they’re quick to make and guaranteed to bring holiday cheer.
- Prep Time: 15 minutes
- Cook Time: 12 minutes
- Total Time: 27 minutes
- Yield: 24 cookies 1x
- Category: Dessert
- Cuisine: American
Ingredients
- 2 cups old-fashioned oats (or quick oats for softer texture)
- 1/2 cup all-purpose flour
- 1 teaspoon baking soda
- 1/2 teaspoon salt
- 1 cup creamy peanut butter
- 1/2 cup unsalted butter, softened
- 1/2 cup granulated sugar
- 3/4 cup brown sugar, packed
- 2 large eggs, room temperature
- 2 teaspoons pure vanilla extract
- 3/4 cup semi-sweet chocolate chips
- 1/2 cup milk chocolate chips
- 1 cup red and green candy-coated chocolates (M&M’s or similar)
Instructions
- Preheat oven to 350°F (175°C). Line two baking sheets with parchment paper.
- In a large bowl, stir together oats, flour, baking soda, and salt. Set aside.
- In another bowl, beat softened butter, peanut butter, granulated sugar, and brown sugar until light and fluffy, about 2-3 minutes.
- Beat in eggs one at a time, then add vanilla extract. Mix until well combined.
- Gradually add the dry mixture to the wet ingredients, mixing on low until just combined. Do not over-mix.
- Fold in semi-sweet chocolate chips, milk chocolate chips, and candy-coated chocolates. Reserve a handful of candies to press on top of cookies if desired.
- Use a medium cookie scoop (about 2 tablespoons) to drop dough onto prepared baking sheets, spacing about 2 inches apart.
- Bake for 10-12 minutes, until edges are set but centers look slightly underdone.
- Let cookies cool on the baking sheet for 5 minutes, then transfer to a wire rack to cool completely.
Notes
For gluten-free cookies, substitute almond flour and certified gluten-free oats. For nut-free, use Wowbutter or sunflower seed butter. Chill dough for 15-20 minutes if your kitchen is warm to prevent spreading. Press extra candies on top after baking for a festive look. Dough freezes well for future baking.
Nutrition
- Serving Size: 1 cookie (about 2 ta
- Calories: 180
- Sugar: 12
- Sodium: 90
- Fat: 8
- Saturated Fat: 3
- Carbohydrates: 23
- Fiber: 2
- Protein: 4
Keywords: monster cookies, Christmas cookies, holiday cookies, peanut butter cookies, festive cookies, easy cookie recipe, cookie tray, party cookies, kid-friendly cookies


