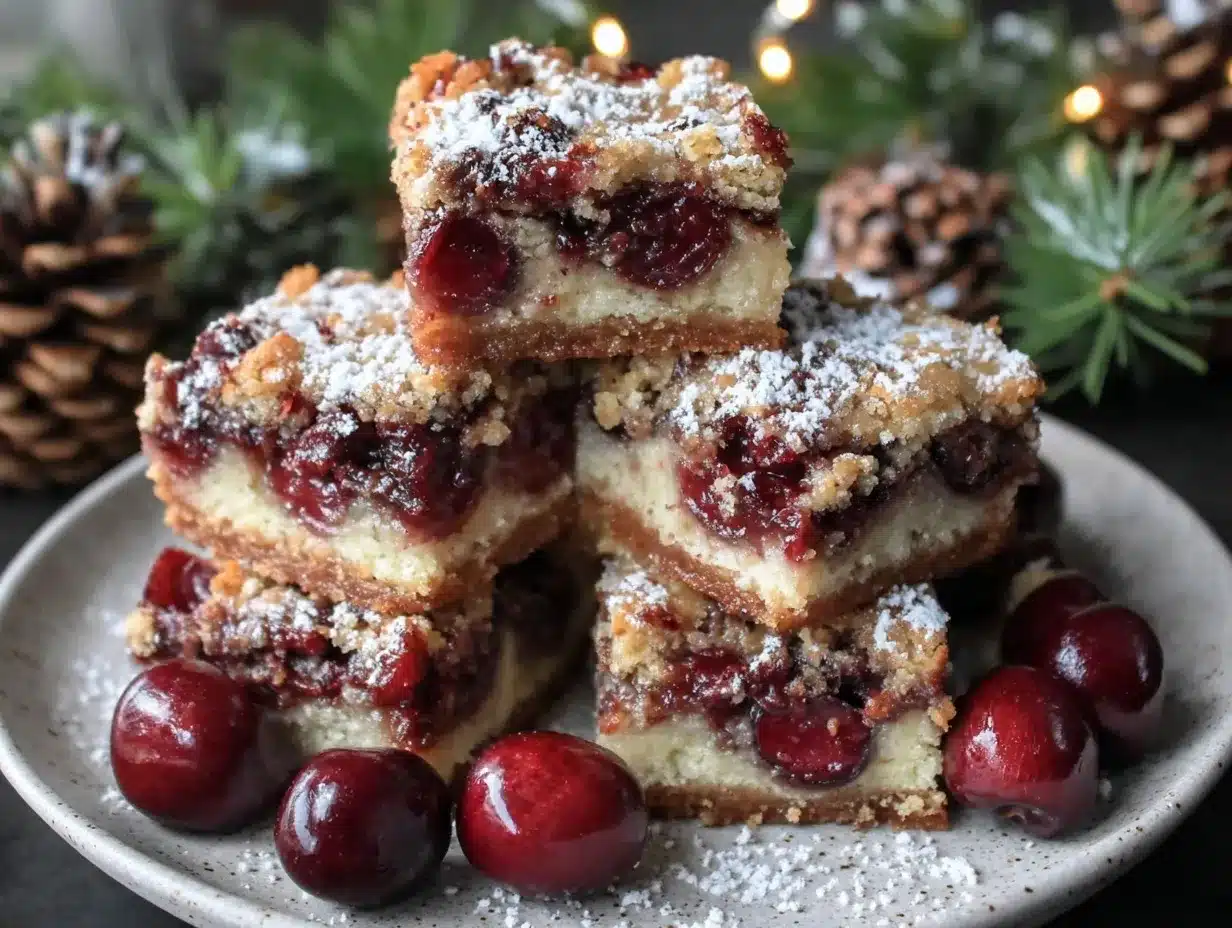
Let me just tell you, the intoxicating aroma of buttery crust mingling with sweet cherry filling as it bakes in my oven is pure holiday magic. It’s like every Christmas memory rolled into one delicious scent — the kind that instantly pulls everyone into the kitchen. The first time I made these Christmas Cherry Bars, I was actually trying to recreate a treat from a childhood potluck, you know, one of those desserts that looked dazzling on the table and disappeared in minutes. I was instantly hooked. There’s something about that ruby-red cherry layer peeking through golden crumbly edges — it just screams festive cheer.
Honestly, when I was knee-high to a grasshopper, my grandma used to whip up a similar cherry dessert right before Christmas dinner. She’d let me sneak a taste of the filling, and it was always the highlight of my day. These bars bring back that exact feeling — pure, nostalgic comfort, dangerously easy to make, and pretty much impossible to resist. My family couldn’t stop sneaking them off the cooling rack (and I can’t really blame them — I do the same). Even the neighbor kids were knocking on our door asking for more after their first bite!
These Christmas Cherry Bars are perfect for gifting, making ahead for parties, or just brightening up your Pinterest cookie board. I’ve tested and tweaked this recipe more times than I can count (in the name of research, of course), and now it’s a staple for every family gathering. If you’re looking for a festive dessert that feels like a warm hug and gets rave reviews every time, you’re going to want to bookmark this one. The recipe keyword — Christmas Cherry Bars — will definitely be the star of your holiday season.
Why You’ll Love These Christmas Cherry Bars
After years of baking for holiday crowds, I can say with confidence: these bars are a total winner. Whether you’re a seasoned baker or just looking for something easy to impress guests, you’ll love the way these Christmas Cherry Bars deliver on flavor and festive charm. Here’s why they stand out (and why I keep making them year after year):
- Quick & Easy: Comes together in under an hour — perfect for busy December weekends or last-minute holiday parties.
- Simple Ingredients: No fancy shopping trips; you likely already have most of the basics in your kitchen.
- Perfect for Holiday Gatherings: These bars slice beautifully, transport well, and look gorgeous on a dessert platter. Great for potlucks, office parties, or family brunch.
- Crowd-Pleaser: Both kids and adults go crazy for that sweet-tart cherry layer and buttery crust. I’ve never had leftovers (which is both a blessing and a curse!).
- Unbelievably Delicious: The texture is spot-on: soft, chewy, with just enough crunch from the golden edges. The cherry filling balances sweet and tangy perfectly.
What makes these Christmas Cherry Bars different from the rest? For starters, the crust uses a touch of almond extract (trust me, it makes the flavor pop). The cherry filling is thick but not gloopy, thanks to a simple trick — draining the canned cherries just enough so they don’t make the bars soggy. I also use a blend of all-purpose flour and a little cornstarch for that melt-in-your-mouth feel. This isn’t just another cherry bar — it’s my best version, shaped by years of festive baking and many taste tests.
These bars aren’t just good. They’re the kind that make you close your eyes after the first bite. It’s comfort food reimagined: easier, faster, but with all the cozy, soul-soothing satisfaction you crave during the holidays. Whether you want to impress guests without the stress or just turn a simple dessert into something memorable, these Christmas Cherry Bars deliver every single time.
What Ingredients You Will Need
This recipe relies on simple, wholesome ingredients to deliver bold flavor and a satisfyingly tender texture. Most are pantry staples, and you can swap a few to suit your taste or dietary needs. Here’s what you’ll need for your Christmas Cherry Bars:
For the Crust & Topping
- 2 1/4 cups (280g) all-purpose flour
- 1 cup (200g) granulated sugar
- 1 cup (226g) unsalted butter, softened (adds richness)
- 1/2 teaspoon baking powder
- 1/2 teaspoon salt
- 2 large eggs, room temperature
- 1 teaspoon vanilla extract
- 1/2 teaspoon almond extract (optional, but highly recommended for that classic holiday aroma)
For the Cherry Filling
- 2 cans (21 oz / 595g each) cherry pie filling (I prefer Comstock or Lucky Leaf for their vibrant color and flavor)
- 1 tablespoon cornstarch (helps thicken the filling)
For the Glaze (Optional)
- 1 cup (120g) powdered sugar
- 1-2 tablespoons milk (use dairy-free if needed)
- 1/4 teaspoon almond extract
Ingredient Tips and Substitutions
- Butter: If you’re dairy-free, swap with a plant butter (I’ve tried Miyoko’s — works great).
- Flour: For gluten-free Christmas Cherry Bars, use a 1:1 gluten-free baking flour (like Bob’s Red Mill).
- Cherry Filling: You can use homemade cherry filling (just cook down fresh or frozen cherries with sugar and cornstarch).
- Almond Extract: If you don’t love almond flavor, stick with vanilla only, but trust me — almond makes these bars taste like Christmas.
- Eggs: For an egg-free version, try flax eggs (1 tbsp ground flax + 2.5 tbsp water per egg).
If you want to go extra festive, sprinkle a handful of slivered almonds or holiday sprinkles on top before baking. The ingredients are flexible, so you can easily adjust for allergies or preferences. I always keep a backup can of cherry pie filling in my pantry — just in case a holiday craving hits!
Equipment Needed
You don’t need fancy gadgets to whip up these Christmas Cherry Bars — just a few basic kitchen tools (plus some personal wisdom from years of baking):
- 9×13 inch (23×33 cm) baking pan: Glass or metal works fine. Glass gives more even browning.
- Mixing bowls: One large for the crust, one small for the glaze.
- Electric mixer: Stand or hand mixer makes creaming butter a breeze. You can use a sturdy whisk and some elbow grease if needed.
- Measuring cups & spoons: Accuracy helps keep the bars tender.
- Spatula: For spreading the dough and cherry filling.
- Sharp knife: For cutting clean slices (wipe between cuts for picture-perfect bars).
- Wire rack: Cooling is key — bars firm up as they cool.
If you don’t have an electric mixer, don’t worry — soft butter mixes up easily by hand, especially if you let it sit at room temperature. I’ve made these bars with everything from thrift-store pans to high-end brands, and honestly, the most important thing is a good nonstick surface or parchment lining (makes cleanup a breeze). For maintenance, wash your baking pan gently — abrasive scrubbers scratch the finish. If you’re baking a ton for the holidays, budget-friendly aluminum pans work for gifting, too!
Preparation Method
-
Preheat Your Oven: Set oven to 350°F (175°C). Lightly grease a 9×13-inch pan or line with parchment paper for easy removal.
Tip: Lining with parchment gives you perfect, Instagram-worthy bar edges. -
Make the Crust & Topping: In a large bowl, cream together 1 cup (226g) unsalted butter and 1 cup (200g) sugar until light and fluffy — about 2-3 minutes with a mixer. Add 2 eggs, vanilla extract, and almond extract; beat until well combined.
Troubleshooting: If mixture looks split, don’t panic — it’ll smooth out when you add the flour. -
Add Dry Ingredients: Whisk together flour, baking powder, and salt. Gradually add to wet mixture, mixing just until dough forms. Don’t overmix — you want a soft, tender base.
Note: Dough will be thick, almost like sugar cookie dough. -
Spread Dough: Scoop out 2/3 of dough and press evenly into the bottom of your prepared pan.
Efficiency Tip: Use damp fingers or a spatula for even spreading — no sticking! -
Prepare Cherry Filling: In a small bowl, stir together cherry pie filling and 1 tablespoon cornstarch. Spread cherry mixture evenly over crust, avoiding edges to prevent sticking.
Sensory Cue: Filling should look glossy and thick, not runny. -
Add Topping: Drop spoonfuls of remaining dough over filling. Don’t worry about full coverage — gaps let the cherry peek through for a festive look.
Personal Tip: I love leaving some cherry exposed; it’s pretty and adds texture! -
Bake: Bake in the preheated oven for 35-40 minutes, until top is golden and filling bubbles around the edges.
Warning: Overbaking dries bars; check at 35 minutes. Bars firm up as they cool. -
Cool: Let bars cool completely in pan (about 1 hour). This helps set the layers for neat slicing.
Sensory Cue: You’ll notice the crust firming up and the cherry layer settling. -
Optional Glaze: Mix powdered sugar, milk, and almond extract in a bowl. Drizzle over cooled bars for extra holiday flair.
Tip: Add glaze only after bars are cool; otherwise, it melts away. -
Slice & Serve: Cut into squares or bars (about 24 pieces). Wipe knife between slices for clean edges.
Personal Tip: Bars are easiest to cut if you chill them briefly before slicing.
Cooking Tips & Techniques
After dozens of batches (and a few kitchen mishaps), I’ve picked up some helpful tricks for perfect Christmas Cherry Bars every time:
- Don’t Overmix: The crust is best when mixed just until combined. Overworking makes it tough instead of tender.
- Watch the Bake Time: Ovens vary. Bars are done when the edges are golden and the middle no longer jiggles. Underbaking = gooey mess, overbaking = dry disappointment.
- Glaze Wisely: If you glaze while bars are warm, it’ll soak in and disappear. Wait for full cooling, then drizzle for a pretty finish.
- Cherry Filling Consistency: If your pie filling is extra runny, drain off some juice before using. Thick filling gives cleaner slices.
- Parchment Power: Line your pan for easy lifting and less stuck-on edges (trust me, I learned this the hard way after scraping bars out of a metal pan for years).
- Multitasking: While bars bake, prep your glaze or set up your serving platter. It saves time and keeps you organized.
One time, I forgot the baking powder and ended up with cherry bricks (not my finest hour). Lesson learned — double-check your ingredients before mixing! For consistent results, use room temperature butter and eggs. If you want bars with crisp edges and soft centers, let them cool completely before cutting. For holiday gifting, I cut bars a bit smaller and wrap in festive parchment — always looks cute and keeps them fresh.
Variations & Adaptations
Christmas Cherry Bars are versatile! You can easily tweak them for different tastes, dietary needs, or seasonal flavors. Here are some tried-and-true variations:
- Gluten-Free: Substitute a 1:1 gluten-free baking flour for the all-purpose flour. I recommend King Arthur or Bob’s Red Mill — both give tender results.
- Dairy-Free: Use plant-based butter and dairy-free milk for the glaze. Works just as well (tested by my vegan cousin, who now requests these every Christmas).
- Berry Twist: Swap the cherry filling for blueberry or raspberry pie filling for a summery version. You can even mix half-and-half for a fun flavor combo.
- Chocolate-Cherry Bars: Sprinkle chocolate chips over the cherry layer before adding the topping dough. Melts into gooey bites — my kids love this one!
- Nutty Bars: Add a handful of chopped pecans or almonds to the crust for crunch and extra holiday flavor.
If you want to customize for allergies, you can use flax eggs or applesauce as an egg replacer. For a personal twist, I’ve tried adding orange zest to the crust — gives a subtle citrus note that’s unexpectedly delicious. You can bake in a smaller pan for thicker bars, or use mini muffin tins for single-serve bites. The recipe is forgiving, so don’t be afraid to experiment and make it your own!
Serving & Storage Suggestions
These Christmas Cherry Bars are best served at room temperature, which really lets the flavors shine. I like to pile them on a festive platter and sprinkle with powdered sugar for a snowy effect (looks gorgeous on your holiday table!).
Pair with a mug of hot cocoa, spiced tea, or even a chilled glass of milk for the ultimate treat. If you’re hosting a brunch, they go perfectly alongside fresh fruit, breakfast casseroles, or savory quiche. For parties, cut into bite-sized squares and serve on cupcake liners for easy grabbing.
To store, keep bars in an airtight container at room temperature for up to 3 days. They stay soft and flavorful. For longer storage, refrigerate for up to a week (bring to room temp before serving for best texture). You can freeze bars for up to 2 months — layer with parchment between slices, then thaw overnight in the fridge. Reheat gently in a low oven if you want them warm (don’t microwave, as it can make them rubbery).
Honestly, I think the flavor improves by day two as the cherry filling settles into the crust. If you’re gifting, wrap bars individually in wax paper and tie with a ribbon — instant holiday cheer!
Nutritional Information & Benefits
Each Christmas Cherry Bar (based on 24 bars per batch) contains approximately:
- Calories: 175
- Fat: 7g
- Carbohydrates: 27g
- Sugar: 17g
- Protein: 2g
The key ingredients — cherries and almonds — bring more than just great flavor. Cherries are packed with antioxidants and vitamin C, which support immune health (always welcome in winter). Almond extract adds nutty flavor and a touch of magnesium. If you choose gluten-free flour or dairy-free swaps, these bars fit many diets (just check your pie filling for gluten or dairy).
Allergen info: Contains wheat, eggs, and may contain tree nuts (if you add nuts or use almond extract). Always check ingredient labels if you’re baking for those with sensitivities. From a wellness perspective, these bars offer a festive treat without being heavy — perfect for a little holiday indulgence!
Conclusion
In a season packed with cookies and cakes, these Christmas Cherry Bars truly shine. They’re festive, easy to make, and always a hit with family and friends. If you love recipes that combine nostalgia with practicality, you’ll appreciate how these bars come together quickly and deliver big on flavor.
Feel free to customize them for your own traditions — swap the filling, try a new extract, or turn them into bite-sized treats. Honestly, these are the bars I crave every December, and I hope they become part of your holiday repertoire, too.
If you give this recipe a try, let me know how it turned out! Drop a comment, share your photos, or tell me about your own family twists. Wishing you lots of cheer and sweet moments around the table — may your holiday gatherings be filled with laughter, love, and plenty of cherry bars!
FAQs
Can I use homemade cherry filling instead of canned?
Absolutely! Just cook down fresh or frozen cherries with sugar and cornstarch until thick and glossy. Makes the bars even more special.
How do I prevent the bars from becoming soggy?
Make sure to drain some juice from the pie filling if it seems runny. Also, let the bars cool completely before slicing — this helps set the layers.
What’s the best way to slice Christmas Cherry Bars cleanly?
Use a sharp knife and wipe it clean between cuts. Chilling the bars for 30 minutes before slicing also helps!
Can I make these bars ahead for a party?
Yes! These bars keep well at room temp for 2-3 days, and the flavor actually deepens overnight. Perfect for prepping ahead.
Are Christmas Cherry Bars freezer-friendly?
They sure are. Freeze in layers with parchment between bars, then thaw in the fridge overnight. They taste just as good — maybe even better!
Pin This Recipe!
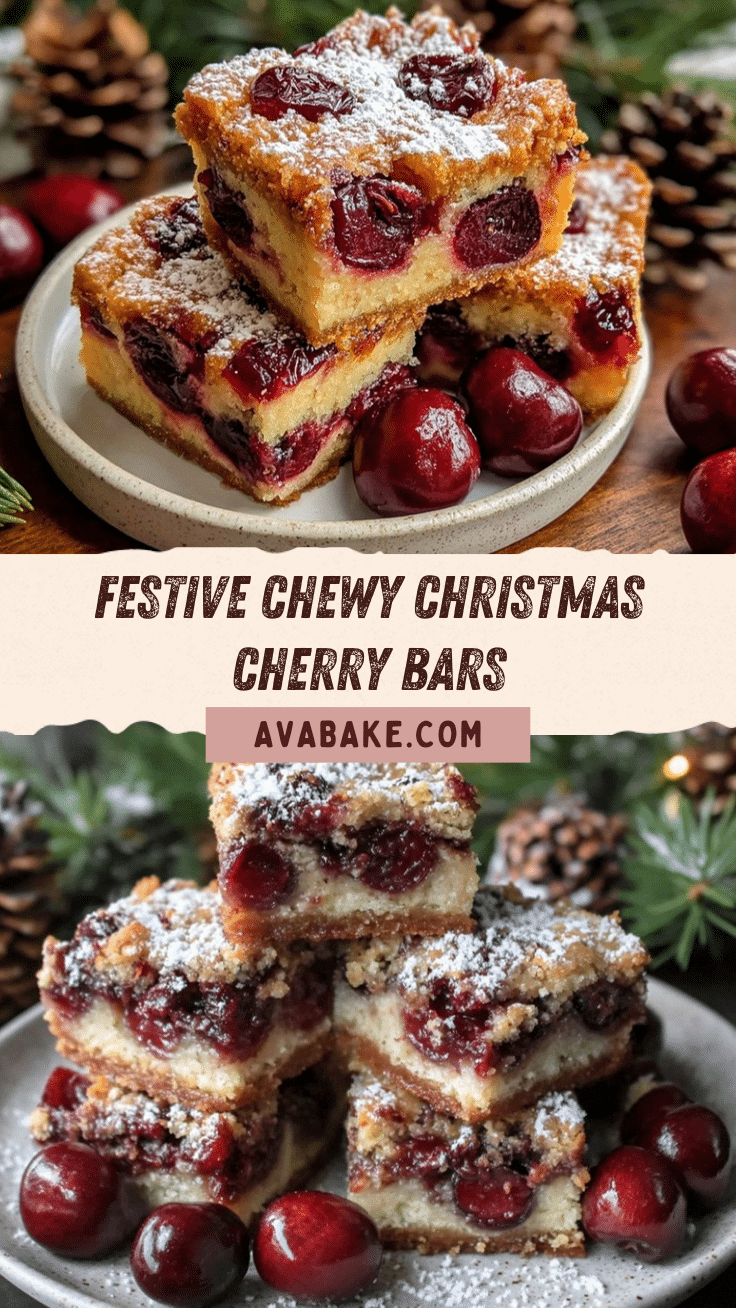
Christmas Cherry Bars
Christmas Cherry Bars are a festive, easy-to-make dessert featuring a buttery crust, sweet-tart cherry filling, and a drizzle of almond glaze. Perfect for holiday parties, gifting, or cozy family gatherings, these bars are a nostalgic treat that everyone will love.
- Prep Time: 15 minutes
- Cook Time: 35-40 minutes
- Total Time: 1 hour 15 minutes
- Yield: 24 bars 1x
- Category: Dessert
- Cuisine: American
Ingredients
- 2 1/4 cups all-purpose flour
- 1 cup granulated sugar
- 1 cup unsalted butter, softened
- 1/2 teaspoon baking powder
- 1/2 teaspoon salt
- 2 large eggs, room temperature
- 1 teaspoon vanilla extract
- 1/2 teaspoon almond extract (optional)
- 2 cans (21 oz each) cherry pie filling
- 1 tablespoon cornstarch
- 1 cup powdered sugar (for glaze, optional)
- 1–2 tablespoons milk (for glaze, optional)
- 1/4 teaspoon almond extract (for glaze, optional)
Instructions
- Preheat oven to 350°F (175°C). Lightly grease a 9×13-inch pan or line with parchment paper.
- In a large bowl, cream together butter and sugar until light and fluffy (2-3 minutes). Add eggs, vanilla extract, and almond extract; beat until well combined.
- Whisk together flour, baking powder, and salt. Gradually add to wet mixture, mixing just until dough forms.
- Scoop out 2/3 of dough and press evenly into the bottom of the prepared pan.
- In a small bowl, stir together cherry pie filling and cornstarch. Spread cherry mixture evenly over crust, avoiding edges.
- Drop spoonfuls of remaining dough over filling. Leave some gaps for the cherry to peek through.
- Bake for 35-40 minutes, until top is golden and filling bubbles around the edges.
- Let bars cool completely in pan (about 1 hour).
- For optional glaze: Mix powdered sugar, milk, and almond extract in a bowl. Drizzle over cooled bars.
- Cut into squares or bars (about 24 pieces). Wipe knife between slices for clean edges.
Notes
For gluten-free or dairy-free adaptations, substitute with 1:1 gluten-free flour and plant-based butter. Use flax eggs for egg-free version. Let bars cool completely before slicing for neat edges. Bars can be made ahead and freeze well. For extra festive flair, add slivered almonds or holiday sprinkles before baking.
Nutrition
- Serving Size: 1 bar (1/24th of rec
- Calories: 175
- Sugar: 17
- Sodium: 90
- Fat: 7
- Saturated Fat: 4
- Carbohydrates: 27
- Fiber: 1
- Protein: 2
Keywords: Christmas Cherry Bars, holiday dessert, cherry bars, festive baking, easy cherry bars, potluck dessert, almond glaze, cherry pie filling bars


