Picture this: the unmistakable sweet scent of butter and vanilla swirling through the kitchen, mingling with the chill of peppermint. The first time I pressed the creamy butter mint mixture into my grandma’s old candy molds, I felt like I’d unlocked a secret holiday tradition. It’s the kind of moment where you pause, take a deep breath, and just smile because you know you’re onto something truly special.
Honestly, these creamy butter mints are pure, nostalgic comfort—dangerously easy to make, and so pretty they look straight off a vintage holiday Pinterest board. When I was knee-high to a grasshopper, my aunt would sneak me a few right before the Christmas Eve dinner (I was supposed to wait, but you know how little hands find their way to the treats). The cool, creamy texture and pastel colors were irresistible. Years later, I tried recreating them for a bake sale, and let’s just say, they disappeared faster than I could refill the tray.
My family can’t help but sneak these off the cooling rack. I can’t blame them—they’re the kind of treat that makes you feel like a kid again, no matter your age. Friends still ask for the recipe every holiday season, and I’ve tested it so many times in the name of research, of course. Now, it’s a staple for family gatherings, gifting, and brightening up any cookie platter. These butter mints feel like a warm hug, and you’re going to want to bookmark this one for every festive occasion!
Why You’ll Love This Creamy Butter Mints Recipe
- Quick & Easy: Comes together in under 30 minutes, perfect for last-minute holiday candy needs or spontaneous sweet cravings.
- Simple Ingredients: No fancy grocery trips—just basic pantry staples and a splash of peppermint extract.
- Perfect for Holiday Gatherings: These creamy butter mints are a hit at parties, potlucks, and as edible gifts. They add a vintage touch to dessert tables and cookie exchanges.
- Crowd-Pleaser: Kids and adults both go wild for the melt-in-your-mouth texture and sweet, minty flavor.
- Unbelievably Delicious: The combo of real butter and cream makes these mints velvety soft. That pastel color? Total eye candy!
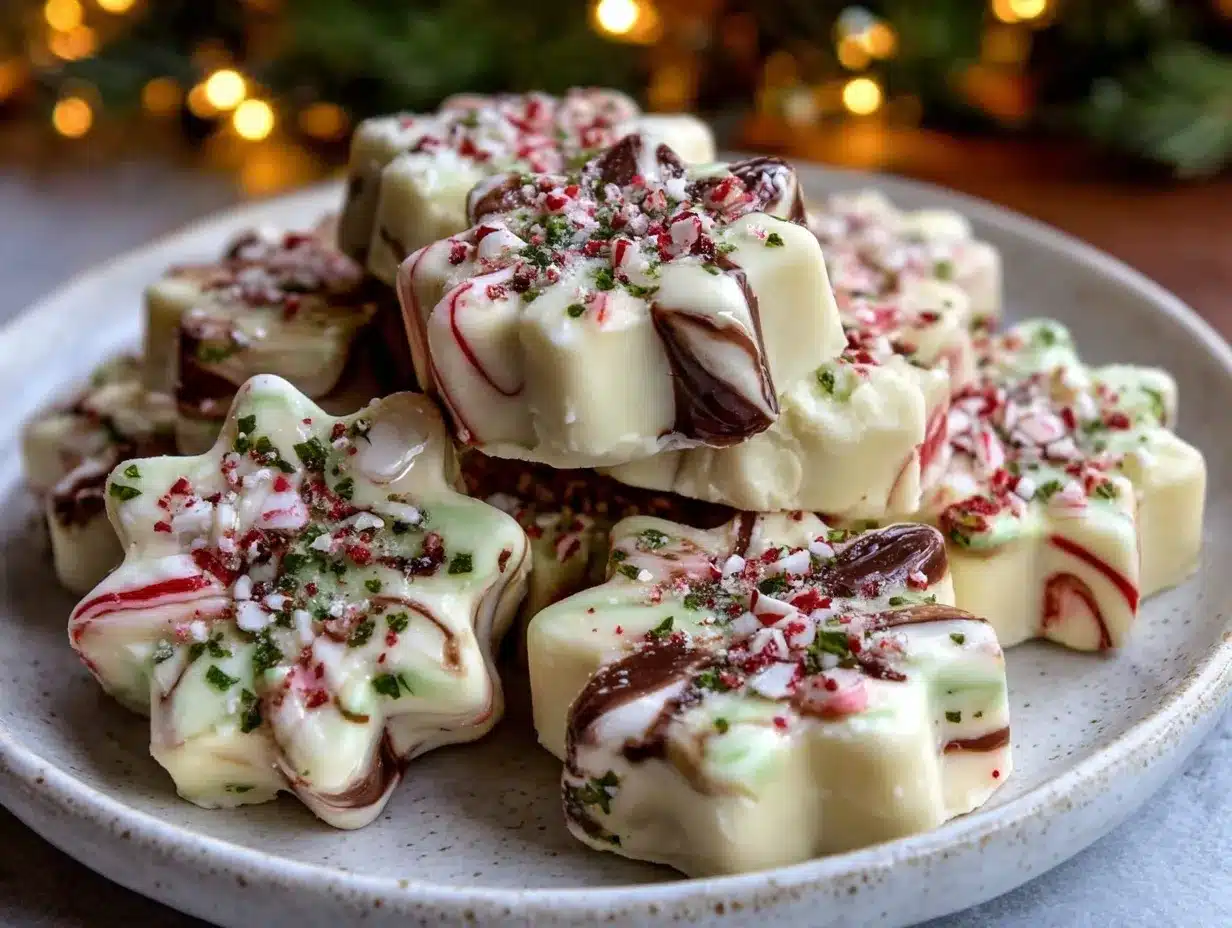
What sets this creamy butter mints recipe apart is its dreamy texture and the use of candy molds for that classic, vintage look. Most recipes just have you roll and cut, but molding lets you create picture-perfect shapes that look (and taste) like they came from a fancy sweets shop. I blend the butter until it’s ultra-soft for a smooth finish—trust me, it makes all the difference.
This isn’t just another butter mint recipe. It’s the kind you’ll find yourself craving on cozy nights, and it’s practically foolproof (I’ve made it with kids in tow and had zero flops). Comfort food at its finest—sweet, creamy, a little bit old-fashioned, but totally reliable. Serve them up after dinner, tuck them into holiday tins, or sneak a few with your morning coffee. Each bite is like a mini celebration!
What Ingredients You Will Need
This creamy butter mints recipe uses simple, wholesome ingredients to deliver bold flavor and a melt-in-your-mouth texture. Most of these are pantry basics, and you can swap a few things to suit your tastes or dietary needs.
- Unsalted butter, softened (1/2 cup / 113 g) – The base of the recipe; gives richness and that creamy texture. I always use real butter for the best flavor.
- Heavy cream (2 tbsp / 30 ml) – Adds a luscious smoothness. If you want a lighter option, you can try half-and-half (but honestly, cream is king here).
- Powdered sugar (3 1/2 cups / 420 g) – Sweetens and thickens the mix. I recommend sifting it for a silky-smooth finish—clumps are the enemy of pretty mints!
- Peppermint extract (1 1/2 tsp / 7 ml) – For that classic minty zing. I’ve tried both McCormick and Nielsen-Massey brands—both work great. Don’t go overboard; too much and it’ll taste medicinal.
- Vanilla extract (1/2 tsp / 2.5 ml) – Just a hint, for warmth and balance. Adds depth that ties it all together.
- Salt (Pinch) – A tiny bit makes the flavors pop. Skip if your butter is salted.
- Gel food coloring (optional, a few drops) – For pastel holiday colors. Wilton and Americolor gels give vibrant shades without watering down the mix.
Ingredient Tips and Substitutions:
- For a dairy-free option, swap butter for vegan butter (like Earth Balance) and use coconut cream in place of heavy cream. The flavor will be slightly different, but still delicious.
- If you want a different flavor, try almond or lemon extract instead of peppermint.
- Prefer less sweetness? Reduce powdered sugar by 1/2 cup, but the texture will be a bit firmer.
- No food coloring? Leave them white, or mix in a tiny pinch of cocoa powder for soft brown mints.
- In summer, swap peppermint for lemon and add yellow coloring for sunny, citrusy mints.
I love using locally sourced butter for extra richness, and if you have access to fresh cream from a dairy, it makes these mints taste even dreamier. That’s the beauty of a vintage candy recipe—it’s easy to make your own!
Equipment Needed
- Mixing bowl – A sturdy, medium-sized bowl for combining ingredients.
- Hand mixer or stand mixer – Makes the creaming process a breeze. You can use a wooden spoon and some elbow grease if you’re feeling old-school.
- Rubber spatula – For scraping the bowl and smoothing the mixture.
- Candy molds – Vintage plastic or silicone molds work best for pretty shapes. I’ve found some great ones at thrift stores and online marketplaces.
- Wax paper or parchment paper – For lining trays and preventing sticking.
- Baking sheet or tray – To set the mints after molding.
- Sifter – Optional but helpful for powdered sugar. It makes the texture ultra-smooth.
If you don’t have candy molds, you can roll the dough into small balls and flatten with a fork—still tasty and cute! Silicone molds are easier to clean and release the mints nicely. My grandma swore by her old-school plastic molds, but I’m partial to silicone for easy maintenance.
Budget tip: Dollar stores sometimes have seasonal candy molds for cheap. Keep an eye out around the holidays! Just give them a good wash before using, and store them in a dry spot so they don’t warp.
Preparation Method
-
Cream the Butter:
Place 1/2 cup (113 g) unsalted butter in your mixing bowl. Beat with a hand mixer or stand mixer until it’s light, fluffy, and almost white—about 2-3 minutes. If your butter is too cold, let it sit out until soft; hard butter won’t blend smoothly (trust me, I’ve tried). -
Add Cream and Flavors:
Pour in 2 tbsp (30 ml) heavy cream, 1 1/2 tsp (7 ml) peppermint extract, 1/2 tsp (2.5 ml) vanilla extract, and a pinch of salt. Beat again until everything is fully combined. The mixture should smell sweet and minty, and look smooth. -
Gradually Add Powdered Sugar:
Add 3 1/2 cups (420 g) powdered sugar, a cup at a time, mixing on low speed. Sift the sugar first if possible. The mixture will look crumbly at first, but keep mixing—it will come together into a thick, doughy paste. If it’s too sticky, add another 1/4 cup (30 g) powdered sugar. If it’s too dry, add another splash of cream. -
Add Food Coloring:
Divide the mixture if you want multiple colors. Add a drop or two of gel food coloring and knead gently until evenly colored. I use gloves for this step to avoid rainbow fingers! The dough should be pastel and smooth. -
Shape with Candy Molds:
Press small amounts of dough into clean candy molds. Scrape off any excess with a spatula or knife, then gently pop out the shapes onto wax paper or parchment. If you don’t have molds, roll dough into 1/2-inch (1.2 cm) balls and flatten with a fork for classic butter mint “coins.” I’ve found letting the dough chill for 10 minutes before molding makes it easier to handle. -
Rest and Set:
Arrange shaped mints on a baking sheet lined with wax paper. Let them air dry at room temperature for 4-6 hours (or overnight) until firm. The outside should feel dry, but the inside stays creamy. If your kitchen is humid, dry near a fan or in a cool, dry spot.
Preparation tip: If the dough gets sticky, dust your hands and molds with powdered sugar. For perfectly smooth mints, press firmly in the molds and pop out gently. Don’t rush the drying time—soft mints are hard to store and serve. I’ve tried speeding it up in the fridge, but they just get sticky. Patience pays off!
Cooking Tips & Techniques
Here’s where experience comes in handy. The key to perfect creamy butter mints is all about the mixing and drying process.
- Use softened butter: Cold butter won’t blend well and leaves lumps. I made that mistake once—ended up with grainy mints.
- Sift powdered sugar: Skipping this gives you clumps. It’s a little extra work, but makes a world of difference in texture.
- Don’t overdo the extract: Peppermint can be strong and go medicinal if you add too much. Start with less and taste as you go. I learned this the hard way—one batch tasted like toothpaste.
- Coloring: Gel works best. Liquid colors make the dough runny and hard to mold.
- Keep hands clean: Sticky dough clings to everything. Wash hands and dust with powdered sugar if needed.
- Mold care: Wash and dry molds fully before use. Any leftover moisture makes the mints stick and break.
- Drying time: Don’t rush. Air drying is the gold standard—refrigeration makes them sweat and become sticky.
If you’re multitasking, you can color the dough while the first batch sets in the molds. I often set up a little assembly line. Consistency tip: mix until the dough is smooth and not crumbly. If it splits, add a tiny splash of cream and knead. If you want extra fancy mints, dip half in chocolate after they’re dry—yum!
Variations & Adaptations
- Seasonal Flavors: Swap peppermint for lemon, orange, or almond extract. Add matching food coloring for spring or summer parties.
- Gluten-Free & Dairy-Free: Use vegan butter and coconut cream. The texture is slightly softer, but still tasty. Make sure powdered sugar is certified gluten-free.
- Chocolate-Dipped Mints: Once set, dip one side in melted dark or white chocolate. Let harden for a rich, candy-shop twist.
For nut allergies, keep extracts simple—avoid almond. If you want a spicy kick, add a pinch of cinnamon or nutmeg. For kids, use fun silicone molds in animal shapes or stars—makes a sweet classroom treat. I once made a batch with orange extract and orange coloring for Halloween, and they were a spooky hit!
Different cooking methods: you can roll the dough into logs and slice for “mint coins” if you don’t have molds. If you want firmer mints, use less cream and let them set longer. The possibilities are endless, and experimenting is half the fun.
Serving & Storage Suggestions
Creamy butter mints are best served cool, at room temperature. For a vintage look, pile them in a glass candy dish or scatter on a pretty holiday platter. Pair with coffee or hot chocolate for a cozy treat. I love adding them alongside sugar cookies or chocolate bark on dessert boards.
Storage is easy: keep mints in an airtight container with wax paper between layers for up to 2 weeks. They freeze well—just place in a freezer-safe box and thaw at room temperature before serving. As they sit, the flavors mellow and the texture becomes even creamier.
Reheating isn’t needed, but if they get too firm, leave them out for a few minutes before serving. Honestly, they rarely last long enough to worry about storage in my house! These mints are perfect for gifting—wrap in cellophane bags with a festive ribbon for instant holiday cheer.
Nutritional Information & Benefits
Estimated per mint (about 7 g):
- Calories: 35
- Fat: 2 g
- Sugar: 5 g
- Carbs: 6 g
- Protein: 0 g
Butter adds vitamin A and a bit of calcium. Powdered sugar is pure sweetness—so moderation is key. Using real extracts means you get flavor without artificial stuff. For gluten-free diets, just double-check your powdered sugar and extracts. Possible allergens: dairy (butter, cream). My personal view: these are a treat—not an everyday snack, but they’re a fun, old-fashioned way to make holidays special.
Conclusion
Creamy butter mints are the kind of treat you make once and never forget. They’re simple, classic, and guaranteed to brighten any holiday table. I love how customizable they are—colors, flavors, even shapes. Whether you’re gifting, hosting, or just want a little sweet something after dinner, this recipe delivers every time.
Don’t be afraid to tweak and experiment. Try different extracts, get creative with molds, or share your unique twist in the comments. Honestly, these butter mints have become a family favorite, and I hope they become a staple in your kitchen too.
Let me know how your batch turns out, and don’t forget to pin and share with friends! Wishing you sweet, creamy success and lots of holiday smiles.
FAQs About Creamy Butter Mints Recipe
Can I make creamy butter mints without candy molds?
Absolutely! Just roll the dough into small balls and flatten with a fork for classic coins. They taste just as delicious and look cute on a platter.
How do I keep butter mints from sticking to the molds?
Make sure molds are dry and dust lightly with powdered sugar before pressing in the dough. If they’re still sticking, chill the dough slightly before molding.
Can I freeze butter mints?
Yes! Store them in a freezer-safe container with wax paper between layers. Thaw at room temperature before serving for best texture.
What’s the best way to color butter mints?
Gel food coloring works best—just knead in a drop or two until you reach your desired shade. Liquid coloring can make the dough too soft.
Are creamy butter mints gluten-free?
Most of the time, yes! Just check your powdered sugar and extracts for gluten-containing additives. For dairy-free, use vegan butter and coconut cream.
Pin This Recipe!
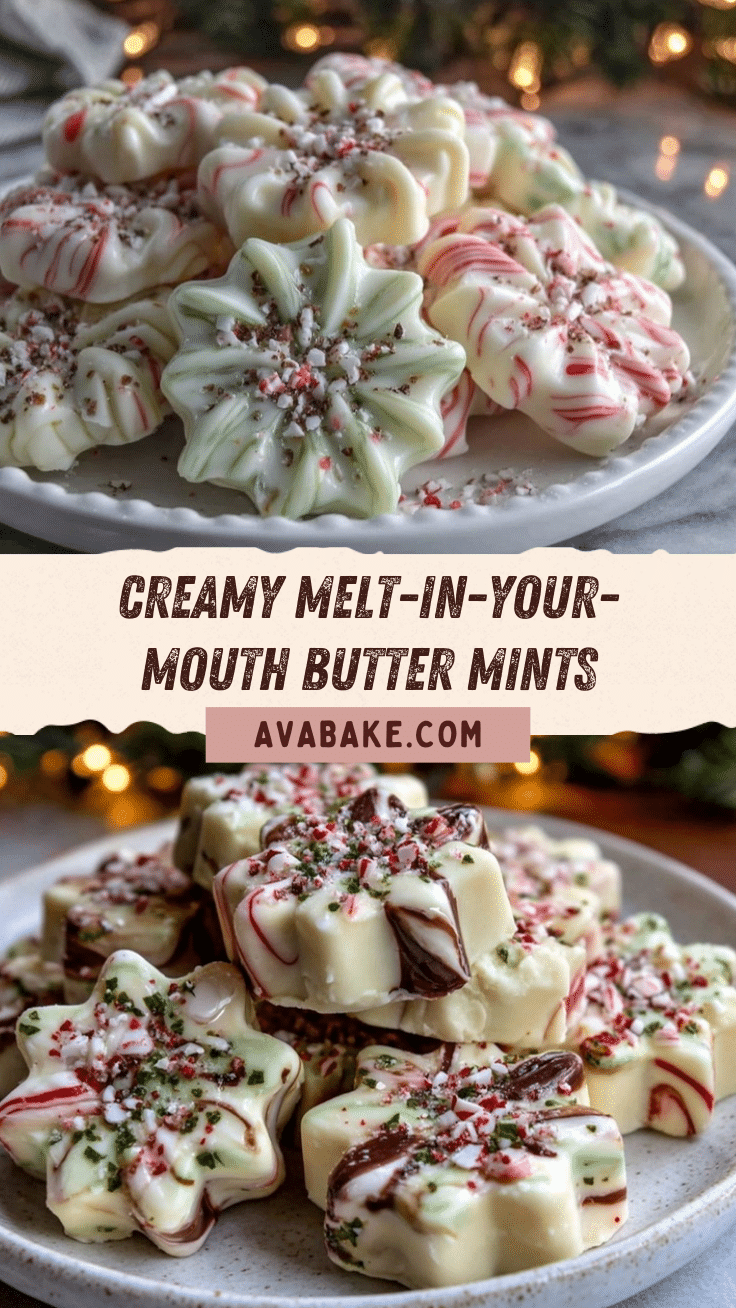
Creamy Butter Mints

Creamy butter mints are a nostalgic, melt-in-your-mouth holiday candy made with simple ingredients and shaped in vintage candy molds. Perfect for gifting, parties, or adding a festive touch to any dessert table.
- Prep Time: 15 minutes
- Cook Time: 0 minutes
- Total Time: 6 hours 15 minutes
- Yield: About 60 mints 1x
- Category: Candy
- Cuisine: American
Ingredients
- 1/2 cup unsalted butter, softened
- 2 tablespoons heavy cream
- 3 1/2 cups powdered sugar, sifted
- 1 1/2 teaspoons peppermint extract
- 1/2 teaspoon vanilla extract
- Pinch of salt (omit if using salted butter)
- Gel food coloring (optional, a few drops)
Instructions
- Place softened butter in a mixing bowl and beat with a hand mixer or stand mixer until light, fluffy, and almost white (about 2-3 minutes).
- Add heavy cream, peppermint extract, vanilla extract, and a pinch of salt. Beat until fully combined and smooth.
- Gradually add powdered sugar, one cup at a time, mixing on low speed. Sift the sugar first for best texture. Mix until a thick, doughy paste forms. If too sticky, add up to 1/4 cup more powdered sugar; if too dry, add a splash of cream.
- Divide the mixture if desired and add gel food coloring, kneading gently until evenly colored.
- Press small amounts of dough into clean candy molds, scraping off excess. Pop out shapes onto wax or parchment paper. Alternatively, roll dough into 1/2-inch balls and flatten with a fork.
- Arrange shaped mints on a baking sheet lined with wax paper. Let air dry at room temperature for 4-6 hours (or overnight) until firm.
Notes
For dairy-free, use vegan butter and coconut cream. Sift powdered sugar for smooth texture. Gel food coloring works best. Let mints air dry fully for best texture; refrigeration makes them sticky. Store in airtight container with wax paper between layers for up to 2 weeks, or freeze for longer storage.
Nutrition
- Serving Size: 1 mint (about 7 g)
- Calories: 35
- Sugar: 5
- Sodium: 10
- Fat: 2
- Saturated Fat: 1.5
- Carbohydrates: 6
Keywords: butter mints, creamy mints, holiday candy, vintage candy, peppermint, easy candy, Christmas treats, edible gifts, pastel mints


