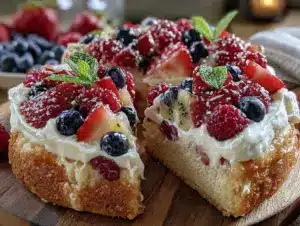
Scrambling through the kitchen with a toddler tugging at my pants and a phone buzzing nonstop, I realized I was missing the one dessert I’d promised to bring to the party: something sweet, simple, and no-fuss. Half a package of cream cheese sitting awkwardly in the fridge, a handful of strawberries wilting on the counter, and barely enough time to breathe. That’s when these Easy Mini Strawberry Cheesecake Trifle Cups came to life—pure kitchen chaos turned into a quick, crowd-friendly delight.
Honestly, the recipe wasn’t planned—it was improvised while juggling snack demands and last-minute outfit changes. Yet, the layers of creamy cheesecake filling, fresh strawberries, and crunchy cookie crumbs came together perfectly, like magic disguised as motherhood madness. The cups were small, easy to hold, and vanished fast, which was exactly what I needed that day.
I still remember the quiet moment when the last crumb disappeared, and I realized this simple dessert had earned a permanent spot in my hosting arsenal. It’s the kind of recipe that makes you look like you spent hours fussing when really, it took less than 30 minutes and a bit of improvisation. If you’re chasing a last-minute, no-stress dessert that feels special, these mini strawberry cheesecake trifle cups are your go-to.
Why You’ll Love This Recipe
After testing, tweaking, and tasting, I can say these Easy Mini Strawberry Cheesecake Trifle Cups have some serious perks that make them a favorite around here. Whether you’re a busy parent, a novice cook, or just someone who loves quick desserts, this recipe fits the bill.
- Quick & Easy: Ready in under 30 minutes, so you can whip it up even when the clock’s against you.
- Simple Ingredients: No specialty store runs needed—staples like cream cheese, strawberries, and crushed cookies are all it takes.
- Perfect for Parties: These mini cups are ideal for potlucks, kids’ birthdays, or casual get-togethers without the mess of slicing and plating.
- Crowd-Pleaser: The blend of creamy, fruity, and crunchy textures gets rave reviews from both kids and adults.
- Unbelievably Delicious: The cheesecake layer is smooth and not too sweet, balanced by the fresh strawberries’ slight tartness and the cookie crumbs’ satisfying crunch.
What sets this recipe apart? The secret is in the no-bake cheesecake filling—lightened with a bit of whipped cream for fluffiness and mixed just right to keep that silky texture. Plus, layering in crushed vanilla wafers instead of the usual graham crackers adds a subtle sweetness that’s a game-changer.
Honestly, this recipe isn’t just dessert; it’s a quick, fuss-free treat that makes you pause for a moment of pure satisfaction. It’s the kind of dish that’ll have you closing your eyes after the first bite, promising yourself you’ll make it again soon.
What Ingredients You Will Need
This recipe keeps things straightforward with easy-to-find ingredients that come together for a flavorful, balanced dessert. Most of these are pantry or fridge staples, so you can usually pull this off on a whim.
- Cream Cheese: 8 oz (227 g), softened—use full-fat for best creaminess; brands like Philadelphia work great here.
- Heavy Whipping Cream: 1 cup (240 ml), cold—helps lighten the cheesecake filling with a fluffy texture.
- Powdered Sugar: ½ cup (60 g)—for smooth sweetness without graininess.
- Vanilla Extract: 1 tsp (5 ml)—adds warmth and depth to the filling.
- Strawberries: 2 cups (about 300 g), hulled and sliced—fresh is best, but frozen thawed berries work in a pinch.
- Vanilla Wafers or Graham Crackers: 1 ½ cups (about 150 g) crushed—vanilla wafers give a lovely sweetness; graham crackers add a classic touch.
- Lemon Zest: 1 tsp (optional)—brightens up the filling and complements the strawberries.
For substitutions, you can swap almond flour or gluten-free cookies for a gluten-free version, and coconut whipped cream if you want dairy-free. In the summer, I like swapping in fresh raspberries or blueberries instead of strawberries for a twist. When it comes to strawberry selection, firmer, ripe berries hold up better in the cups without turning mushy.
Equipment Needed
- Mixing Bowls: At least two—a medium for the cheesecake filling and a small one for whipping cream.
- Electric Mixer or Whisk: An electric hand mixer is easiest for whipping the cream and beating the cream cheese smooth, but a sturdy whisk works if you’re feeling strong.
- Measuring Cups and Spoons: For accuracy, especially with sugar and vanilla.
- Mini Trifle Cups or Small Glasses: About 8 to 10, to layer and serve the dessert; clear ones show off the pretty layers best.
- Spatula: For folding and spreading the layers without deflating the whipped cream.
If you don’t have mini trifle cups, small mason jars or even espresso cups do the trick. I’ve found that using a piping bag or a zip-top bag with the corner cut off makes layering neater and faster. For budget-friendly options, disposable clear plastic cups work just fine for parties or picnics.
Preparation Method
- Prepare the Cheesecake Filling (10 minutes): In a medium bowl, beat 8 oz (227 g) of softened cream cheese with ½ cup (60 g) powdered sugar and 1 tsp (5 ml) vanilla extract until smooth and creamy. Use an electric mixer on medium speed for best results. If lumps remain, keep beating—it’ll smooth out. Add 1 tsp lemon zest if using, and mix gently.
- Whip the Cream (5-7 minutes): In a chilled bowl, pour 1 cup (240 ml) of cold heavy whipping cream. Whip on high speed until stiff peaks form but be careful not to overbeat—it can turn grainy or start turning to butter. This whipped cream lightens the filling for that fluffy texture.
- Fold the Whipped Cream (2 minutes): Gently fold the whipped cream into the cream cheese mixture using a spatula. Use slow, deliberate strokes to keep the airiness. The filling should be smooth, silky, and spreadable.
- Prepare the Strawberries (5 minutes): Hull and slice 2 cups (about 300 g) of fresh strawberries. Set aside. If your strawberries are very juicy, pat them dry with a paper towel to avoid soggy layers.
- Crush the Cookies (2 minutes): Place 1 ½ cups (about 150 g) of vanilla wafers or graham crackers in a sealed bag and crush with a rolling pin until fine crumbs with some small chunks remain. Keep texture varied for the best crunch.
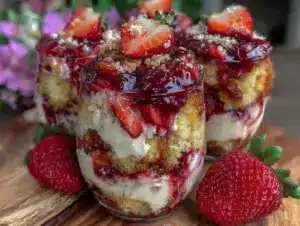
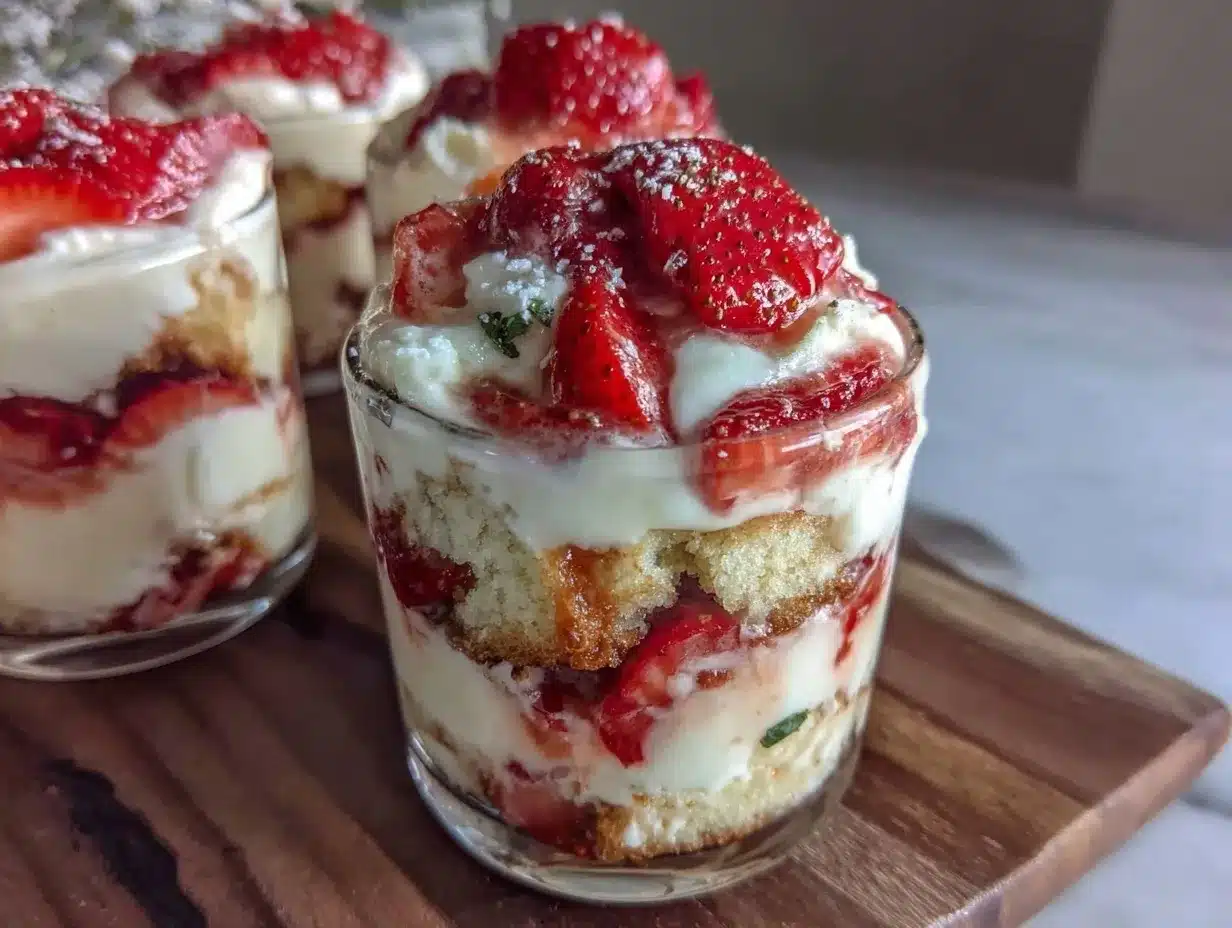
- Assemble the Trifle Cups (10 minutes): Start with a spoonful of crushed cookies at the bottom of each cup (about 2 tbsp / 20 g). Next, add a layer of cheesecake filling (about 3 tbsp / 45 ml), then a layer of sliced strawberries (about 2 tbsp / 30 g). Repeat the layers once more if your cups are tall enough, finishing with a sprinkle of cookie crumbs and a small strawberry slice on top for garnish.
- Chill Before Serving (at least 1 hour): Transfer the assembled cups to the fridge to set. The flavors meld and the filling firms up, making them easier to eat and more flavorful. If you’re short on time, chilling for 30 minutes still works, but the texture is best after a longer rest.
Tip: If the cheesecake filling feels too thick after chilling, let it sit at room temperature for 10 minutes before serving to soften slightly. Also, layering while the filling is cold helps keep distinct layers.
Cooking Tips & Techniques
Perfecting these Easy Mini Strawberry Cheesecake Trifle Cups is all about balancing texture and flavor without overcomplicating the process.
- Softening Cream Cheese: Let it sit at room temperature for at least 30 minutes before starting. Cold cream cheese leads to lumps and a tough mix.
- Whipping Cream Just Right: Stop whipping when stiff peaks form but before it looks grainy. Overwhipping wastes cream and ruins the texture.
- Folding Technique: Use gentle folding motions to combine whipped cream with cream cheese. Stirring too aggressively knocks out air, resulting in a dense filling.
- Cookie Crumbs Texture: Keep some chunks in the crushed cookies for crunch contrast. Too fine, and it becomes mushy quickly.
- Layer Order: Always put cookies at the bottom first to create a sturdy base and prevent sogginess from moisture.
- Multi-tasking: While the filling chills, prep strawberries or clean up to save time.
From personal experience, trying to rush the chilling step is a rookie mistake—patience really makes a difference. Also, I once forgot to hull the strawberries and ended up with a bitter bite in every cup. Lesson learned: prep is key!
Variations & Adaptations
These mini trifle cups are wonderfully adaptable, so feel free to get creative with flavors and dietary needs.
- Dairy-Free Version: Swap cream cheese for a plant-based alternative and use coconut whipped cream. The texture is slightly different but still delicious.
- Berry Medley: Replace strawberries with a mix of blueberries, raspberries, and blackberries for a colorful twist.
- Chocolate Lover’s: Add a layer of chocolate ganache or mix cocoa powder into the cheesecake filling. Crushed chocolate cookies can replace vanilla wafers for extra indulgence.
- Gluten-Free: Use gluten-free cookies or almond flour crumbs for the base. Make sure your cream cheese and other ingredients are labeled gluten-free.
- Adult Version: Stir in a tablespoon of liqueur like Grand Marnier or Amaretto into the filling for a grown-up kick.
Once, I swapped the cookie crumbs for crushed pistachios and layered fresh peaches instead of strawberries—an unexpected but delightful summer variation. Feel free to experiment with what’s in your pantry or what’s fresh at the market.
Serving & Storage Suggestions
Serve these trifle cups chilled straight from the fridge. The cold temperature enhances the cheesecake’s silkiness and keeps the cookie layers delightfully crisp. I like to garnish with a fresh strawberry slice and a tiny mint leaf for a pop of color.
They pair wonderfully with a cup of coffee or a sparkling rosé for celebrations. For kid-friendly occasions, a cold glass of milk or fruity iced tea works just as well.
To store, cover the cups tightly with plastic wrap or a reusable lid and refrigerate for up to 3 days. Avoid freezing, as the texture of the cream and cookies changes noticeably once thawed.
When reheating is needed, simply let the cups sit at room temperature for 15 minutes before serving to soften the filling slightly. The flavors often deepen overnight, making them even better the next day if you can wait.
Nutritional Information & Benefits
Each mini cheesecake trifle cup contains approximately 250 calories, with about 15 grams of fat and 25 grams of carbohydrates. The recipe provides a moderate amount of protein from the cream cheese and cream.
Strawberries add vitamin C and antioxidants, making this dessert a bit more wholesome than your average sweet treat. Using fresh fruit keeps it light, and you can reduce sugar by cutting back slightly on powdered sugar without losing much flavor.
For those monitoring gluten, the recipe is easily customizable to be gluten-free, and dairy-free options exist as well. As always, be mindful of allergens like dairy, gluten, or nuts if you add variations.
I find this dessert strikes a nice balance between indulgence and nutrition, making it a dessert I’m comfortable serving to family and friends—even on a busy weeknight.
Conclusion
Easy Mini Strawberry Cheesecake Trifle Cups are proof that sometimes, the best recipes come from a little chaos and plenty of improvisation. Their simplicity, quick prep, and crowd-pleasing flavor make them a reliable choice when you need a dessert that looks special but practically makes itself.
Feel free to tweak the layers and flavors to match your preferences or occasion. I love how this recipe always brings smiles, whether at casual family dinners or lively parties.
Your turn to try it—these trifle cups might just become your new dessert secret weapon in the kitchen. Drop a comment to share your favorite variations or how they went over at your next gathering. Here’s to sweet moments made easy!
FAQs
- Can I make these ahead of time?
Yes! Assemble and refrigerate them up to 2 days before serving for best flavor and texture. - What can I use instead of strawberries?
Blueberries, raspberries, or peaches all work well as alternatives or additions. - How do I store leftover trifle cups?
Cover them tightly and keep refrigerated for up to 3 days; avoid freezing to maintain texture. - Is this recipe gluten-free?
It can be if you use gluten-free cookies or almond flour for the crumb layers. - Can I make the cheesecake filling without an electric mixer?
Yes, but beating by hand will take longer and require some elbow grease to get it smooth and creamy.
For those looking for more easy but impressive recipes, you might enjoy my easy creamy no-bake Oreo cheesecake or the crispy honey mustard chicken strawberry salad—both favorites for fuss-free entertaining.
Pin This Recipe!
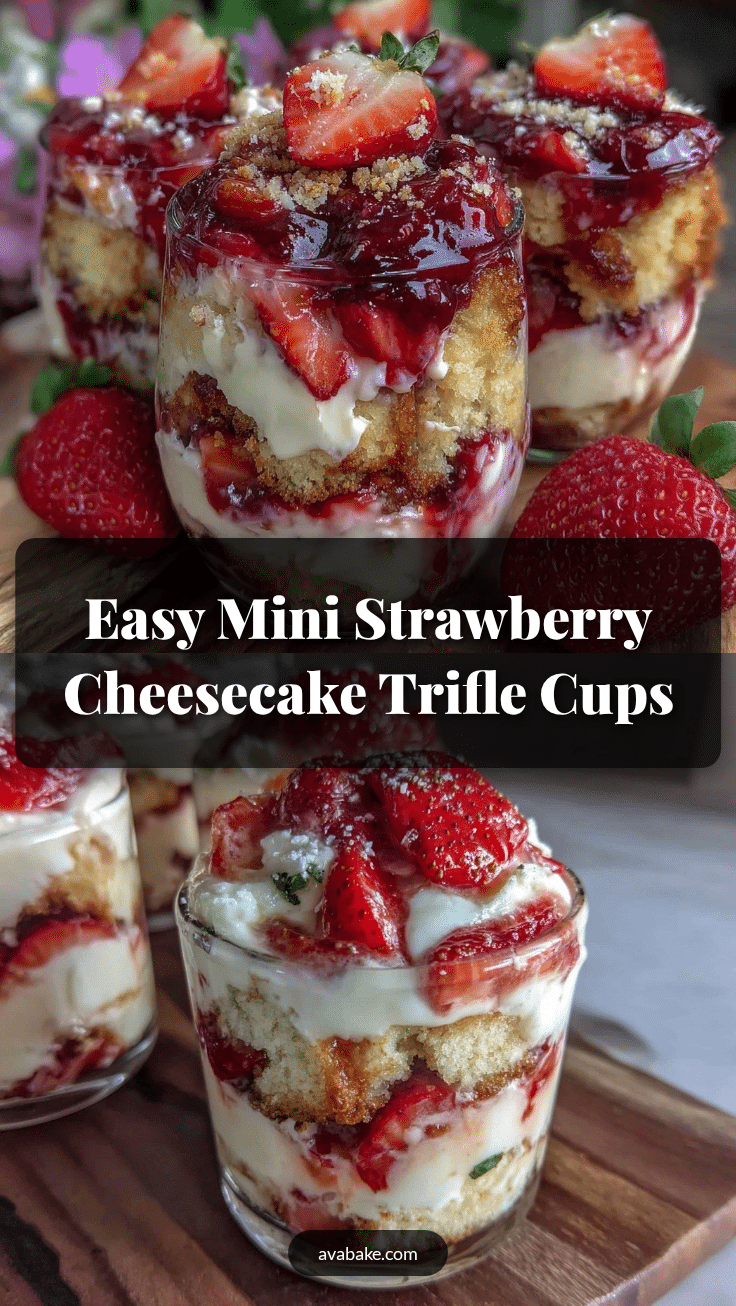
Easy Mini Strawberry Cheesecake Trifle Cups

A quick, no-bake dessert featuring layers of creamy cheesecake filling, fresh strawberries, and crunchy cookie crumbs, perfect for parties and last-minute treats.
- Prep Time: 20 minutes
- Cook Time: 0 minutes
- Total Time: 1 hour 20 minutes
- Yield: 8 to 10 servings 1x
- Category: Dessert
- Cuisine: American
Ingredients
- 8 oz (227 g) cream cheese, softened
- 1 cup (240 ml) heavy whipping cream, cold
- ½ cup (60 g) powdered sugar
- 1 tsp (5 ml) vanilla extract
- 2 cups (about 300 g) strawberries, hulled and sliced
- 1 ½ cups (about 150 g) crushed vanilla wafers or graham crackers
- 1 tsp lemon zest (optional)
Instructions
- In a medium bowl, beat softened cream cheese with powdered sugar and vanilla extract until smooth and creamy. Add lemon zest if using and mix gently.
- In a chilled bowl, whip cold heavy whipping cream on high speed until stiff peaks form, being careful not to overbeat.
- Gently fold the whipped cream into the cream cheese mixture using a spatula until smooth and silky.
- Hull and slice strawberries; pat dry if very juicy.
- Crush vanilla wafers or graham crackers to fine crumbs with some small chunks remaining.
- Assemble trifle cups by layering 2 tbsp crushed cookies, 3 tbsp cheesecake filling, and 2 tbsp sliced strawberries. Repeat layers if cups are tall enough, finishing with cookie crumbs and a strawberry slice on top.
- Chill assembled cups in the refrigerator for at least 1 hour before serving.
Notes
Let cream cheese soften at room temperature for at least 30 minutes before starting. Stop whipping cream at stiff peaks to avoid graininess. Fold whipped cream gently to keep airiness. Keep some chunks in cookie crumbs for texture. Chill at least 1 hour for best texture; 30 minutes is minimum. If filling is too thick after chilling, let sit at room temperature for 10 minutes before serving.
Nutrition
- Serving Size: 1 mini trifle cup
- Calories: 250
- Sugar: 18
- Sodium: 150
- Fat: 15
- Saturated Fat: 9
- Carbohydrates: 25
- Fiber: 1
- Protein: 4
Keywords: mini cheesecake, strawberry dessert, no-bake cheesecake, party dessert, trifle cups, quick dessert, easy cheesecake