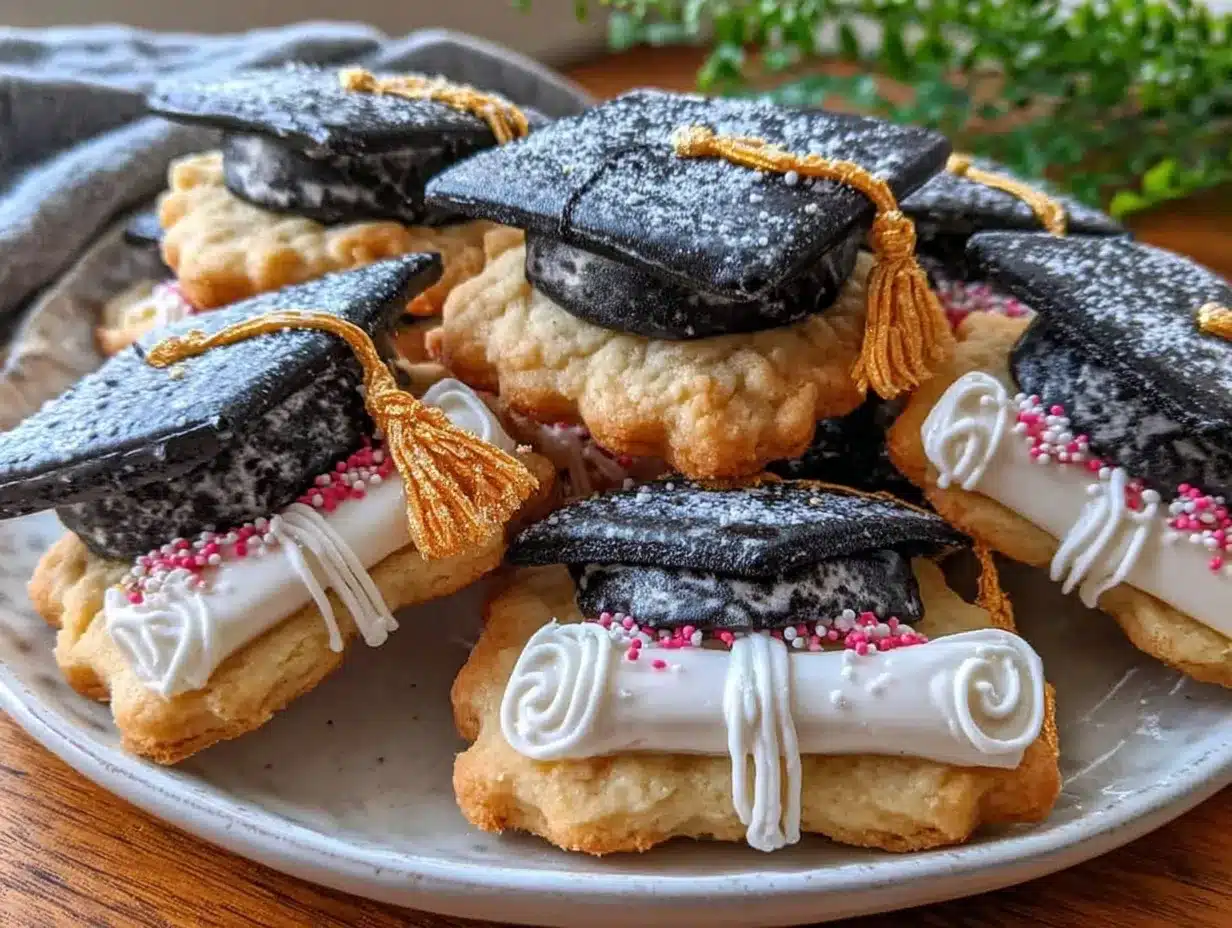
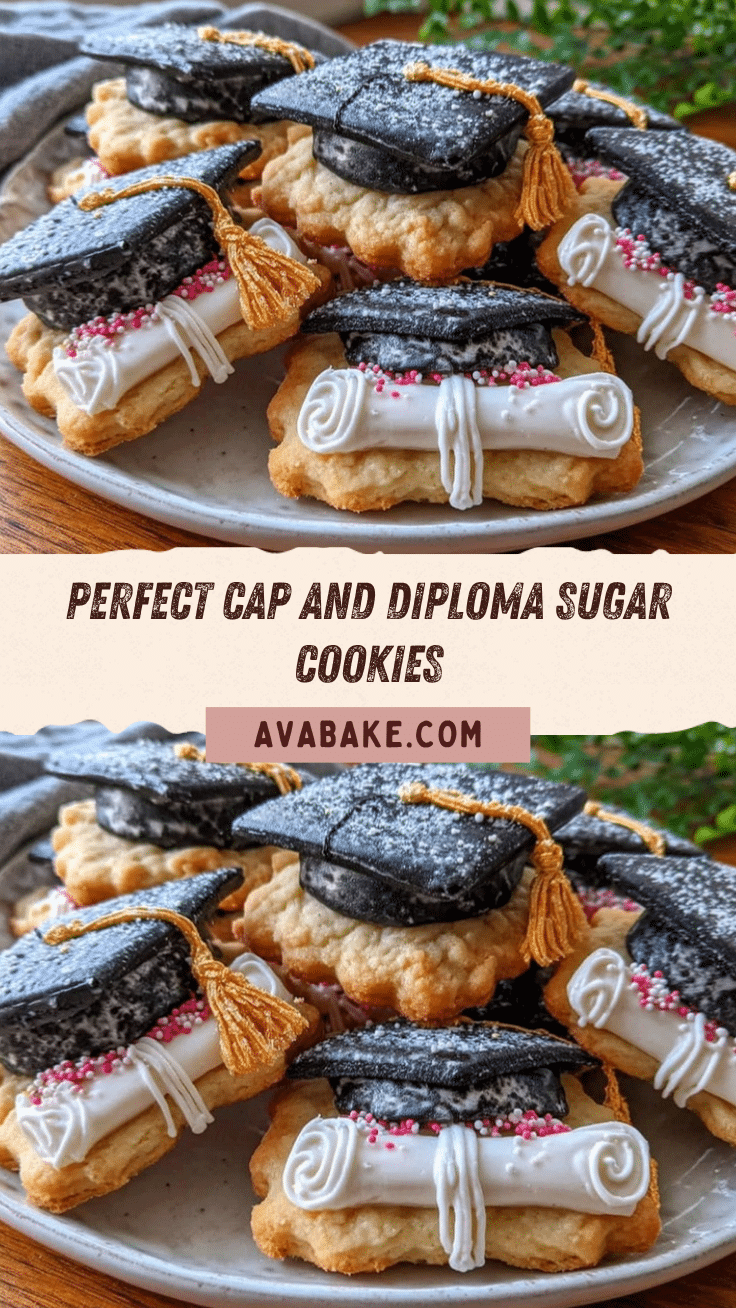
“You won’t believe this,” my neighbor Tom said as he handed me a slightly cracked cookie tin last spring. It was graduation season, and Tom, who rarely bakes beyond a sad box mix, had somehow whipped up these perfect cap and diploma sugar cookies with royal icing. Honestly, I was skeptical at first—royal icing always seemed complicated, like some secret wizardry only professional bakers could pull off. But there I was, nibbling on one of those little masterpieces, the smooth icing gleaming under the kitchen light, and thinking, “How hard can this really be?”
That afternoon, I tried the recipe myself—after a bit of a mess involving flour everywhere and a royal icing bowl that slipped from my hands (classic me)—and found the process surprisingly doable and honestly kind of fun. Maybe you’ve been there: wanting to make something special for graduation parties without the stress of complex baking or decorating classes. These cookies have that nostalgic crunch and that sweet, smooth icing that just melts in your mouth. They bring a tiny celebration to any kitchen counter.
What’s more, this recipe became my go-to for those last-minute celebrations when I need a sweet gift or a charming dessert. If you’ve ever wished for sugar cookies that look as good as they taste, this step-by-step tutorial will put those dreams within reach. Let me tell you, once you get the hang of the royal icing (and yes, it takes a tiny bit of patience), you’ll keep coming back to this simple, crowd-pleasing recipe again and again.
Why You’ll Love This Recipe
After testing numerous sugar cookie recipes and royal icing formulas, this one stands out for a few key reasons that make it a favorite in my kitchen:
- Quick & Easy: The dough comes together in about 15 minutes, and the whole batch bakes in under 20. Perfect when you’re juggling graduation prep and last-minute plans.
- Simple Ingredients: No fancy items here—just basics you probably have on hand like butter, sugar, eggs, and vanilla. I usually use King Arthur flour for that reliable texture.
- Perfect for Celebrations: These cap and diploma shapes bring just the right vibe for graduation parties, classroom treats, or even as thoughtful gifts.
- Crowd-Pleaser: Kids and adults alike rave about the balance of buttery cookie with the sweet, silky royal icing.
- Unbelievably Delicious: The cookie’s slight crisp edges and tender centers make every bite a joy, and the royal icing dries with that perfect smooth finish that’s just begging to be admired (and eaten!).
What makes this version different? The secret is in the dough’s chill time and the royal icing consistency. I’ve found that letting the dough rest overnight helps prevent spreading, so your caps and diplomas keep their sharp shape. Plus, the royal icing recipe strikes that sweet spot—thick enough to pipe details but thin enough to flood the cookies without cracking. It’s not just a recipe; it’s a little celebration in every bite.
What Ingredients You Will Need
This recipe uses simple, wholesome ingredients to deliver bold flavor and that satisfying buttery texture without any fuss. Most of these are pantry staples, but I’ll share some tips for picking the best versions:
- For the Sugar Cookie Dough:
- 2 ¾ cups (345g) all-purpose flour (I prefer King Arthur for consistent results)
- 1 teaspoon baking powder
- ½ teaspoon salt
- 1 cup (226g) unsalted butter, softened (Room temp butter is key for easy mixing)
- 1 ½ cups (300g) granulated sugar
- 1 large egg, room temperature
- 1 teaspoon pure vanilla extract (adds warmth and depth)
- 1 teaspoon almond extract (optional but gives a lovely subtle flavor)
- For the Royal Icing:
- 3 large egg whites (or 4 tablespoons pasteurized egg whites)—fresh is best for stability
- 4 cups (480g) powdered sugar, sifted (helps avoid clumps)
- 1 teaspoon lemon juice or pure vanilla extract (for flavor and slight acidity)
- Food coloring gels—black, red, and gold (to decorate caps and diplomas)
- Optional: Meringue powder as a substitute for egg whites for longer shelf life
For the best results, look for fresh, high-quality butter and sift your powdered sugar to avoid graininess in the royal icing. If you’re in a pinch or avoiding raw eggs, meringue powder works brilliantly—I’ve used the Wilton brand with no issues. And if graduation is in the summer, keep the dough chilled to prevent spreading in the warm kitchen.
Equipment Needed
- Mixing bowls—one large for dough, one medium for icing
- Electric hand mixer or stand mixer with paddle attachment (makes creaming butter so much easier)
- Measuring cups and spoons (accuracy is everything in baking!)
- Rolling pin (a non-stick or lightly floured surface helps)
- Cookie cutters shaped like graduation caps and diplomas (I found mine on Etsy, but craft stores have great options)
- Baking sheets lined with parchment paper or silicone mats
- Cooling racks
- Piping bags and small round piping tips (sizes #1 or #2) for detailed royal icing work
- Toothpicks or scribe tools for flood icing smoothing
If you don’t have piping bags, small zip-top bags with the corner snipped work just fine. I keep a set of reusable silicone bags that I swear by—they’re budget-friendly and easy to clean. For cookie cutters, if you’re on a tight budget, you can even carefully cut shapes with a knife or use sturdy cardboard templates as guides.
Preparation Method
- Mix Dry Ingredients: In a medium bowl, whisk together 2 ¾ cups (345g) of flour, 1 teaspoon baking powder, and ½ teaspoon salt. Set aside. This ensures even distribution and helps the dough rise just right. (Approx. 5 minutes)
- Cream Butter and Sugar: Using a stand or hand mixer, beat 1 cup (226g) softened unsalted butter and 1 ½ cups (300g) granulated sugar on medium speed until light and fluffy, about 3-4 minutes. This step is crucial for that tender crumb. (Approx. 5 minutes)
- Add Egg and Extracts: Beat in 1 large room-temperature egg, 1 teaspoon vanilla extract, and 1 teaspoon almond extract (if using) until fully combined. The mixture will look creamy and smooth. (Approx. 2 minutes)
- Combine Wet and Dry: Gradually add the flour mixture to the butter mixture, mixing on low speed until just combined. Don’t overmix—once the flour disappears, stop. The dough will be soft but manageable. (Approx. 3 minutes)
- Chill the Dough: Divide dough into two disks, wrap each tightly in plastic wrap, and refrigerate for at least 1 hour or overnight. This rest helps prevent spreading and makes rolling easier. (Minimum 1 hour; overnight preferred)
- Preheat Oven & Prepare Baking Sheets: Set oven to 350°F (175°C). Line baking sheets with parchment paper or silicone mats. (Approx. 10 minutes)
- Roll and Cut: On a lightly floured surface, roll dough to about ¼-inch (6mm) thickness. Use your graduation cap and diploma cookie cutters to cut shapes. Transfer carefully to baking sheets leaving 1 inch (2.5 cm) between cookies. (Approx. 15 minutes)
- Bake: Bake for 9-11 minutes or until edges are just golden. The center will still look slightly soft—that’s perfect. Remove from oven and let cool on baking sheets for 5 minutes, then transfer to wire racks to cool completely. (Approx. 10-12 minutes)
- Prepare Royal Icing: In a clean bowl, beat 3 large egg whites or 4 tablespoons pasteurized egg whites with 4 cups (480g) sifted powdered sugar and 1 teaspoon lemon juice or vanilla extract. Beat on medium-high until stiff peaks form — about 7-9 minutes. Divide and tint with food gels as desired. (Approx. 10 minutes)
- Decorate: Use piping bags fitted with small round tips to outline and flood the cookies with royal icing. Use a toothpick to gently spread or pop air bubbles. Let each layer dry before adding details for best results. (Drying takes several hours, ideally overnight)
Pro tip: If the dough feels too sticky when rolling, sprinkle a bit more flour—but not too much, or cookies will turn tough. And don’t rush the royal icing drying process; patience pays off with smooth, crack-free surfaces.
Cooking Tips & Techniques
Working with sugar cookies and royal icing can be intimidating, but here are some lessons I learned the hard way:
- Don’t skip chilling: The dough needs rest to behave in the oven. Without chilling, cookies spread too thin and lose shape.
- Room temperature ingredients: Butter and eggs at room temp cream together more evenly, giving a tender cookie.
- Consistent dough thickness: Roll your dough evenly—using rolling pin rings or guides helps keep cookies uniform, which bakes evenly and looks professional.
- Royal icing consistency matters: For outlining, thicker icing (like toothpaste consistency) prevents flooding. For flooding, thin it slightly with water until it flows slowly off a spoon.
- Work in layers: Let each royal icing layer dry before adding details or colors, or they’ll bleed into each other.
- Keep icing covered: Royal icing dries out fast—cover bowls with damp towels or plastic wrap to prevent crusting.
- Practice patience: Decorating takes time, but it’s oddly relaxing once you get into a rhythm.
One time, I rushed and iced a whole batch too soon—the colors ran together, and I had a royal icing meltdown. Now, I always remind myself: slow and steady wins the cookie race!
Variations & Adaptations
Want to switch things up? Here are some fun ways to customize your cap and diploma sugar cookies:
- Gluten-Free Version: Swap all-purpose flour with a gluten-free blend like Bob’s Red Mill 1-to-1. Add ¼ teaspoon xanthan gum if your blend doesn’t contain it to help structure.
- Flavor Boost: Add a tablespoon of lemon zest or swap almond extract for orange extract in the dough for a fresh twist.
- Alternative Icing: Use cream cheese frosting piped on instead of royal icing for a softer, tangy finish. It won’t harden but tastes amazing.
- Decoration Styles: Try sprinkles or edible gold dust for a fancy look, or keep it simple with black and white for a classic feel.
- Vegan Adaptation: Use vegan butter and aquafaba (chickpea water) in place of eggs in both dough and icing. The texture is slightly different but still delightful.
Personally, I once made these with lavender extract and a dusting of edible silver shimmer for a friend’s graduation party—everyone was impressed and asked for the recipe!
Serving & Storage Suggestions
For the best experience, serve these sugar cookies at room temperature so the royal icing is perfectly set but not cold and hard. They look adorable arranged on a platter or individually wrapped in clear bags tied with a ribbon for gifts.
To store, place cookies in an airtight container with parchment paper between layers. They keep well for up to 5 days at room temperature. If you want to store longer, freeze them in a single layer on a baking sheet, then transfer to a sealed container or bag—freeze up to 3 months.
When reheating, just let frozen cookies thaw fully at room temperature. Don’t microwave, as that can make royal icing sticky. Over time, the flavors meld and the cookie softens slightly, which some folks love.
Pair these treats with a cold glass of milk, a robust cup of coffee, or a floral iced tea to balance the sweetness.
Nutritional Information & Benefits
Each cookie (about 3-inch diameter) contains roughly 150-180 calories depending on size and icing amount, with about 7 grams of fat and 20 grams of carbs. While these are definitely a treat, using real butter and fresh ingredients means there are no artificial additives.
Key ingredients like eggs and butter provide protein and vitamins, and using fresh vanilla and almond extracts adds flavor without extra sugar. For those watching gluten, the gluten-free adaptation makes these accessible to more diets.
From a wellness perspective, enjoying a homemade sweet like this can be a joyful moment—a reminder to savor celebrations with loved ones rather than stress over perfect products.
Conclusion
If you’re looking for a sweet that’s both charming and doable, these perfect cap and diploma sugar cookies with royal icing fit the bill. They bring a little handmade magic to graduation celebrations and beyond, combining buttery crispness with that flawless icing finish you’ll be proud to show off.
Feel free to customize colors, flavors, and decorations to make the recipe your own. Honestly, that’s part of the fun—seeing what you can create with a basic, reliable recipe. I keep coming back to this one because it’s approachable, forgiving, and just plain delicious.
So grab your rolling pin and piping bags, and give it a try. And hey, if you do make these cookies, I’d love to hear about your decorating adventures or any fun twists you tried!
Happy baking and congrats to all the grads out there!
FAQs
Can I make the cookie dough ahead of time?
Absolutely! The dough can be refrigerated for up to 3 days or frozen for up to 3 months. Just thaw and roll when ready.
Is it safe to use raw egg whites in royal icing?
Using fresh, pasteurized egg whites is generally safe, but if you’re concerned, meringue powder is a great alternative and widely available.
How do I prevent my royal icing from cracking?
Keep the icing covered when not in use, avoid adding too much powdered sugar, and let cookies dry slowly at room temperature—rushing drying can cause cracks.
Can I use store-bought sugar cookie dough for this recipe?
You can, but homemade dough offers better flavor and texture, plus it holds shapes more precisely after chilling.
What’s the best way to store decorated cookies?
Store in an airtight container at room temperature with parchment paper between layers. Avoid stacking until icing is fully dry to prevent smudging.
Pin This Recipe!
Perfect Cap and Diploma Sugar Cookies Recipe
These sugar cookies shaped like graduation caps and diplomas feature a buttery crisp texture and smooth royal icing, perfect for celebrations and gifts. The recipe is easy to follow with simple ingredients and step-by-step instructions.
- Prep Time: 15 minutes
- Cook Time: 10 minutes
- Total Time: 1 hour 25 minutes (including chilling time, excluding overnight chill and drying time)
- Yield: 24 cookies 1x
- Category: Dessert
- Cuisine: American
Ingredients
- 2 ¾ cups (345g) all-purpose flour
- 1 teaspoon baking powder
- ½ teaspoon salt
- 1 cup (226g) unsalted butter, softened
- 1 ½ cups (300g) granulated sugar
- 1 large egg, room temperature
- 1 teaspoon pure vanilla extract
- 1 teaspoon almond extract (optional)
- 3 large egg whites or 4 tablespoons pasteurized egg whites
- 4 cups (480g) powdered sugar, sifted
- 1 teaspoon lemon juice or pure vanilla extract
- Food coloring gels—black, red, and gold
- Optional: Meringue powder as a substitute for egg whites
Instructions
- Mix dry ingredients: whisk together flour, baking powder, and salt in a medium bowl. Set aside.
- Cream butter and sugar: beat softened butter and granulated sugar on medium speed until light and fluffy, about 3-4 minutes.
- Add egg and extracts: beat in egg, vanilla extract, and almond extract (if using) until fully combined.
- Combine wet and dry ingredients: gradually add flour mixture to butter mixture, mixing on low speed until just combined. Do not overmix.
- Chill the dough: divide dough into two disks, wrap tightly in plastic wrap, and refrigerate for at least 1 hour or overnight.
- Preheat oven to 350°F (175°C) and line baking sheets with parchment paper or silicone mats.
- Roll and cut: roll dough on lightly floured surface to ¼-inch thickness. Cut shapes with graduation cap and diploma cookie cutters. Place cookies 1 inch apart on baking sheets.
- Bake for 9-11 minutes until edges are just golden. Cool on baking sheets for 5 minutes, then transfer to wire racks to cool completely.
- Prepare royal icing: beat egg whites with sifted powdered sugar and lemon juice or vanilla extract until stiff peaks form, about 7-9 minutes. Divide and tint with food coloring gels as desired.
- Decorate: use piping bags with small round tips to outline and flood cookies with royal icing. Use a toothpick to smooth icing and pop air bubbles. Let each layer dry before adding details. Drying takes several hours, ideally overnight.
Notes
Chill dough at least 1 hour or overnight to prevent spreading. Use room temperature butter and eggs for best texture. Let royal icing dry slowly and cover when not in use to prevent crusting. For gluten-free, substitute flour with a 1-to-1 gluten-free blend and add xanthan gum if needed. Vegan adaptation possible using vegan butter and aquafaba.
Nutrition
- Serving Size: 1 cookie (about 3-in
- Calories: 165
- Sugar: 14
- Sodium: 90
- Fat: 7
- Saturated Fat: 4
- Carbohydrates: 20
- Protein: 2
Keywords: sugar cookies, graduation cookies, royal icing, cap and diploma cookies, easy sugar cookies, celebration cookies


