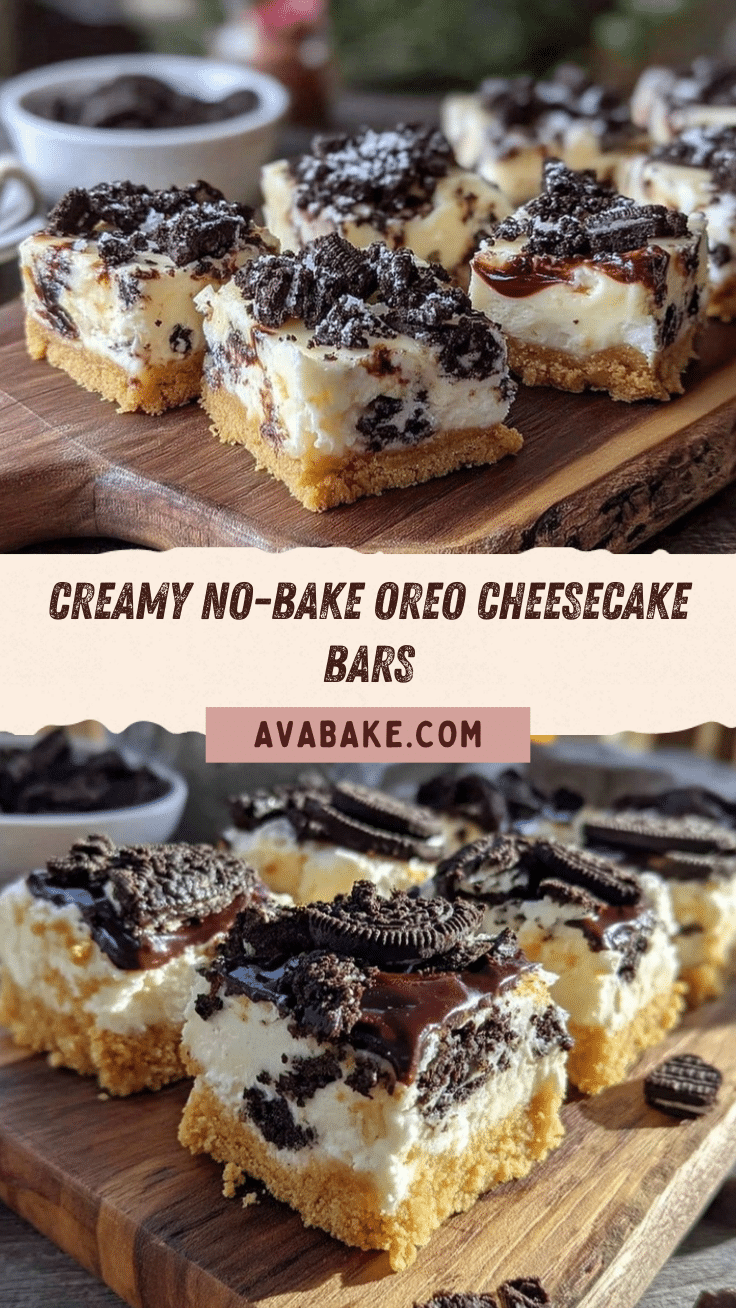
“You know that moment when you’re rummaging through the pantry for a midnight snack, and all you have are a few Oreos and some cream cheese? Well, last Thursday night, that was me—half asleep and half starving. I had this cracked mixing bowl on the counter from a previous mishap (don’t ask), and honestly, I wasn’t expecting much. But somehow, those few ingredients turned into the most luscious, creamy no-bake Oreo cheesecake bars with graham crust I’ve ever tasted. It’s funny how accidents in the kitchen sometimes lead to your new favorite dessert.”
That night, I made a mess, forgot to chill the crust properly, and almost gave up, but the final result was worth every crumb. Maybe you’ve been there too—looking for a simple, fuss-free dessert that feels fancy but doesn’t take all day. This recipe kept calling me back, and honestly, it’s become my go-to when friends pop over unexpectedly or when I just want a sweet treat without firing up the oven.
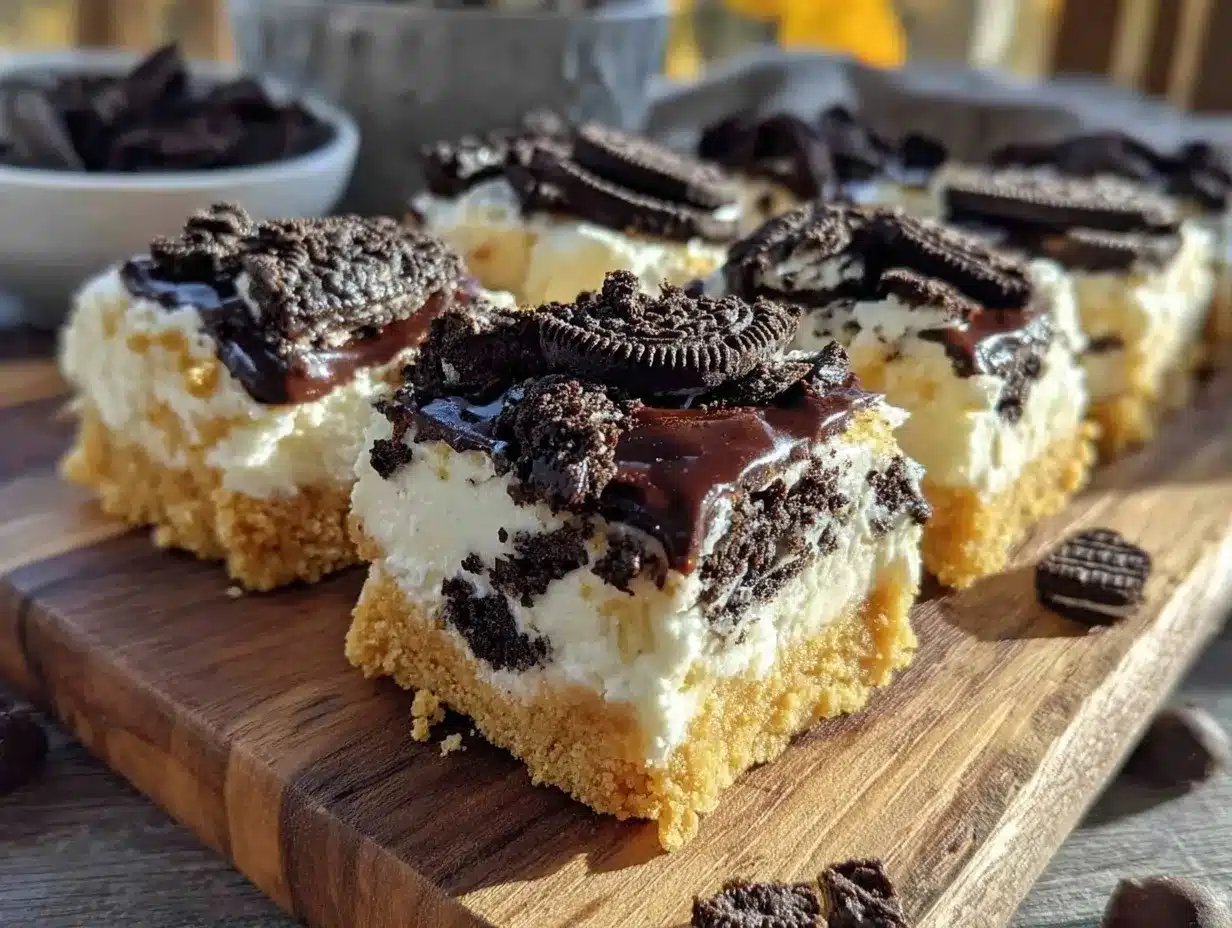
What’s magical about these cheesecake bars is how the crunchy graham crust pairs with the silky, Oreo-studded filling. The cool, creamy texture melts in your mouth, while the chocolate cookie bits add just the right amount of bite. Plus, it’s no-bake, so it’s perfect for warmer days or when you’re just not in the mood to slave over a hot kitchen.
So, if you’re craving a dessert that’s simple, delightful, and guaranteed to impress without breaking a sweat, keep reading. I promise you’ll want to make these creamy no-bake Oreo cheesecake bars with graham crust again and again.
Why You’ll Love This Recipe
This creamy no-bake Oreo cheesecake bars recipe isn’t just another dessert—it’s a little slice of heaven you can throw together in under 30 minutes. I’ve tested this recipe countless times (sometimes with friends hovering, sometimes solo), and each batch has been met with oohs and ahhs.
- Quick & Easy: Ready in just about 25 minutes, plus chilling time. Perfect for busy weeknights or last-minute dessert emergencies.
- Simple Ingredients: No need to hunt down specialty items. You probably have everything in your pantry or fridge already.
- Perfect for Any Occasion: Great for potlucks, birthday parties, or cozy nights in with a movie.
- Crowd-Pleaser: Kids love the Oreo bits, and adults appreciate the creamy texture and balanced sweetness.
- Unbelievably Delicious: The graham crust adds a buttery crunch that complements the smooth, rich filling perfectly.
What makes this recipe stand out is the creamy texture achieved by beating the cream cheese just right and folding in whipped cream to create that light, dreamy feel. Plus, crushing the Oreos into chunks—not powder—adds a fun texture that surprises every bite. Honestly, it’s the kind of dessert that makes you close your eyes and smile after the first mouthful.
This recipe isn’t just about taste; it’s about making dessert effortless without sacrificing that homemade touch. Whether you’re new to baking or a seasoned pro looking for a quick fix, these no-bake cheesecake bars are your ticket to dessert success.
What Ingredients You Will Need
This recipe uses simple, wholesome ingredients to deliver bold flavor and satisfying texture without the fuss. Most of the items are pantry staples, and the Oreos bring that classic touch everyone loves.
- For the Graham Crust:
- 1 ½ cups graham cracker crumbs (about 10 full sheets, finely crushed)
- 5 tablespoons unsalted butter, melted (I prefer Land O’Lakes for richness)
- 2 tablespoons granulated sugar (balances the buttery crust)
- For the Cheesecake Filling:
- 16 oz (450g) cream cheese, softened (use full-fat for best creaminess)
- 1 cup powdered sugar (sifted for smooth texture)
- 1 teaspoon vanilla extract (pure, if possible)
- 1 cup heavy whipping cream, cold (for that airy, light finish)
- 15 Oreo cookies, coarsely chopped (feel free to keep some bigger chunks for texture!)
Ingredient Tips: When choosing graham crackers, I like to go with honey-flavored ones for a slight sweetness that complements the Oreo filling. Also, if you want a dairy-free option, swap heavy cream with coconut cream and use a vegan cream cheese alternative. For seasonal flair, toss in some fresh raspberries on top before chilling—they add a lovely pop of color and tartness.
Equipment Needed
- 9×9-inch (23×23 cm) square baking pan – glass or metal works fine; I prefer glass for easy slicing.
- Mixing bowls – one large for cream cheese mixture, another for whipping cream.
- Electric mixer or stand mixer – makes beating cream cheese and whipping cream much easier.
- Spatula – for folding ingredients smoothly without deflating the whipped cream.
- Measuring cups and spoons – precise measurements keep the balance perfect.
- Food processor or plastic bag and rolling pin – for crushing graham crackers and Oreos (I’ve used both; a food processor is faster but the bag method works in a pinch!).
If you don’t have a stand mixer, a hand mixer is totally fine. And if you’re budget-conscious, those plastic mixing bowls from the dollar store get the job done without fuss. Just be sure your spatula is flexible enough to scrape the bowl clean for no wastage!
Preparation Method
- Prepare the Graham Crust: In a medium bowl, combine 1 ½ cups graham cracker crumbs, 5 tablespoons melted butter, and 2 tablespoons granulated sugar. Mix until the crumbs are evenly coated and look like wet sand. Press the mixture firmly and evenly into the bottom of your 9×9-inch pan. Use the back of a spoon or a flat-bottomed glass to smooth it out. Chill in the fridge for about 15 minutes while you prepare the filling.
- Make the Cheesecake Filling: In a large bowl, beat 16 oz softened cream cheese on medium speed until smooth and creamy—no lumps! This usually takes about 2-3 minutes. Add 1 cup powdered sugar and 1 teaspoon vanilla extract, then beat again until well combined.
- Whip the Cream: In a separate chilled bowl, whip 1 cup of cold heavy cream until stiff peaks form. This means when you lift the beaters, the cream holds its shape without collapsing. This step took me a few tries to perfect, but cold cream and a cold bowl help a lot.
- Fold in the Whipped Cream: Gently fold the whipped cream into the cream cheese mixture using a spatula. Use slow, sweeping motions to keep the mixture airy and light. This is key to that creamy, fluffy texture!
- Add the Oreo Chunks: Fold in the coarsely chopped Oreos, saving a few pieces to sprinkle on top if you like. This adds a fun surprise crunch in every bite.
- Assemble the Bars: Pour the filling over the chilled graham crust and spread evenly with your spatula. Sprinkle the reserved Oreo pieces over the top.
- Chill: Cover with plastic wrap and refrigerate for at least 4 hours, preferably overnight. This allows the bars to set perfectly, making slicing much easier.
- Serve: Use a sharp knife to cut into squares. For neat edges, dip the knife in hot water and wipe it dry between cuts.
Pro tip: If you notice the filling is too soft to spread easily, pop it back in the fridge for 10-15 minutes to firm up before assembling. Also, if the crust seems crumbly, pressing it firmly and chilling well helps keep it intact.
Cooking Tips & Techniques
One thing I learned the hard way is that softening the cream cheese properly is crucial. I used to rush it and ended up with lumps hidden in the filling. Letting it sit at room temperature for at least 30 minutes (or microwaving gently for 10 seconds) makes all the difference.
Whipping the cream to the right consistency is another trick. Under-whipped cream won’t hold the light texture, while over-whipping can make it grainy and buttery—which you definitely don’t want here. Cold equipment and patience help a lot.
When folding the whipped cream and Oreos, be gentle. I know, it’s tempting to mix it fast, but you want to keep as much air in the filling as possible. Folding slowly with a spatula helps maintain that fluffy texture.
Also, chilling time isn’t just a suggestion—it’s a must. Without enough time in the fridge, the bars won’t set properly and will be messy to cut. I usually make these a day ahead so the flavor and texture develop nicely.
And one last thing: if your graham crust is crumbling too much, try adding an extra tablespoon of melted butter next time. It binds the crumbs better, making for a sturdier base.
Variations & Adaptations
- Chocolate Lovers’ Twist: Mix 2 tablespoons of cocoa powder into the graham crust for a chocolatey base. You can also drizzle melted chocolate over the top before chilling.
- Berry Bliss: Fold in fresh or frozen raspberries or strawberries into the cheesecake filling for a fruity surprise. Swap the Oreos with a gluten-free cookie if needed.
- Peanut Butter Delight: Swirl in ¼ cup of smooth peanut butter into the cream cheese mixture before folding in the whipped cream. Top with chopped peanuts for extra crunch.
- Vegan-Friendly: Use a dairy-free cream cheese alternative, coconut cream instead of heavy cream, and gluten-free graham crackers to make these bars vegan and allergy-friendly.
Personally, I once tried a salted caramel drizzle on top—unexpected but seriously addictive. It’s a fun way to mix sweet and salty and impress guests without much extra effort.
Serving & Storage Suggestions
These cheesecake bars are best served chilled, right out of the fridge. The creamy filling needs that cool temperature to keep its structure and texture. For presentation, I like to dust a little powdered sugar or cocoa powder on top, or garnish with extra Oreo crumbs or fresh berries.
They pair wonderfully with a cup of strong coffee or a glass of cold milk—perfect combo for any time of day.
To store, cover the pan tightly with plastic wrap or transfer bars to an airtight container. They keep well in the fridge for up to 4 days—though, honestly, they rarely last that long in my house!
You can also freeze them for up to 2 months. Just thaw overnight in the fridge before serving. When reheating, avoid the microwave; instead, enjoy them chilled or at room temperature for best texture.
Interestingly, the flavor deepens a bit after a day or two, making the Oreo bits even more pronounced. So if you can resist, let them sit a bit before digging in.
Nutritional Information & Benefits
Each creamy no-bake Oreo cheesecake bar contains roughly:
| Serving Size | Calories | Fat | Carbohydrates | Protein |
|---|---|---|---|---|
| 1 Bar (approx. 2×2 inch) | 280 kcal | 18 g | 25 g | 4 g |
Thanks to the cream cheese and heavy cream, these bars provide a good dose of calcium and protein, though they are definitely an indulgence treat. The graham cracker crust adds fiber, and the Oreo chunks bring that classic chocolate flavor (and some sugar).
For those watching carbs, swapping the graham crust for almond flour and using sugar substitutes in the filling can lighten the load. Just remember, this recipe is all about balance—treat yourself now and then, you deserve it!
Conclusion
Honestly, these creamy no-bake Oreo cheesecake bars with graham crust are the kind of dessert that wins hearts without fancy techniques or hours in the kitchen. Whether you’re making them for a crowd or just a quiet night in, they’re reliable, delicious, and fun to eat.
Feel free to tweak the recipe to your liking—more Oreos, less sugar, or even a splash of espresso in the filling for a mocha twist. It’s your dessert adventure, after all.
Why do I keep making these bars? Because they bring back those late-night kitchen moments, the laughter, the little messes, and the pure joy of sharing something sweet with people I care about.
If you try this recipe, I’d love to hear how you make it your own—drop a comment, share your photos, or tell me your favorite variations!
Remember, dessert is meant to be fun, simple, and a little bit indulgent. Happy baking (or should I say, no-baking)!
FAQs
Can I use a different type of cookie instead of Oreos?
Absolutely! You can swap Oreos for any chocolate sandwich cookies, chocolate chip cookies, or even gluten-free options. Just chop them coarsely to keep that crunchy texture.
Do I have to chill the bars overnight?
Chilling for at least 4 hours is necessary for the bars to set properly, but overnight chilling is best for flavor and ease of slicing.
Can I make these bars ahead of time for a party?
Yes! These bars keep well in the fridge for up to 4 days and can be frozen for longer storage. Just thaw in the fridge before serving.
What if I don’t have an electric mixer?
You can whisk the cream cheese by hand, but it will take longer and require more elbow grease. Whipping the cream by hand is possible but challenging; a hand mixer is highly recommended for best results.
Is it possible to make these bars gluten-free?
Yes. Use gluten-free graham crackers or substitute with almond flour for the crust, and make sure to pick gluten-free Oreo alternatives if available.
Pin This Recipe!
Creamy No-Bake Oreo Cheesecake Bars Easy Homemade Recipe with Graham Crust
A luscious, creamy no-bake Oreo cheesecake bars recipe with a buttery graham cracker crust, perfect for quick and easy dessert cravings without using an oven.
- Prep Time: 15 minutes
- Cook Time: 0 minutes
- Total Time: 4 hours 15 minutes
- Yield: 16 servings 1x
- Category: Dessert
- Cuisine: American
Ingredients
- 1 ½ cups graham cracker crumbs (about 10 full sheets, finely crushed)
- 5 tablespoons unsalted butter, melted
- 2 tablespoons granulated sugar
- 16 oz (450g) cream cheese, softened (full-fat recommended)
- 1 cup powdered sugar, sifted
- 1 teaspoon vanilla extract
- 1 cup heavy whipping cream, cold
- 15 Oreo cookies, coarsely chopped
Instructions
- Prepare the Graham Crust: In a medium bowl, combine graham cracker crumbs, melted butter, and granulated sugar. Mix until crumbs are evenly coated and look like wet sand. Press firmly and evenly into the bottom of a 9×9-inch pan. Smooth out and chill in the fridge for about 15 minutes.
- Make the Cheesecake Filling: Beat softened cream cheese on medium speed until smooth and creamy (2-3 minutes). Add powdered sugar and vanilla extract, then beat until well combined.
- Whip the Cream: In a separate chilled bowl, whip cold heavy cream until stiff peaks form.
- Fold in the Whipped Cream: Gently fold whipped cream into the cream cheese mixture using slow, sweeping motions to keep it airy and light.
- Add the Oreo Chunks: Fold in coarsely chopped Oreos, reserving some pieces to sprinkle on top.
- Assemble the Bars: Pour the filling over the chilled graham crust and spread evenly. Sprinkle reserved Oreo pieces on top.
- Chill: Cover with plastic wrap and refrigerate for at least 4 hours, preferably overnight.
- Serve: Cut into squares using a sharp knife dipped in hot water and wiped dry between cuts for neat edges.
Notes
Softening cream cheese properly is crucial to avoid lumps. Use cold cream and chilled bowl for whipping cream to achieve stiff peaks. Fold whipped cream and Oreos gently to maintain airy texture. Chill bars at least 4 hours or overnight for best results. If crust is crumbly, add an extra tablespoon of melted butter. For neat cutting, dip knife in hot water and dry between cuts.
Nutrition
- Serving Size: 1 bar (approx. 2x2 i
- Calories: 280
- Fat: 18
- Carbohydrates: 25
- Protein: 4
Keywords: no-bake cheesecake, Oreo cheesecake bars, graham crust, easy dessert, quick dessert, no oven dessert, creamy cheesecake, Oreo dessert


